
This post contains affiliate links, find out what that means here.
I have a dream! That dream is for the insides of my cupboards to be as pretty and organised as the outside. I feel like it’s taking me ages to get my home organised in the way I want it to be. 50% of my cupboards and drawers are untidy with stuff just shoved in and I hate it! This blog is giving me a very good reason to get on with tasks that have been on my to do list for months and months. One of those tasks was how to organise the cleaning products. The best way for me to start this post is to show you what my cleaning cupboard under the kitchen sink looked like before.
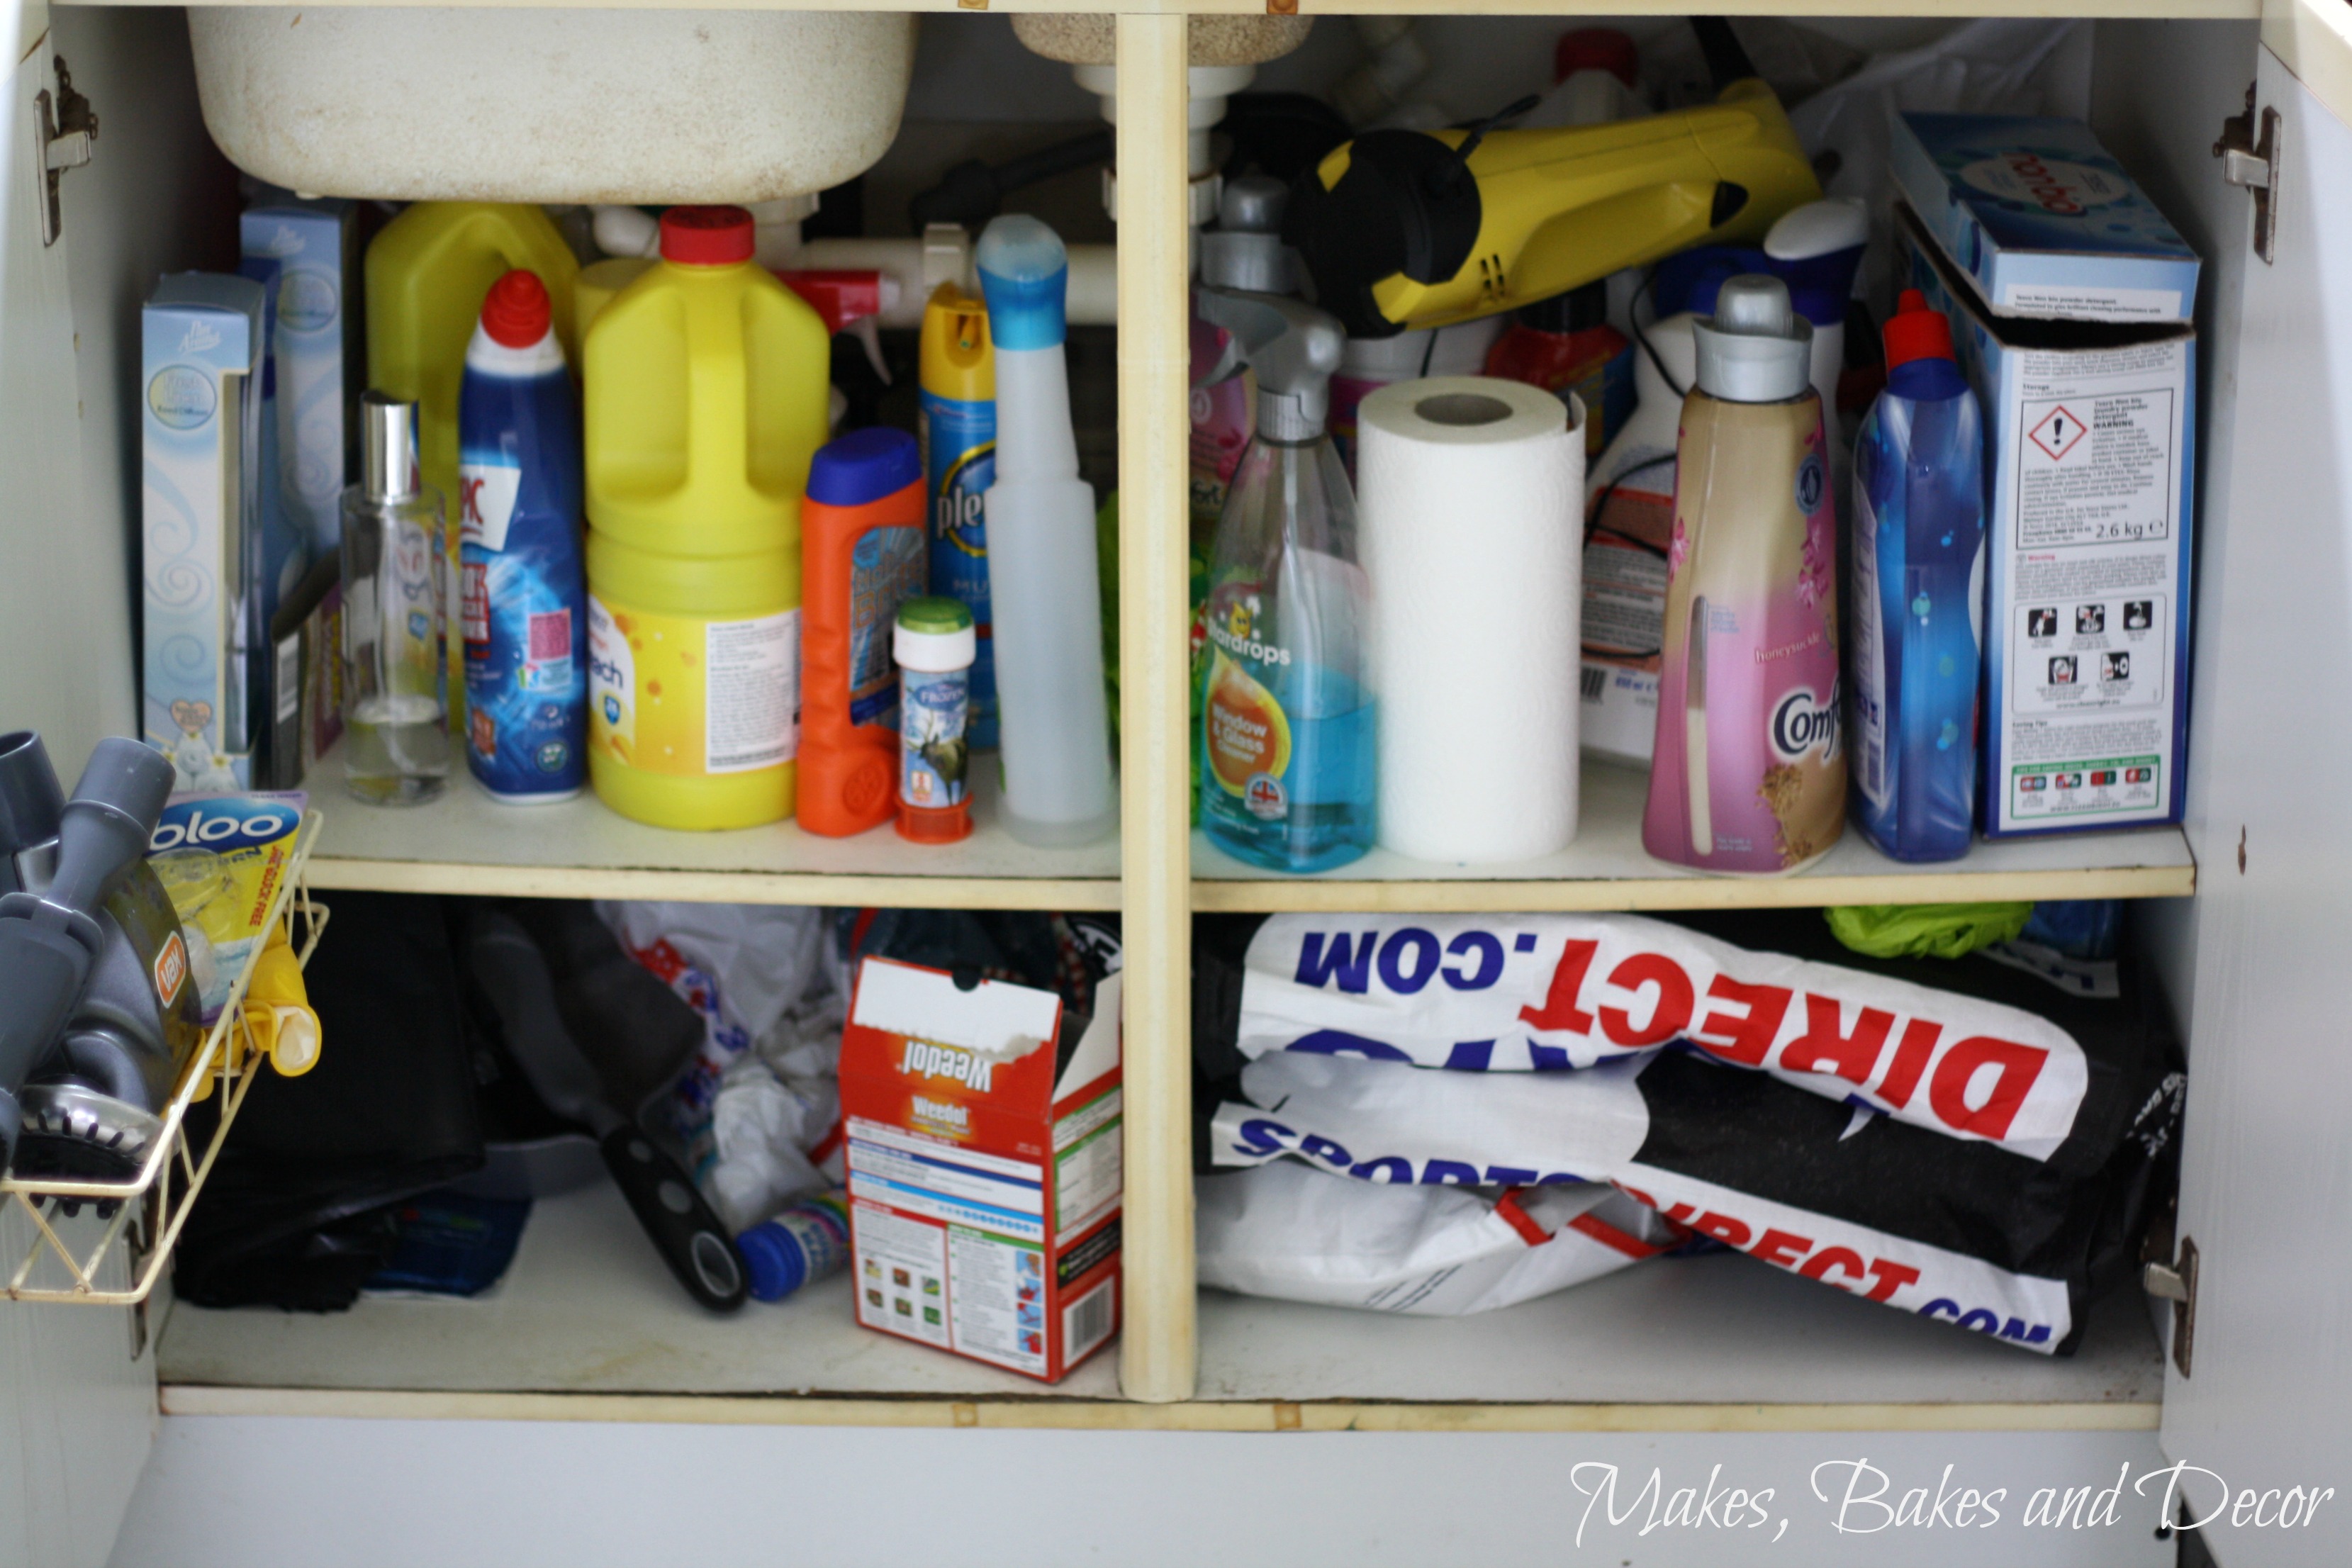
*Hides face in embarrassment* Ha Ha! This is a completely honest picture, it had been a couple weeks since I last tidied all the bottles etc and things were just shoved in. Can you see the Karcher window cleaner literally resting on top of everything else!!! There are so many things wrong here I don’t know where to start, The shelves have some water damage on the front edges, which bugged me so much as they just looked dirty no matter how often I cleaned this cupboard out. The bottom shelf isn’t tall enough to fit any of the cleaning products on and the pipes for the sink prevent me from raising the shelf, so everything is crammed on the top shelf. Also I like to collect carrier bags 🙂 . Since they now cost 5p I don’t like to throw them away but I forget to take them when I go shopping to re use them so I end up buying more! Near enough the whole bottom shelf is full of carrier bags! Then the Vacuum Cleaner attachments are in that little basket on the door which is pretty useless as I always knock them out when I open the door.
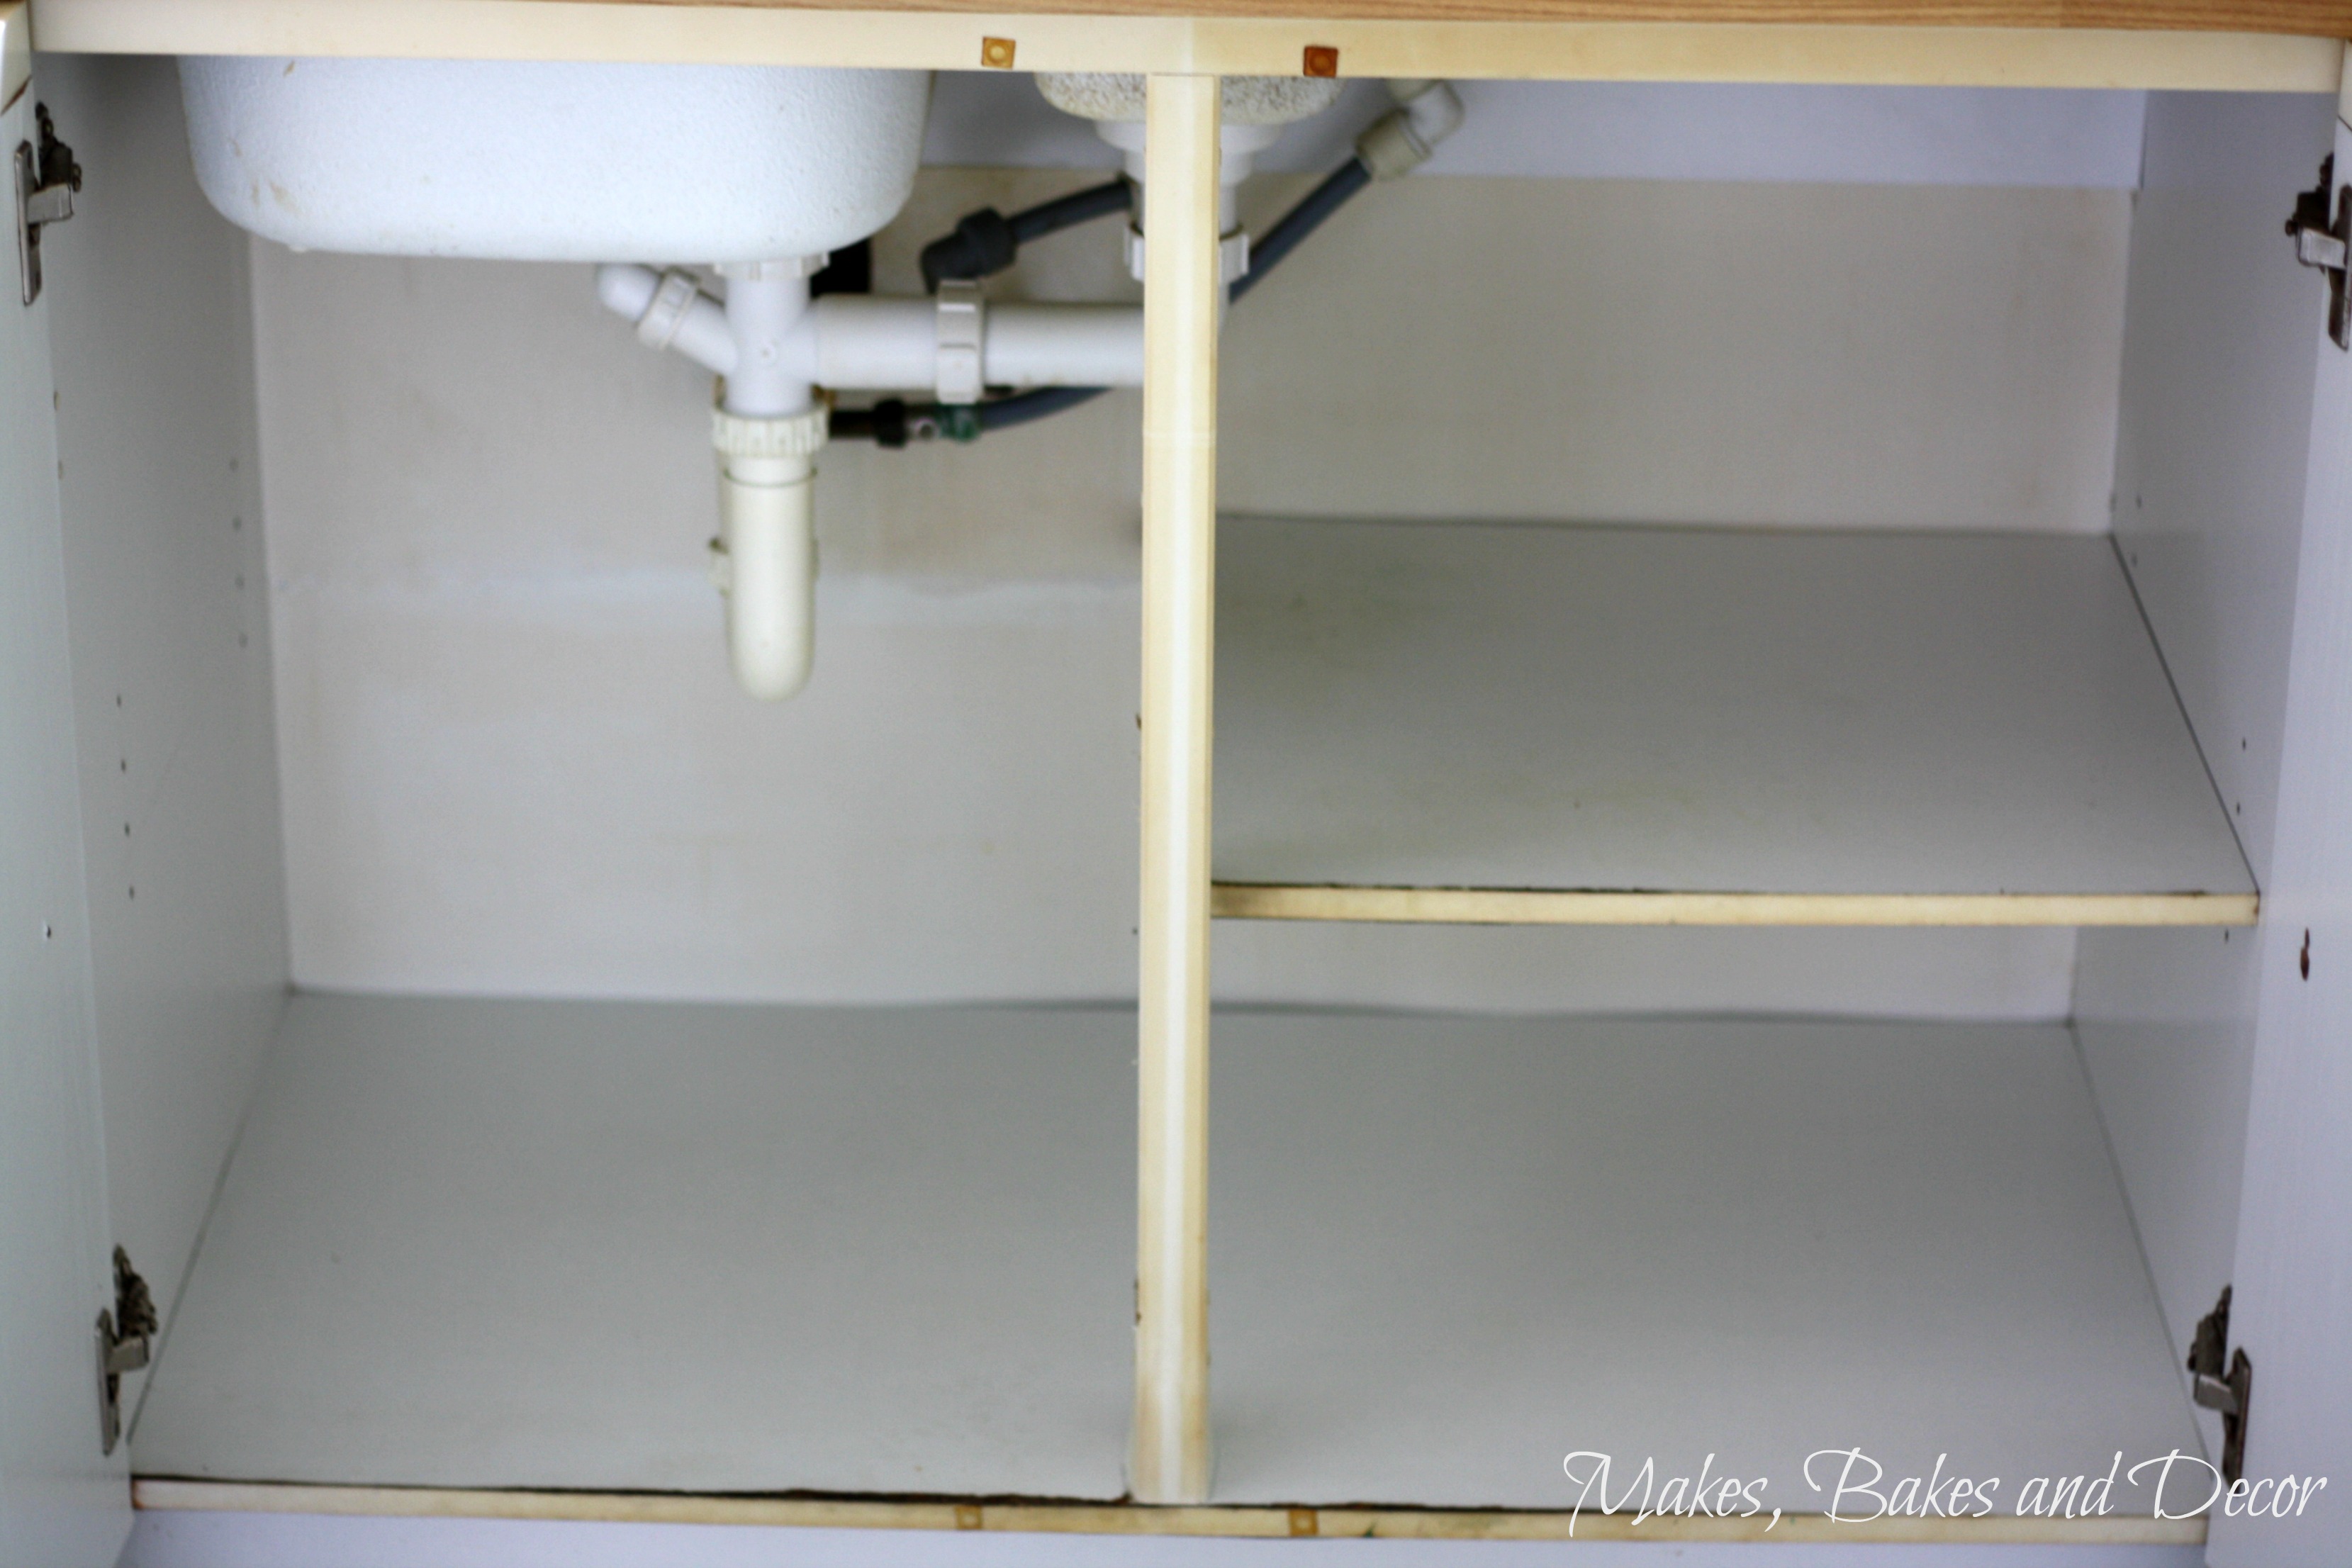
So I emptied the cupboard and bleached the shelves and walls to make it as clean as possible. The walls of the cupboard are still a little discoloured so I might paint them at some point but I haven’t decided yet. I also cut down the shelf, because of the pipes I was only able to put things at the very front on that shelf anyway. I was then able to raise the shelf on the right to make the bottom shelf a little taller. I also took the basket off the door.
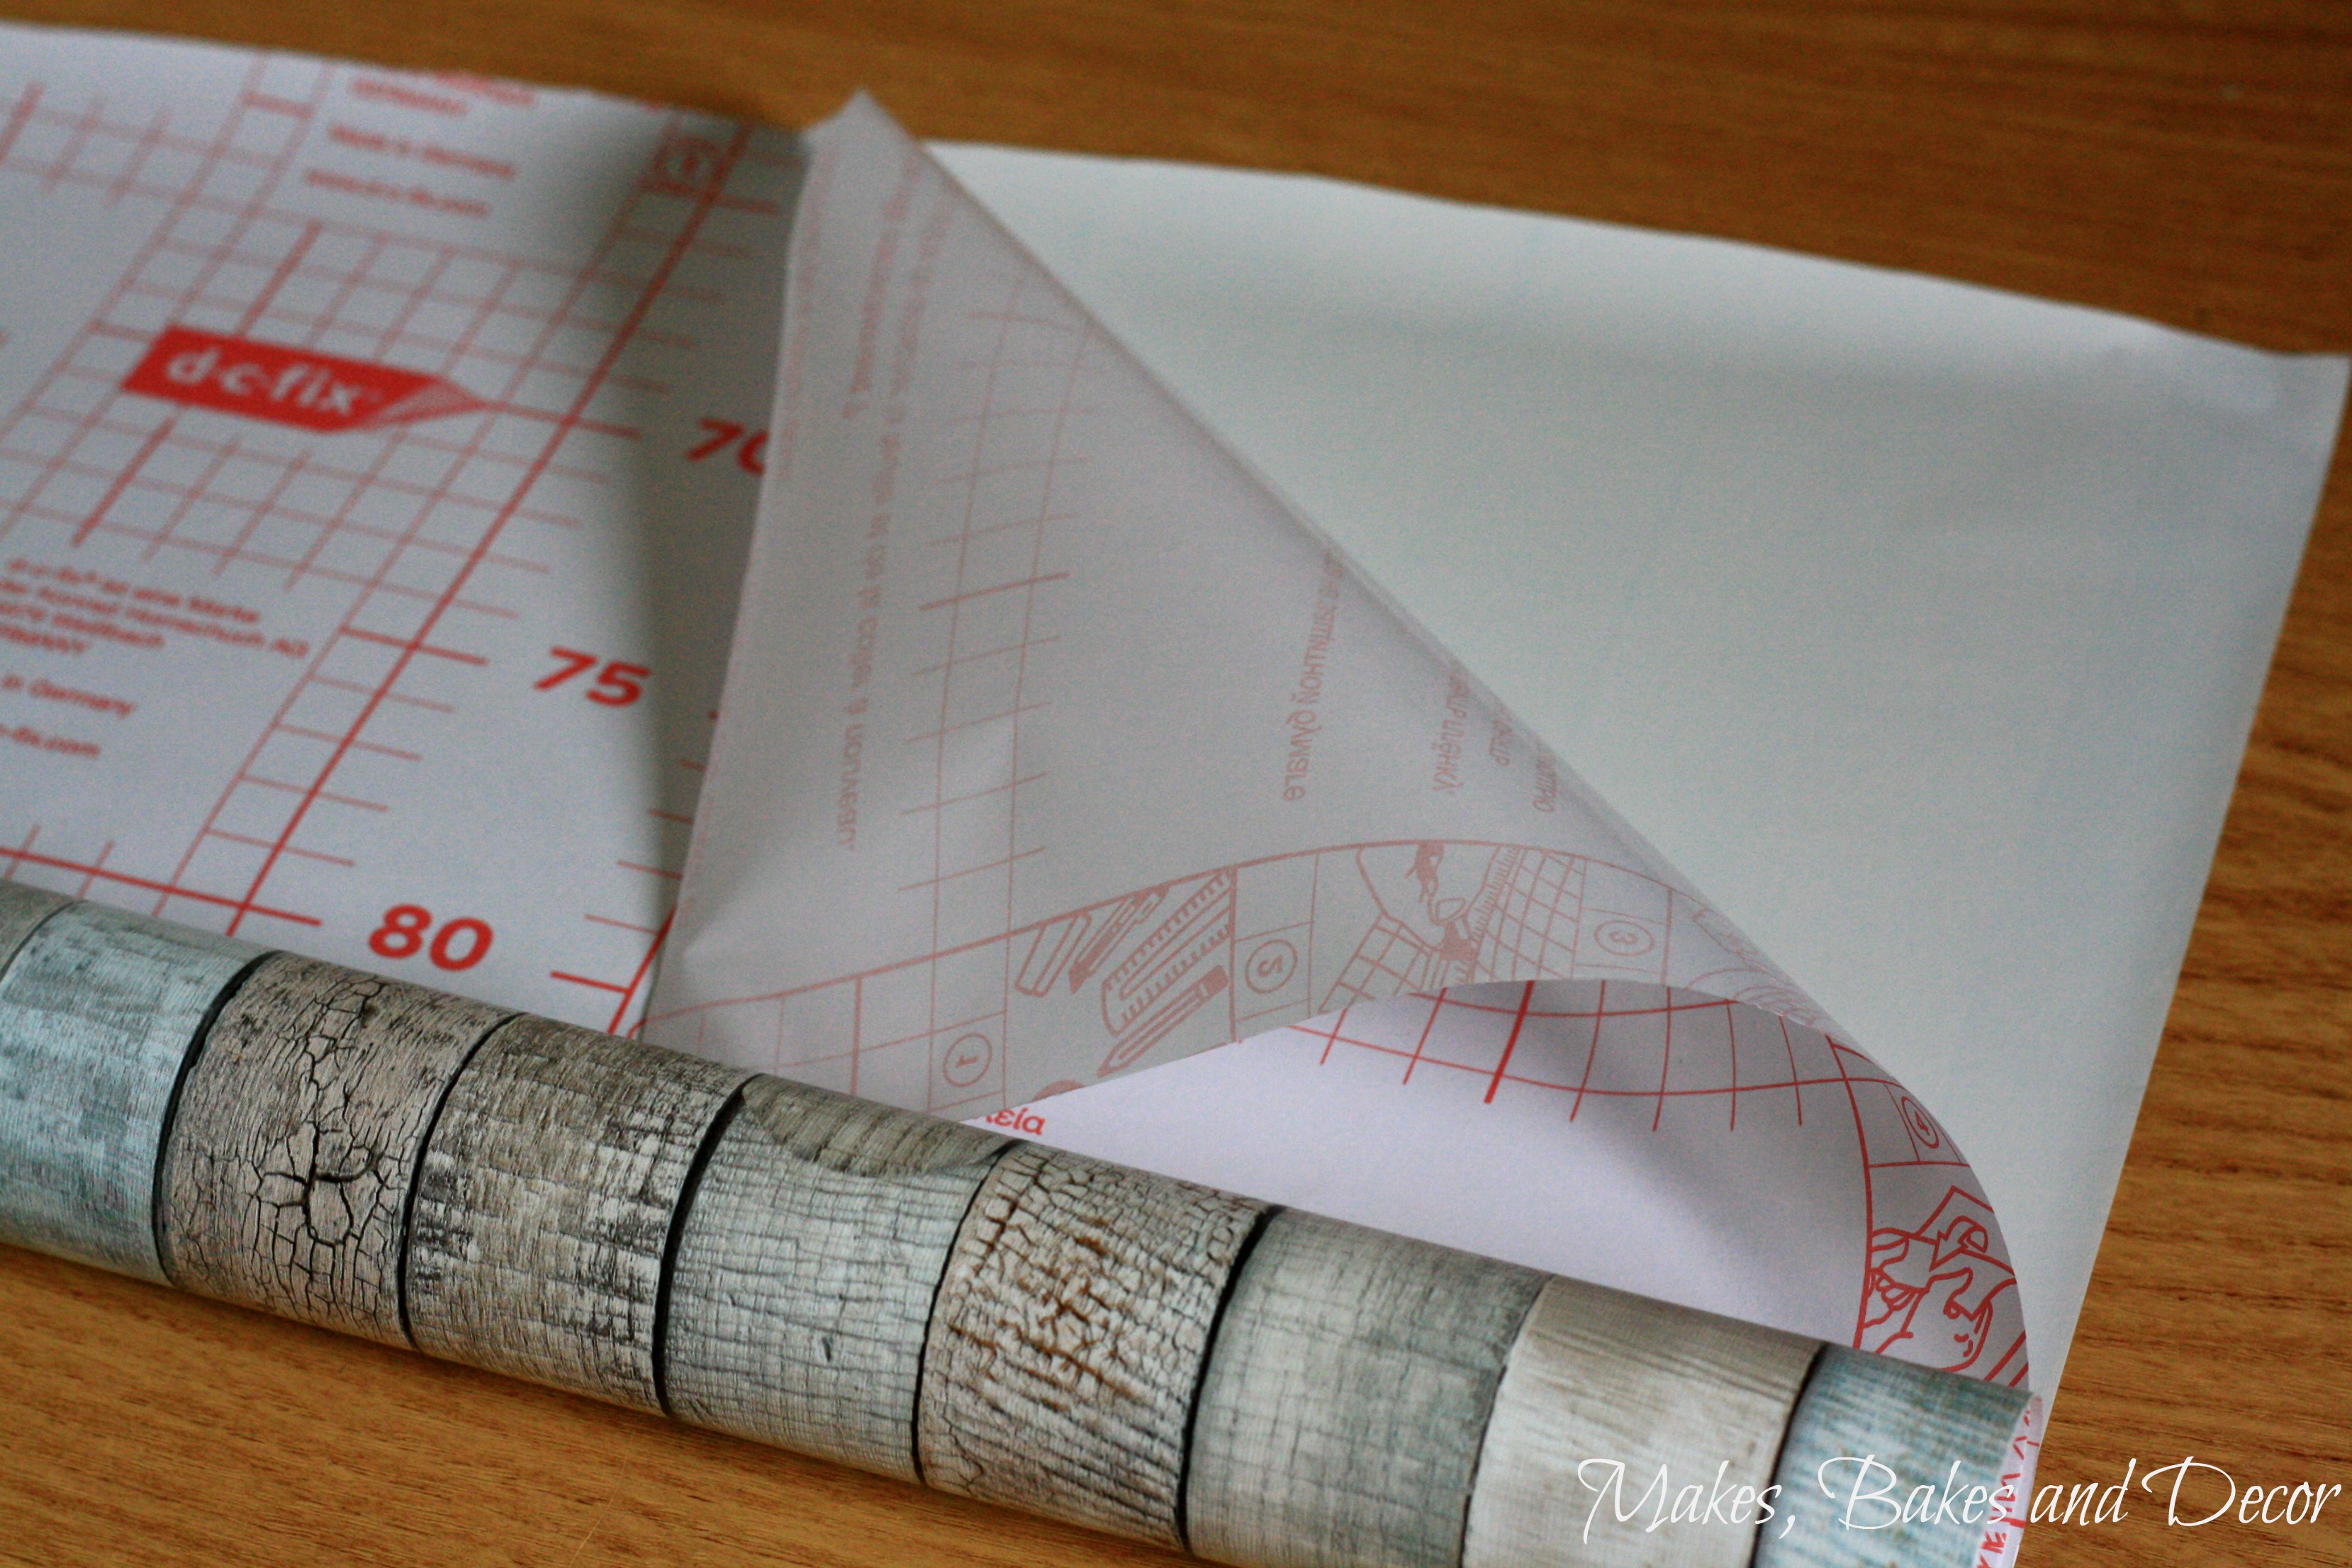
I purchased some D-C-Fix to cover the shelves, it’s a sticky backed plastic that can be used on so many different projects. I’ve used D-C-Fix before, in fact my kitchen counters that you can see in the background of the above picture are covered in D-C-Fix. You can find videos on how to apply D-C-Fix here. You can also purchase the one I used for my cupboards here and the one I used for my counters here.
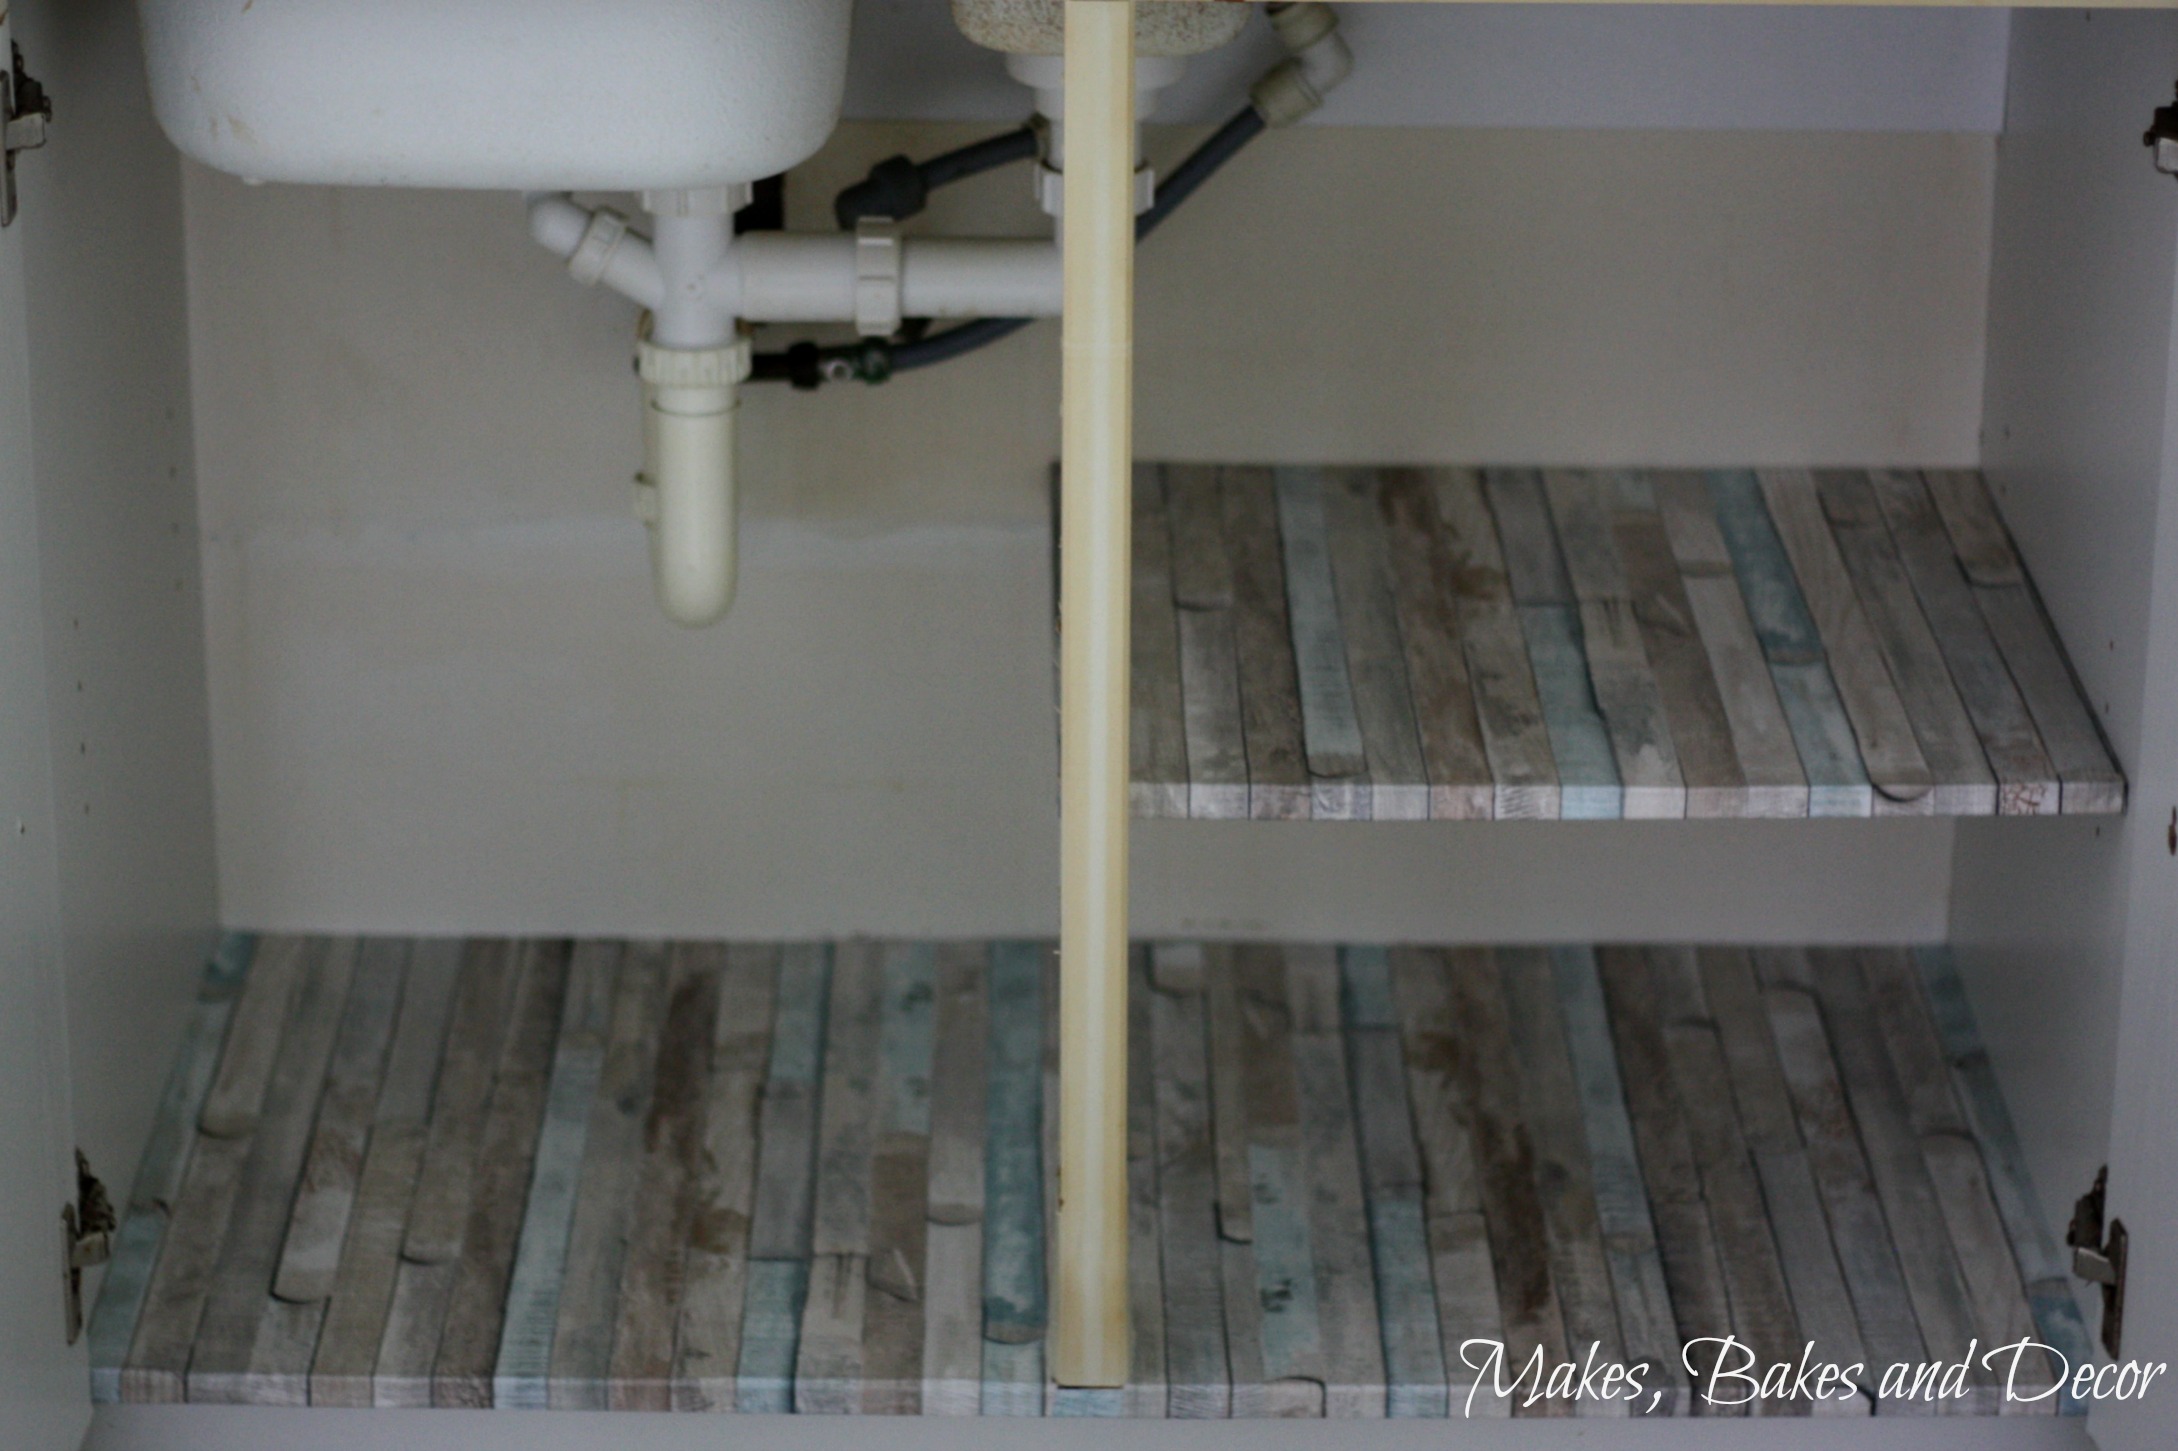
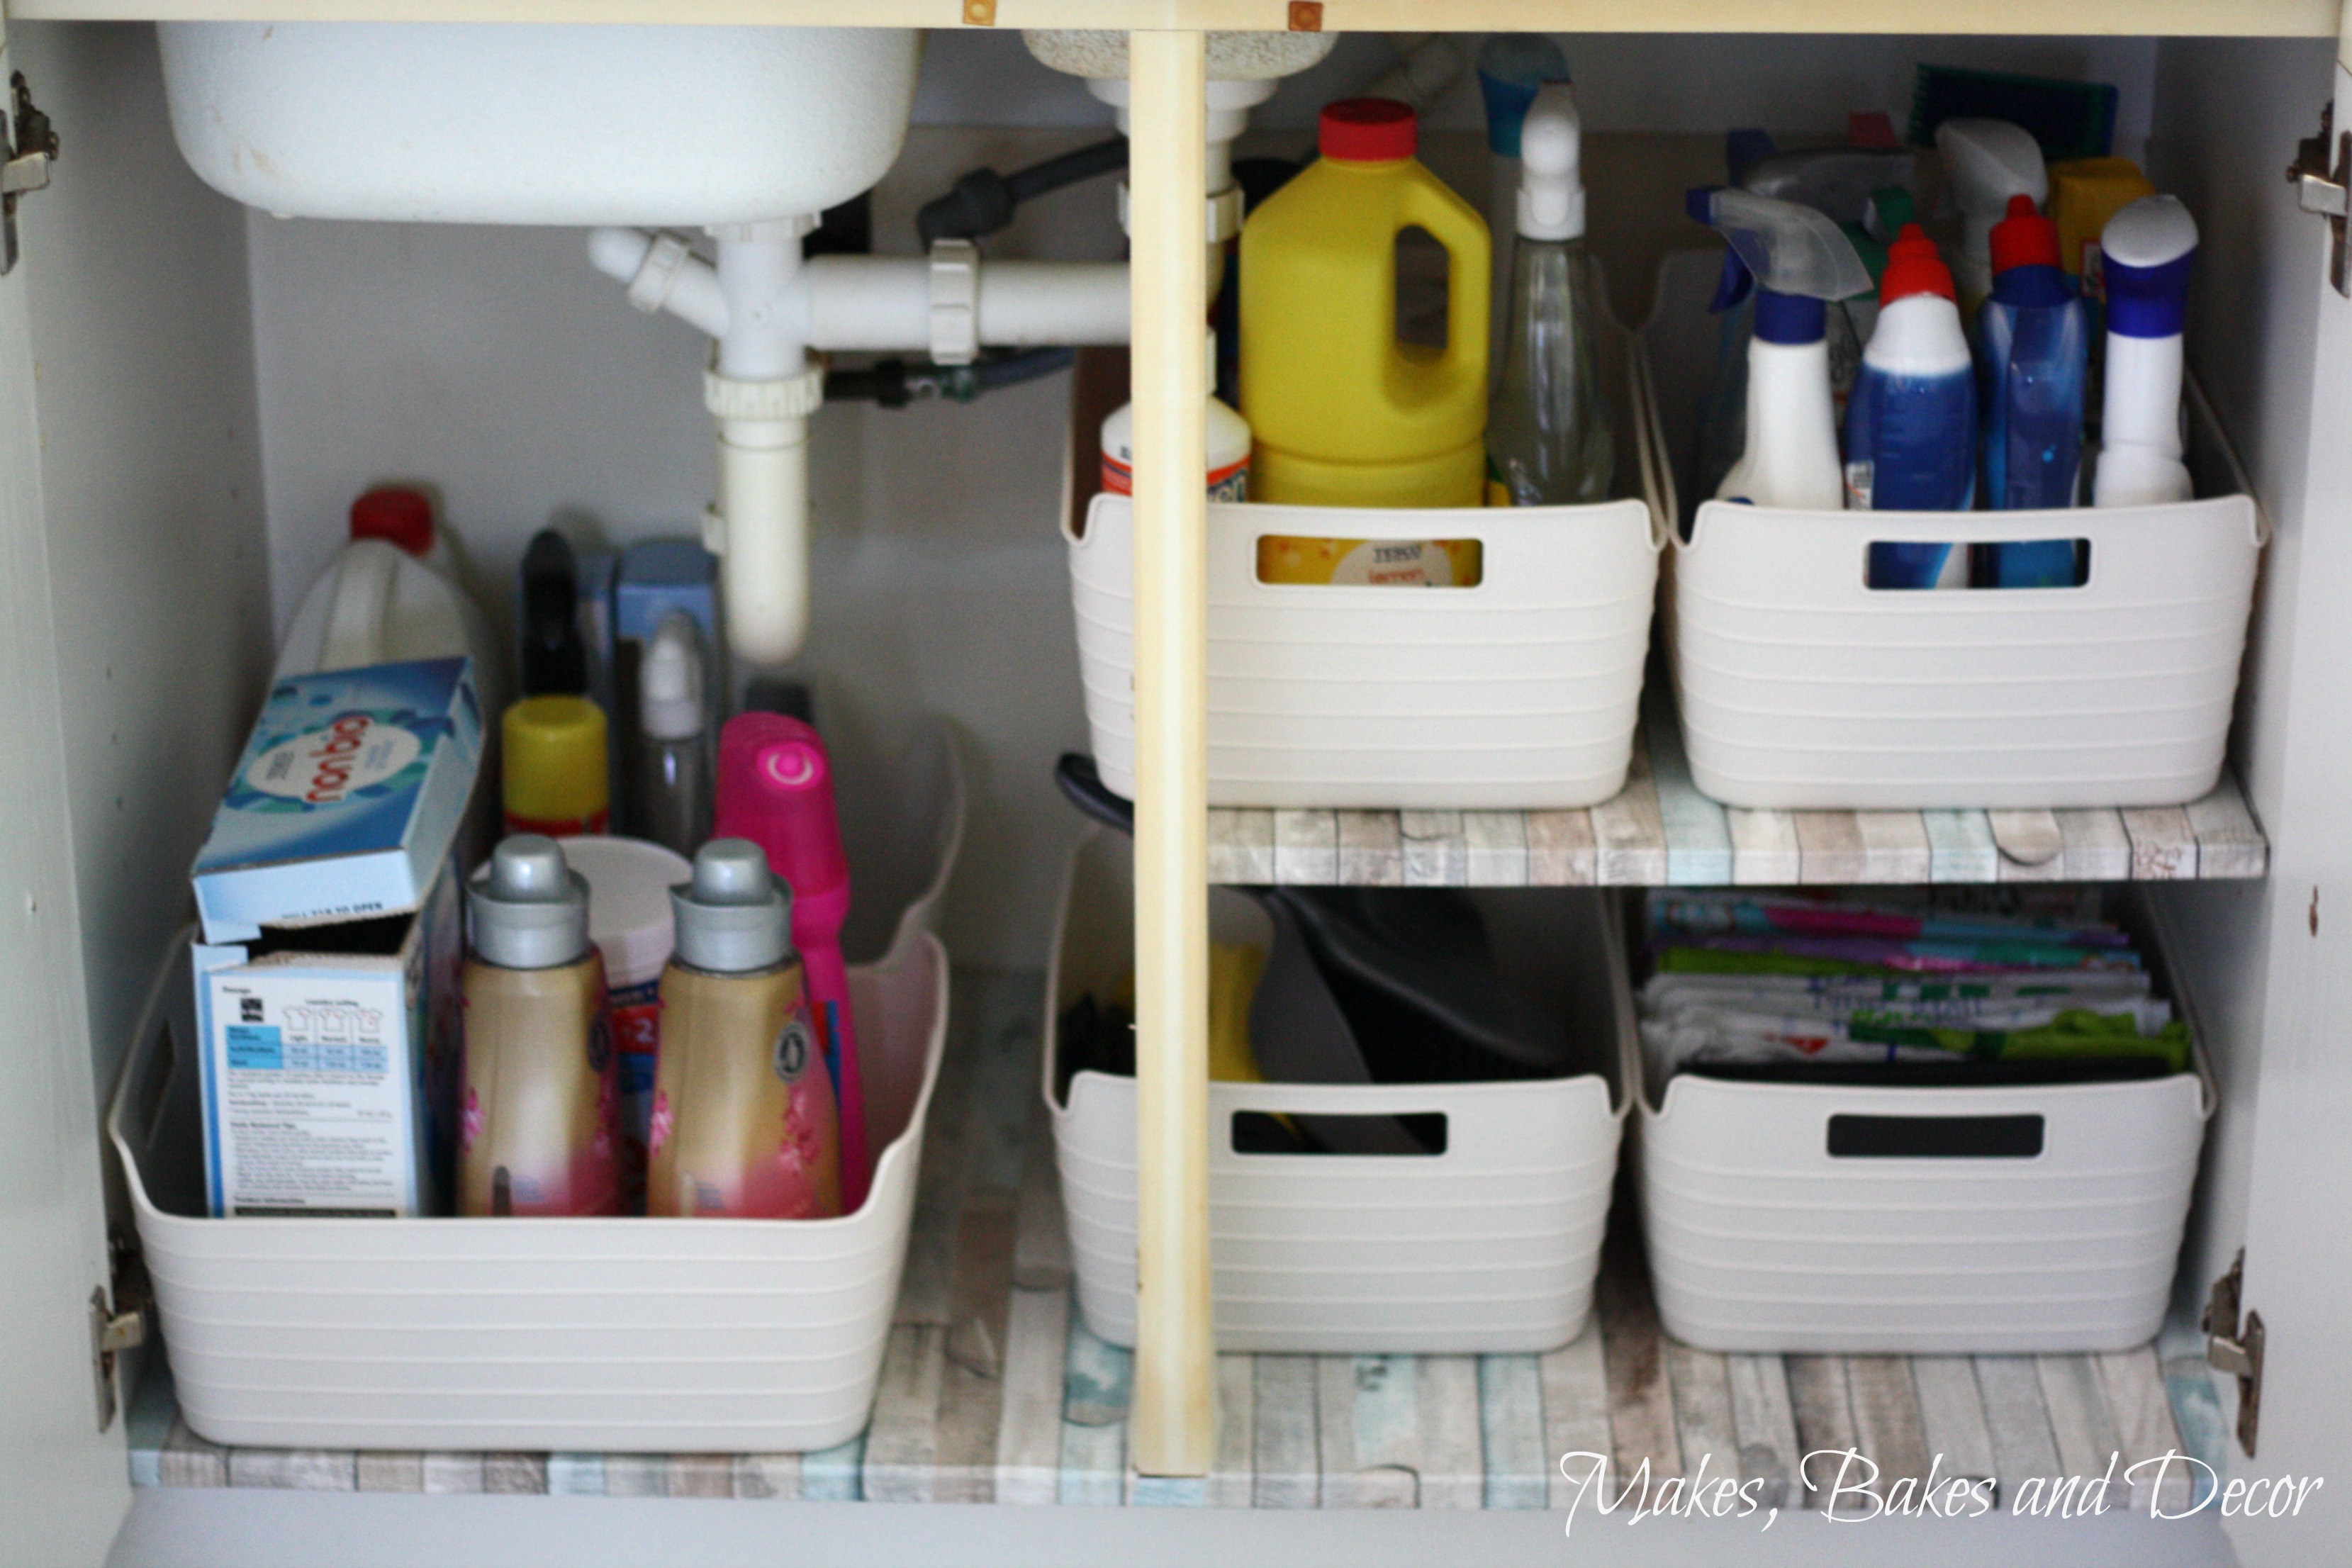
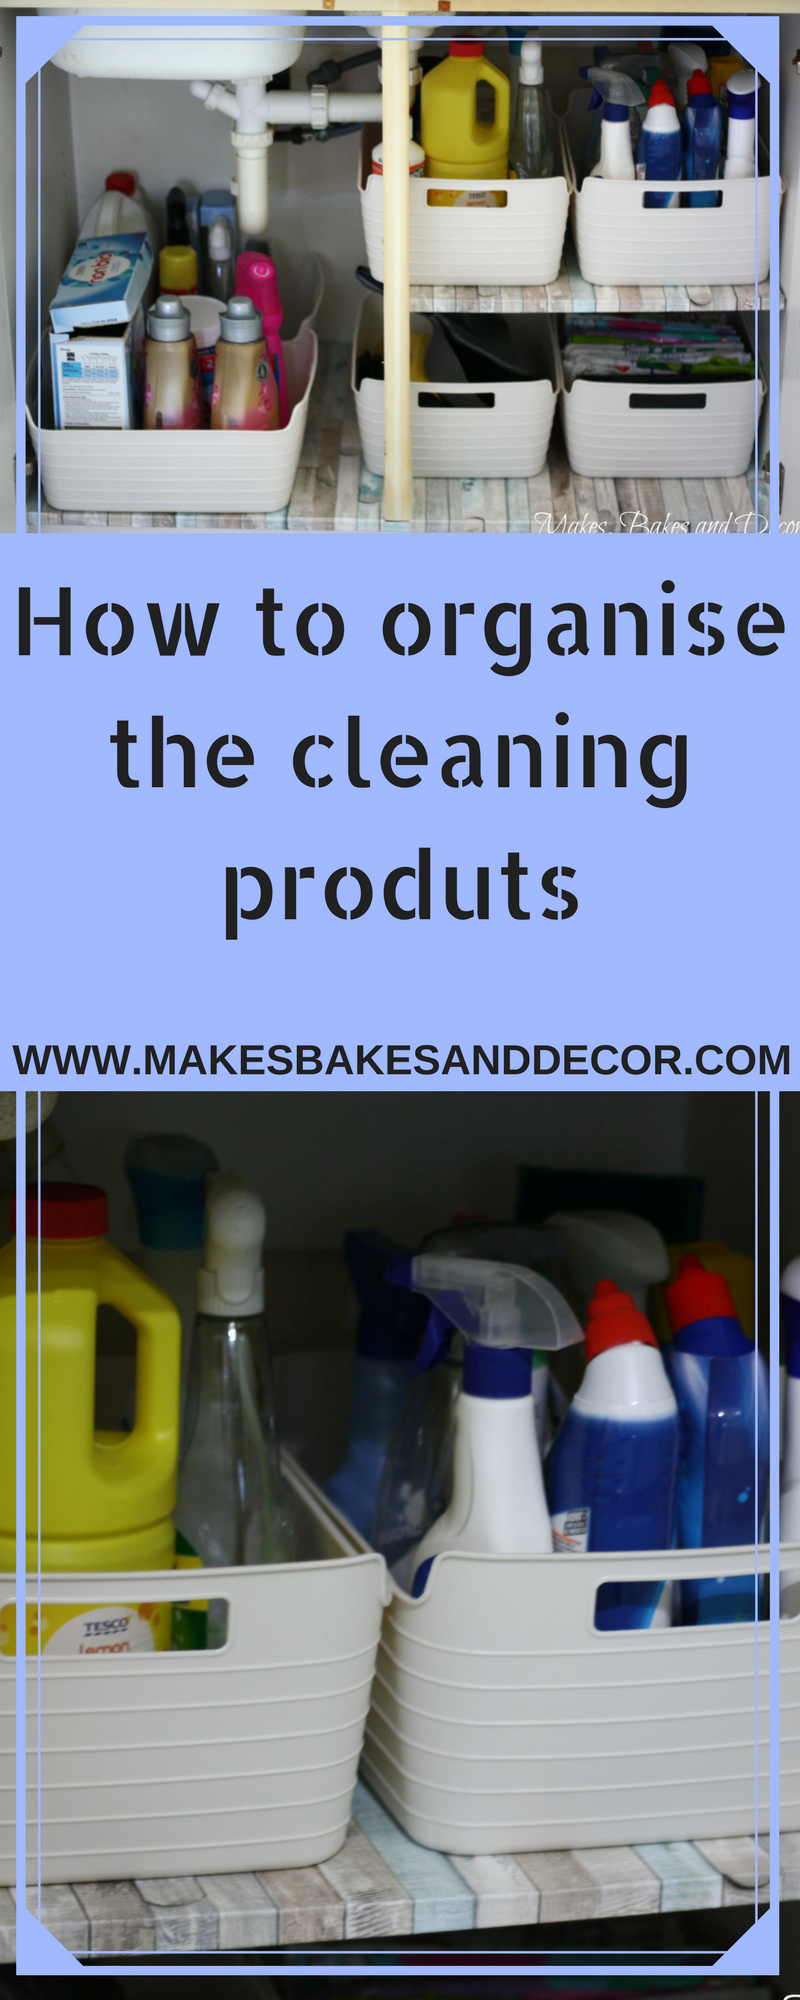
My cupboard now. I’m so happy that all the water damage has been covered. They look so much better and cleaner! At some point I plan on buying some white D-C-Fix to cover that central post but it’s fine for now.
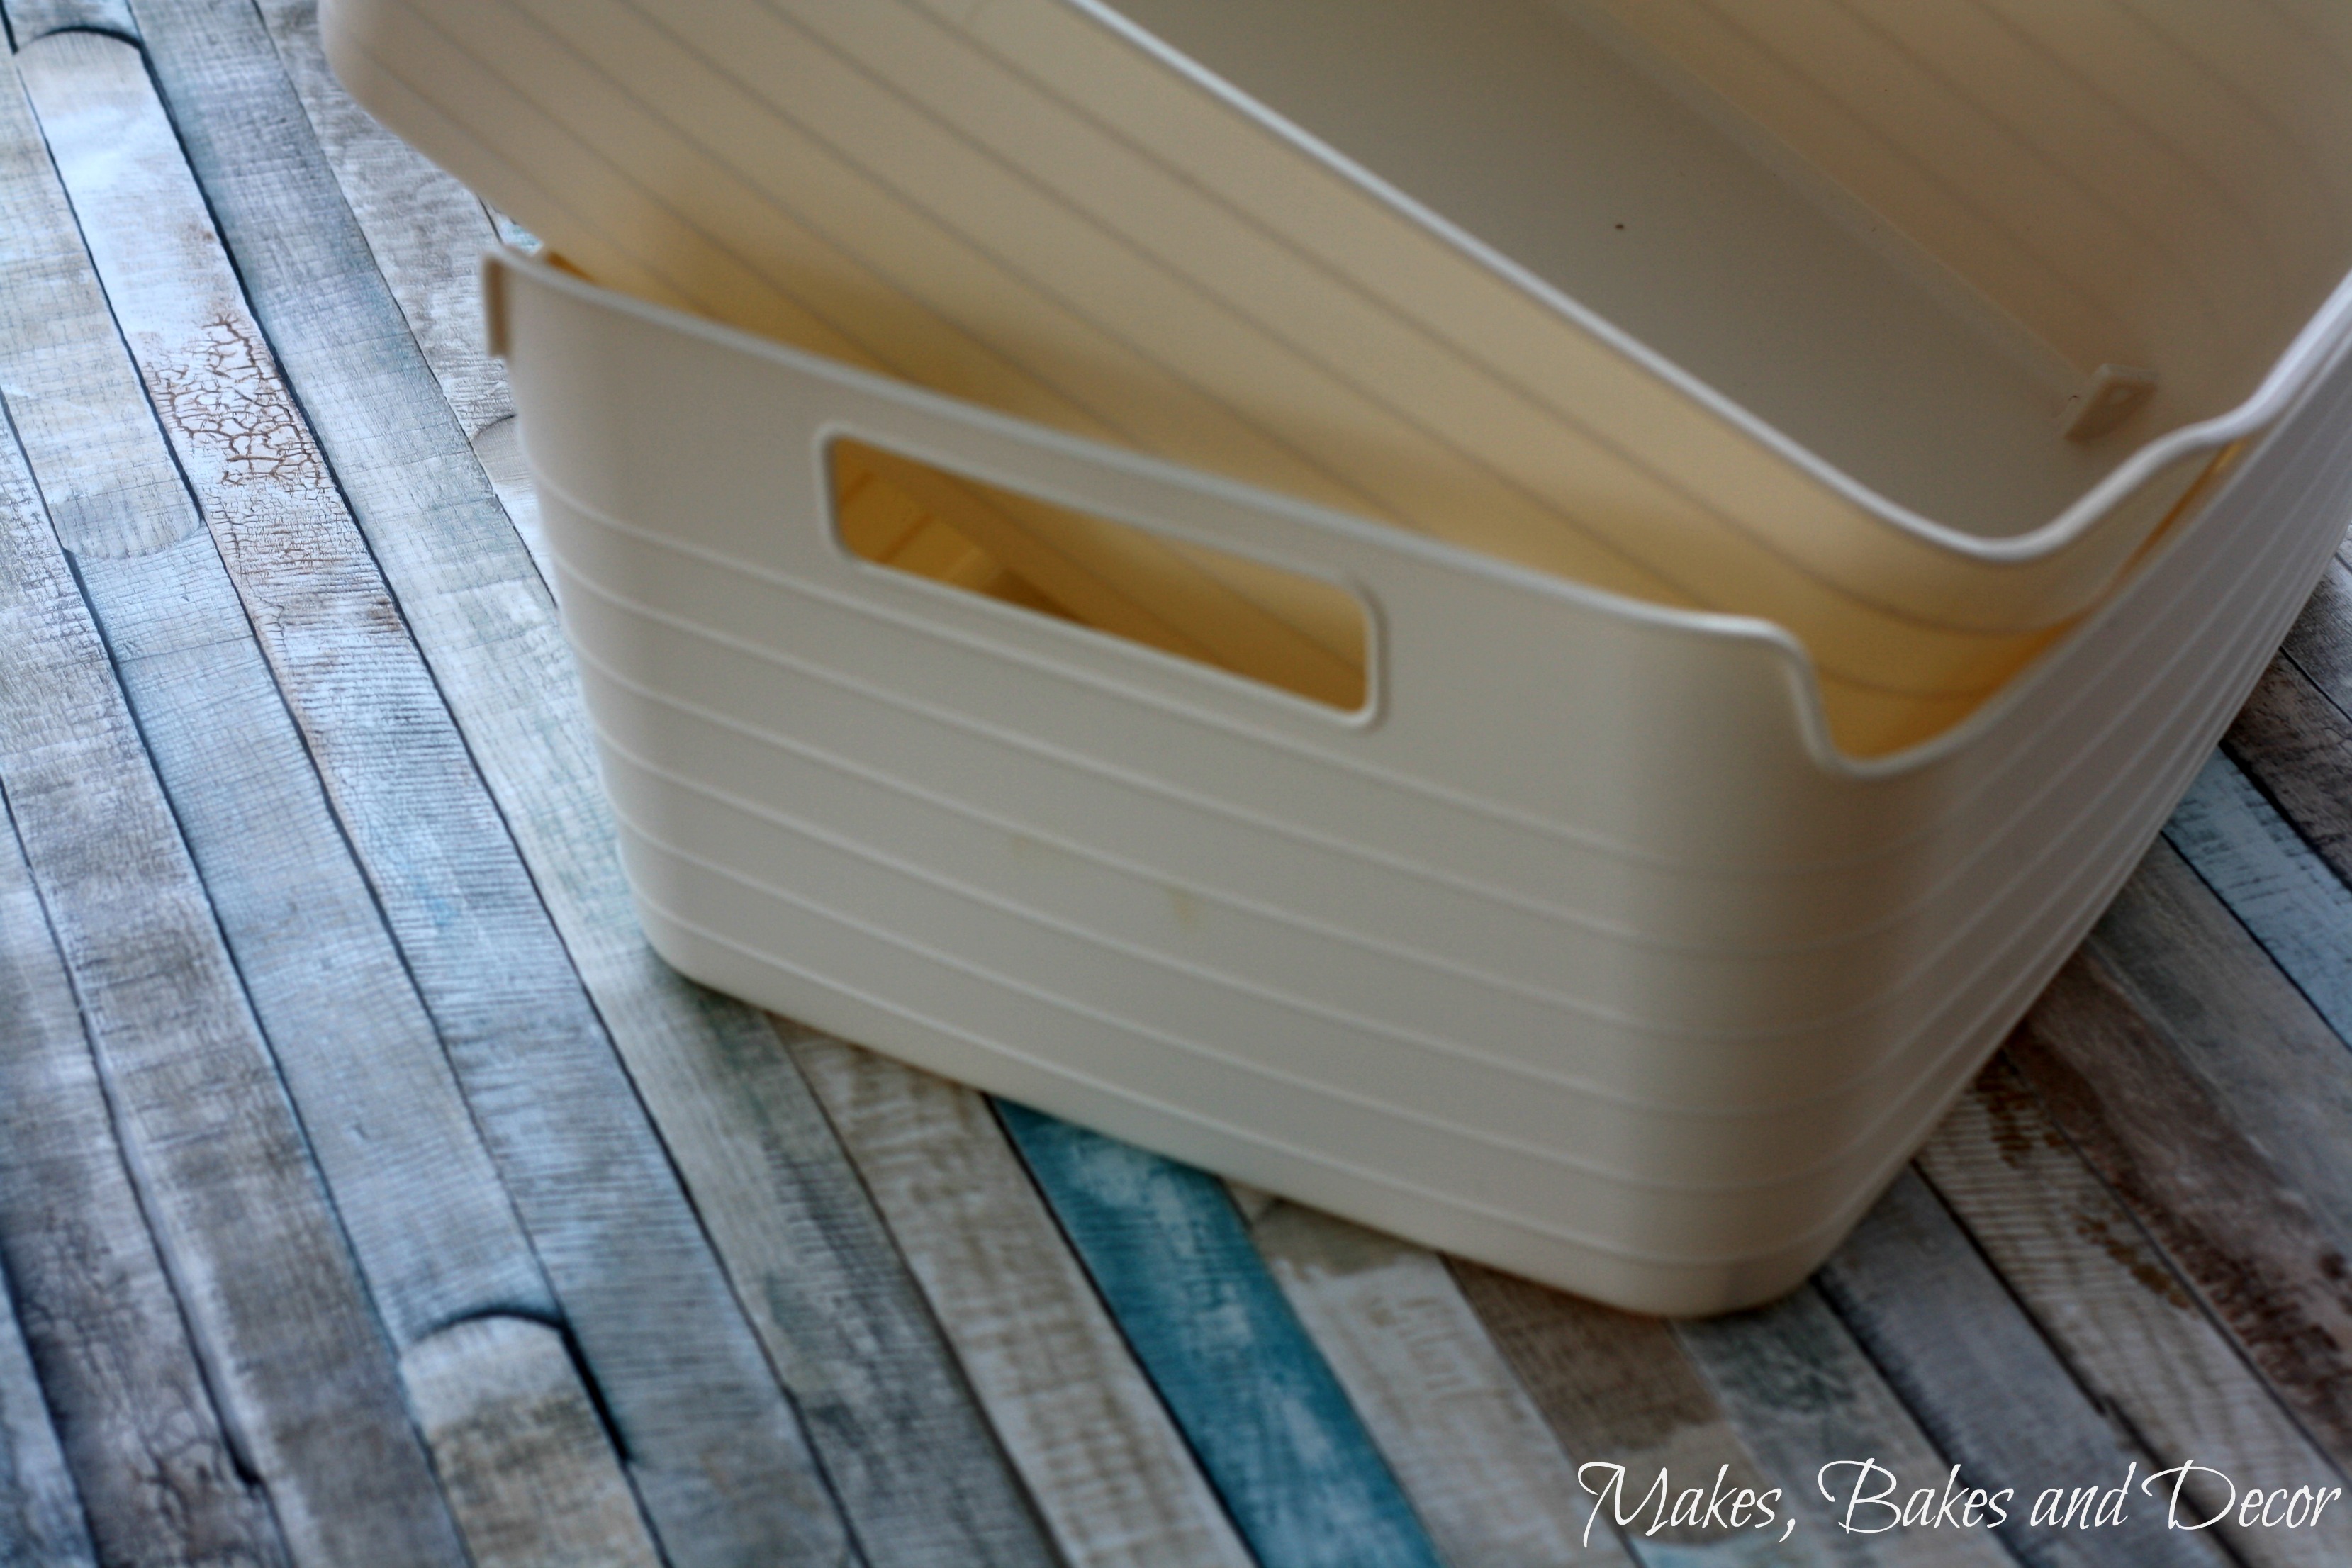
I chose these flexible baskets to put everything in as they will be easy to clean. Here are some other options for you.


So much better right!! I spent £5.00 on the D-C-Fix and £9.00 on the baskets so a pretty cheap makeover!

I put products that I don’t use very often like the carpet shampoo at the very back and then all my laundry products at the front on the left. I can now easily scoop out powder without having to lift the box out every time.
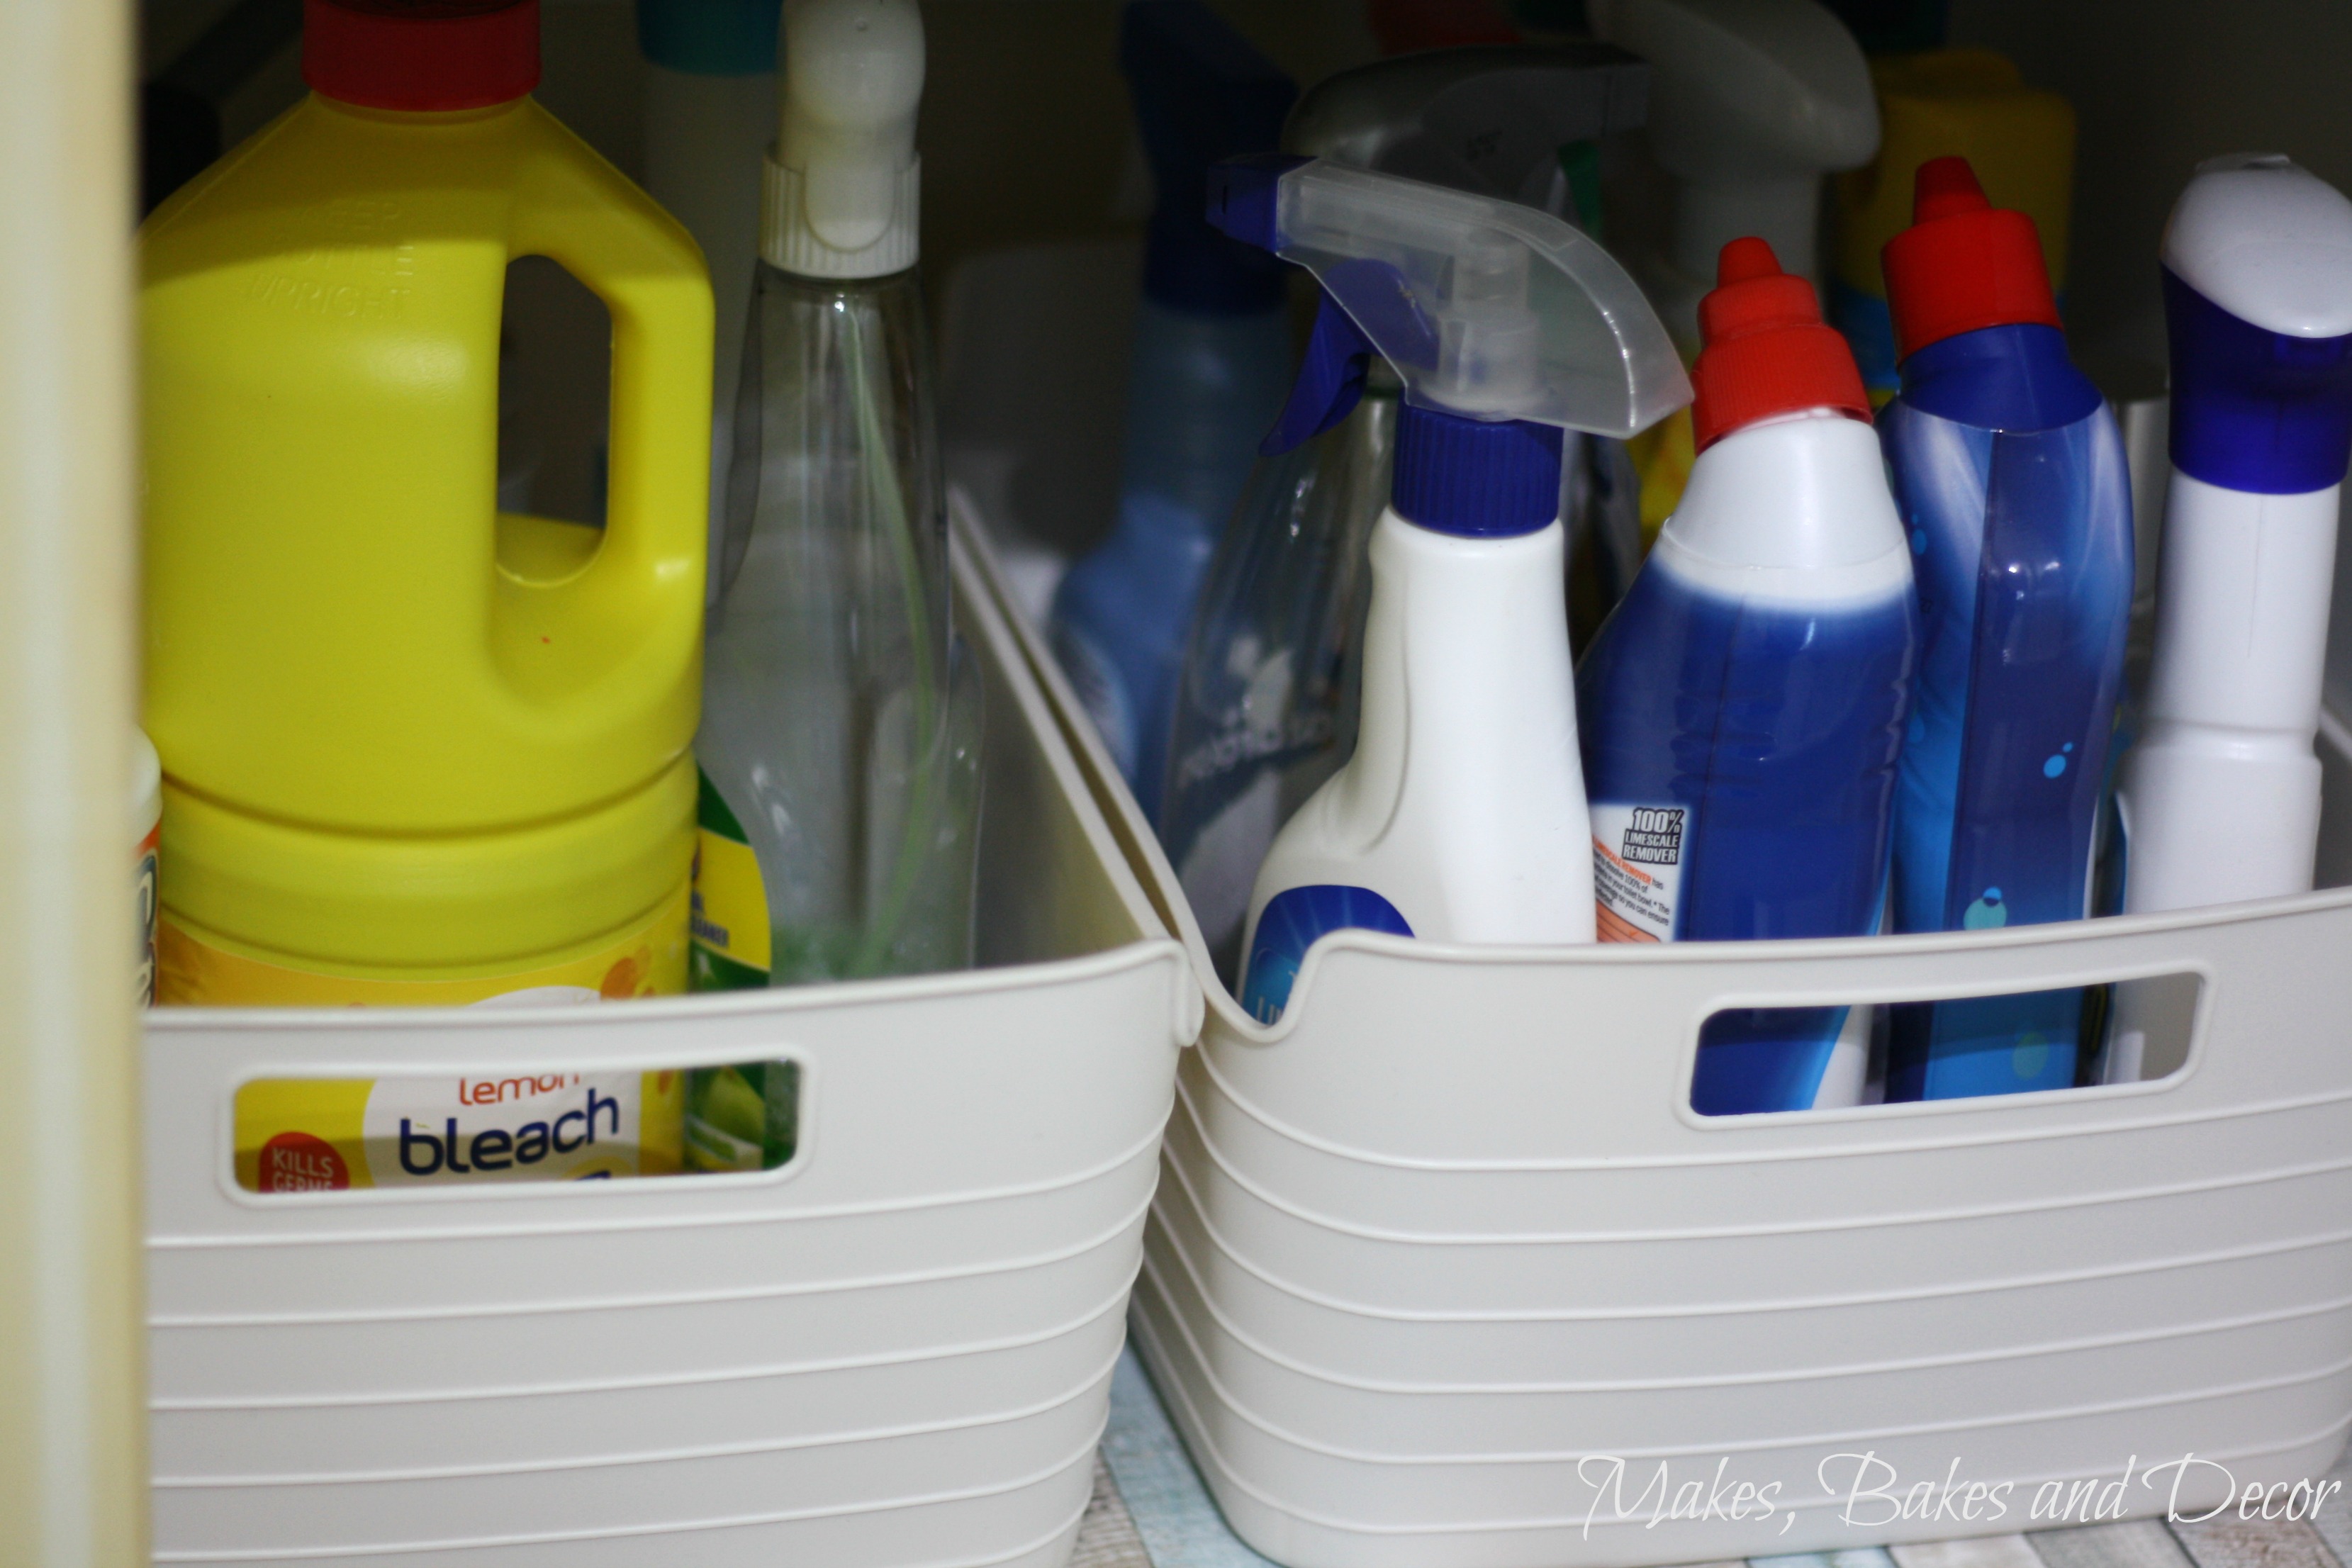
I put all the other cleaning products in the baskets on the top shelf, kitchen products in one and bathroom cleaners, furniture polish etc in the other. When I’m doing the cleaning around the house I can just lift the basket out and take it with me.
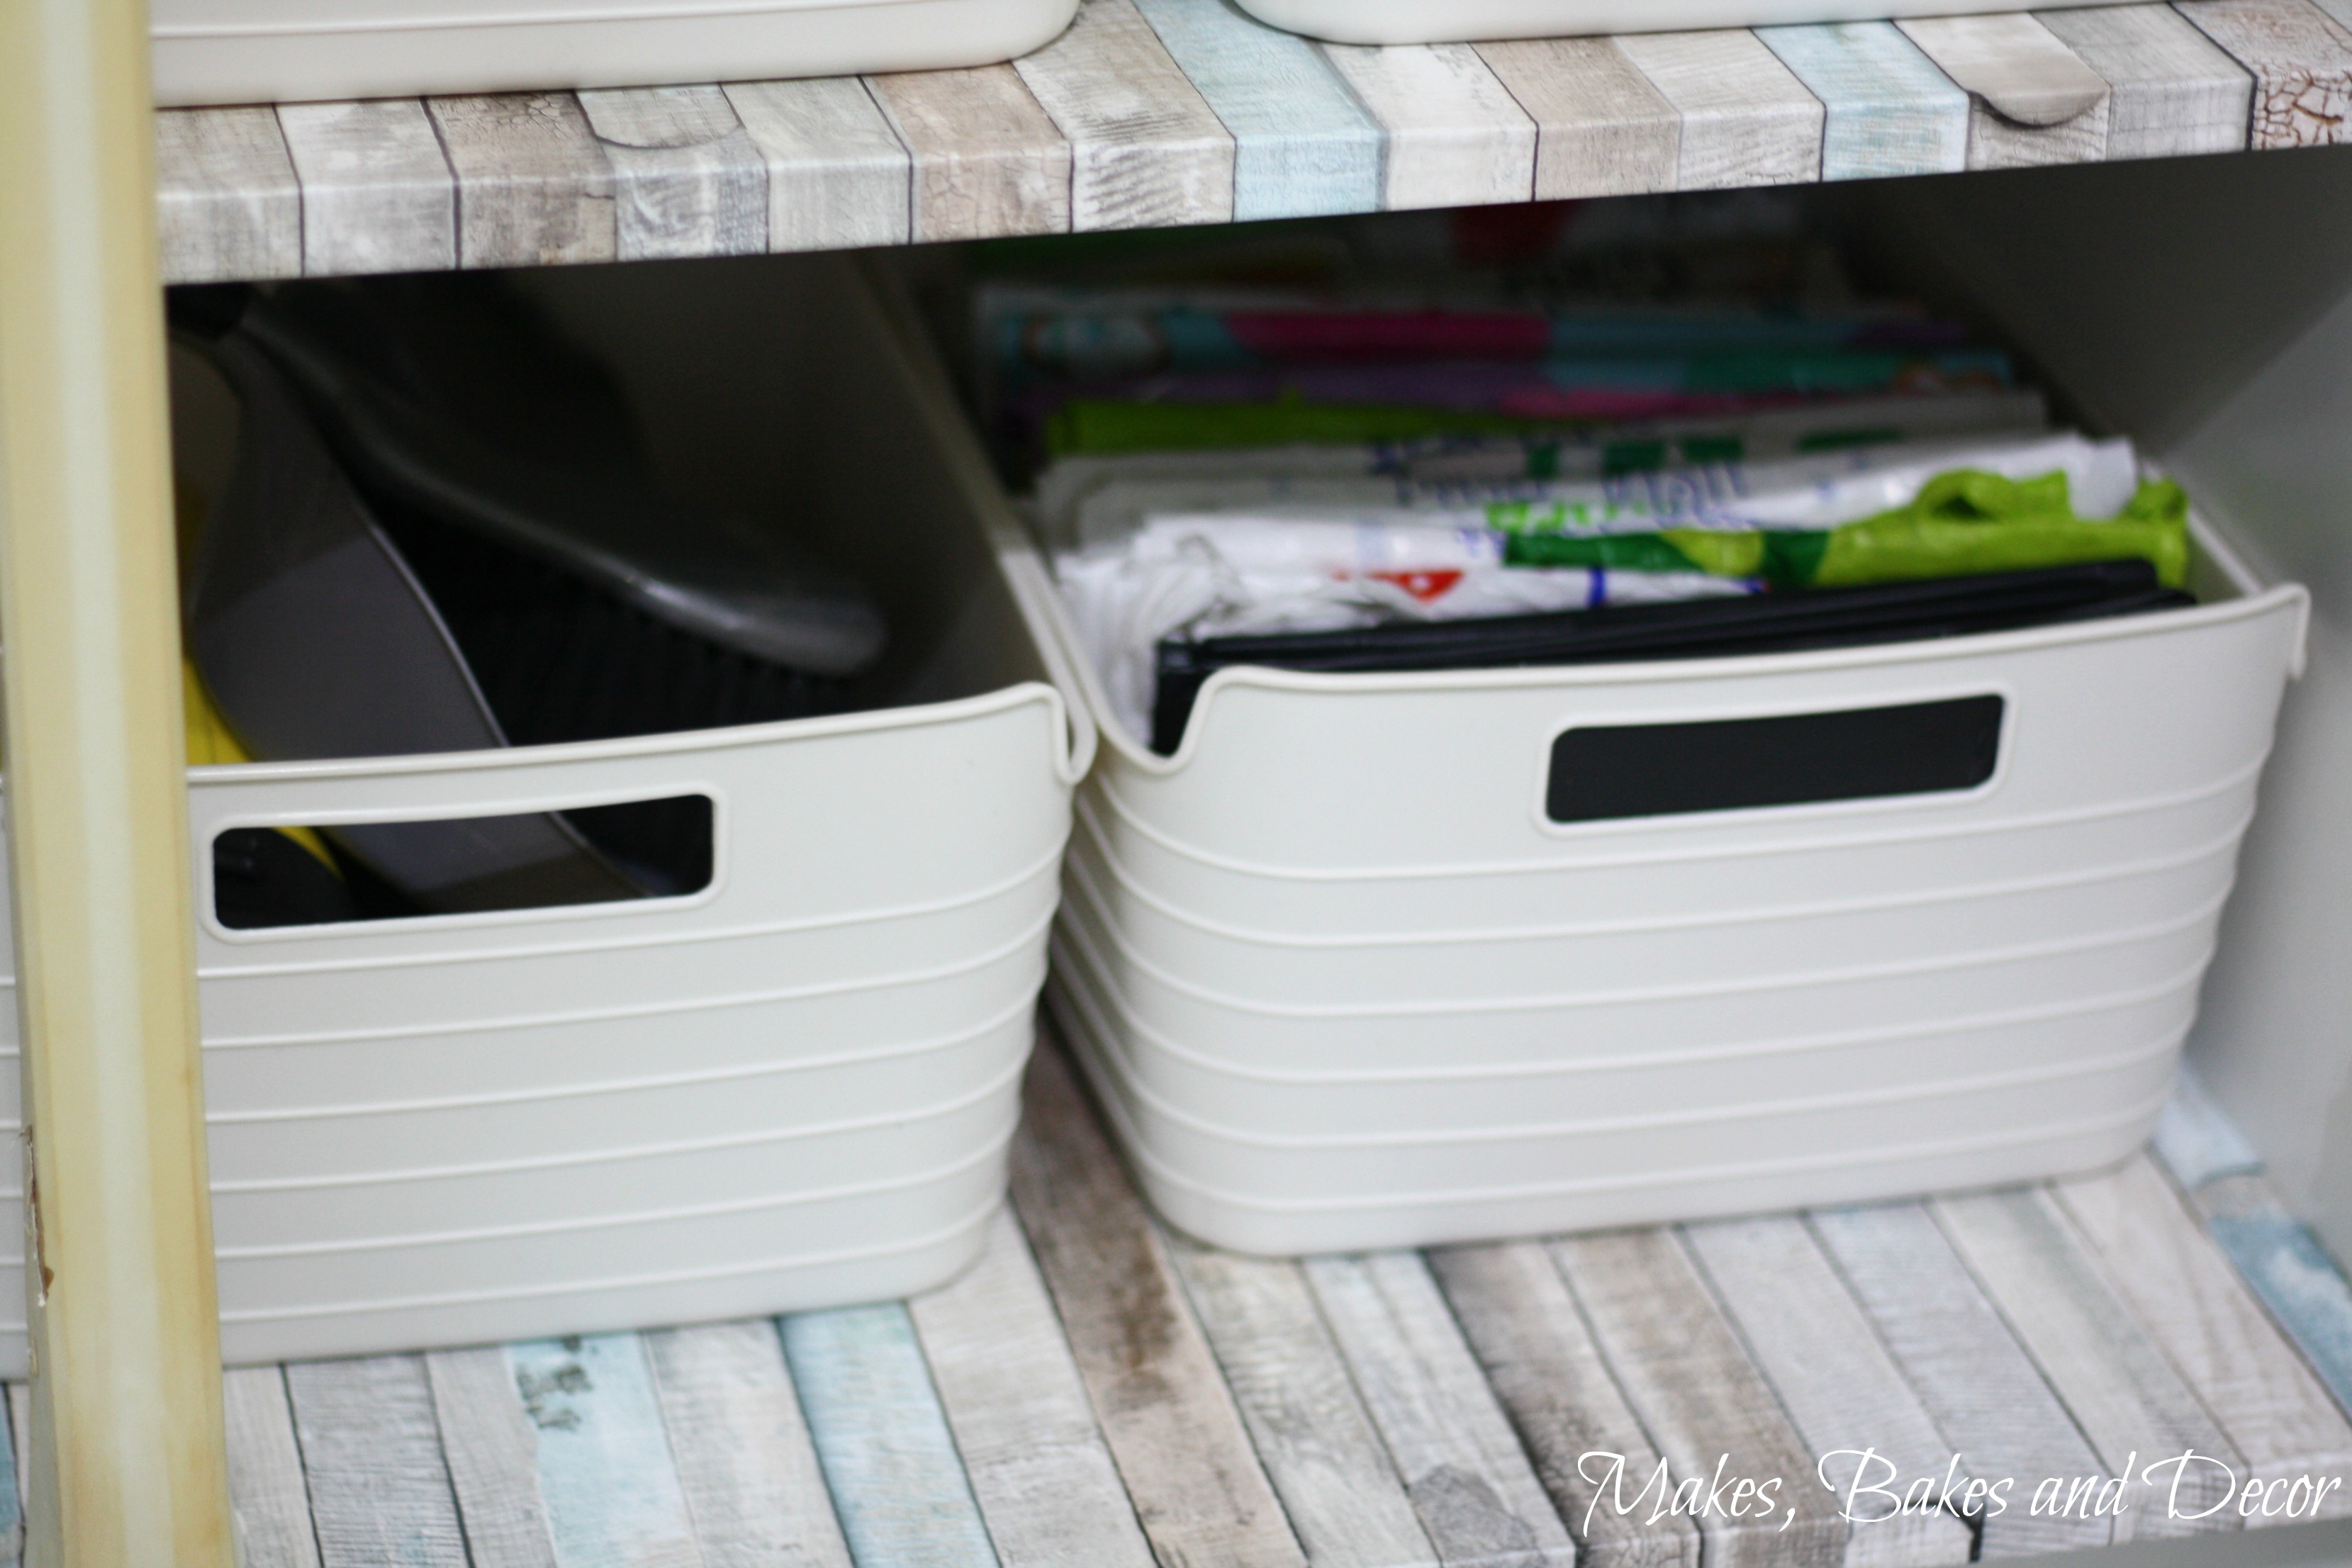
On the bottom shelf on the right I have one basket with the karcher window cleaner, dustpan and brush and vacuum cleaner attachments. The other basket has black bags, folded and my carrier bag collection. I folded some and recycled the rest!
BEFORE
AFTER
I hope I’ve given you some ideas on how to organise the cleaning products and how to revamp the insides of your kitchen cupboards. So why are you putting it off any longer!! I know I’m much happier. Now I get a bottle out and 10 more DON’T fall over! 🙂 Leave me your thoughts and feelings at the bottom of the page!
Lianne x
Pin How to Organise the Cleaning Products to save it for later!
Follow my Staying Organised Board on Pinterest for loads more organising ideas!
[bws_pinterest_widget type=”board” width=”360″ height=”60″ thumbnail=”60″ url=”https://uk.pinterest.com/makesbakesdecor/staying-organised/”]

Totally doing this this weekend! I literally just throw everything below and can find anything! Your “After” picture looks so nice!
Author
Thank you! I’m glad I’ve inspired you to get organising!! 🙂
Awesome tips!
Caitlin, Beauty & Colour
Author
thanks
Hi Lianne, it’s a nice idea to use the spare spaces. You have decorated it quite nicely. The pictures look amazing. I will definitely try this. But you have to make sure those cleaning material to keep away from children.
Your home automatically looks good when you organize everything, thanks for sharing the tips.