This post for Felt Flower Cushion contains affiliate links, Find out what that means here.
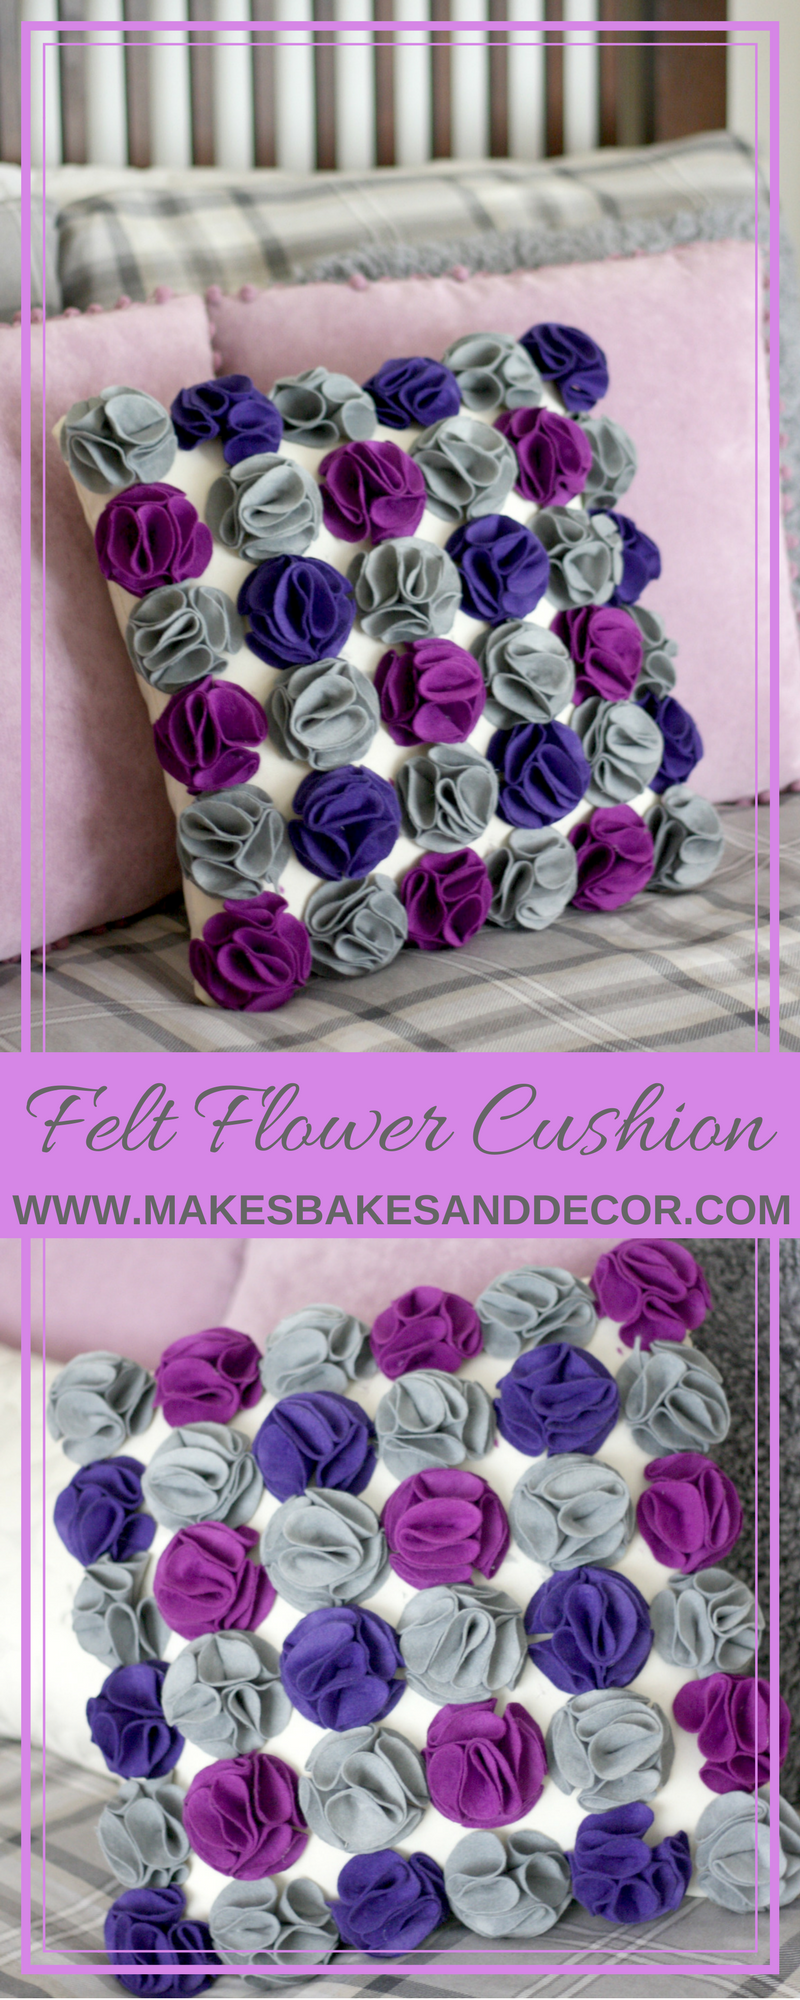
It is time for August’s #DIYBlogChallenge and the theme for this month is Flower Power. When we came up with the theme I thought it would be easy to think up a project but it wasn’t! The idea for this Felt Flower cushion finally came to me in what I thought was the week before it was due so I was panicking that I wouldn’t finish it in time. I contacted all the other bloggers taking part asking for their finished images panicking everyone else too until someone said “I thought the deadline was next week”. It was lol and so I had plenty of time to finish! Here is my finished Felt Flower Cushion.
I used a ready made cushion for this project and just made the felt flowers to decorate. My original design was the grey felt and one shade of purple felt. I seriously underestimated how much felt I would need though and when I returned to the shop to pick up more felt they didn’t have any more of the same purple! So the finished cushion has the two shades of purple with the grey but you can go with any colour scheme you like. you could go with a single colour or even rainbow!
You do need a lot of felt for this project. I used a 40cm by 40cm cushion and used a 7cm circle to make the flowers. To fill the cushion you need 36 flowers. It takes 5 circles of felt to make each flower so all together you need to cut out 180 circles! So you need 20 22cm/9inch felt squares.
As well as felt, scissors, a blank cushion and a glue gun you need a pencil and a compass to draw your circles or if you don’t have a compass find something that has a diameter of 7cm to draw around like I did.
Step number one is to draw and cut out all 180 circles. Good luck ha ha! It’s actually quite relaxing once you get into it. If you are doing more than one colour just remember you need 5 circles per flower.
The next step I’ve shown you before in my post for my Felt Flower Hairband. Take a circle, add a small amount of hot glue and fold the circle in half. Then add a small amount of glue again and fold in half again. The photos below will help to explain the steps.
[easy-image-collage id=1887]One you have 5 folded circles, the next step is to add a good sized blob of glue to one folded circle.
Then stick the other four folded circles onto this like in the image below.
And there you have your finished felt flower.
It does take a bit of time to make all 36 flowers and I did mine in a few sittings. Once they are all done though you just need to add some glue to the underneath of each flower.
And start to stick them to the cushion cover. I placed the 6 along the bottom and up the side first to make sure I had the spacing right, then kept filling the cushion in from there.
My finished cushion is destined for my bedroom. It’s still undecorated in there but when finished it’s going to be shades of purple and grey.
I hope you’ve enjoyed my project! If you make this yourself, let me know. Use #makesbakesdecor in your social media posts or tag me @makesbakesanddecor on Facebook and Instagram or @makesbakesdecor on Twitter. Now it’s time for you to take a look at all the other Flower Power projects from my blogging friends! Enjoy!
Lianne x
Gifts and Blab
Raven Would
Pin my Felt Flower Cushion to save it for later!


Oh wow, those flowers look so good and yet are actually really easy to do! Fab! #DIYBlogChallenge
I can think of a number of ways to use the flowers. The pillow looks great!
Beautiful pillow and perfect colors! And that is great new way to make fabric flowers!
Author
Thank you! I love to make these felt flowers a lot as they are so easy and you can use them in so many ways! 🙂
Love your cushion, it is so pretty and definitely worth the effort as the outcome is stunning! I thought flower theme will be so easy too can’t believe we both struggled.. you did great!!!
What a pretty pillow! I love the colors. I also thought flowers would be an easy thing to do but it was really hard for me also.
What a gorgeous pillow! Colour and Fabric awesome.
Author
Thanks so much! 🙂