
Photo Christmas Bauble
Hello everyone! The challenge for this months #DIYBlogChallenge was photos. Unfortunately everyone else was too busy to take part this month but I still wanted to make my project and share it with you all. The project I came up with was this Photo Christmas Bauble.
I was on Instagram the other week and a blogger that I follow, Gemma Bonham-Carter from The Sweetest Digs did an unboxing of some items she has received including a tree ornament that had a photo of her family on it. She was talking about how this was something she had bought every single year so each year they unpack the ornaments and there are pictures of them all from each year on an ornament. I thought this was a lovely tradition and definitely something I could DIY as opposed to buying.
We have so few pictures of all of us as a family, there are pictures of the kids, pictures of me with the kids and pictures of Shaun with the kids but we forget to take pictures of us all. So I’ve used a picture of just Mason and Noa for now but I plan on making another with all of us.
This post contains affiliate links, find out what that means here.
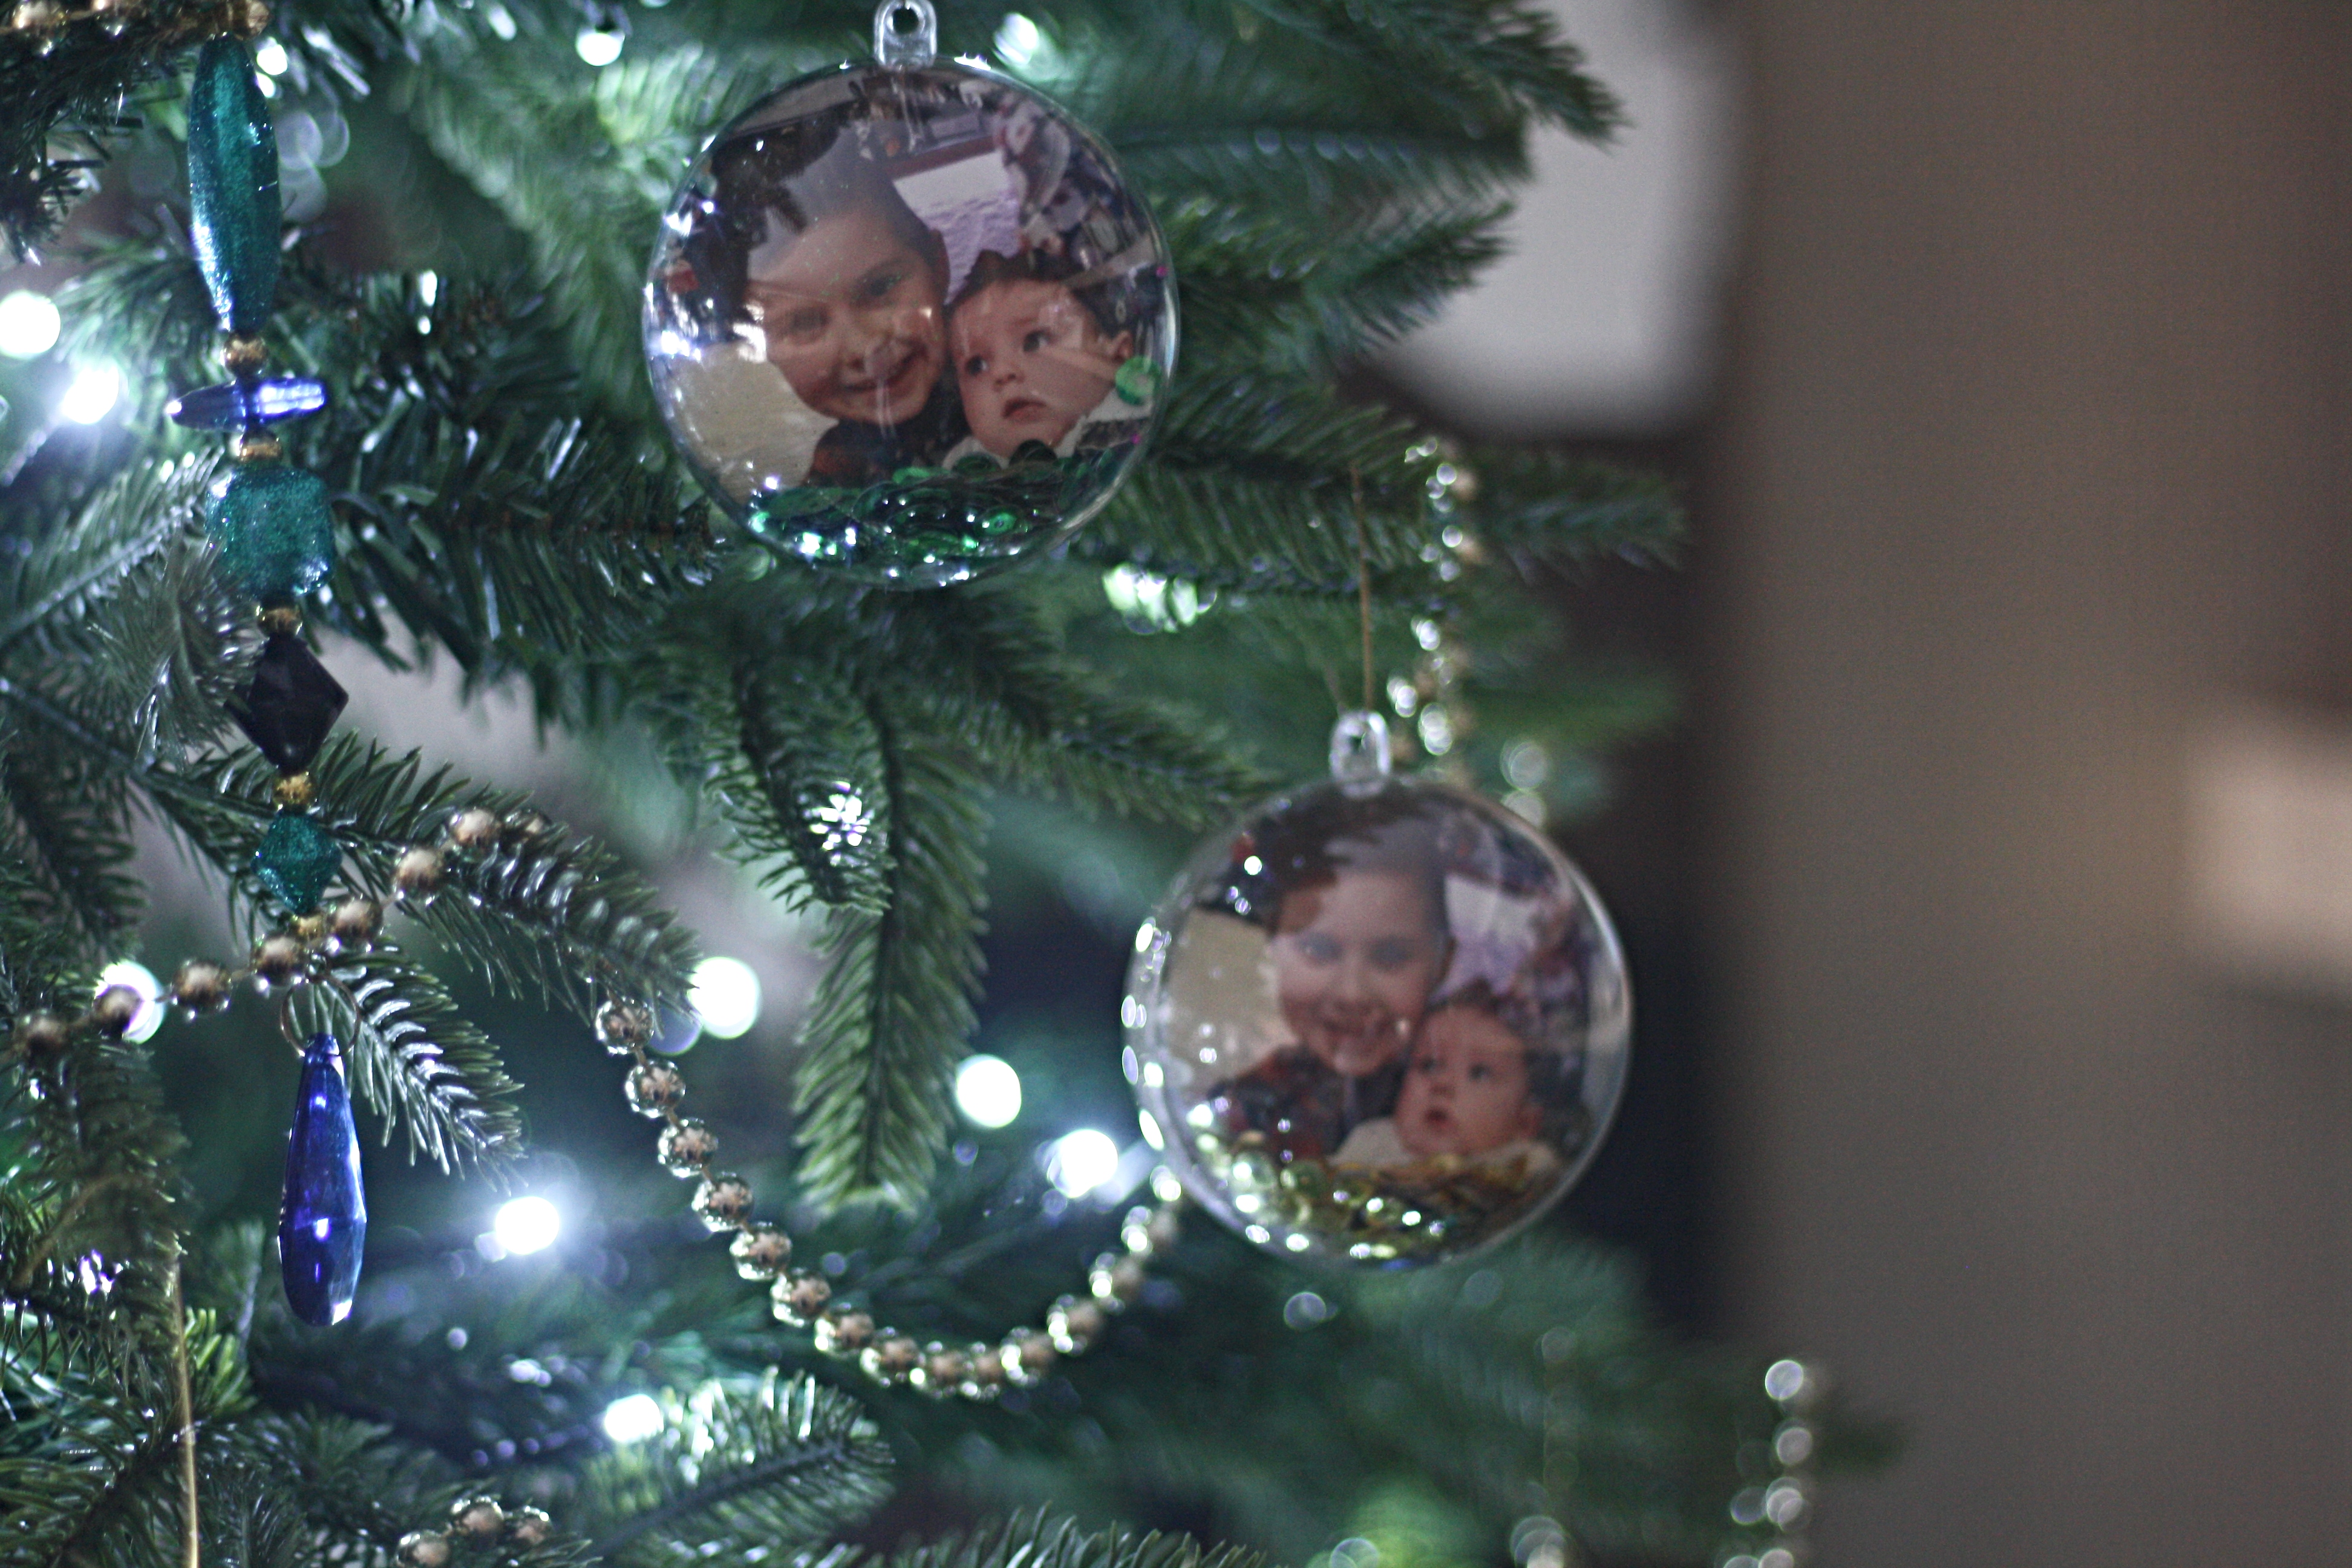
Photo Christmas Bauble – How to make it

First up let’s talk about what you need, it only takes a couple of items to put this together. A lot of it I already had in my craft stash so the only thing I needed to buy was the clear baubles. You also need a photo, a glue gun, mod podge, glitter and sequins.
Once you have picked your photo use one side of the bauble to draw out a circle on the section you want to use and then cut it out just a little bit smaller.
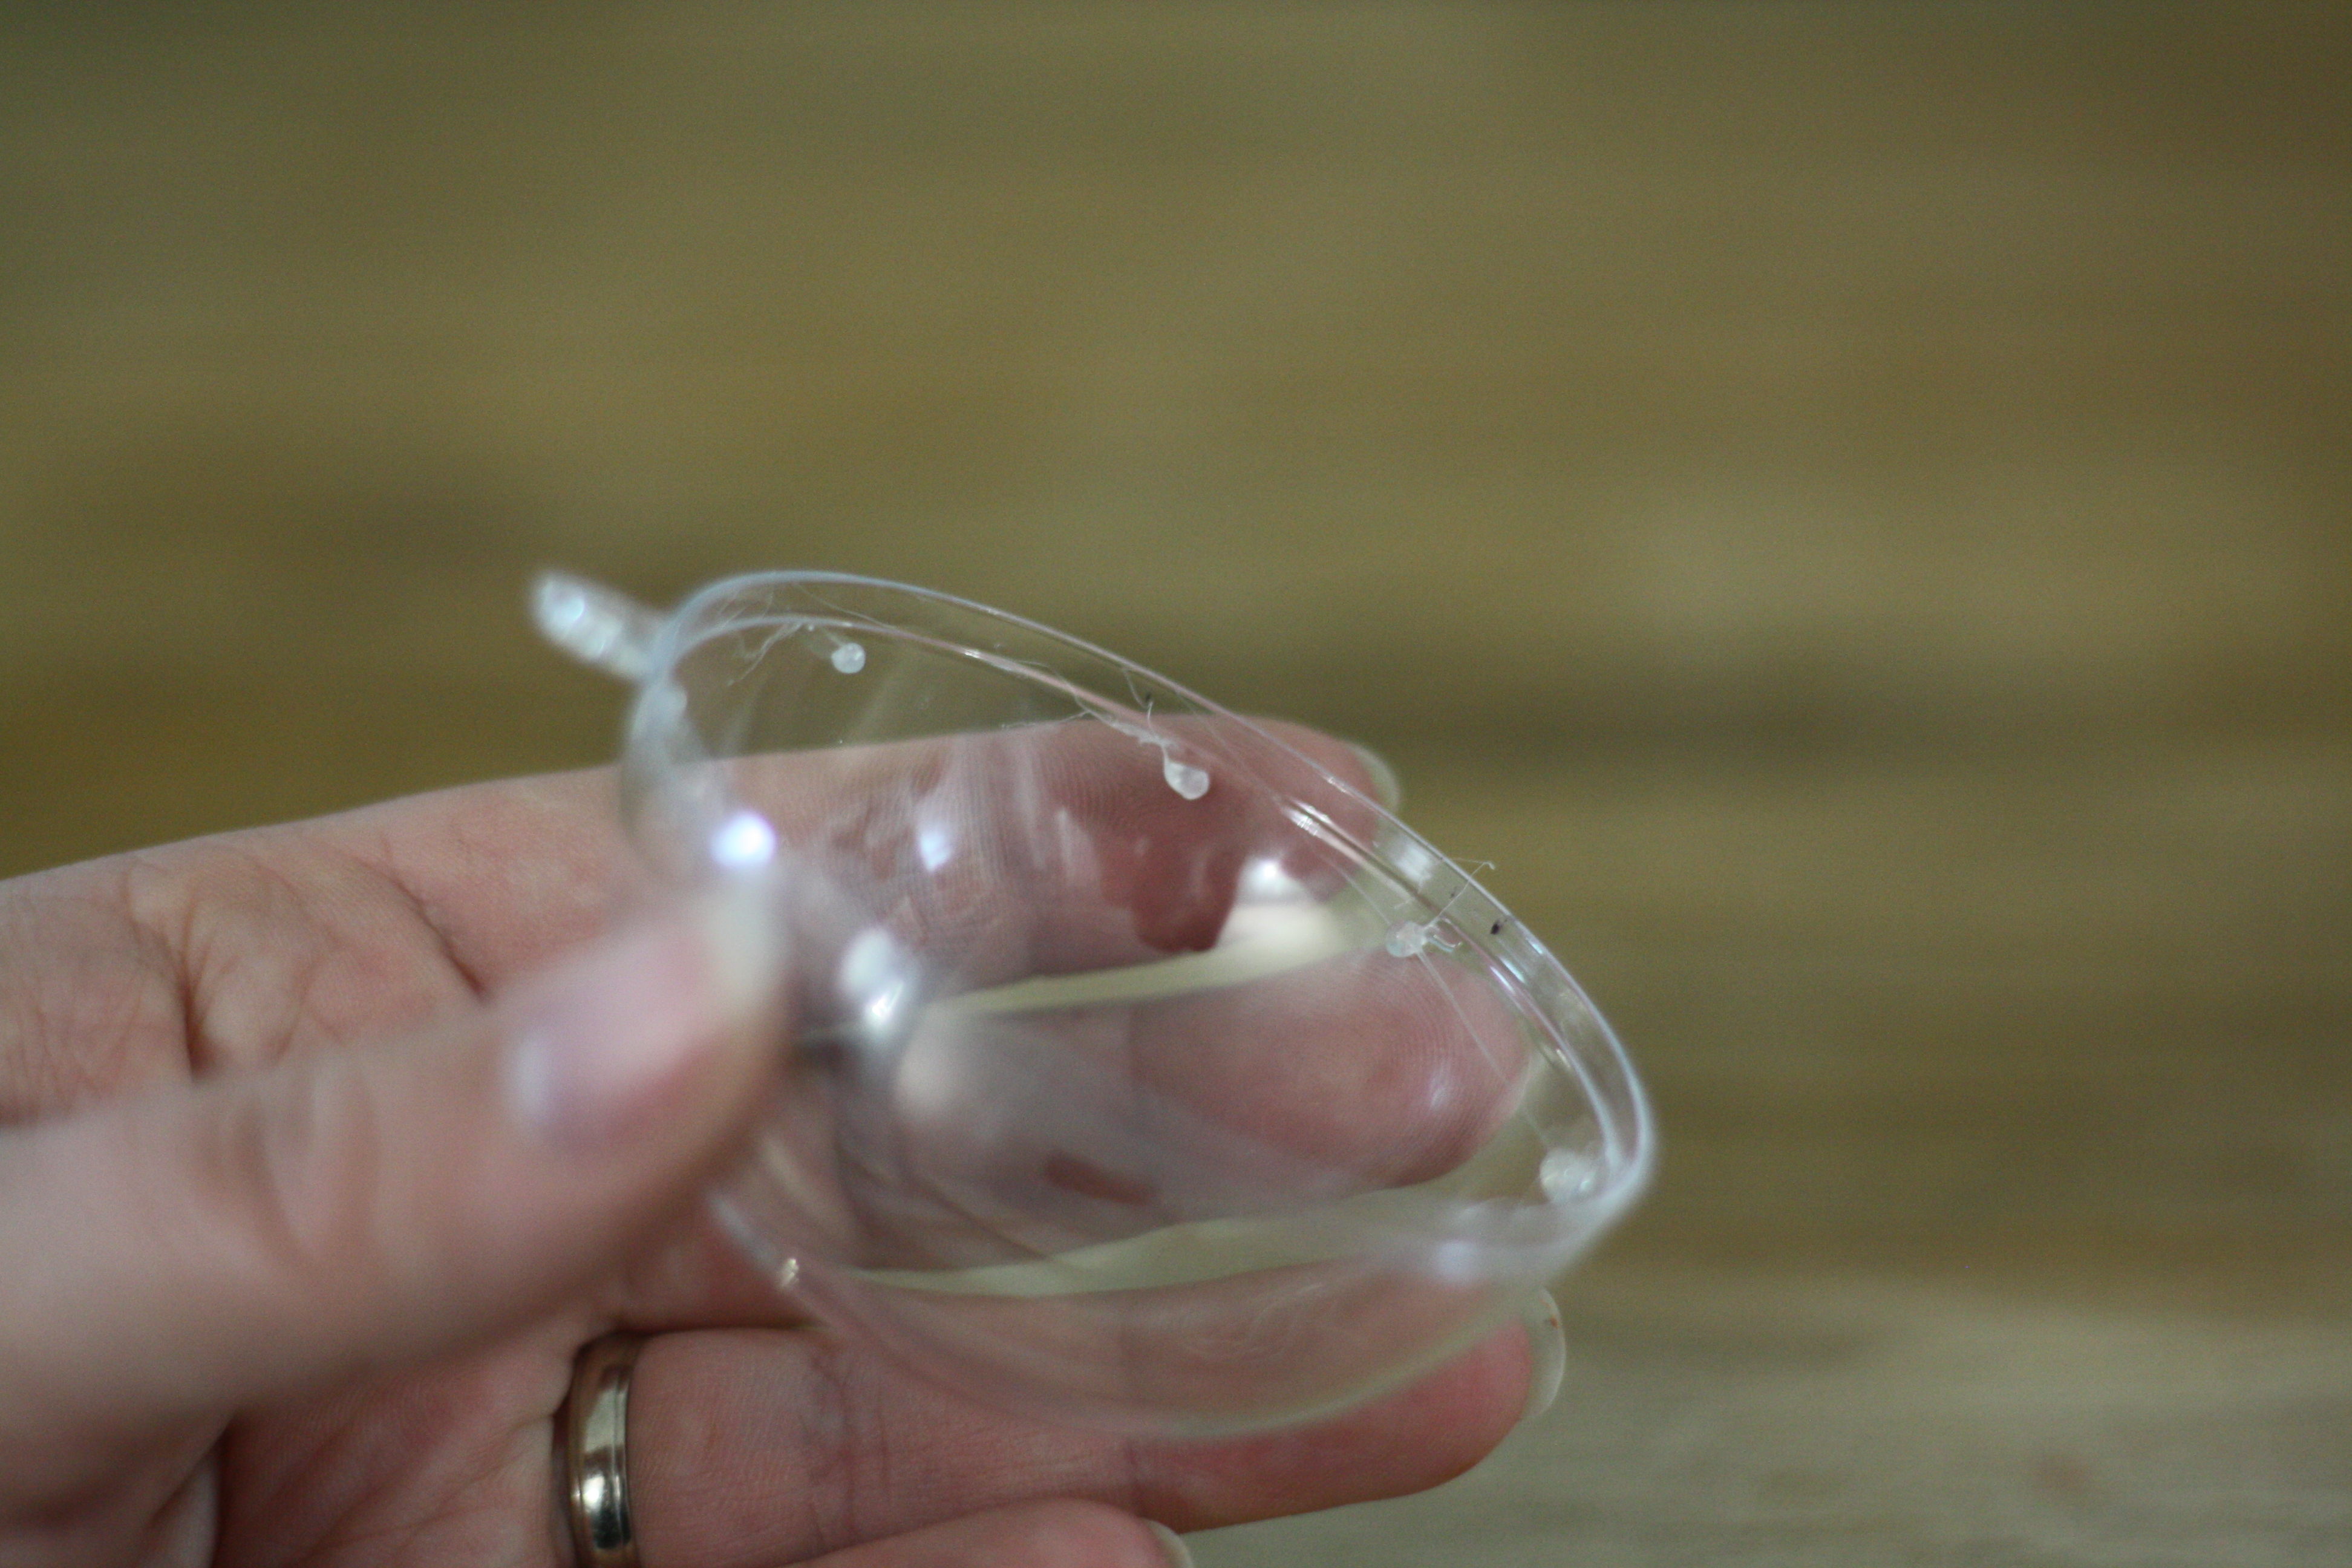
Next up use your glue gun to add small dots of glue around the outside edge. This is to make sure the photo doesn’t fall forward. Also you want to be using the side of the bauble with the lip on the inside.
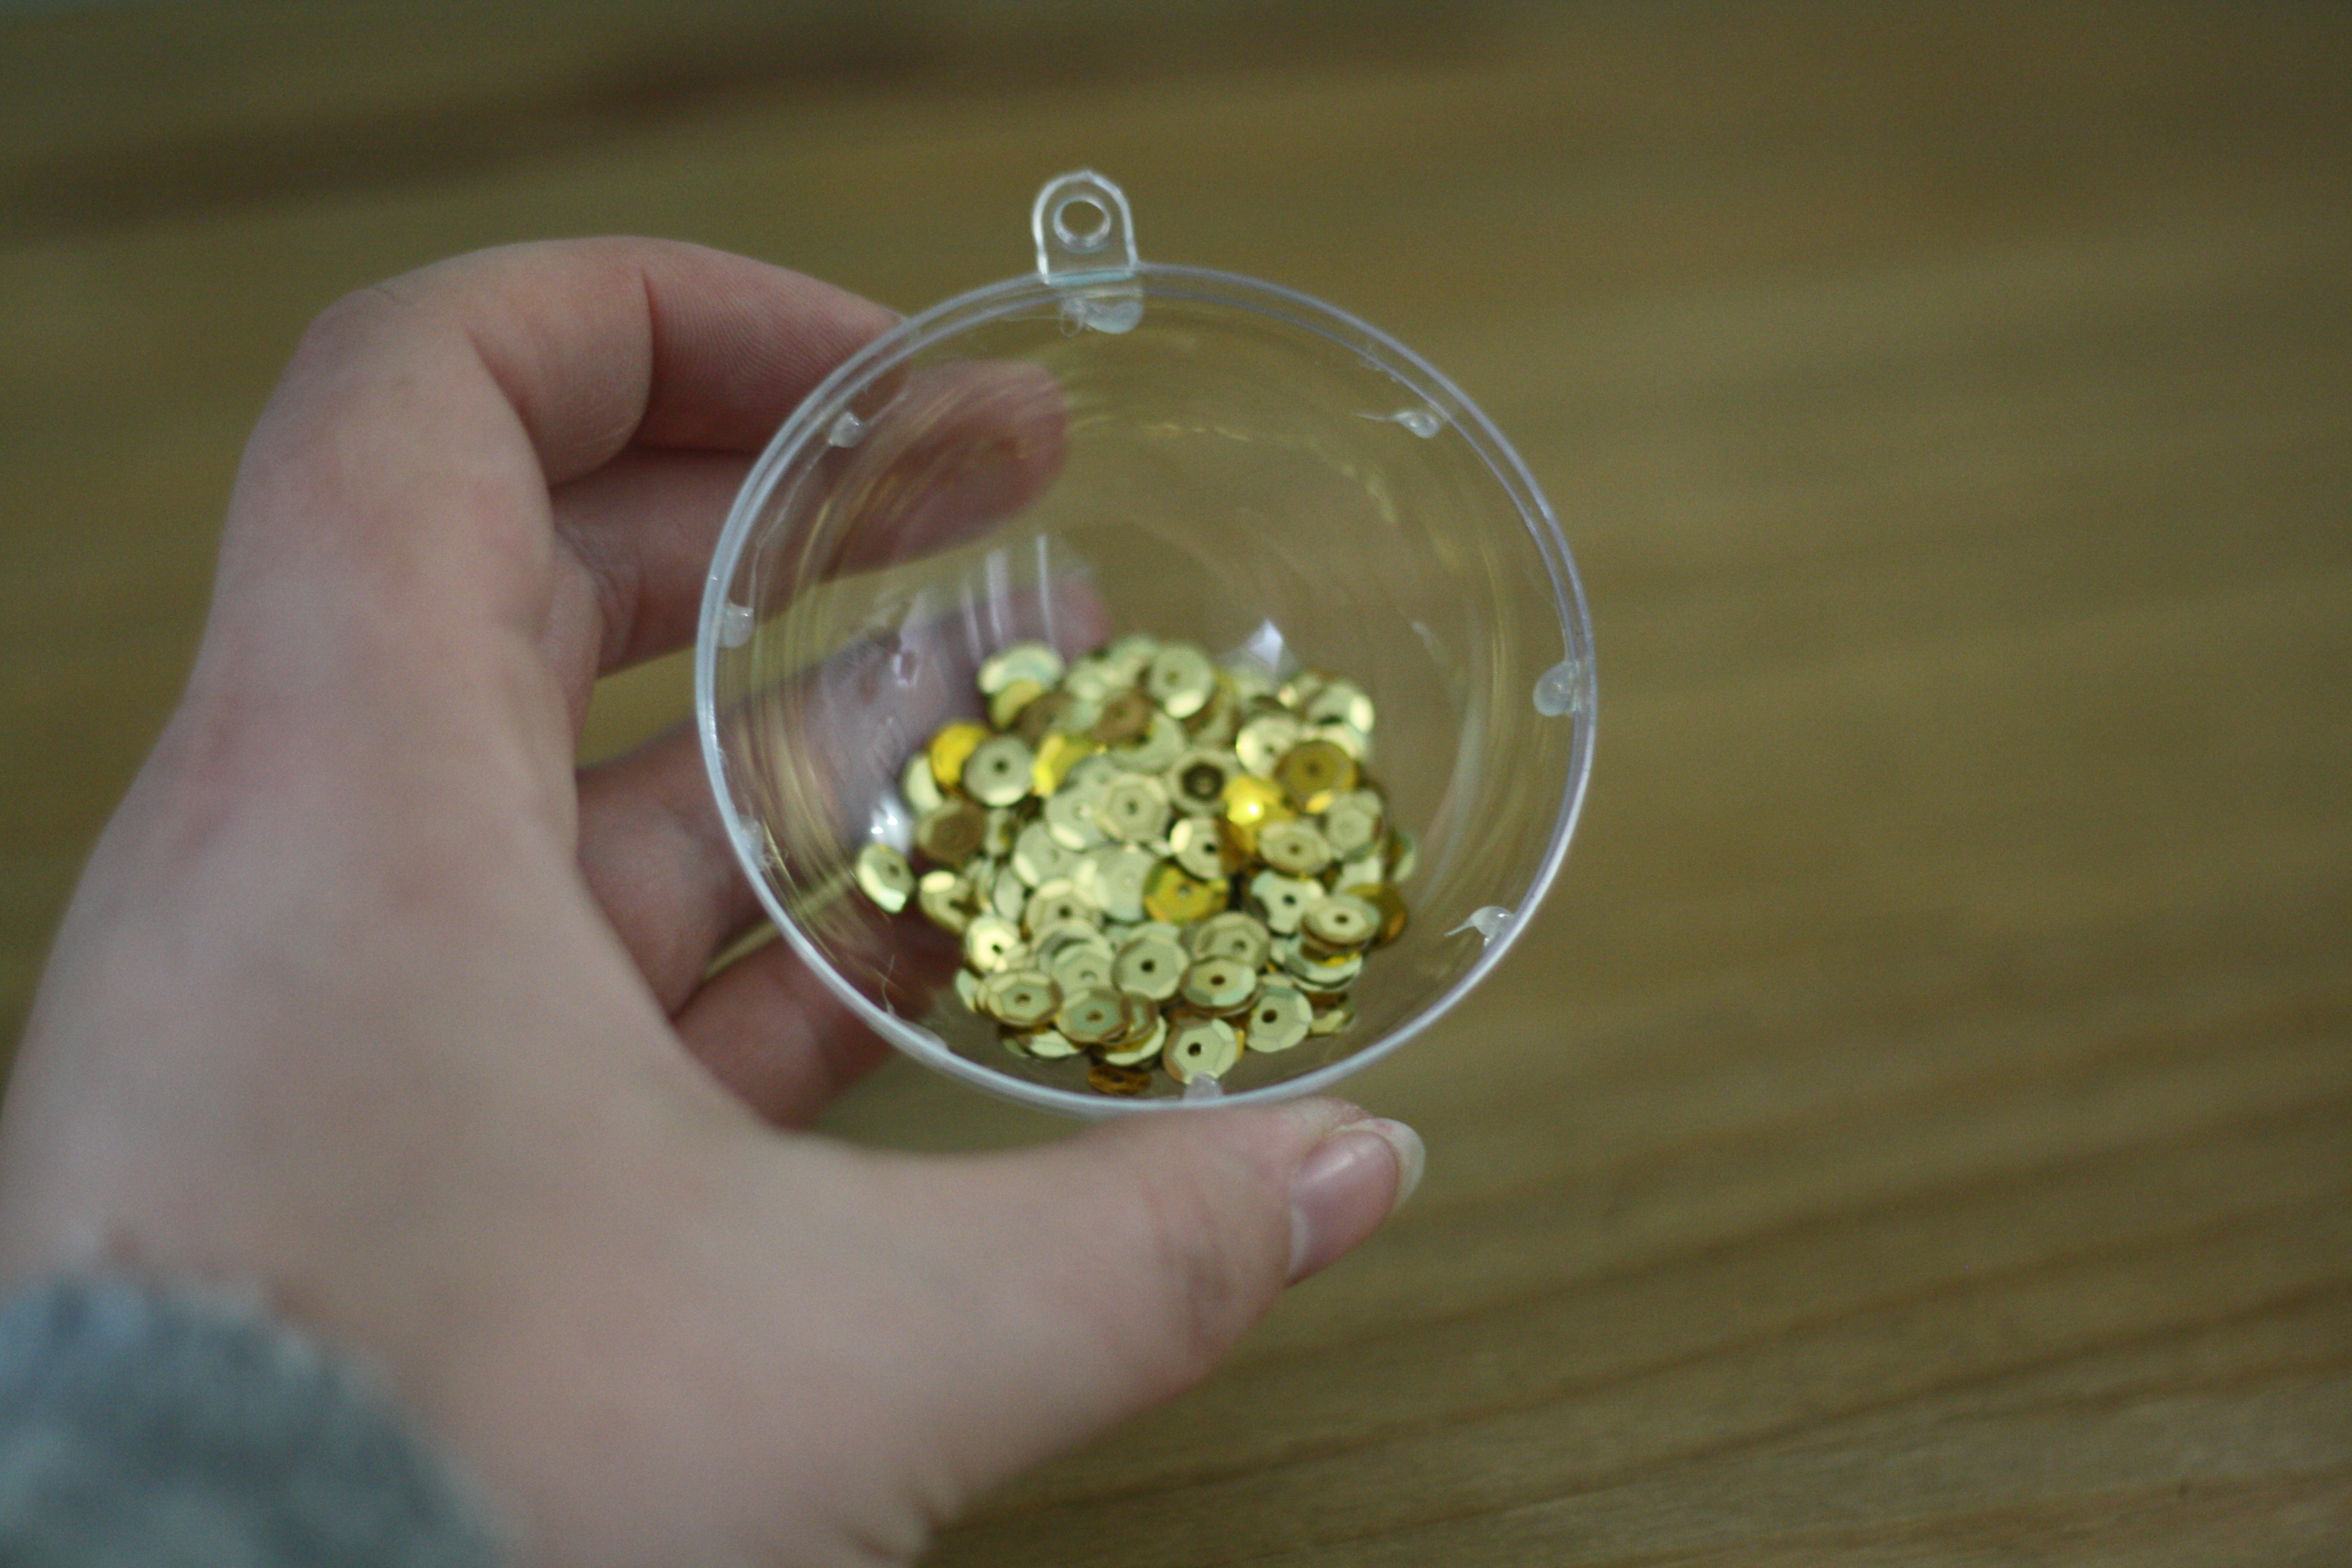
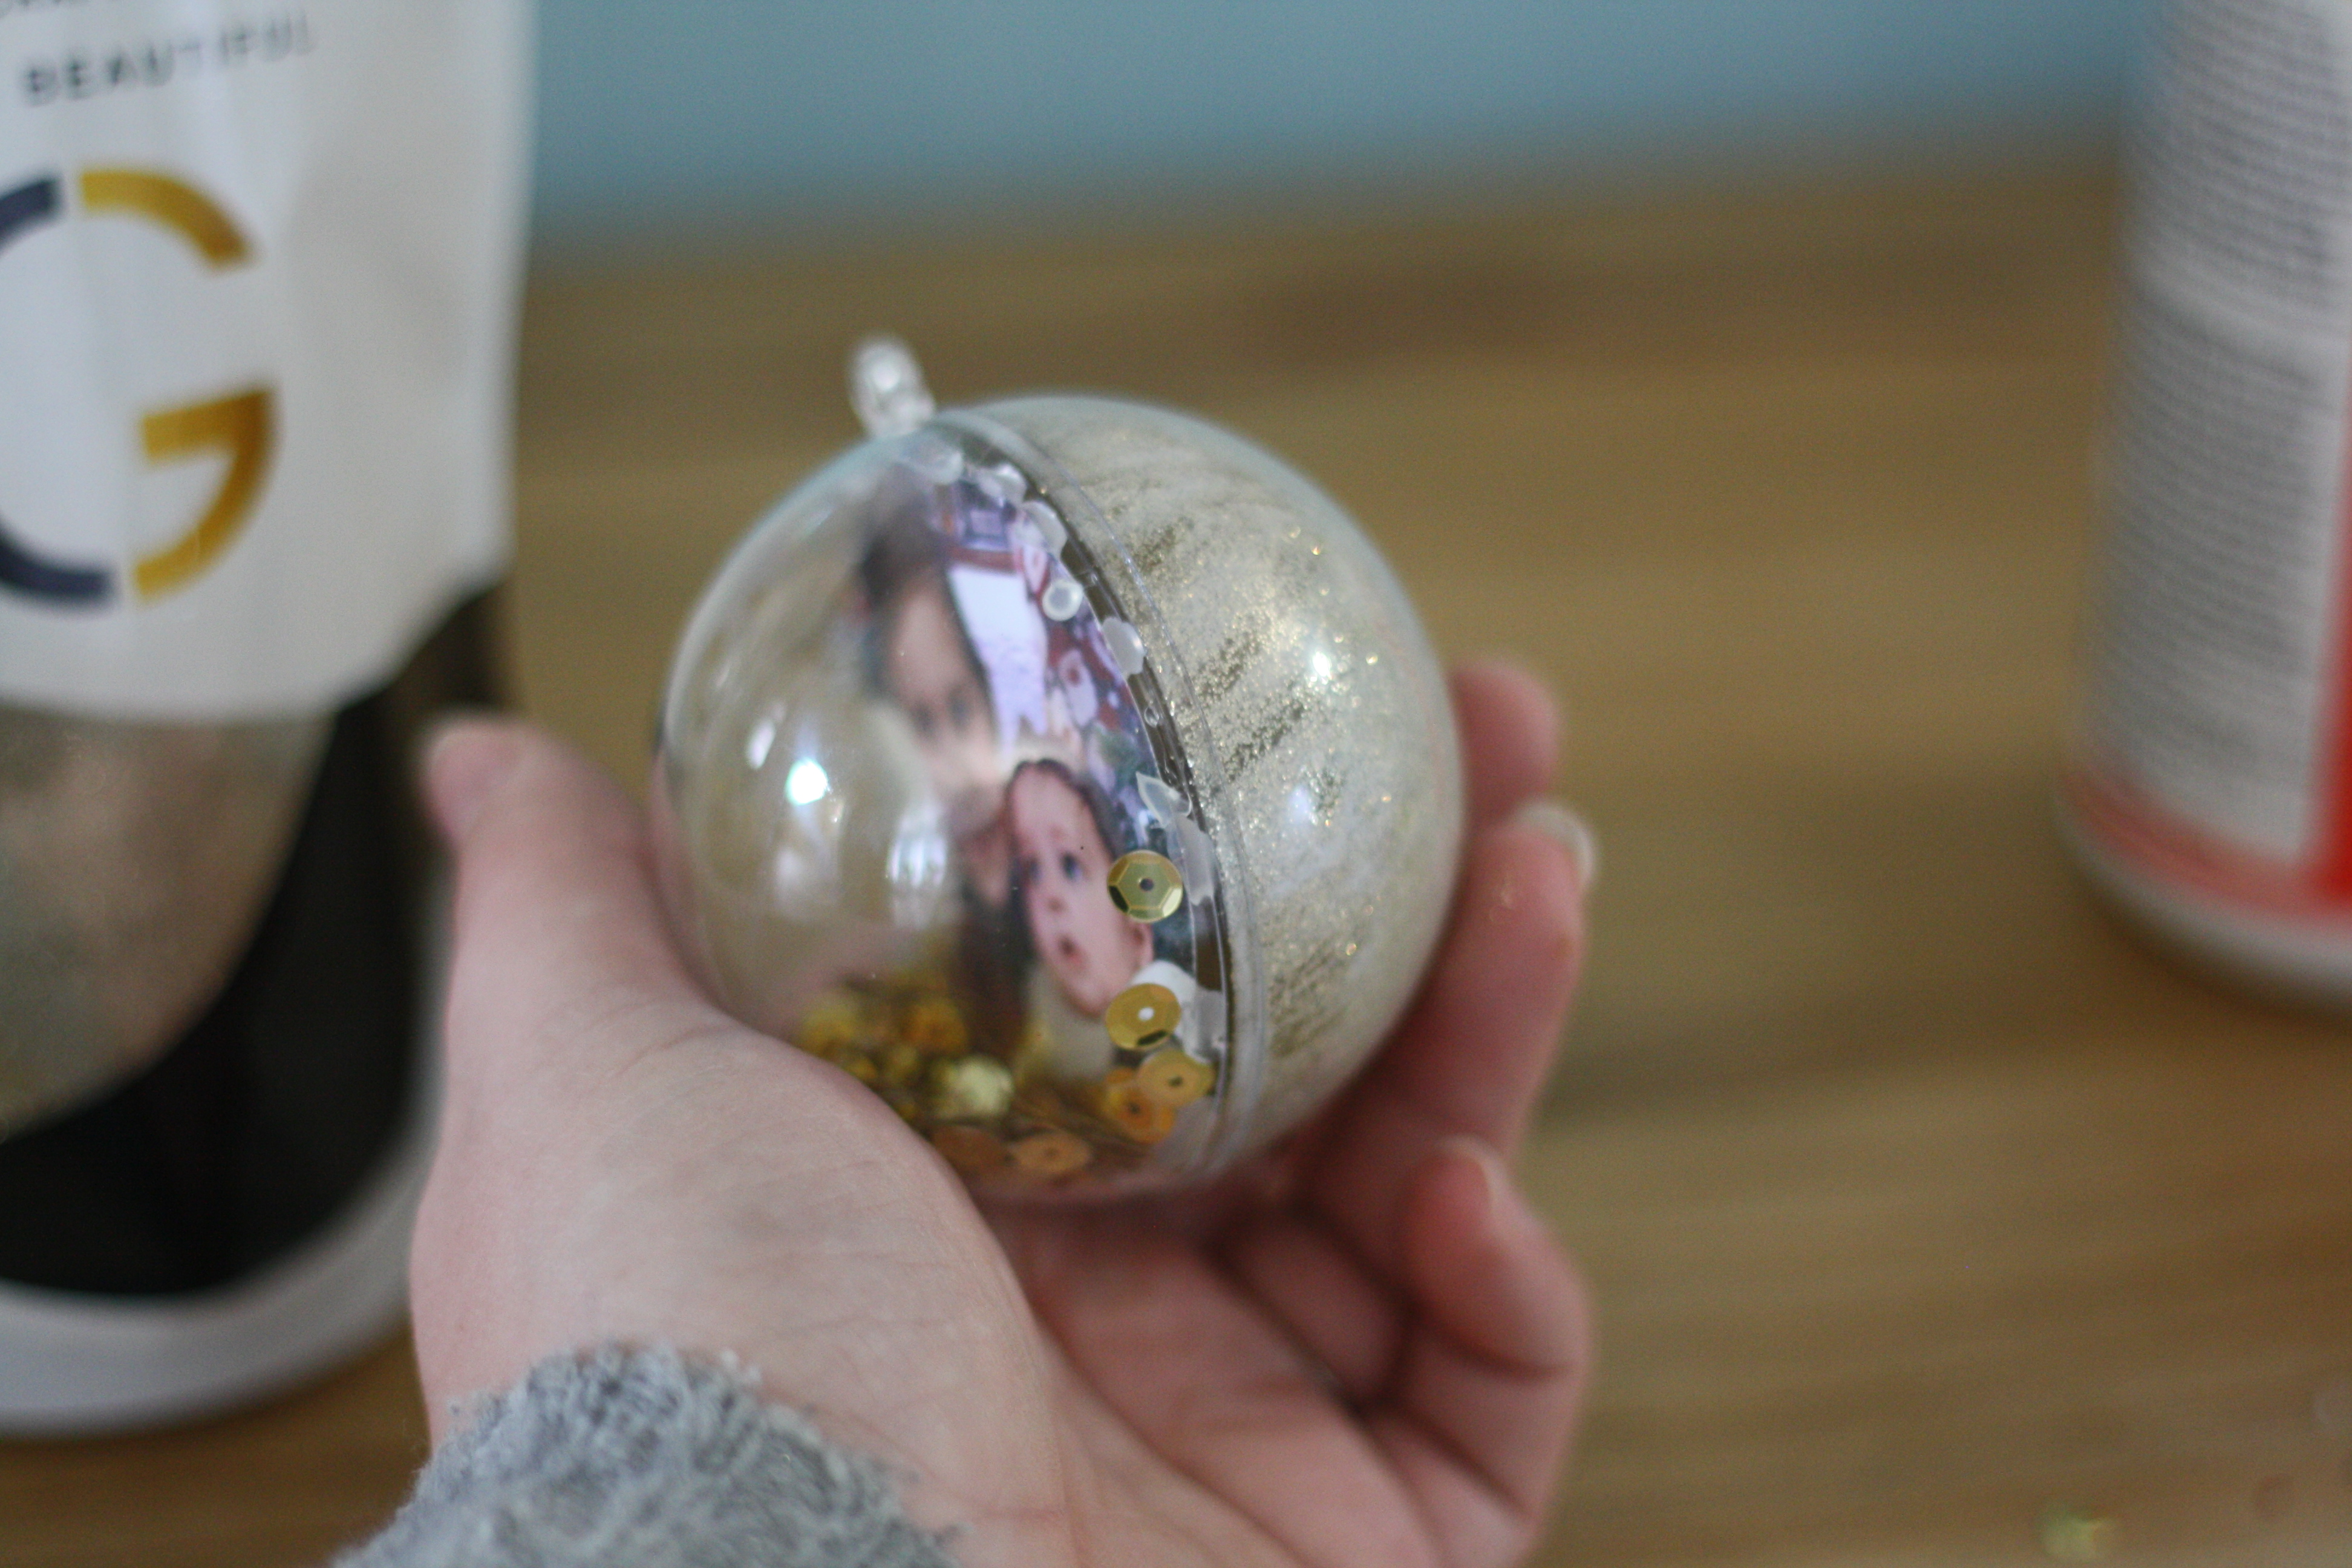
Put your sequins in the bauble.
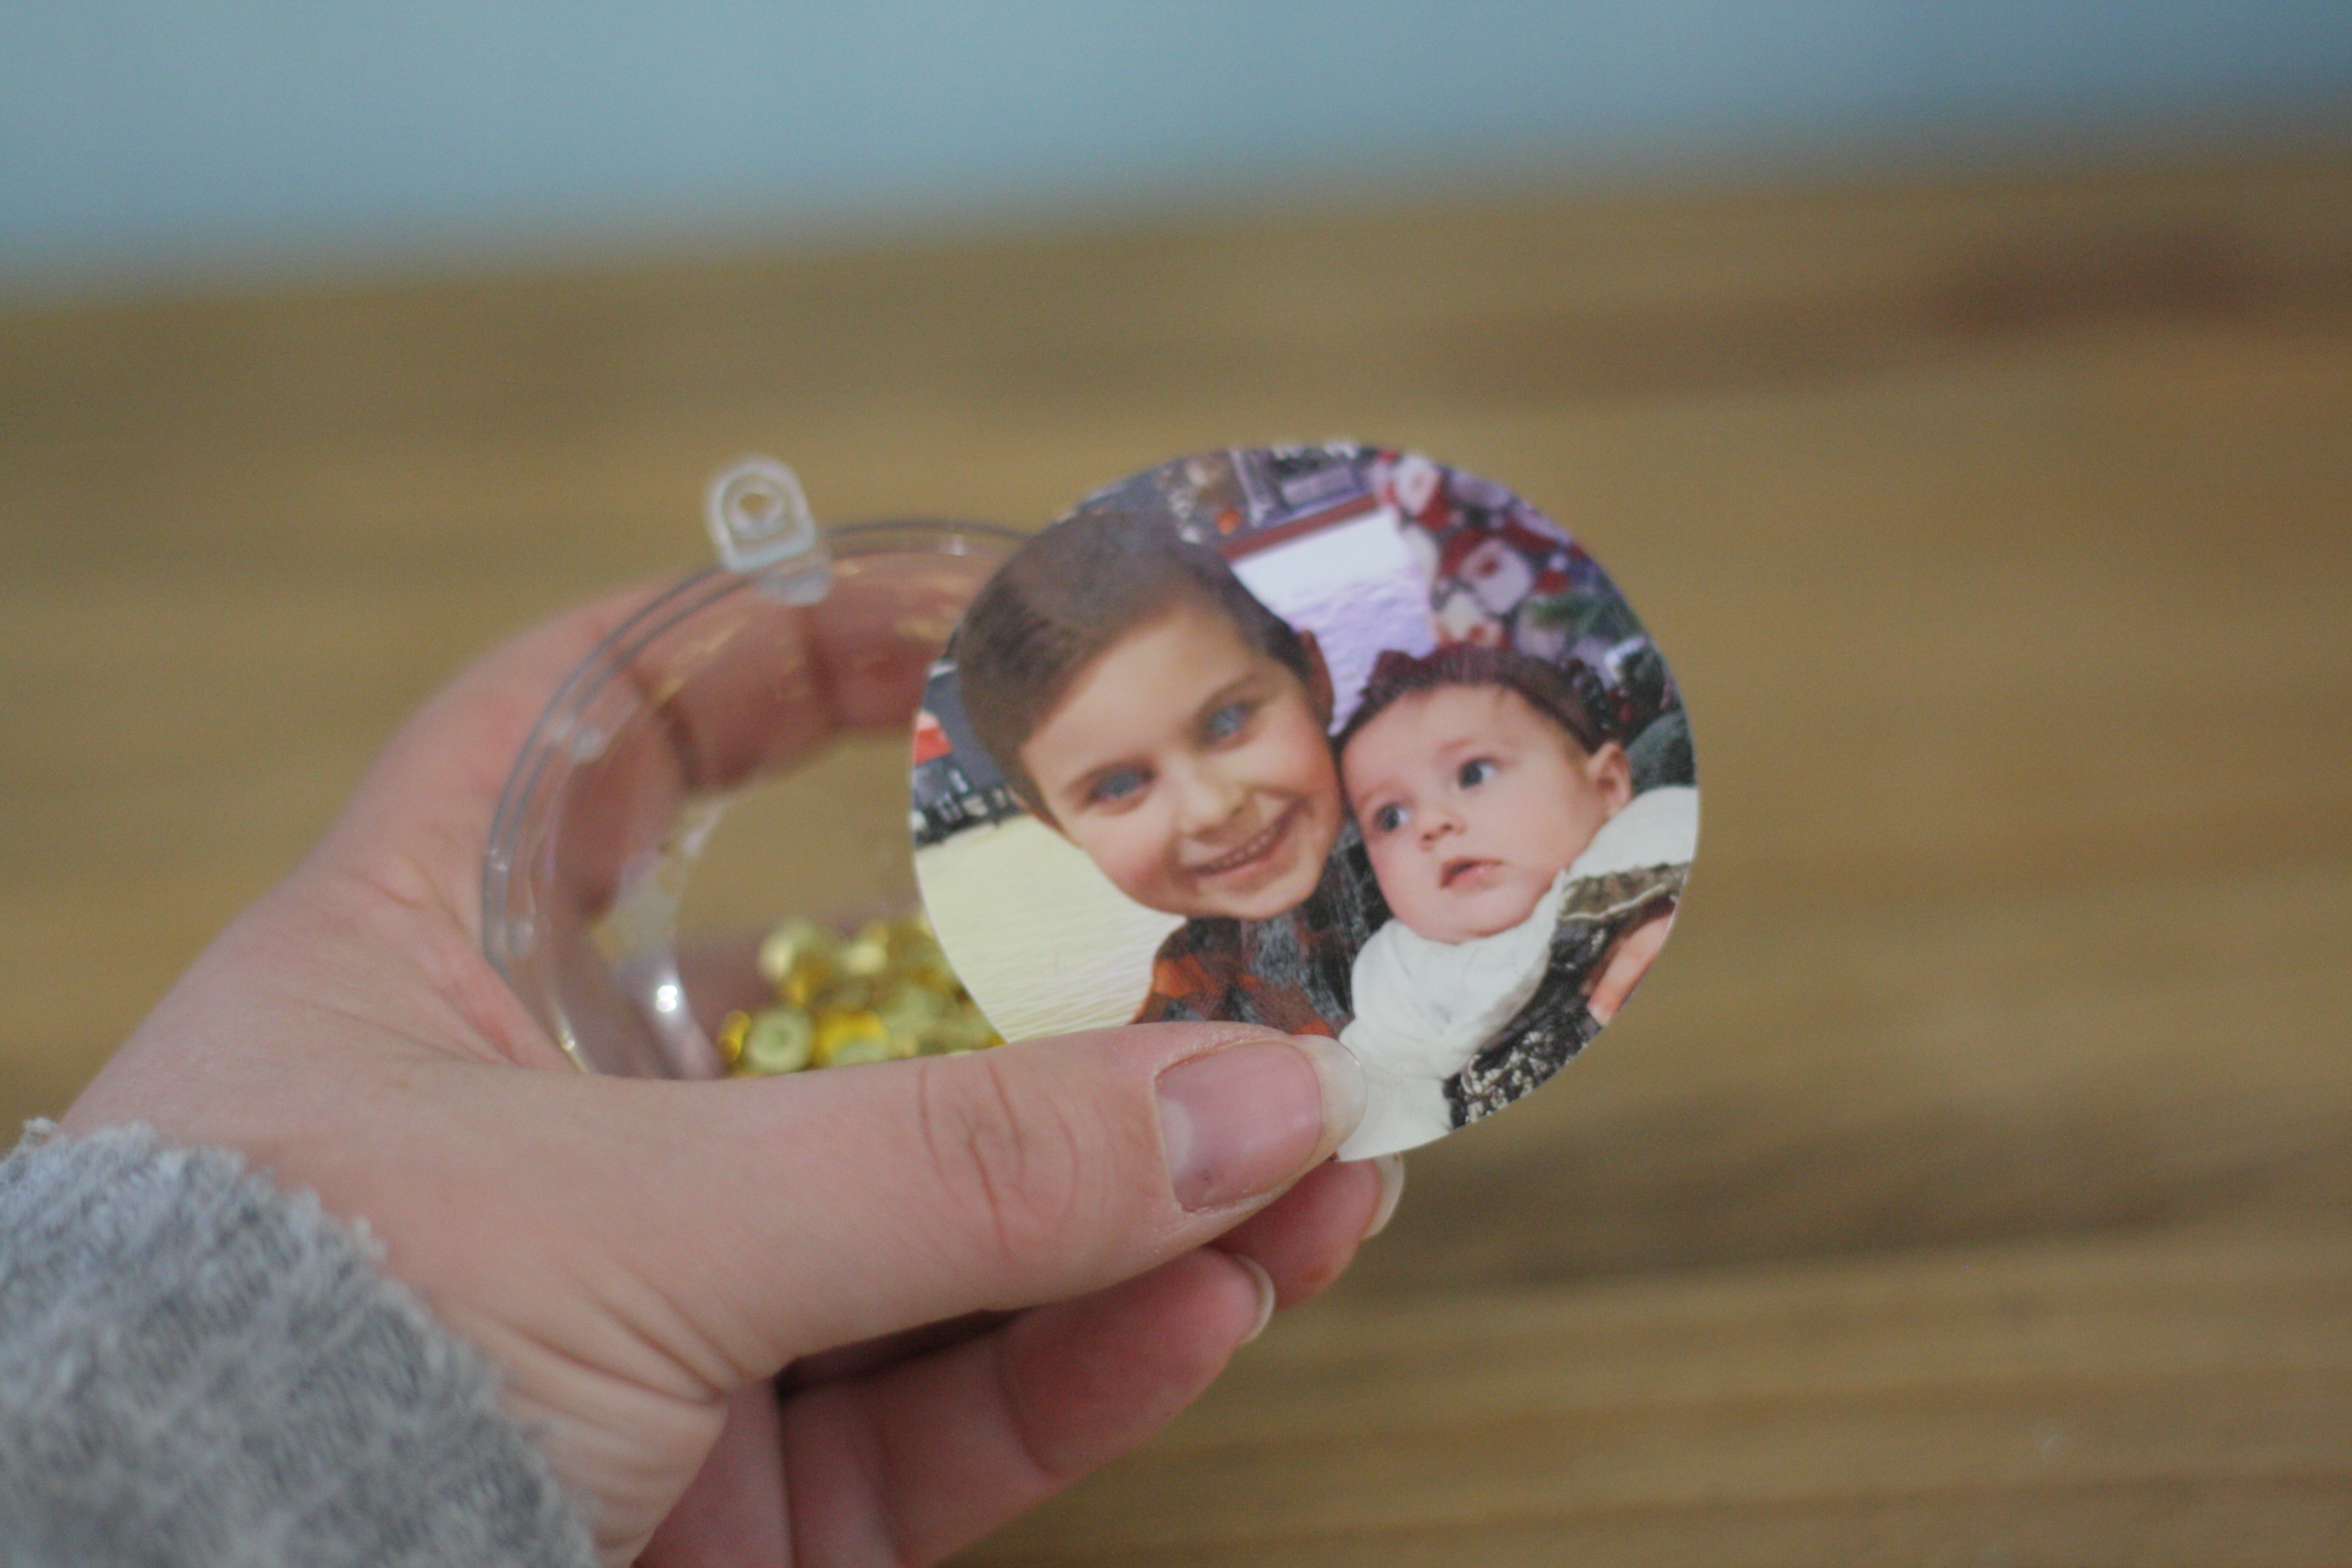
Place your photo (with the picture facing the sequins) in the bauble. It should sit on top of the glue dots.
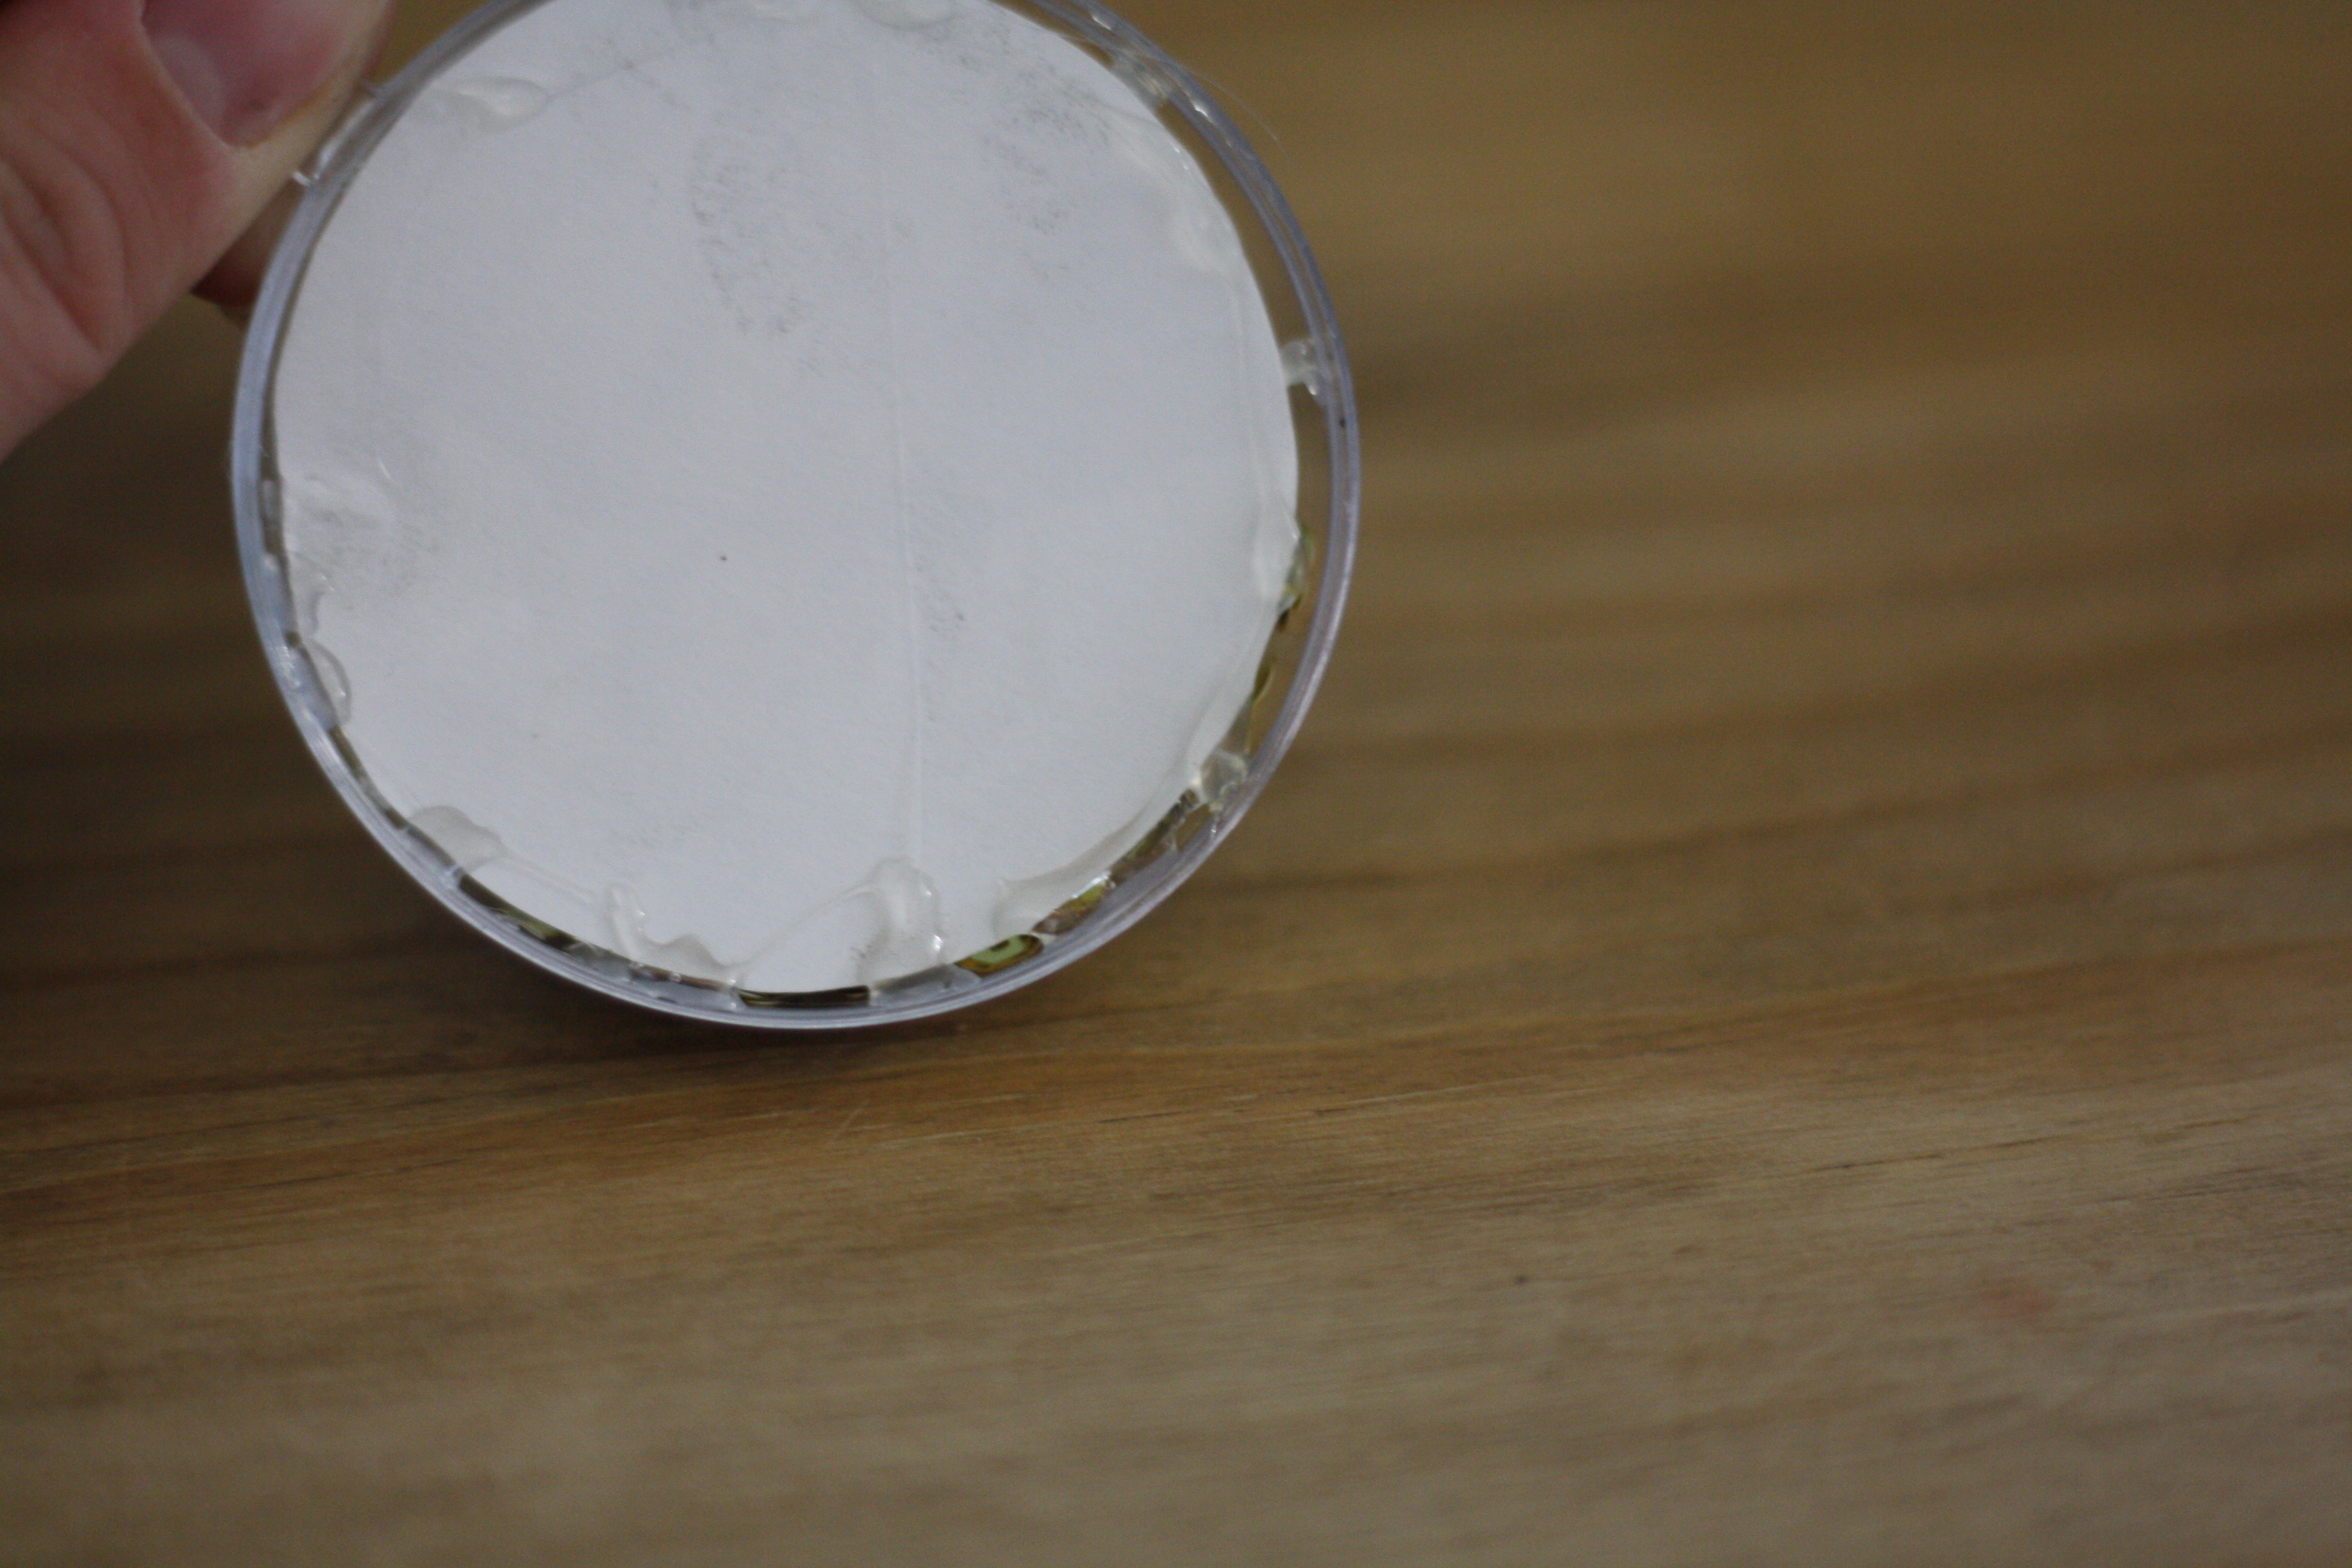
I then added extra hot glue around the outside edge to make sure the sequins stay in the right half. Just make sure your photo is facing the right way up before you glue it in place.
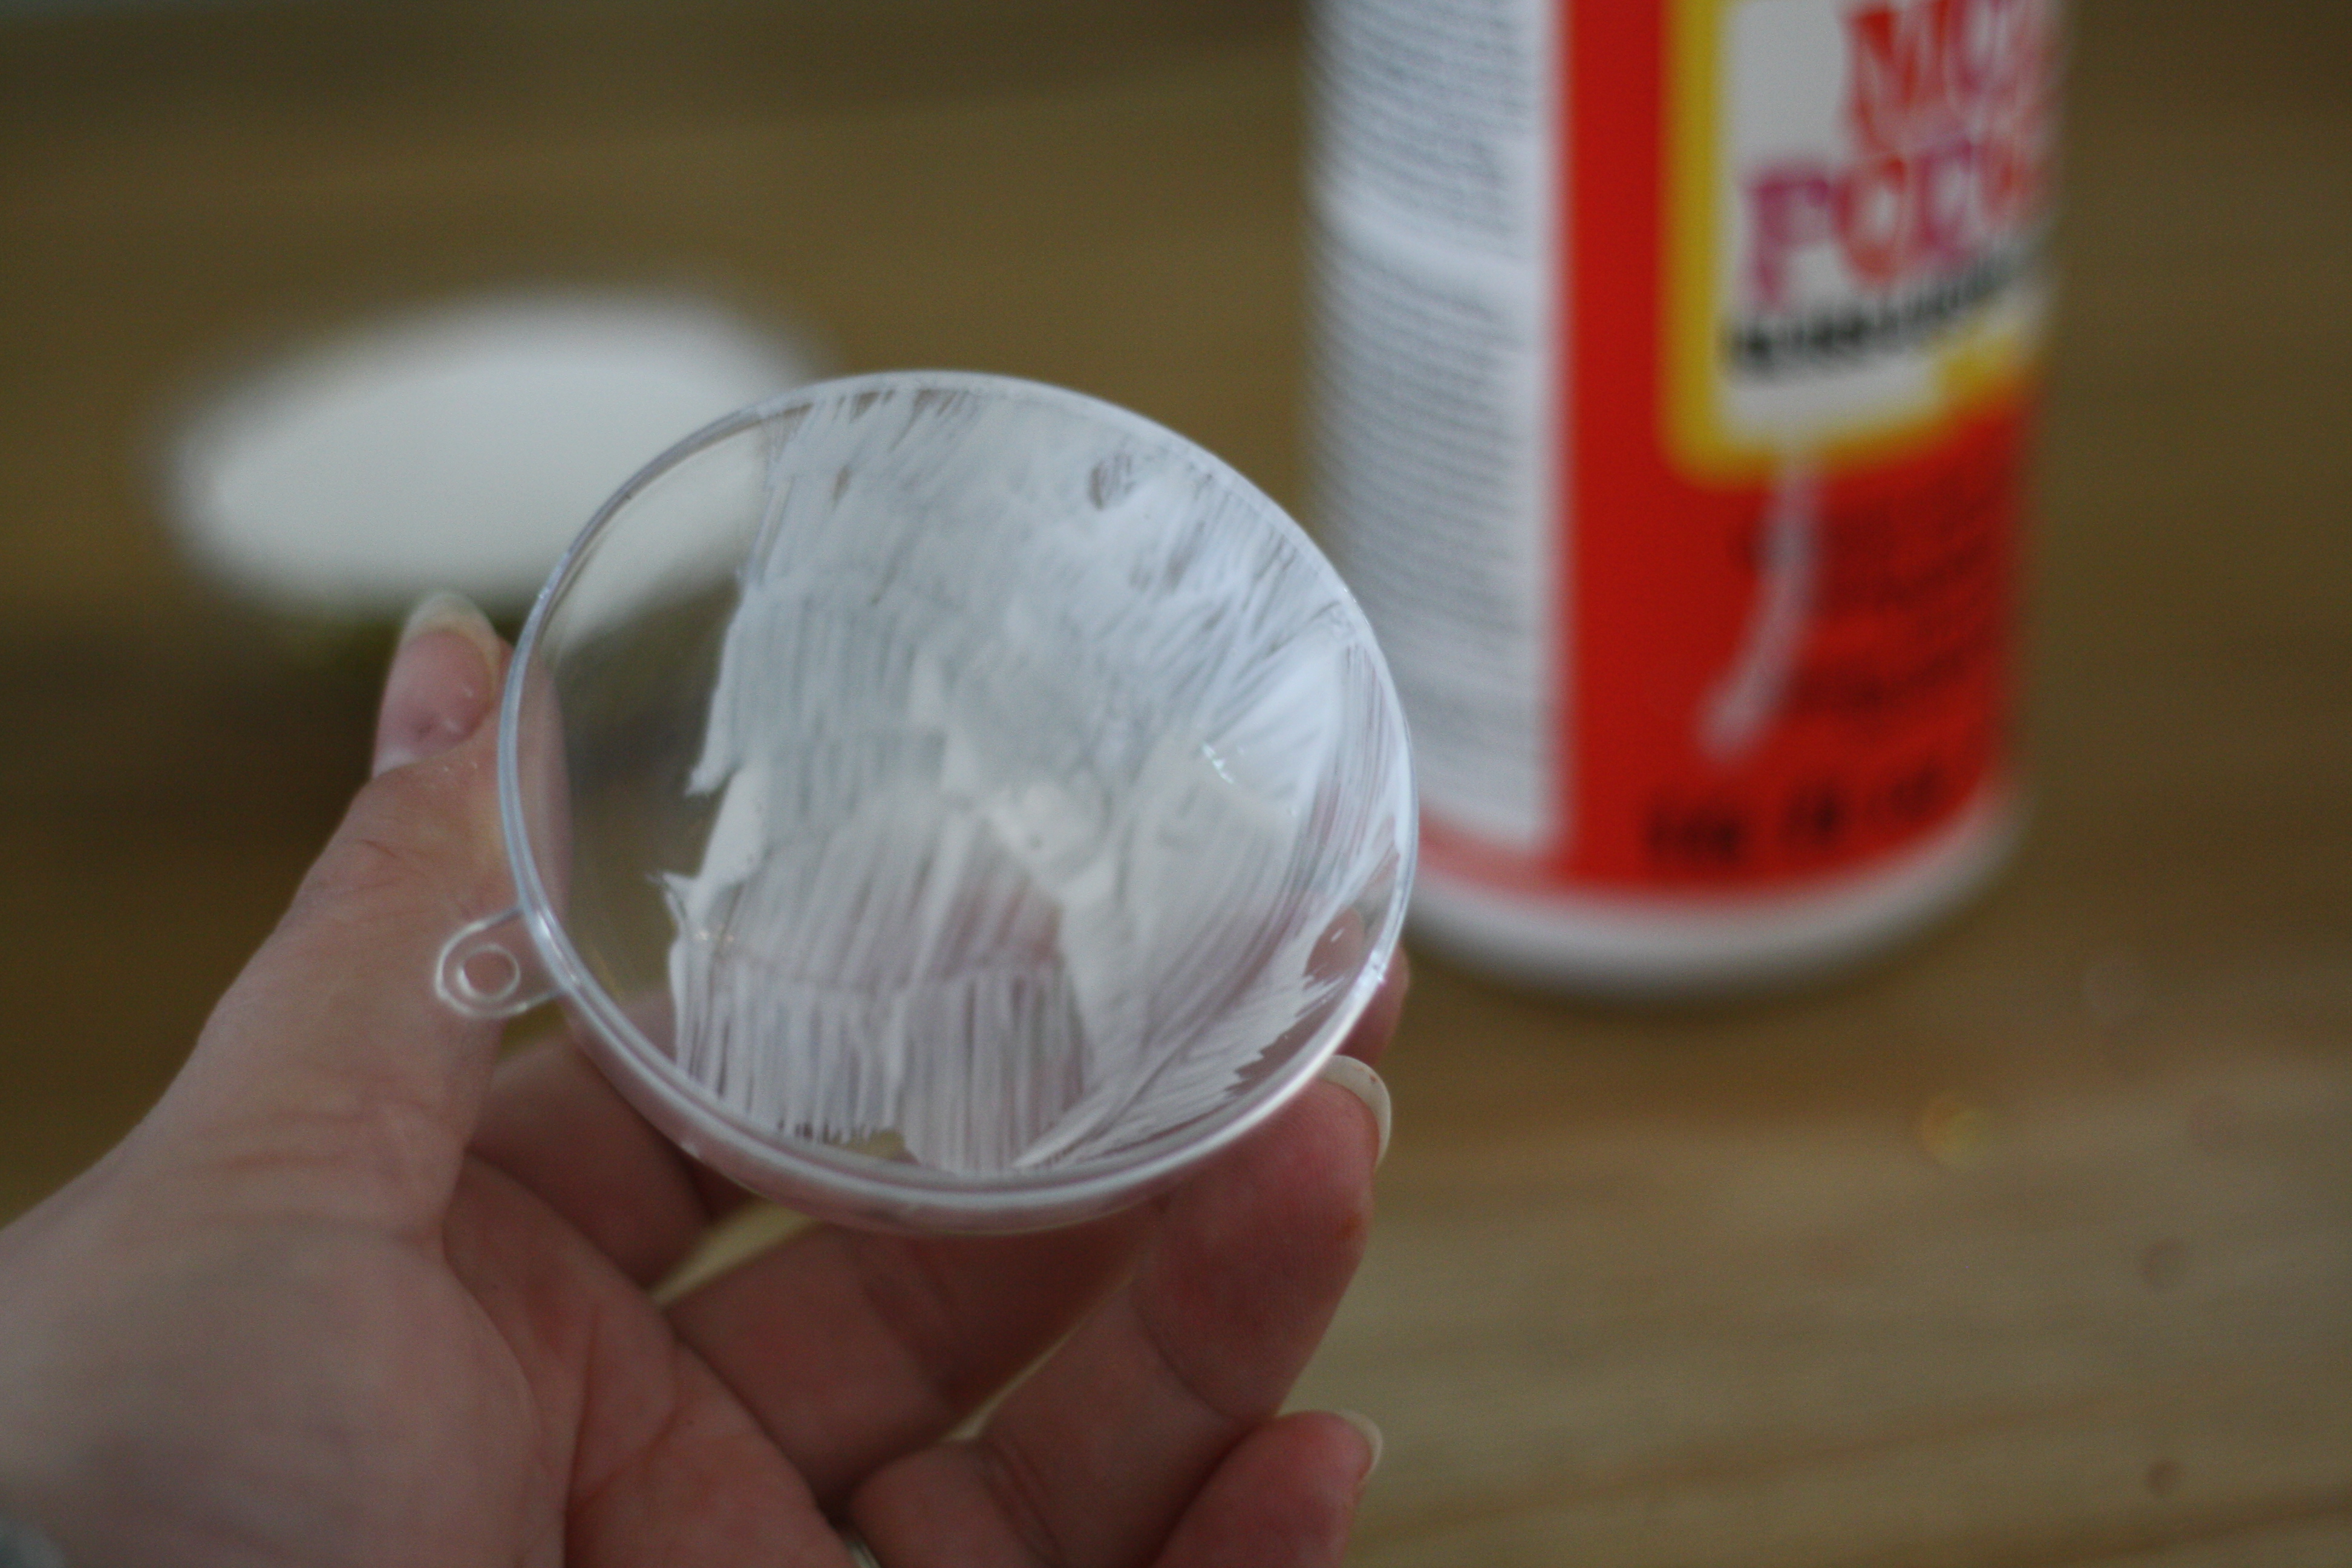
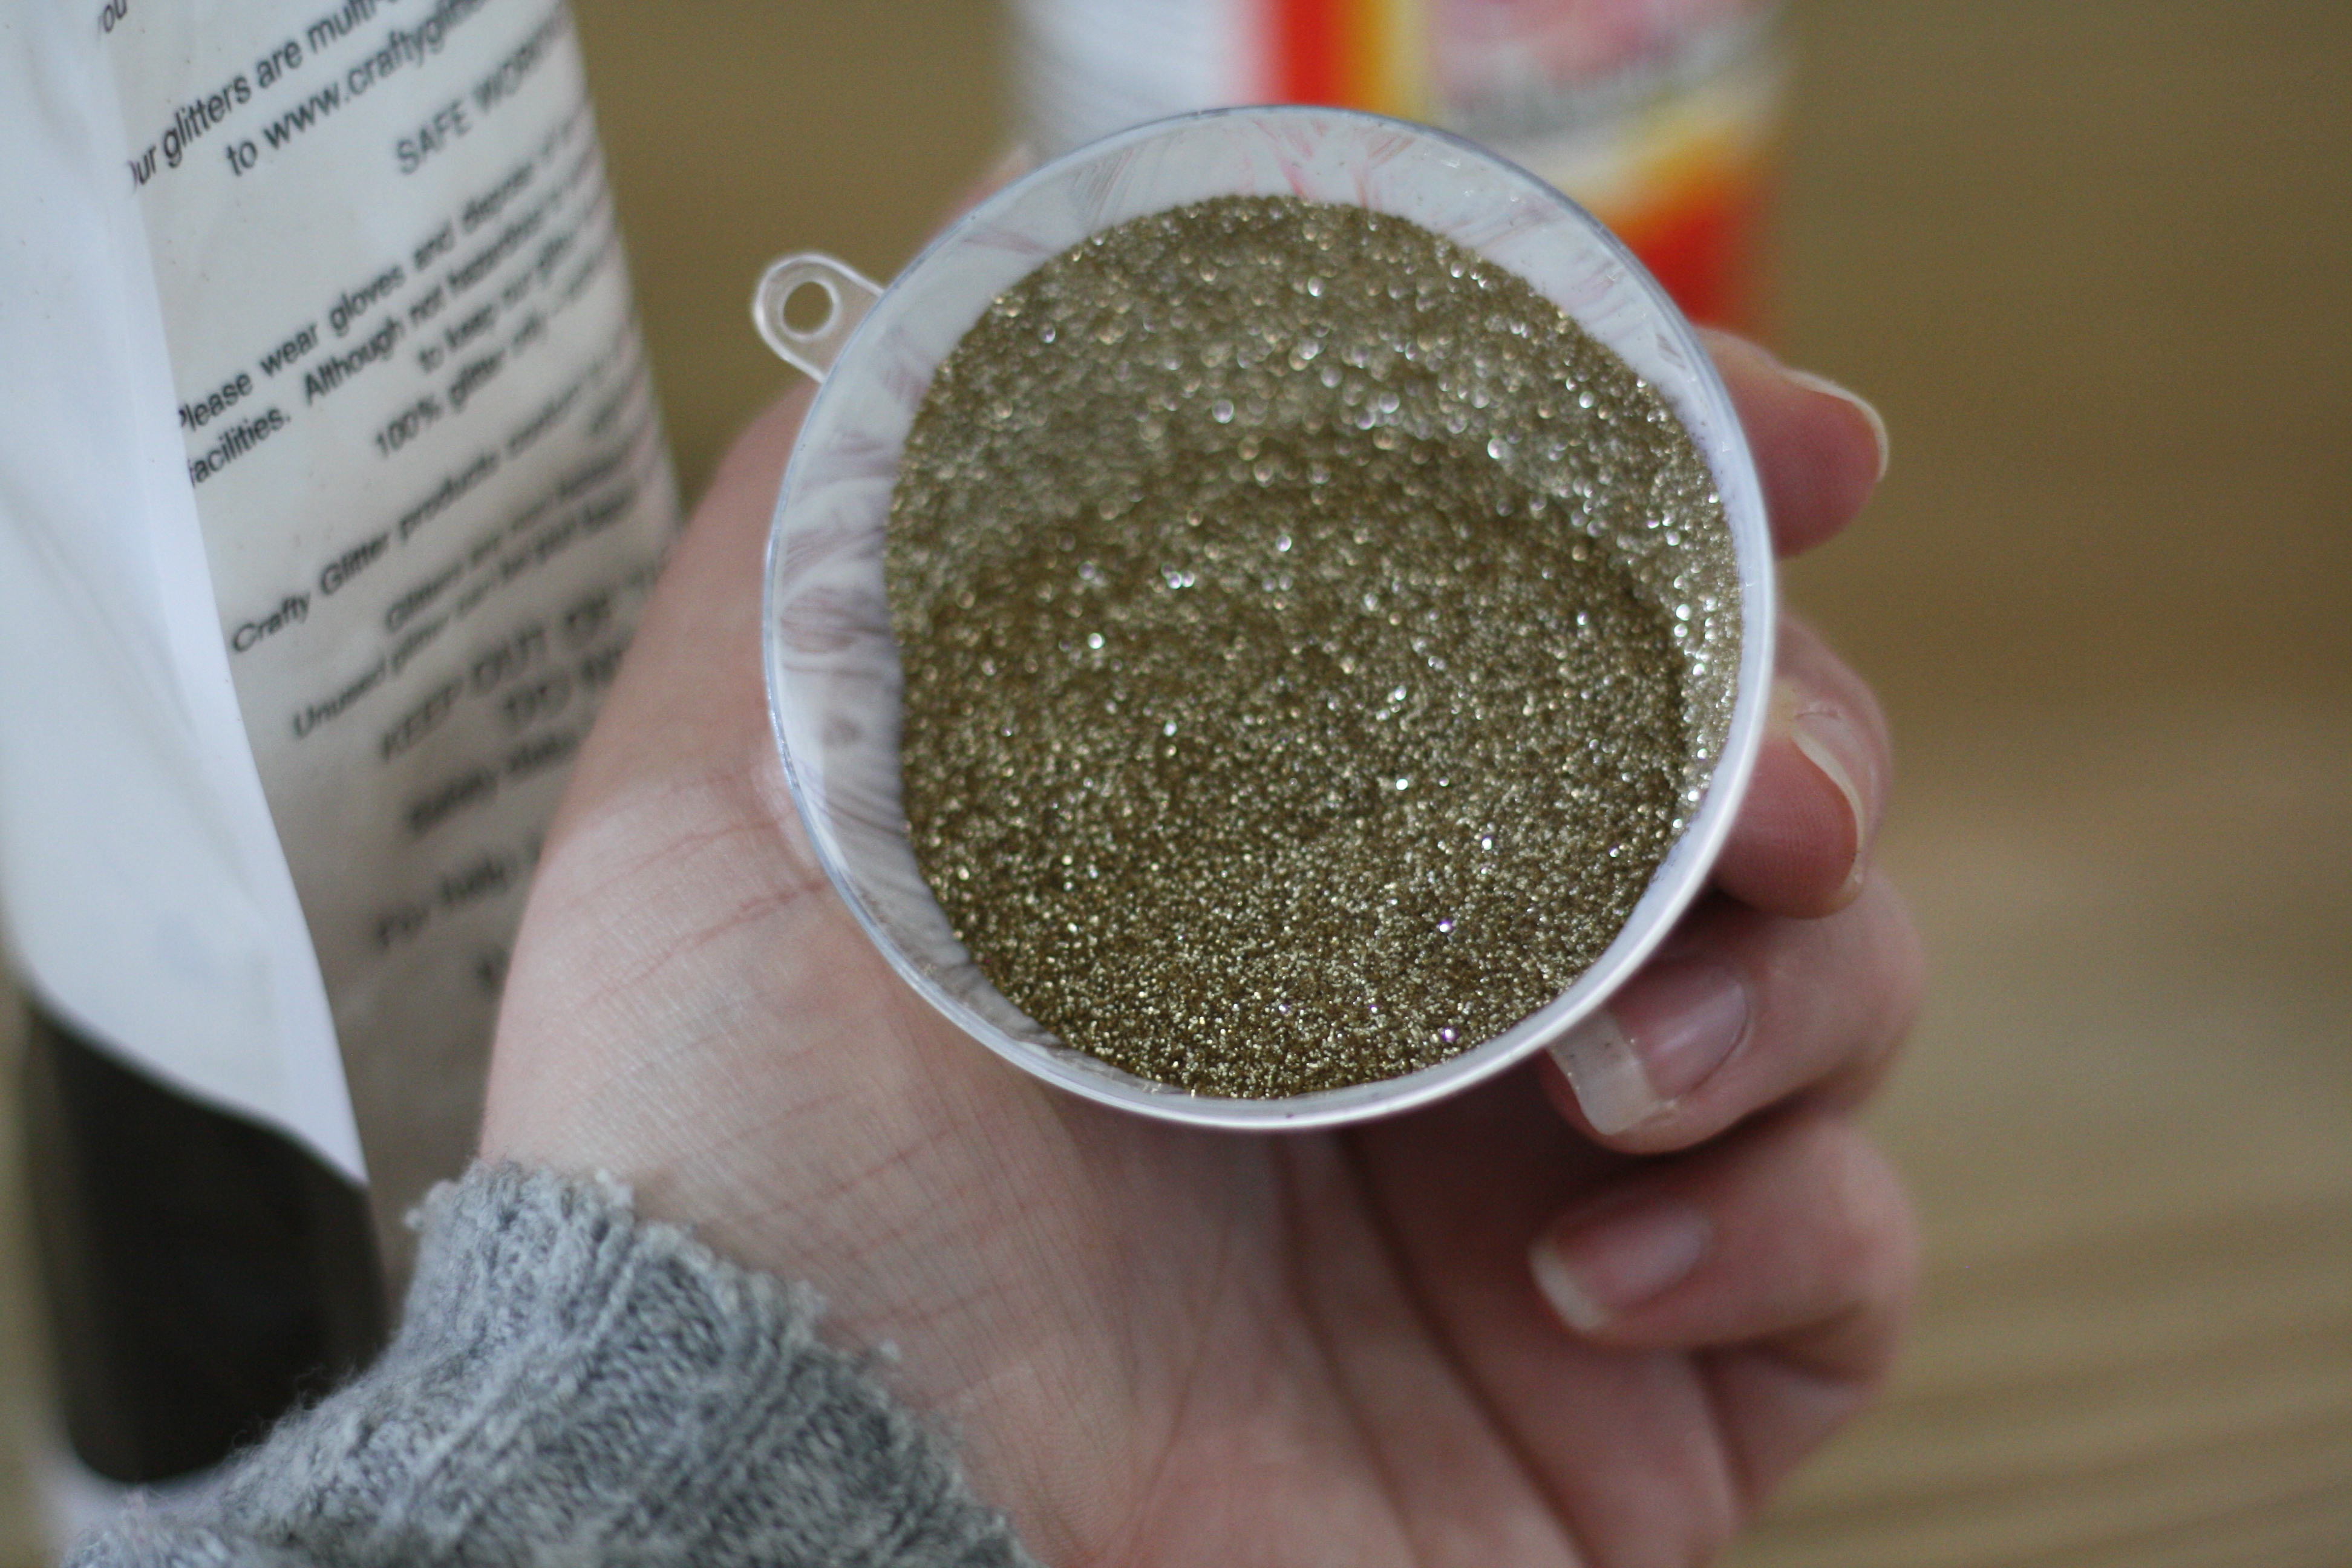
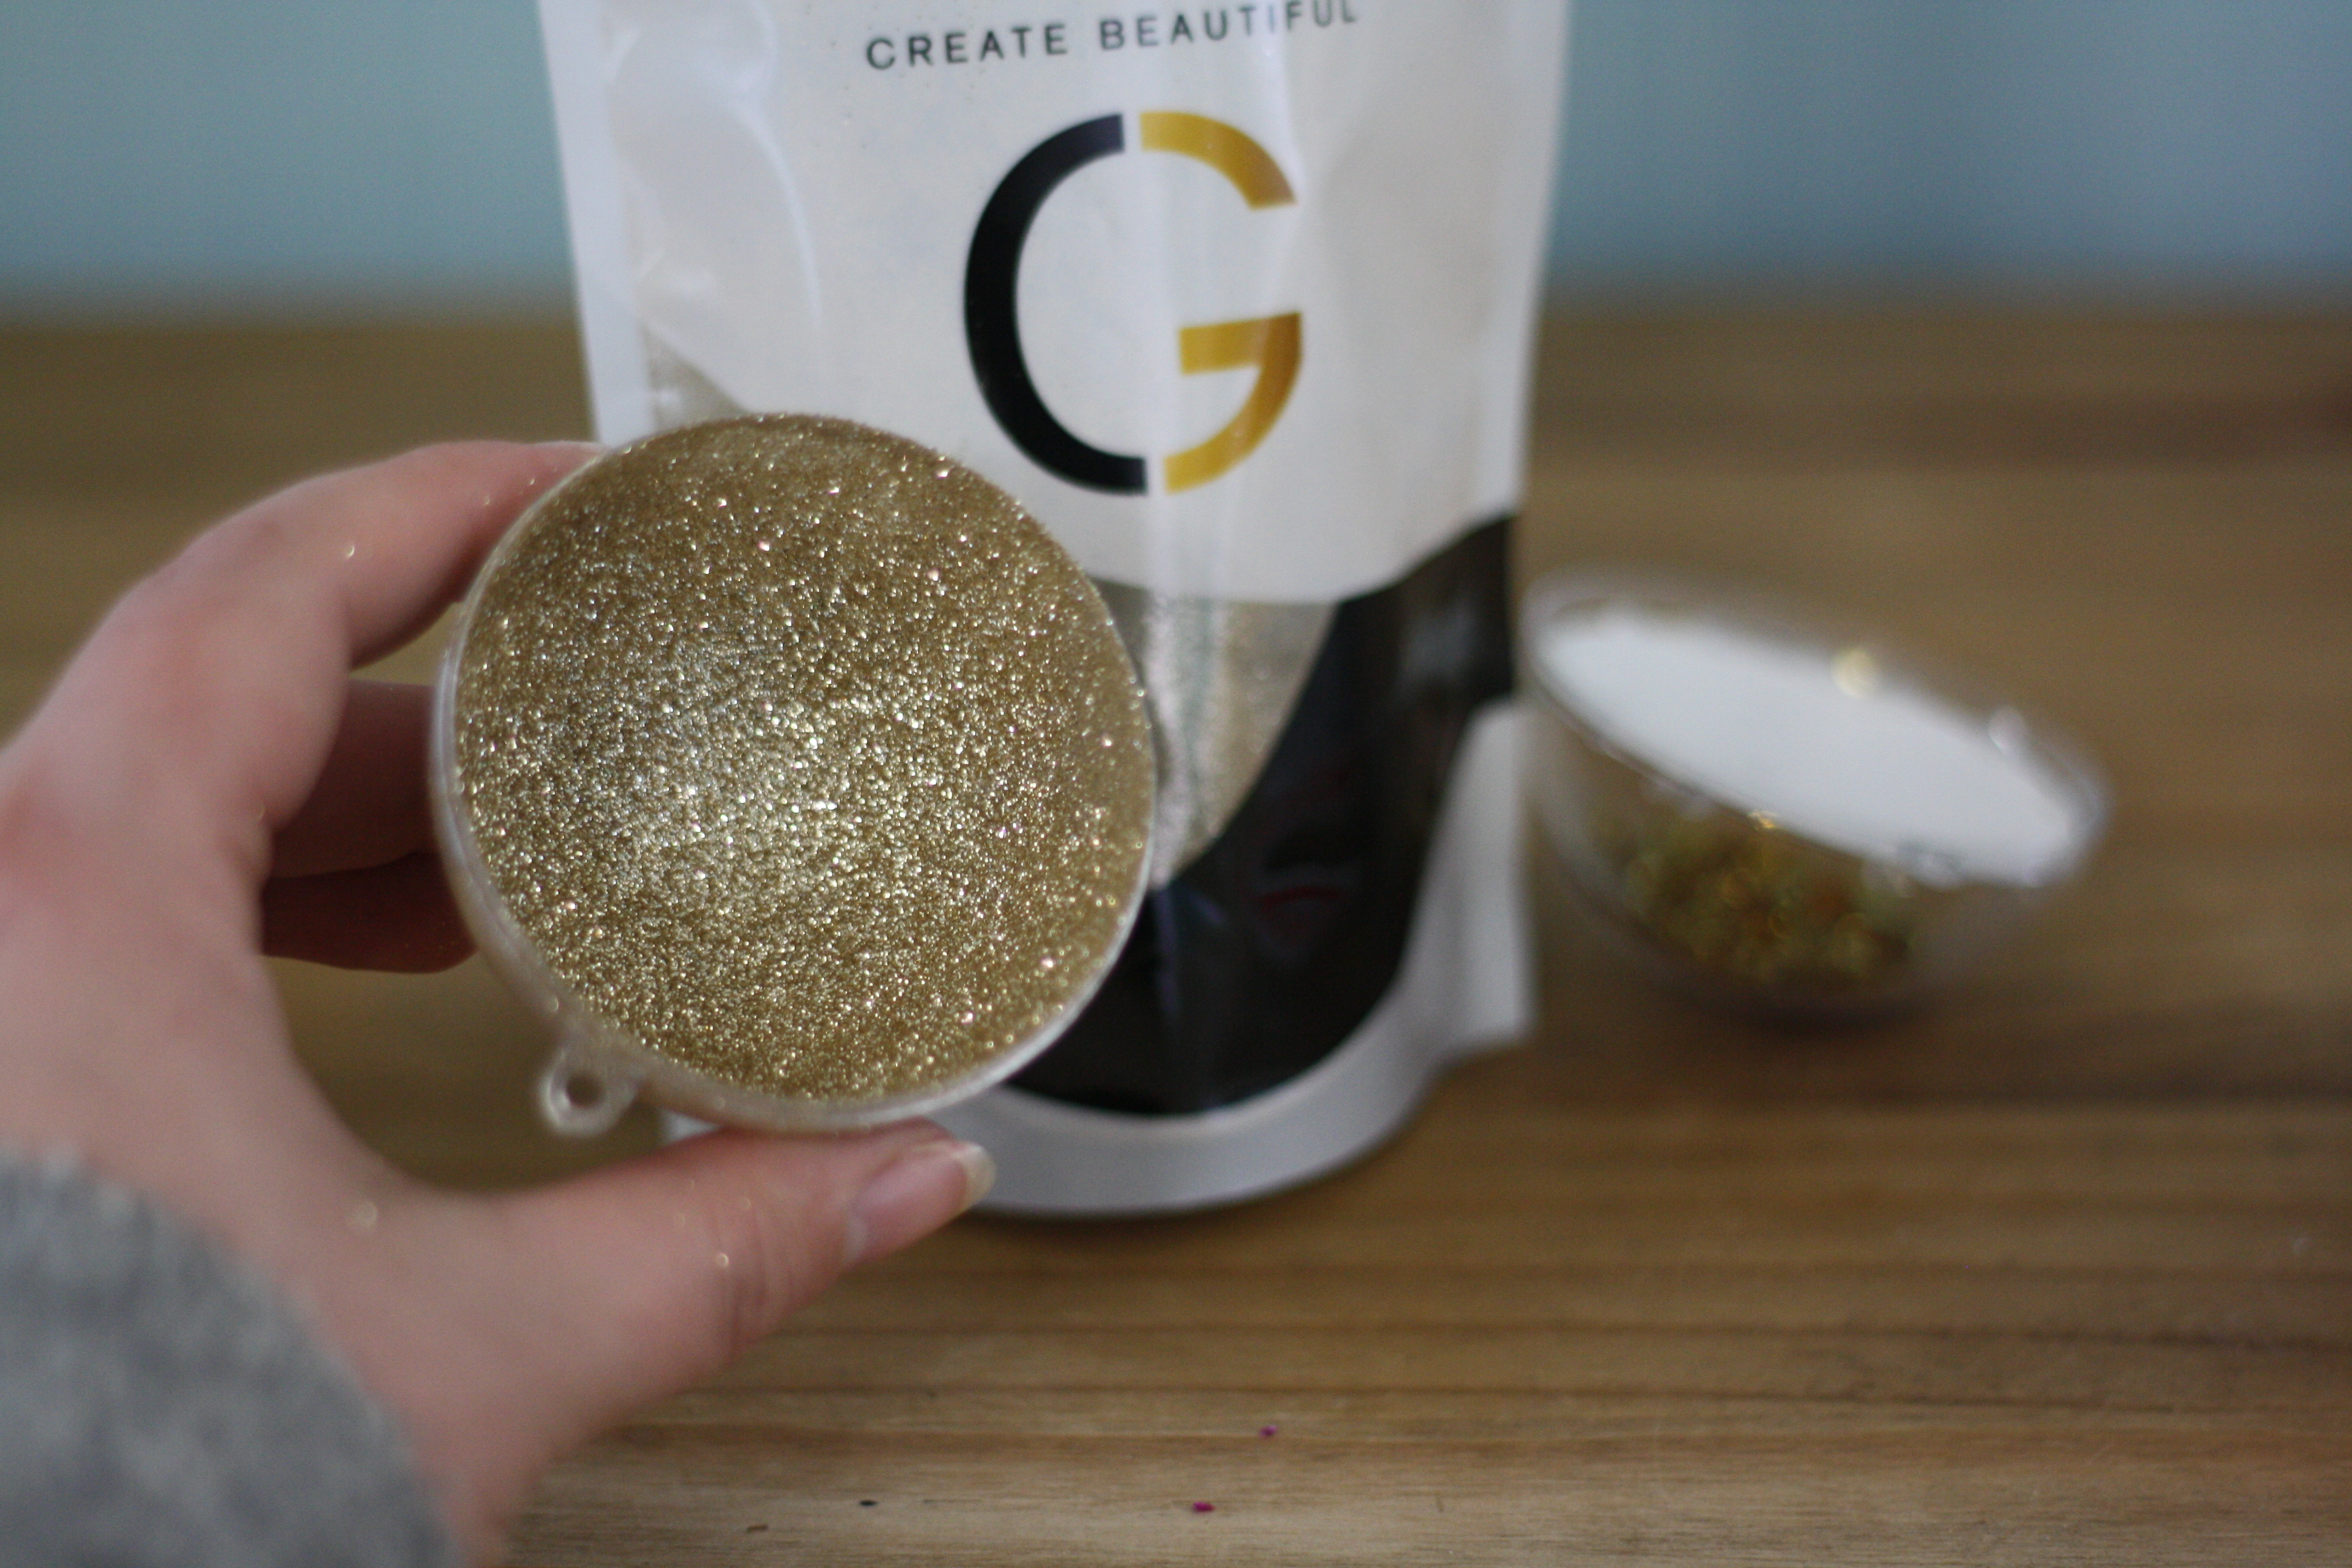
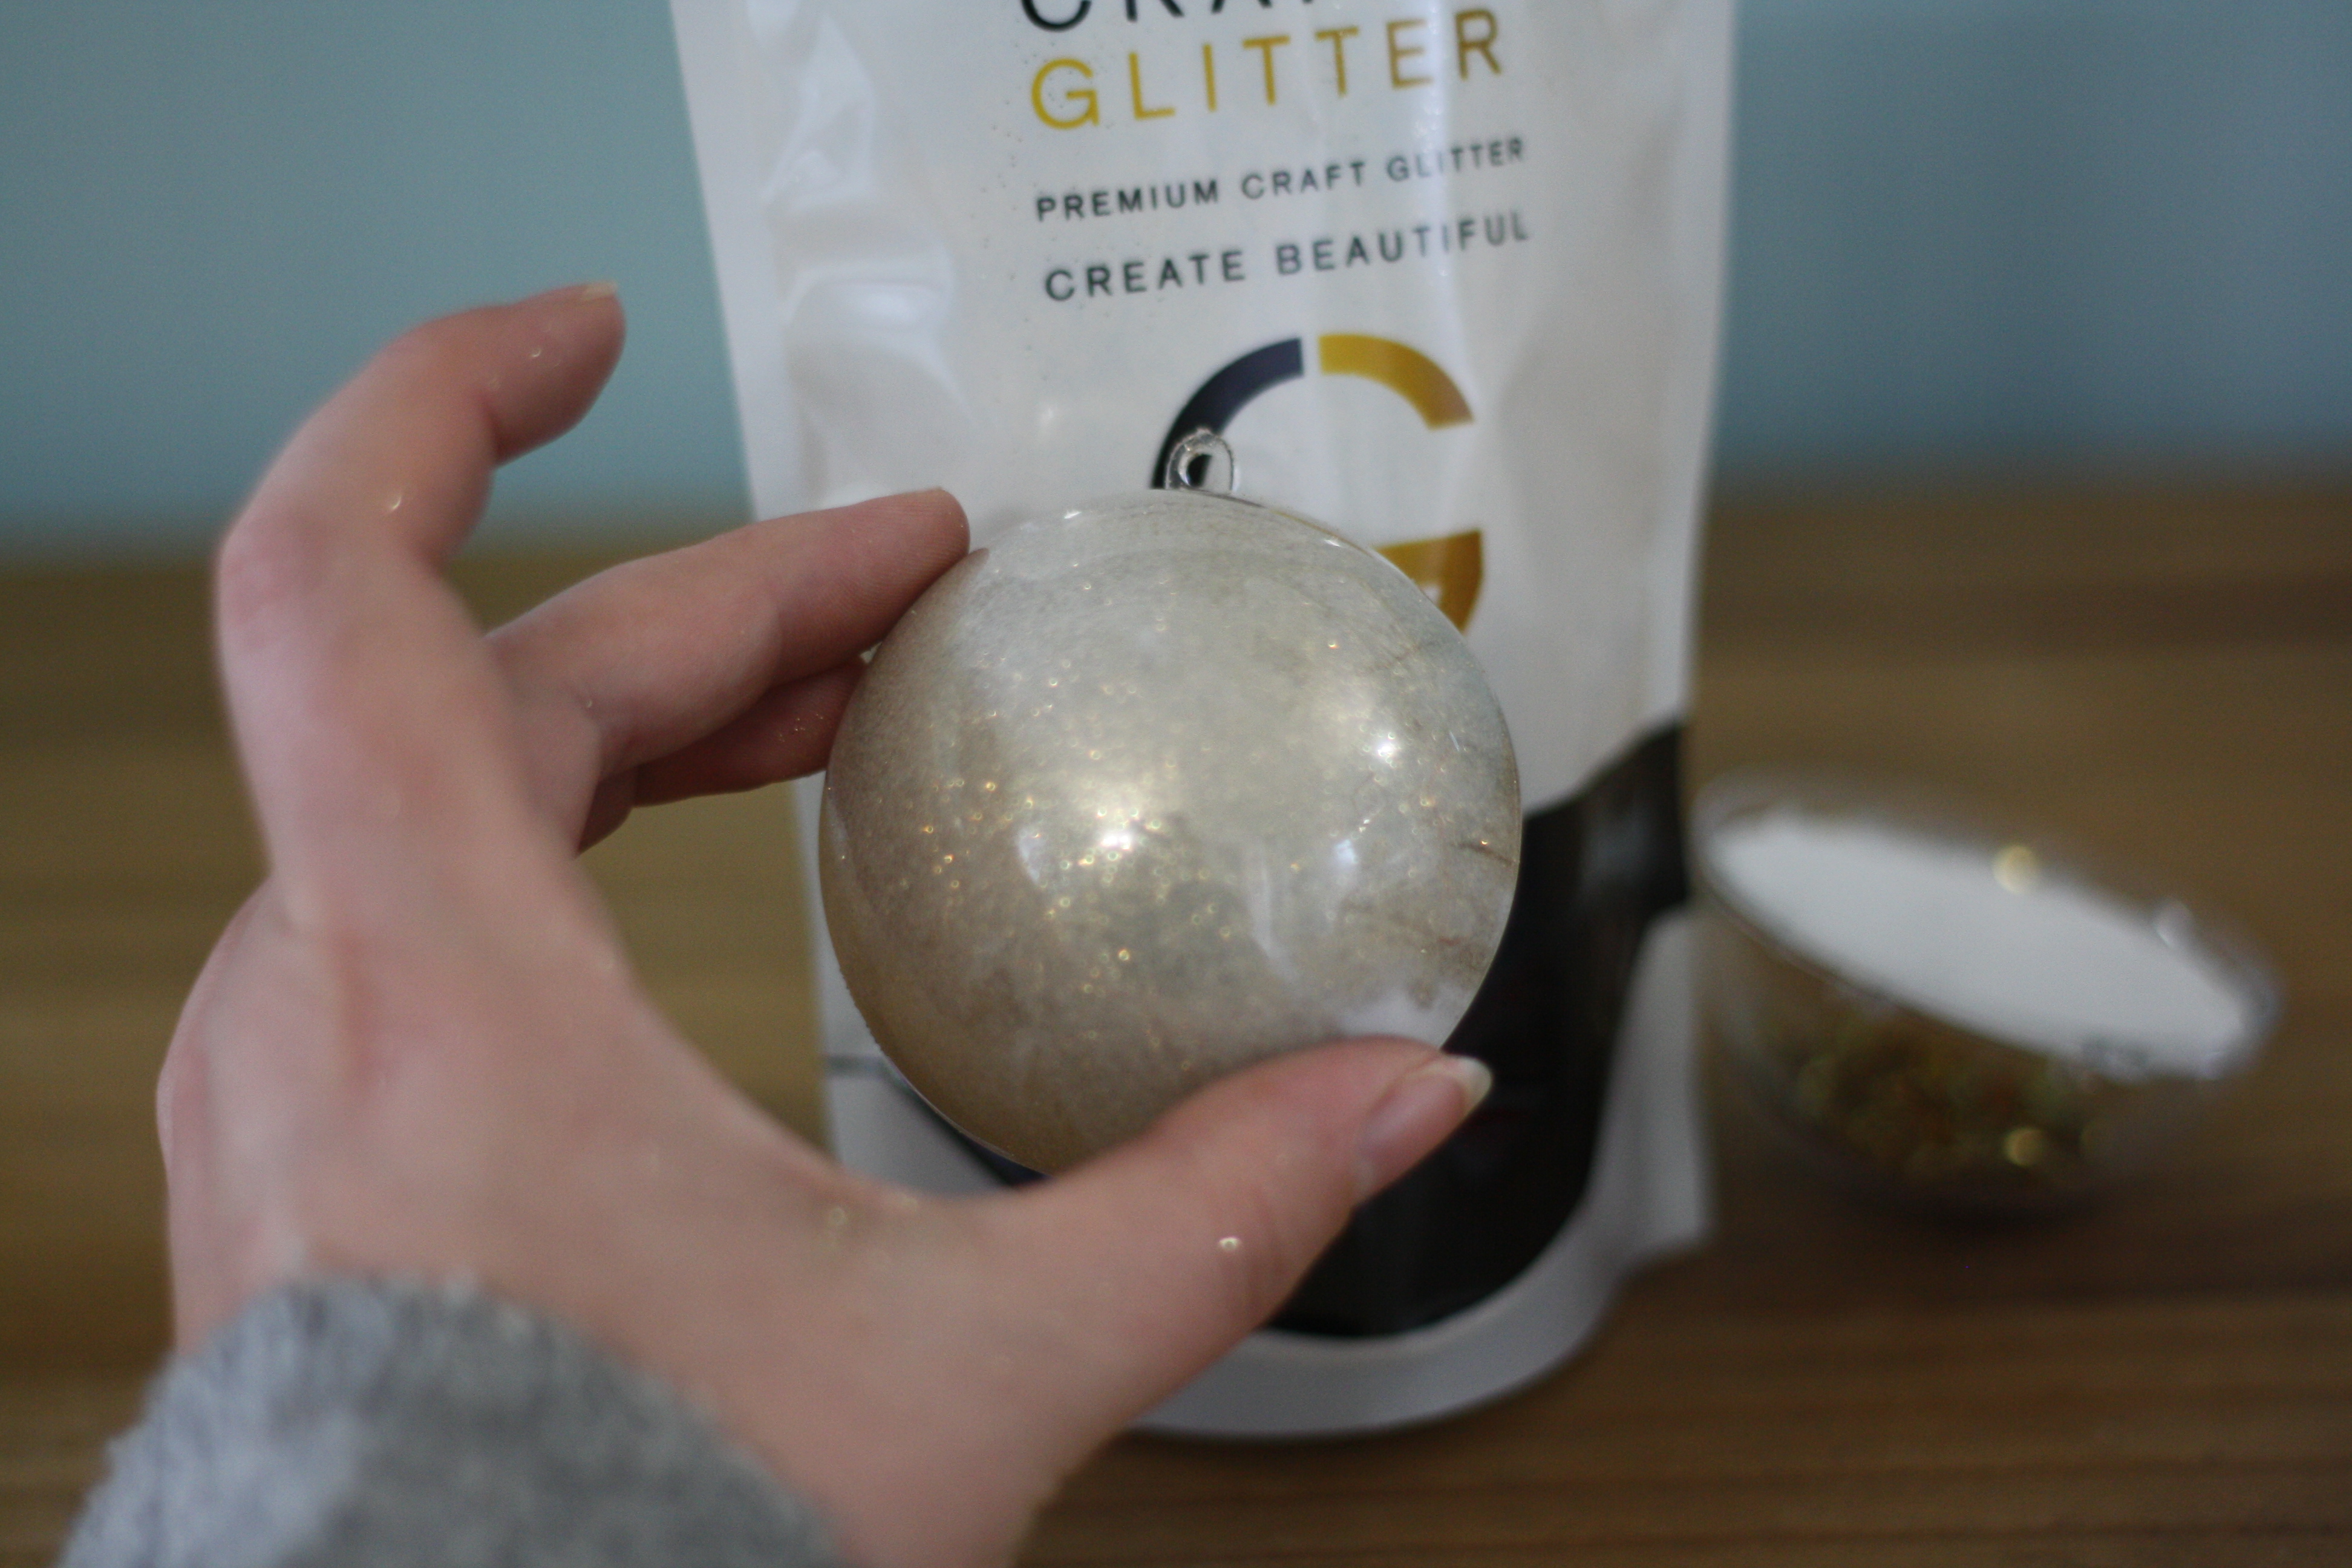
For the other side of the bauble (the side with the lip on the outside) you need to cover it with a thin layer of mod podge, fill it with glitter and swirl it round so the whole inside is covered. Pour the excess back into the pot/packet. It will look cloudy when you first do it but it will dry clear and look sparkly.
Then once the glue has dried all you need to do it clip the two halves together and hang it on the tree. As you can see below the hot glue is visible from the sides so if you wanted you could maybe add some ribbon around the join but you can’t notice it when it’s hung on the tree so I just left it as is.
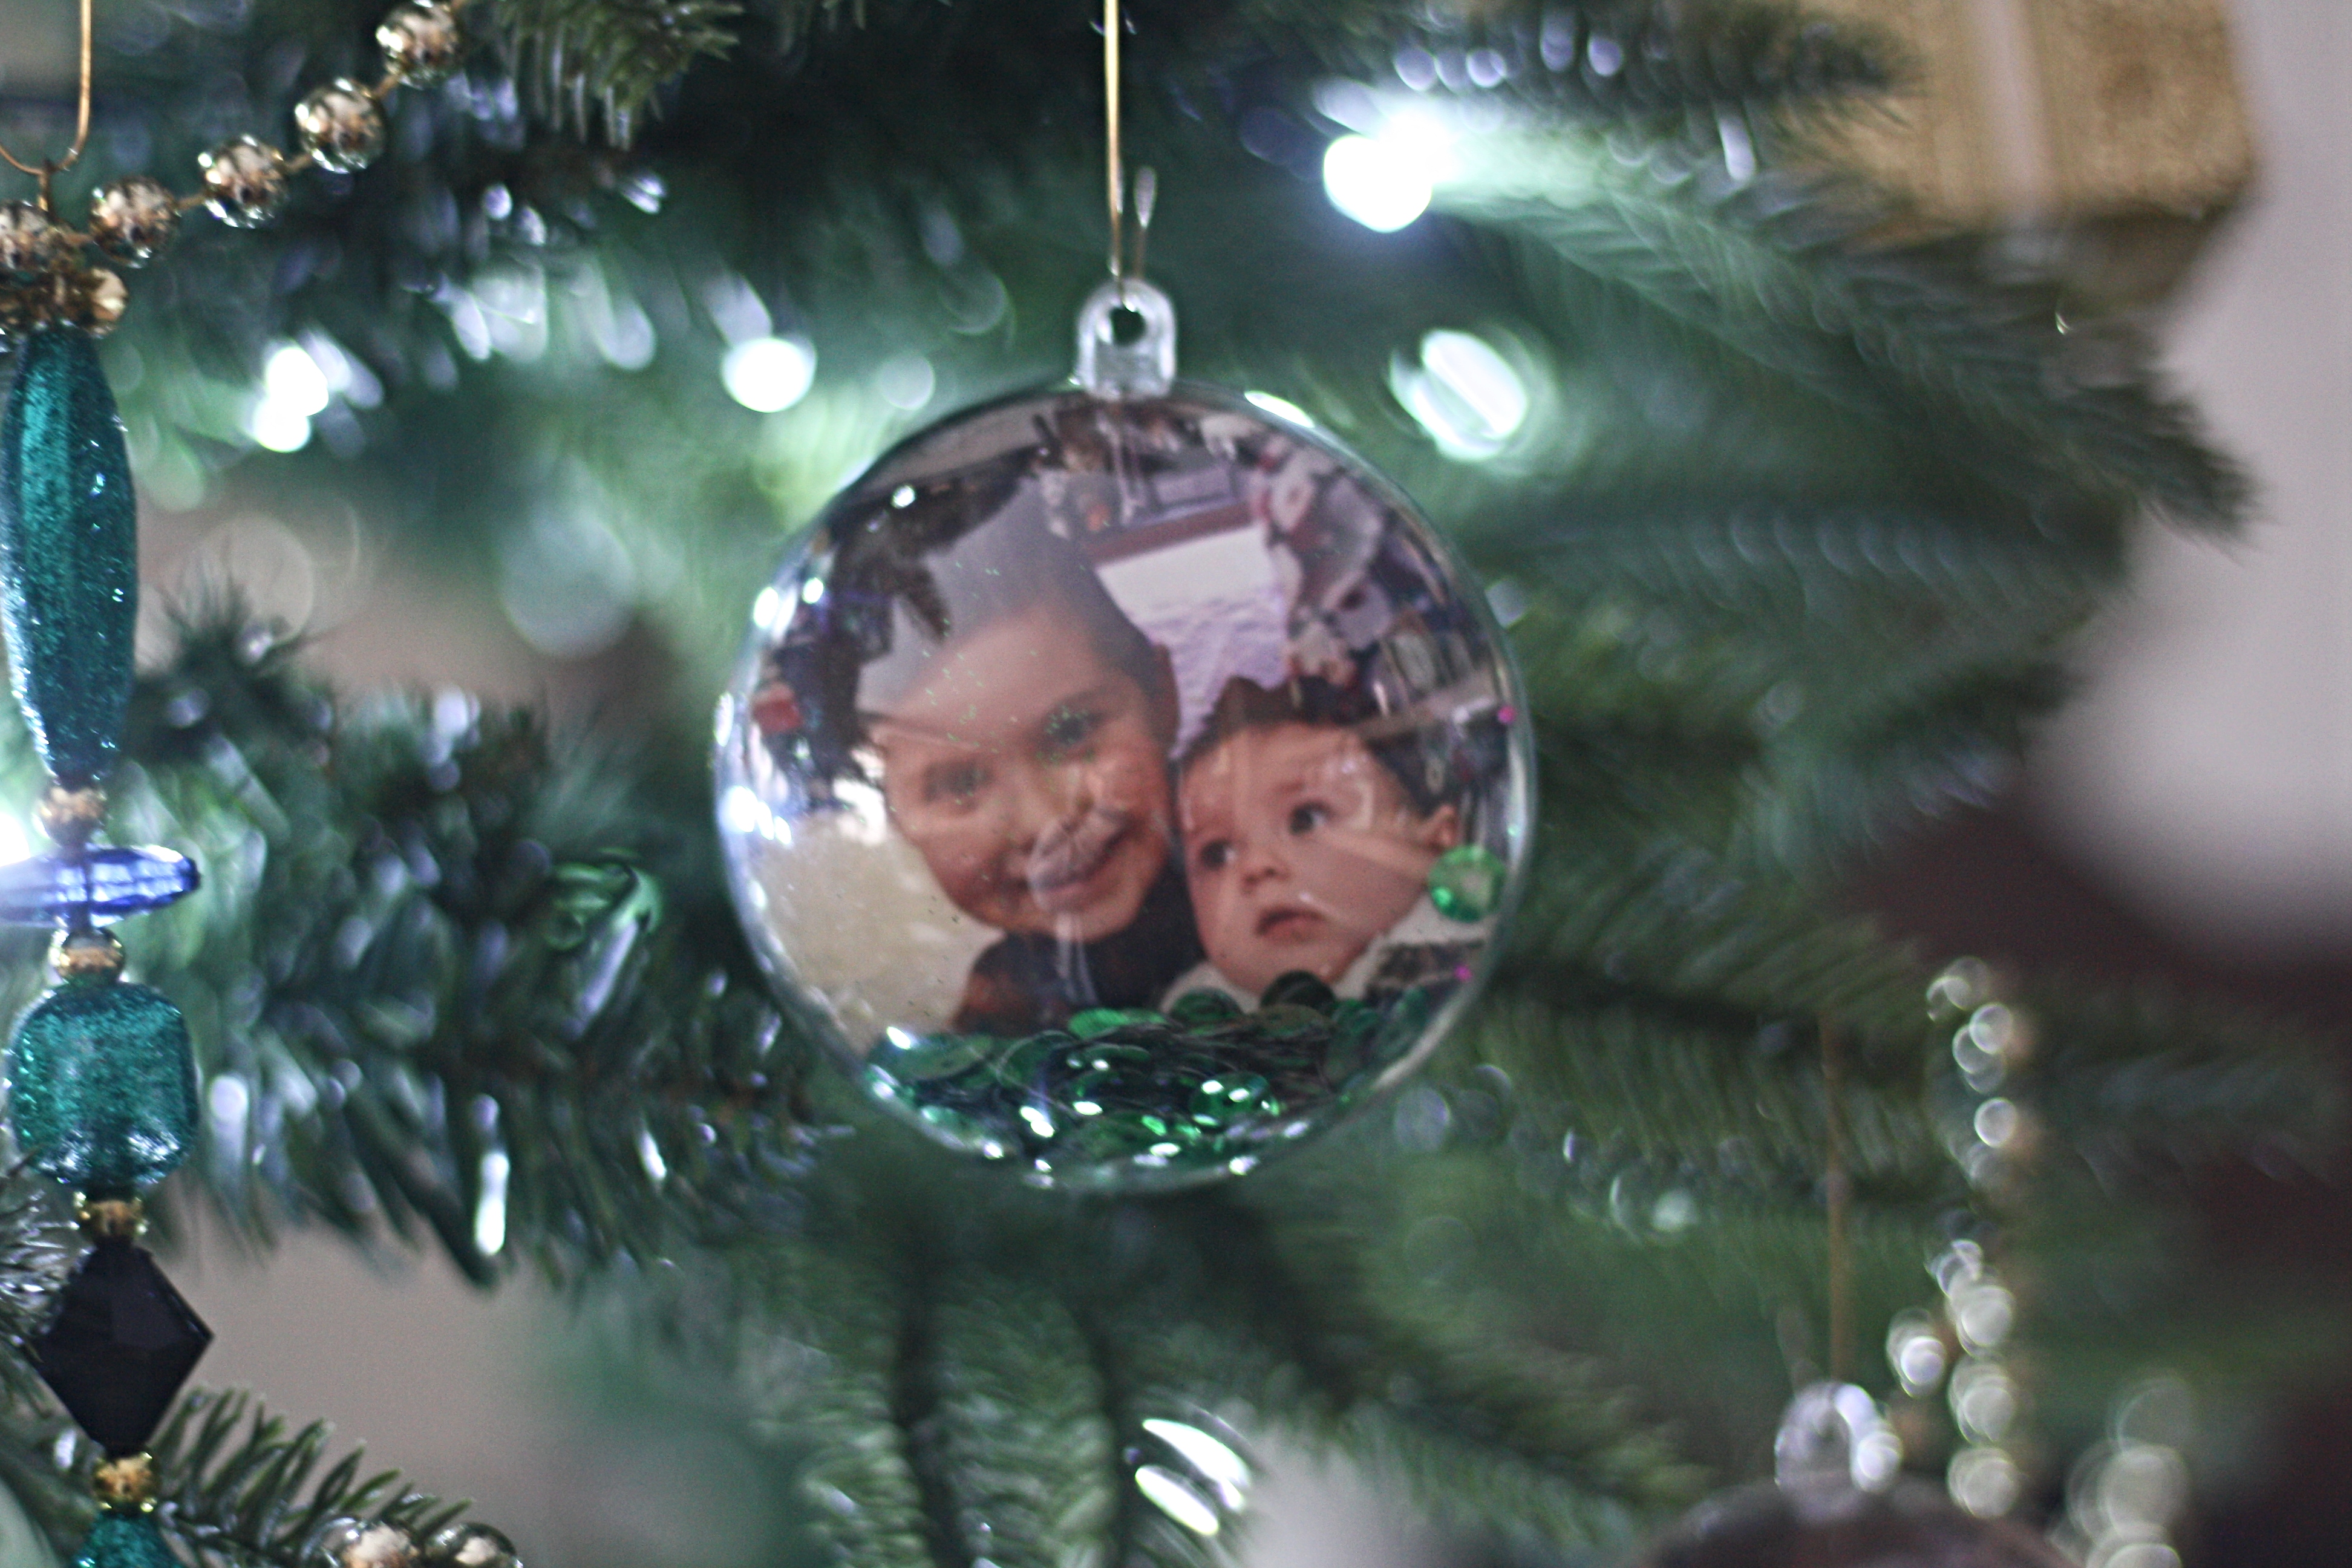
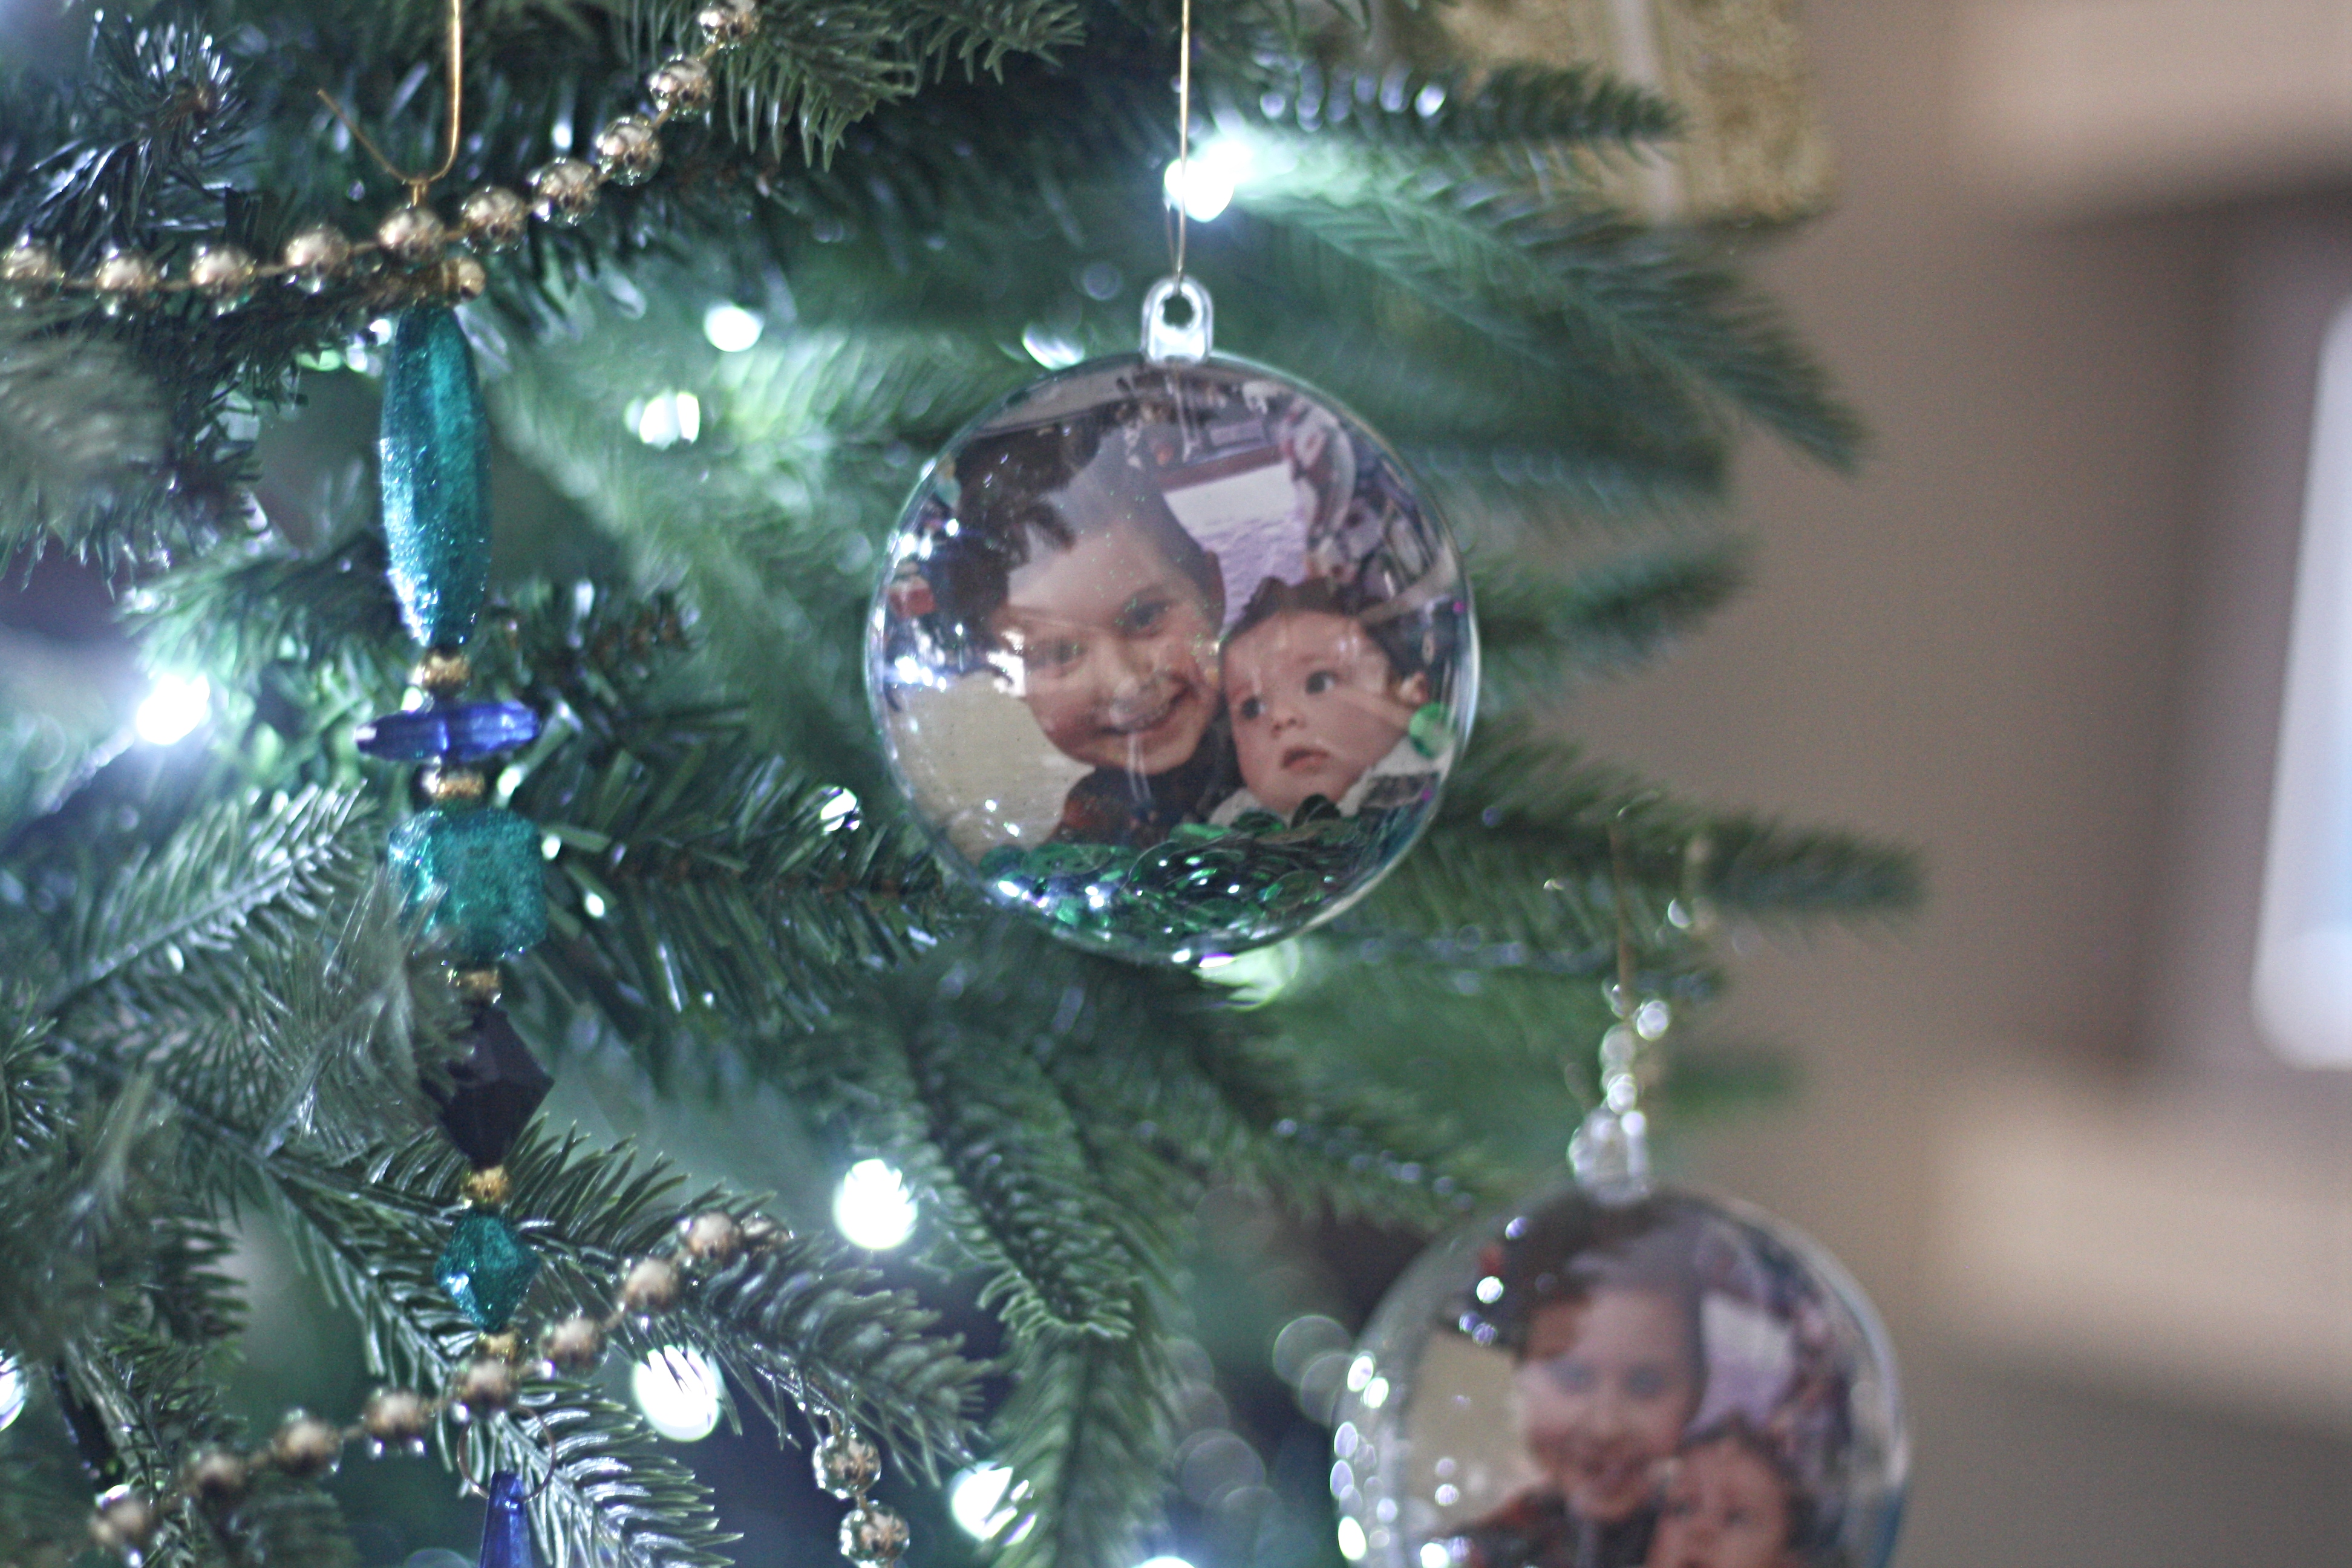
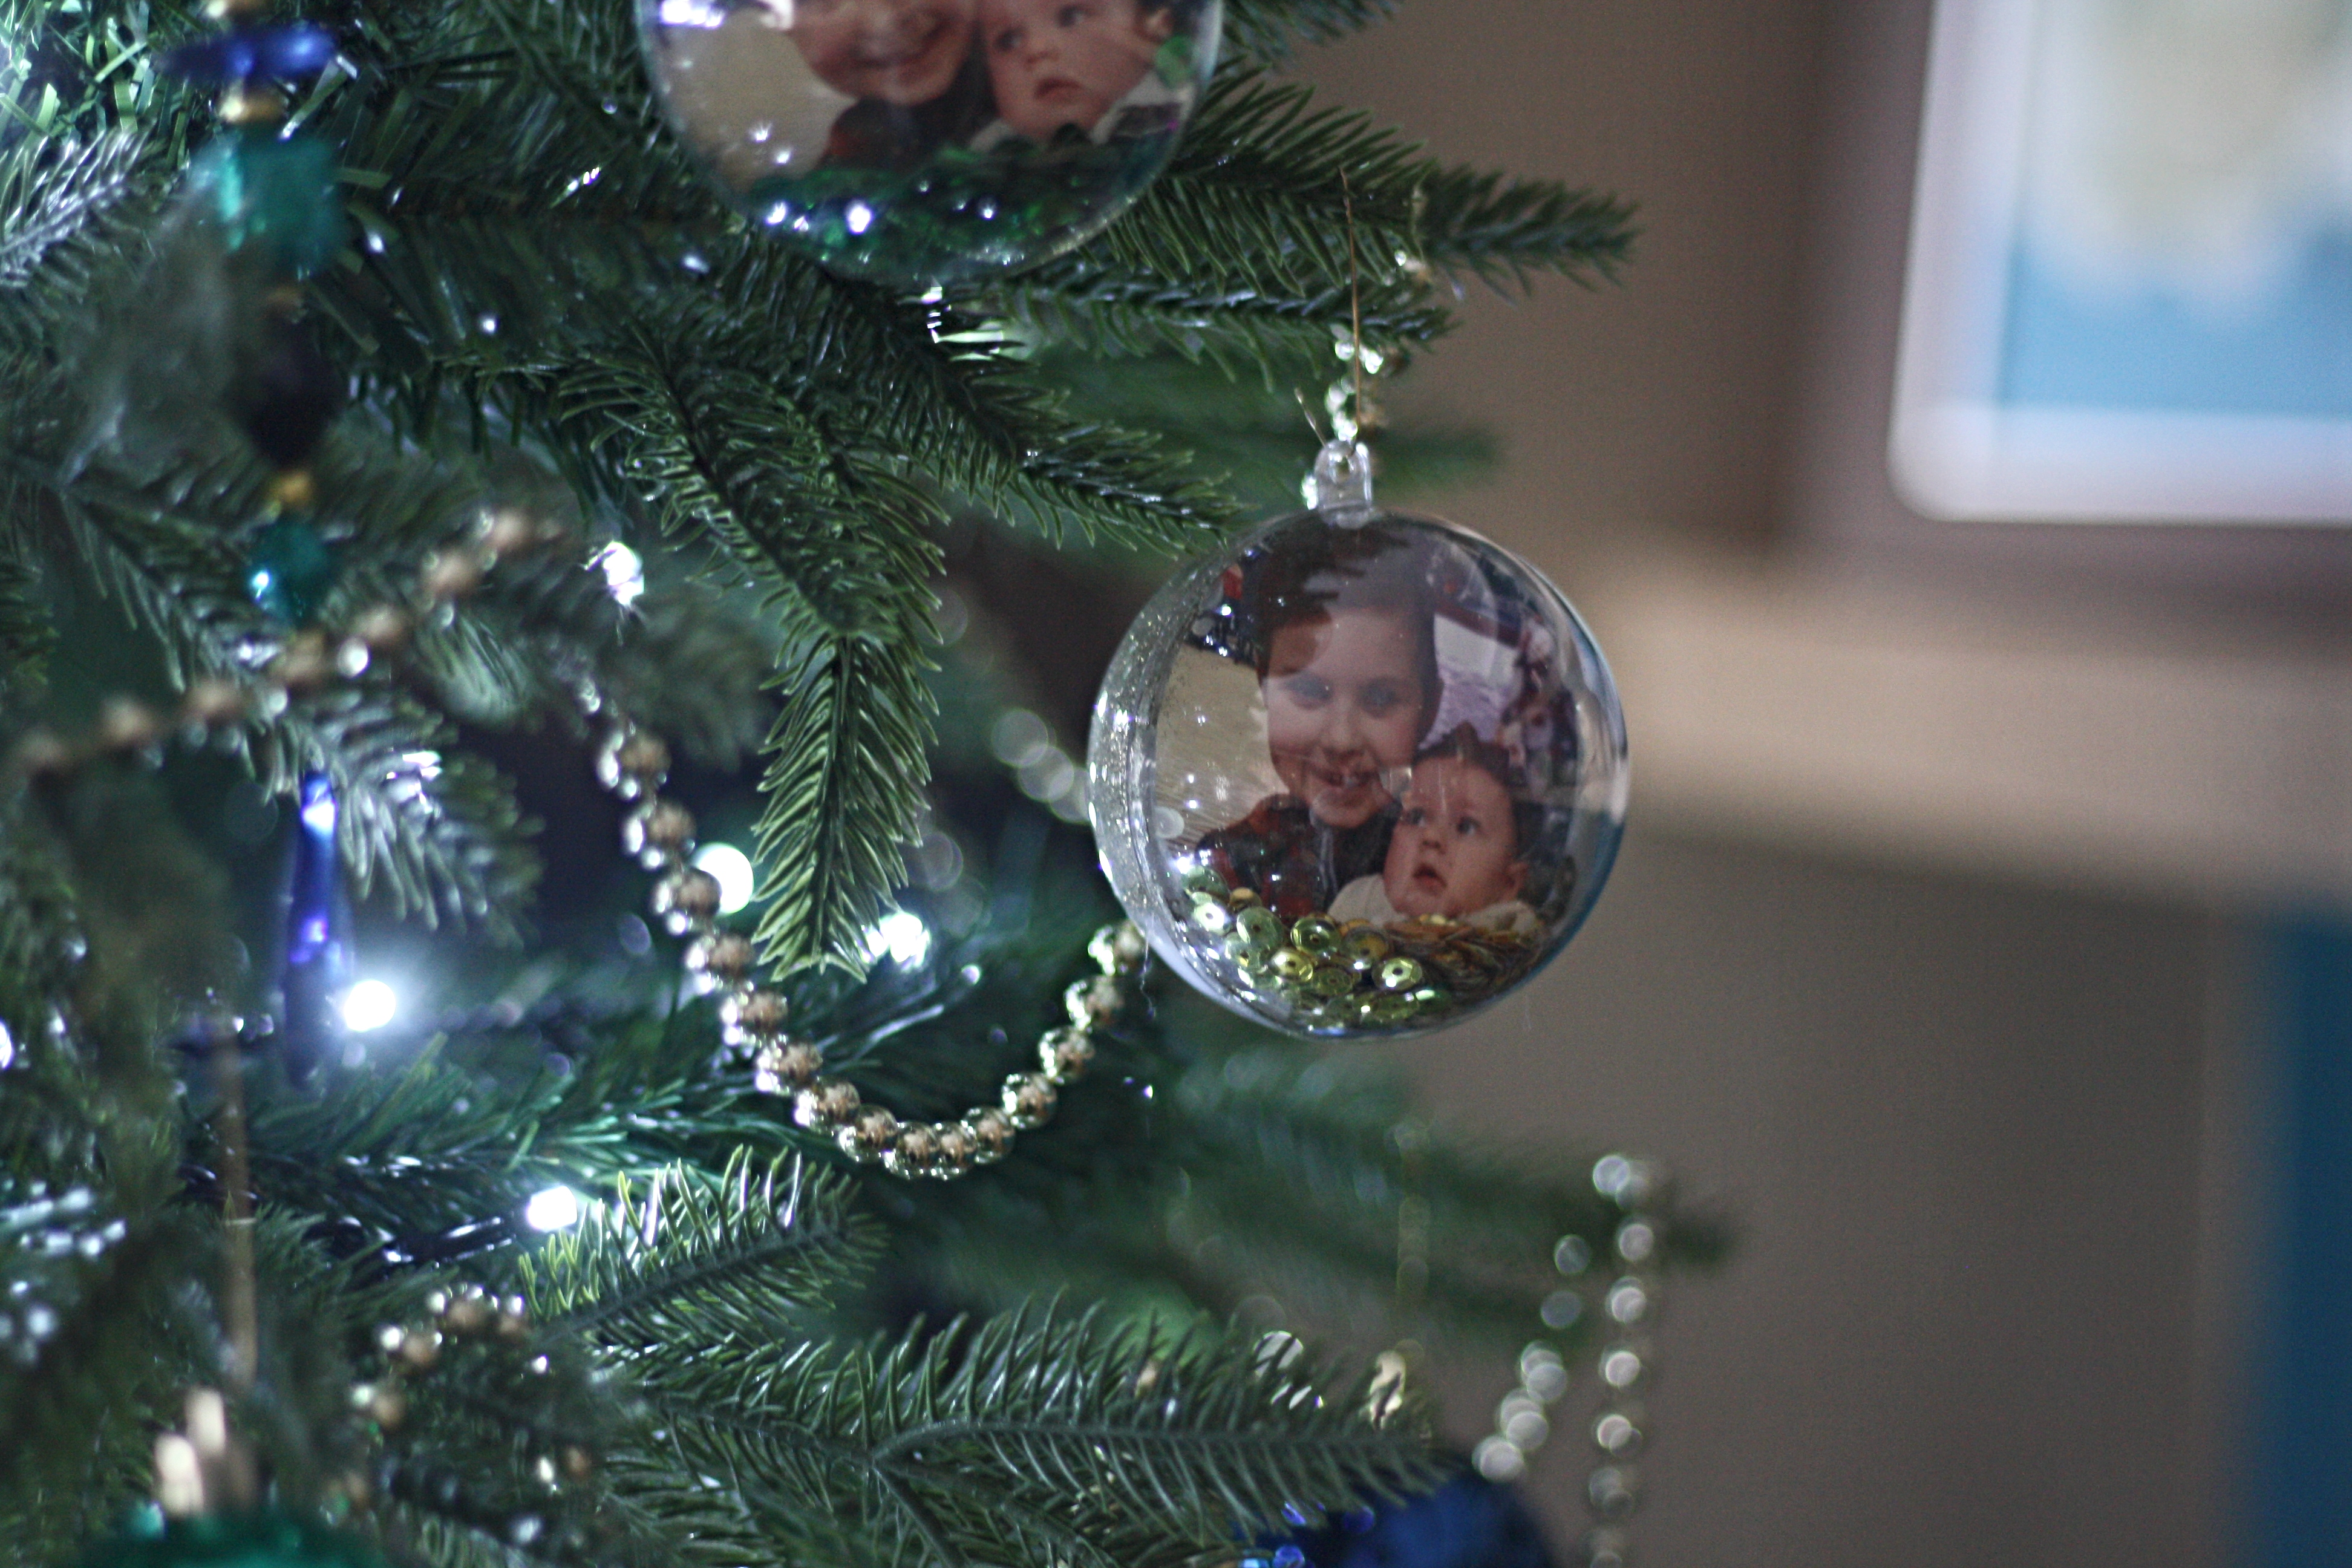
I made one in gold and one in green. One good thing about using just a photo of the kids is this would make a great present for grandparents.
So there you have it, my finished Phot Christmas Bauble. I can’t believe how quickly Christmas is sneaking up on us this year! I still haven’t even got all my decorations out yet so I really need to get a move on. Hopefully I’ll get a couple more Christmas posts up before the season is over too!
Lianne x
Pin my Photo Christmas Bauble to save it for later!

Your blog post was a true gem amidst the vast sea of content online. It stood out with its exceptional quality.
Please provide cost and delivery charge of 12 self-fill tree bauble kits.
So thrilled to see you do these.