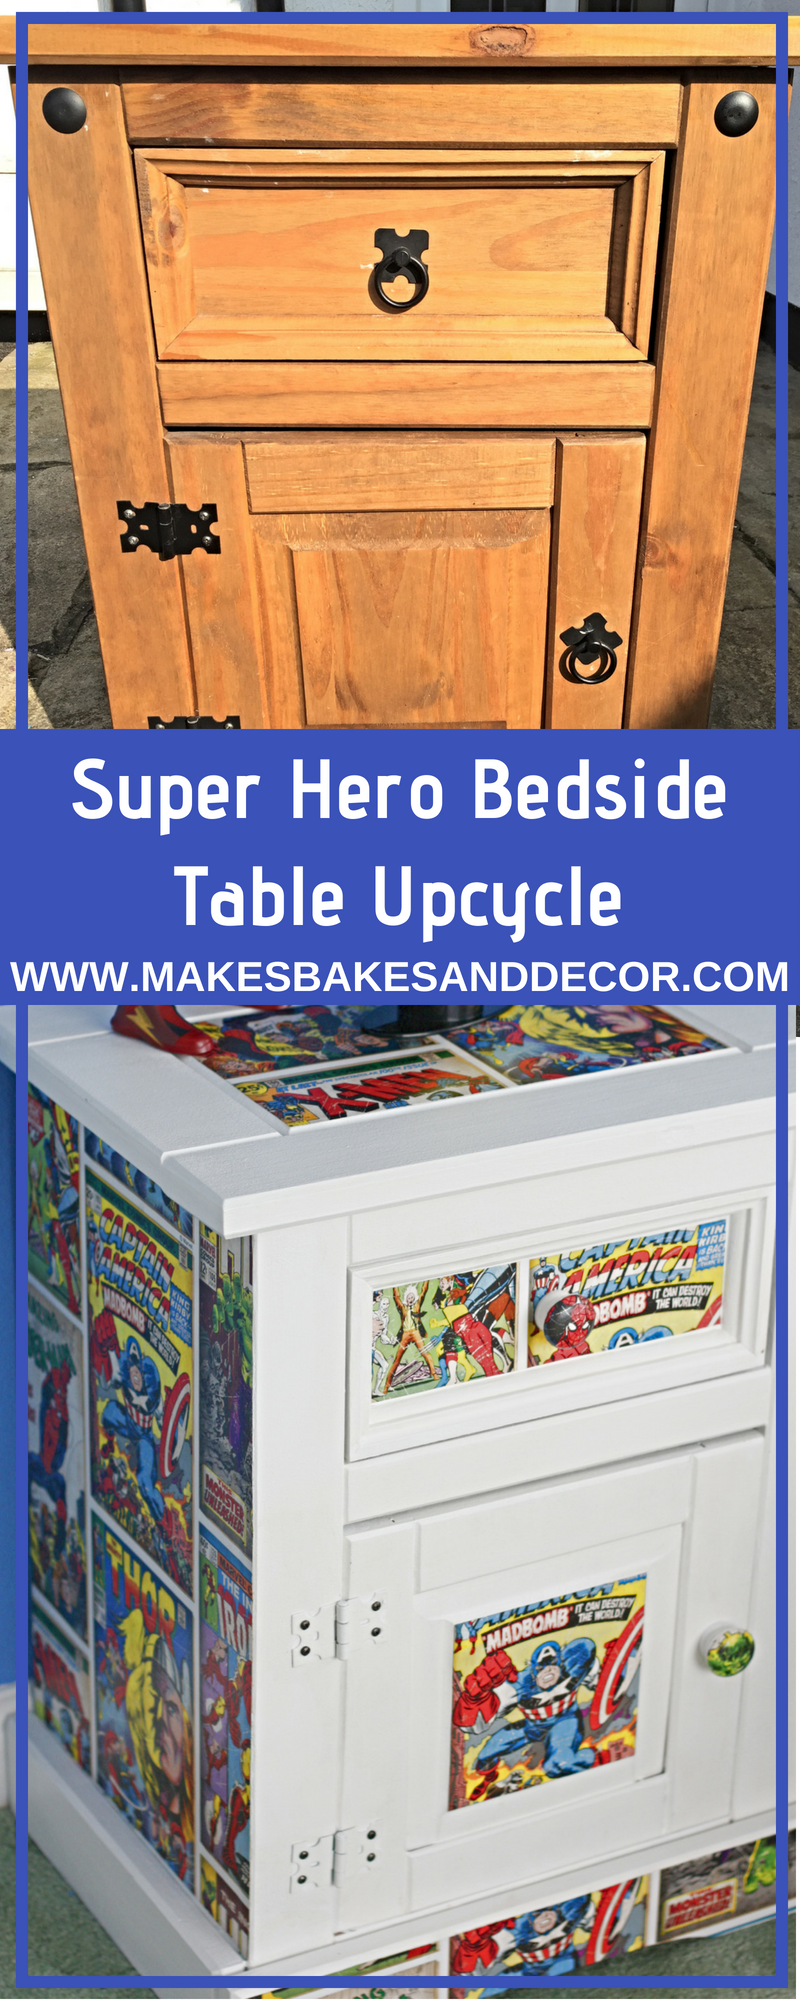
Super Hero Bedside Table for Mason’s Room
We’ve been working on Mason’s Bedroom for a long time now. It was the second room we painted when we moved in and we’ve now been living here for three years! We started off just painting the walls and putting up blackout blinds then adding the dinosaur bedding etc he had at our last home but they were very cutsey dinosaurs and about a year ago we decided he had grown out of it. We asked him what bedroom he wanted and he picked a super hero bedroom. Apart from the trofast toy storage from Ikea all the furniture in his room is a mix and match of what we already had and some that was given to us. To make everything match and fit in with his super hero theme I knew I would have to do some upcycling if I didn’t want to buy all new, (which with our budget wasn’t even an option) and this Super Hero Bedside Table Upcycle is the first piece I’ve tackled.
We’ve been trying to get Mason’s room done as we are also working on the nursery at the same time and I really don’t want the babies room all done and poor Mason’s still half finished! With only 6 weeks to go until baby is due to arrive we are really pushing it getting everything done in time. Luckily as baby will be in our room for at least six months the nursery doesn’t have to be 100% finished by the time they arrive 🙂
This post contains affiliate links, find out what that means here.
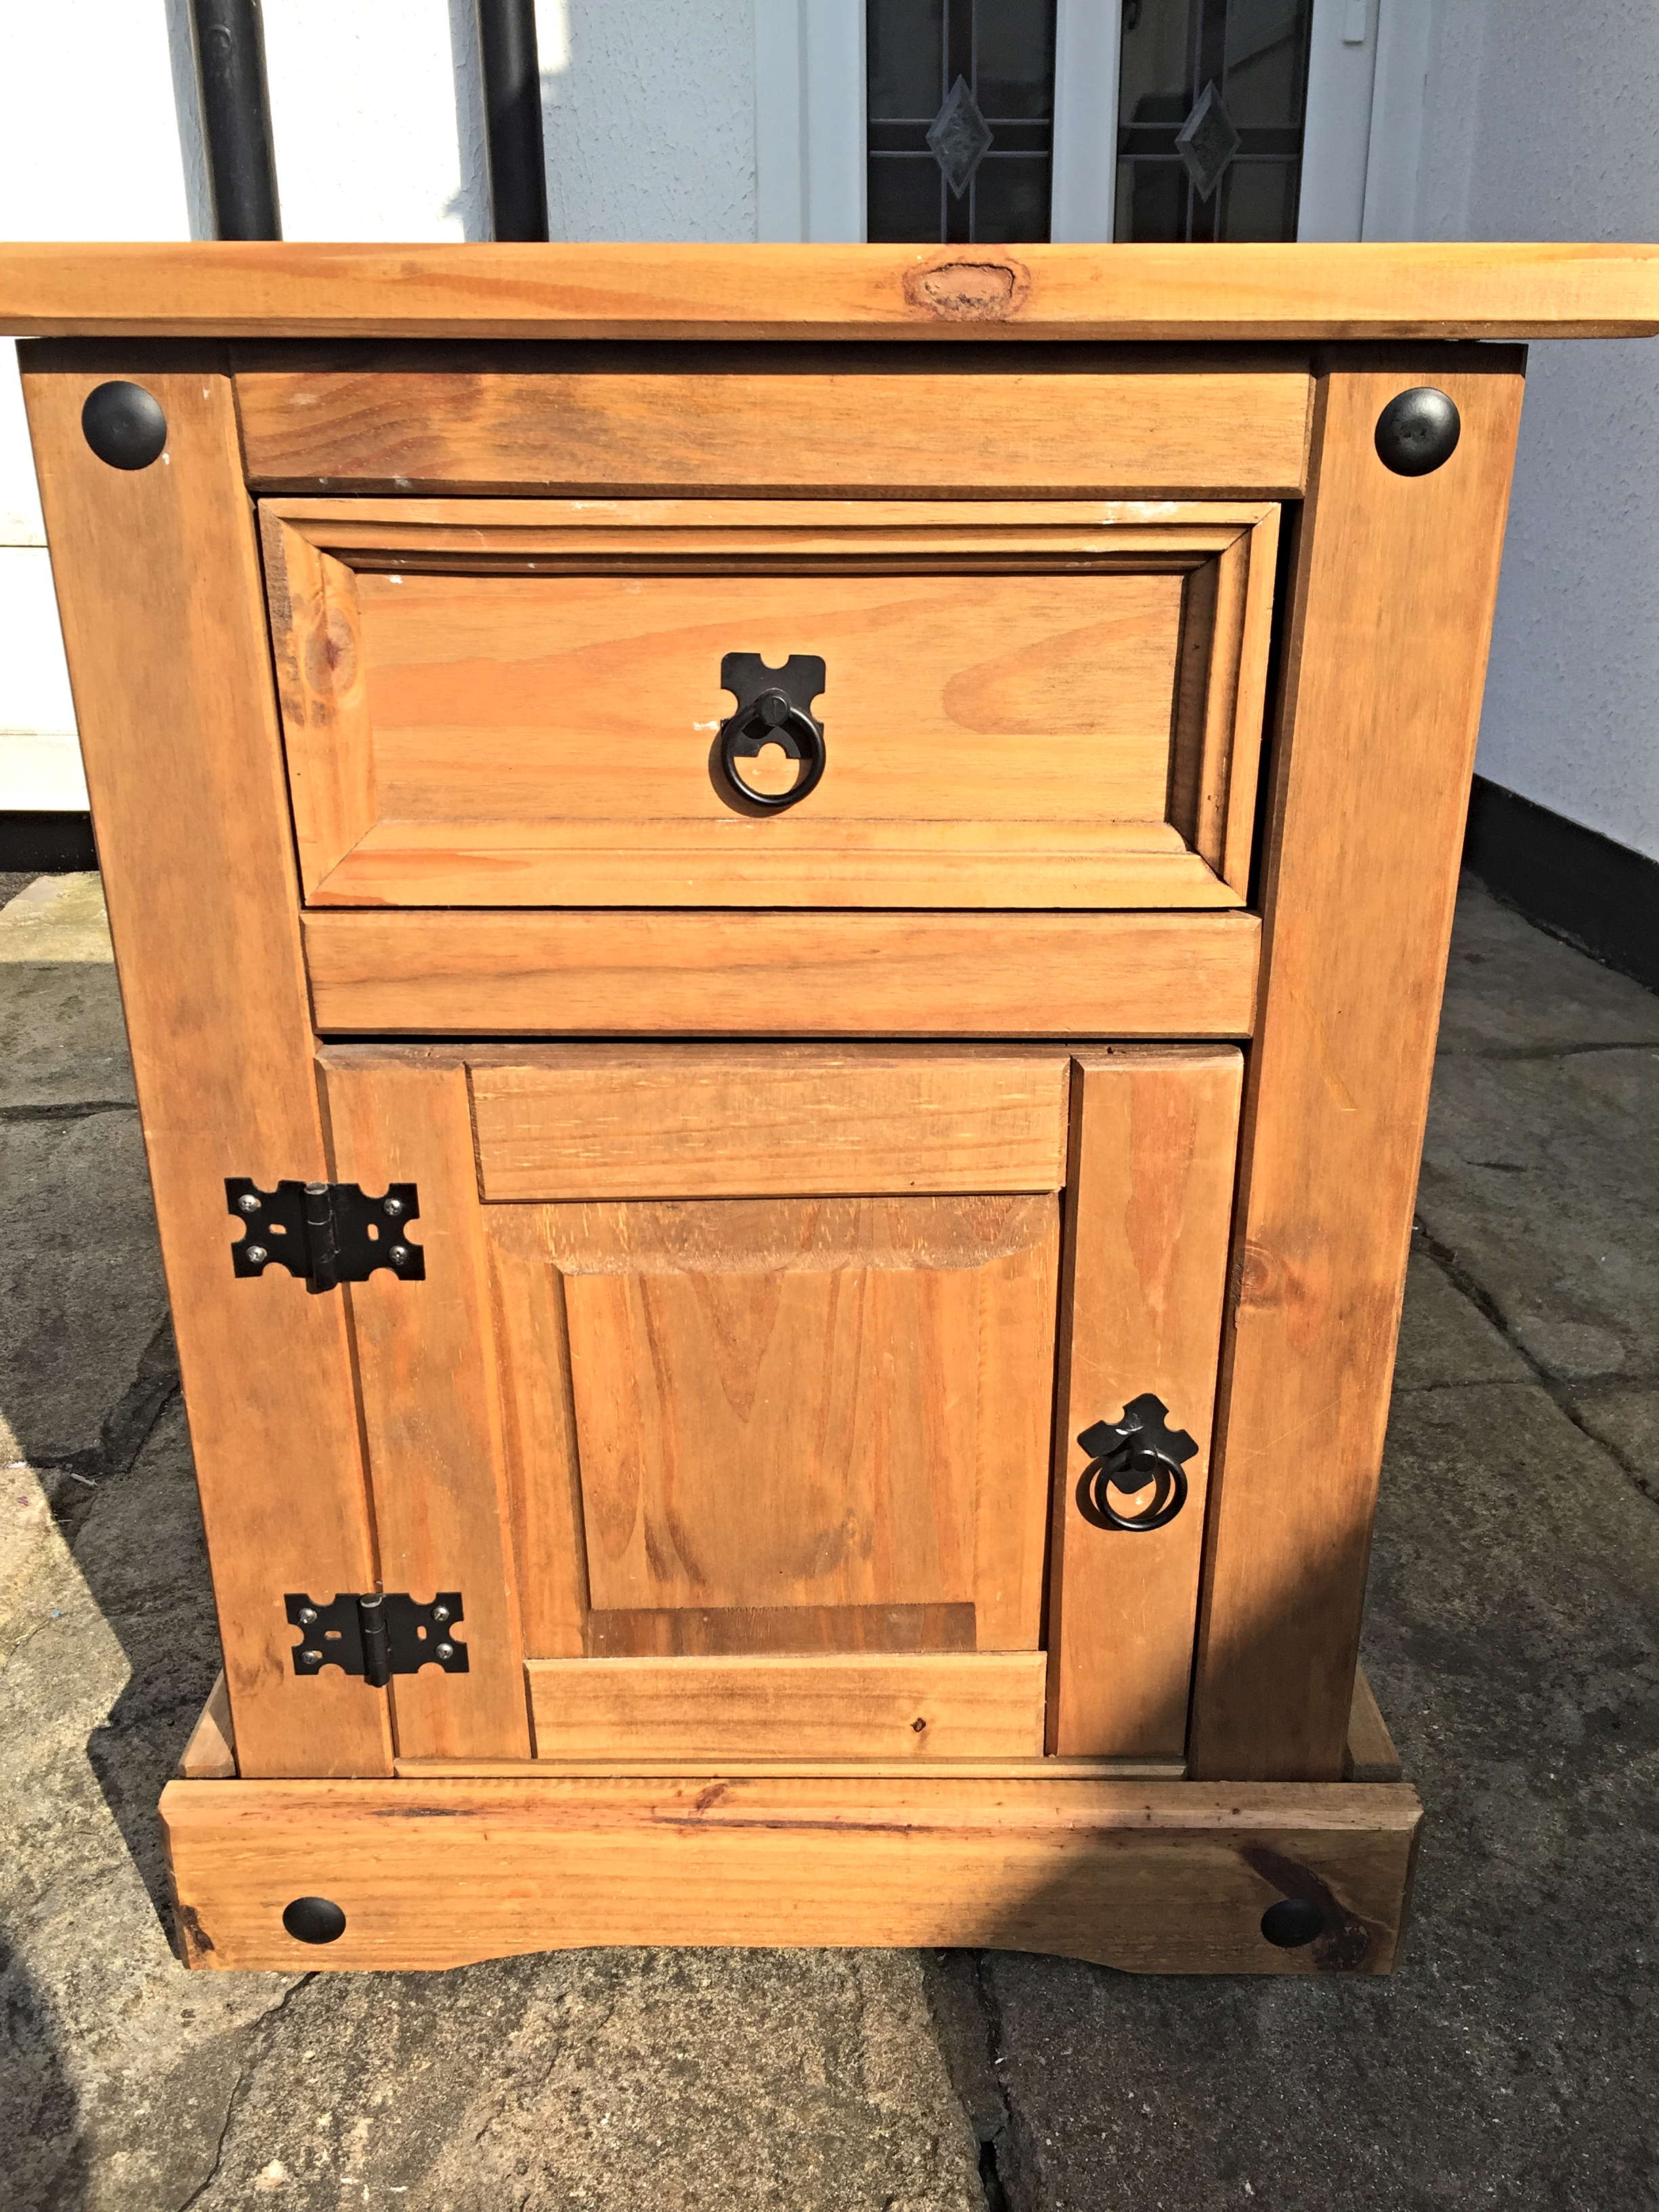
Here is what the bedside table looked like before. This is one of the pieces of furniture I got when my Dad moved house so it didn’t cost us anything and I wanted to upcycle it for as little as possible. For that reason I didn’t purchase any fancy furniture paint, I just used emulsion that we already had in the garage. I’ve used emulsion to paint a few pieces of furniture before, like my Before and After Occasional Tables, and as long as you are painting bare solid wood (not anything plasticy or shiny) I’ve found it to last just fine!
How I made my Super Hero Bedside Table
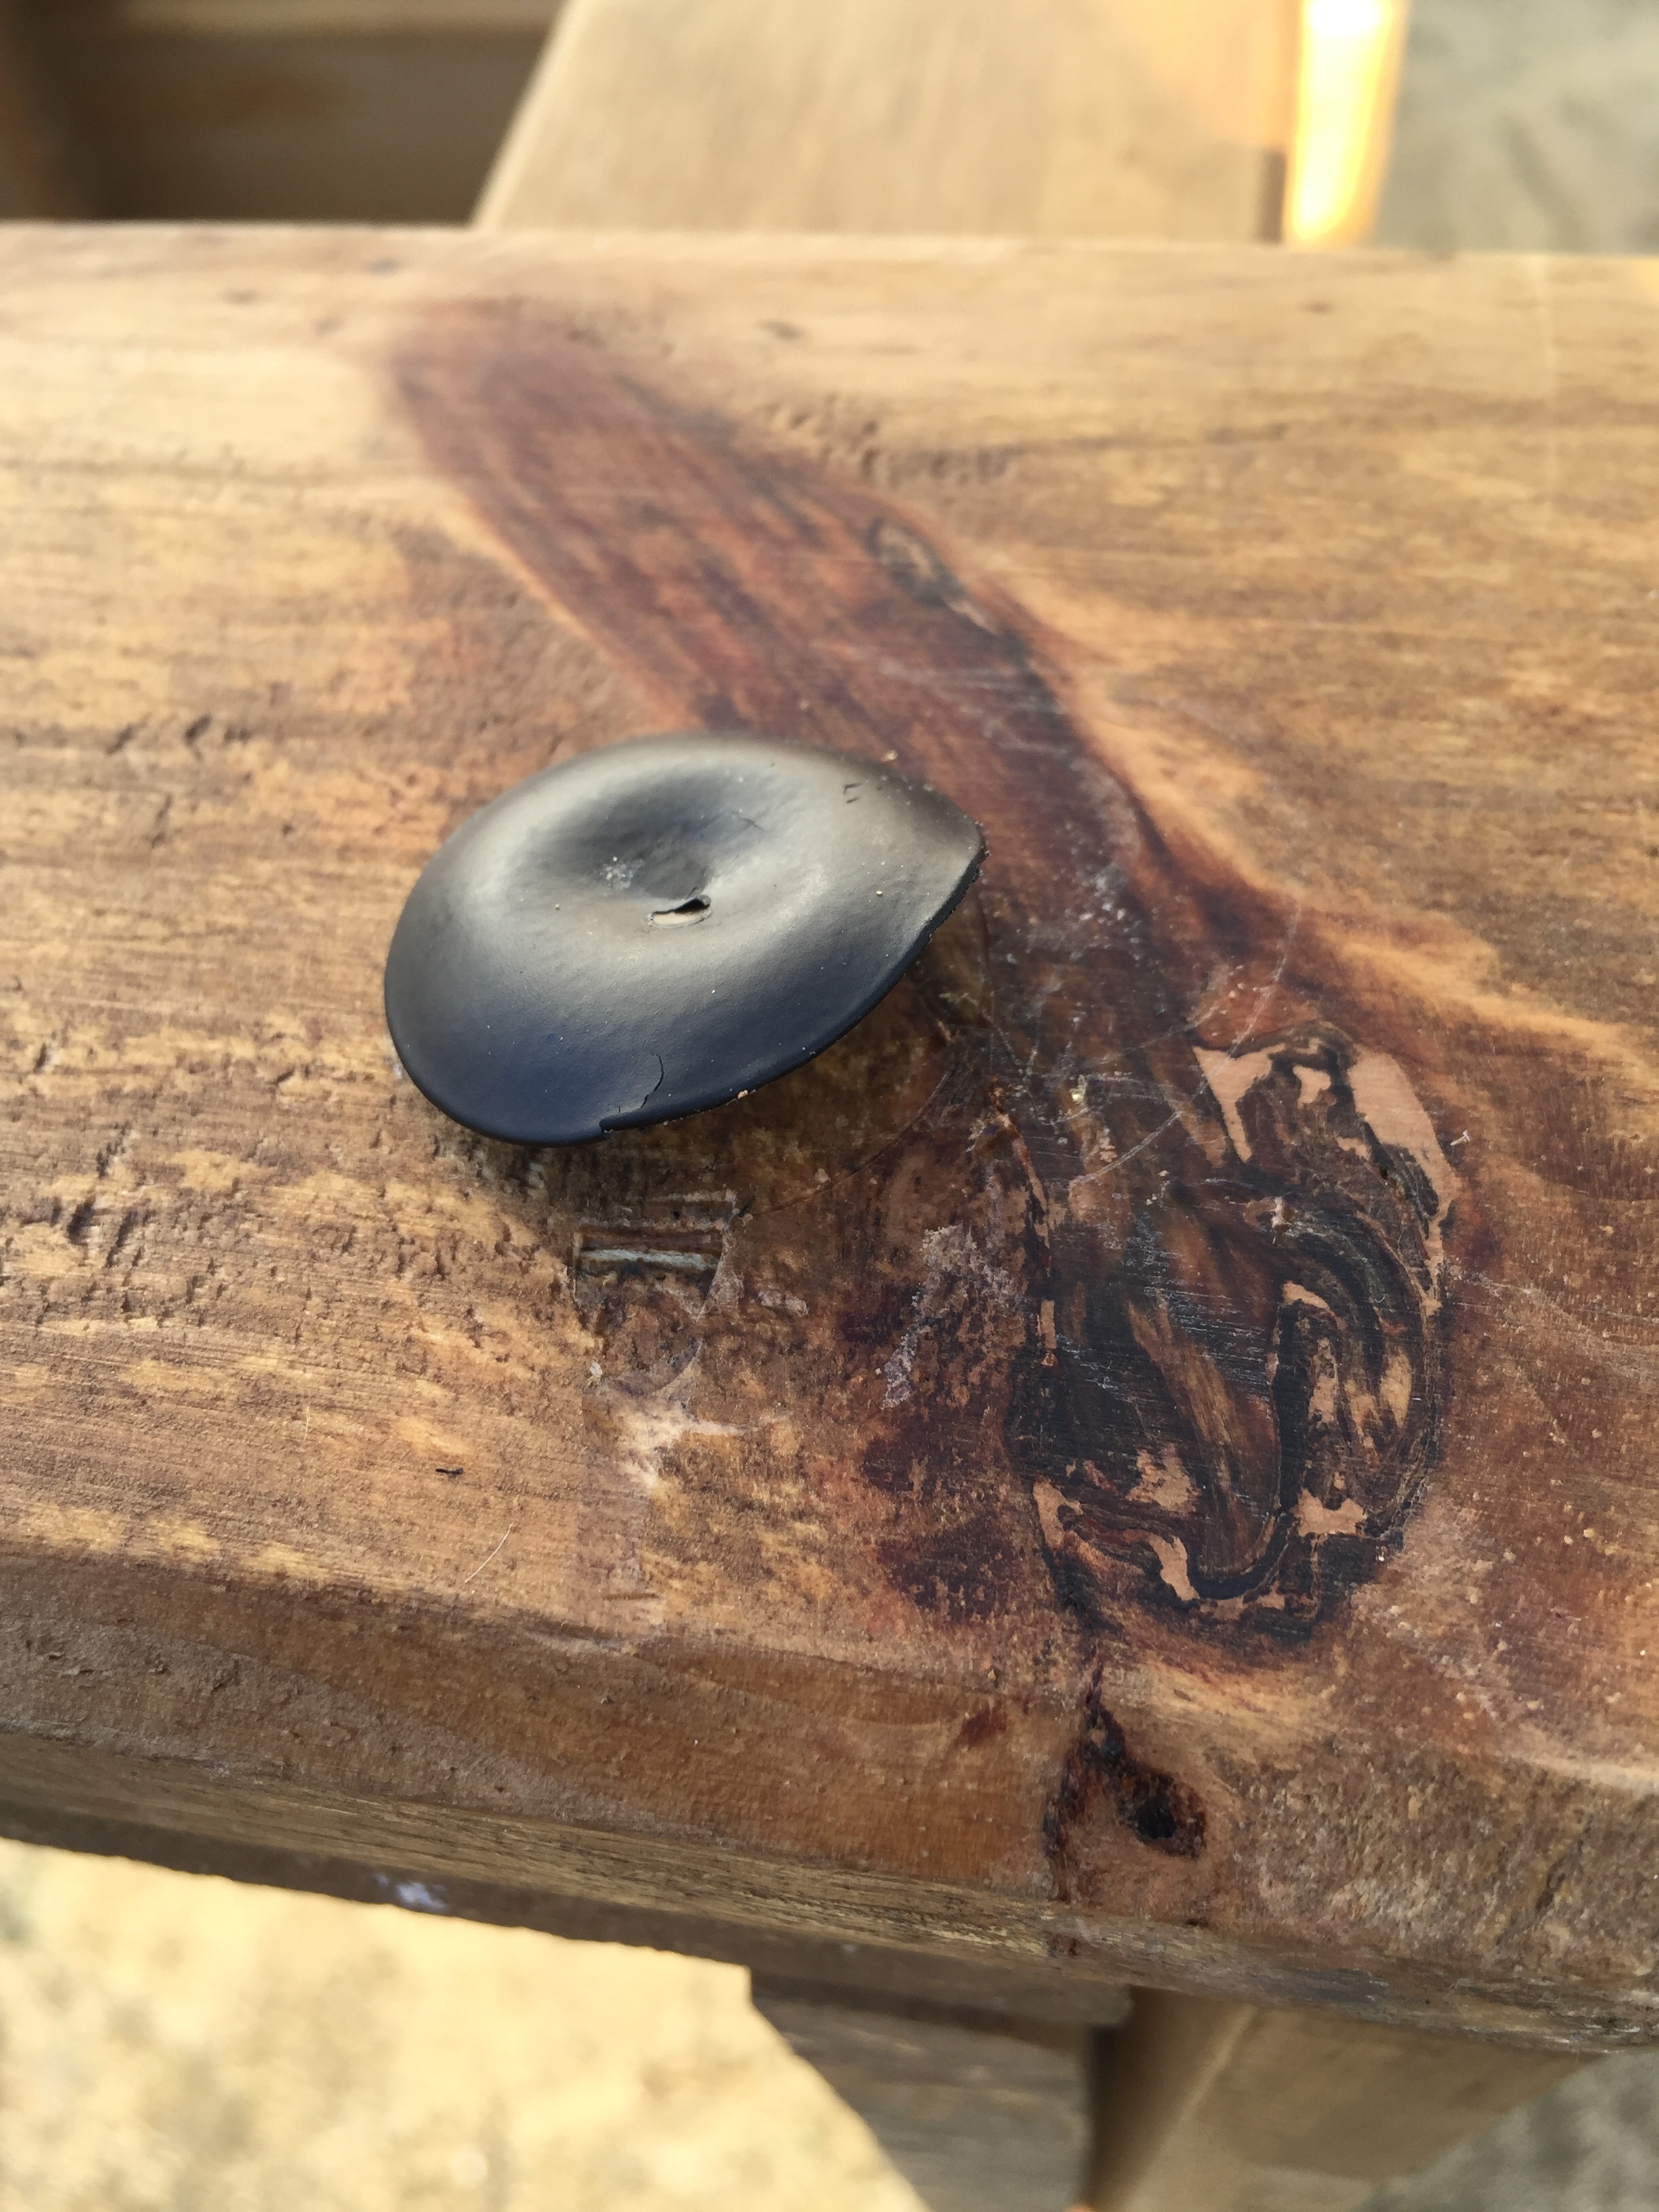
First things first, I removed the drawer and door and took off any hardware. I also removed the black circles on the front which were like pins with giant heads, I just levered them out with a screwdriver. Then I gave everything a good clean with sugar soap, this removes any grease and makes it ready for painting. As the wood was bare there was no need to do any sanding.

Next, I used wood filler to fill the holes that were left from where I had removed the pins. When the filler was dry I went over it with some sand paper to make sure it was smooth.
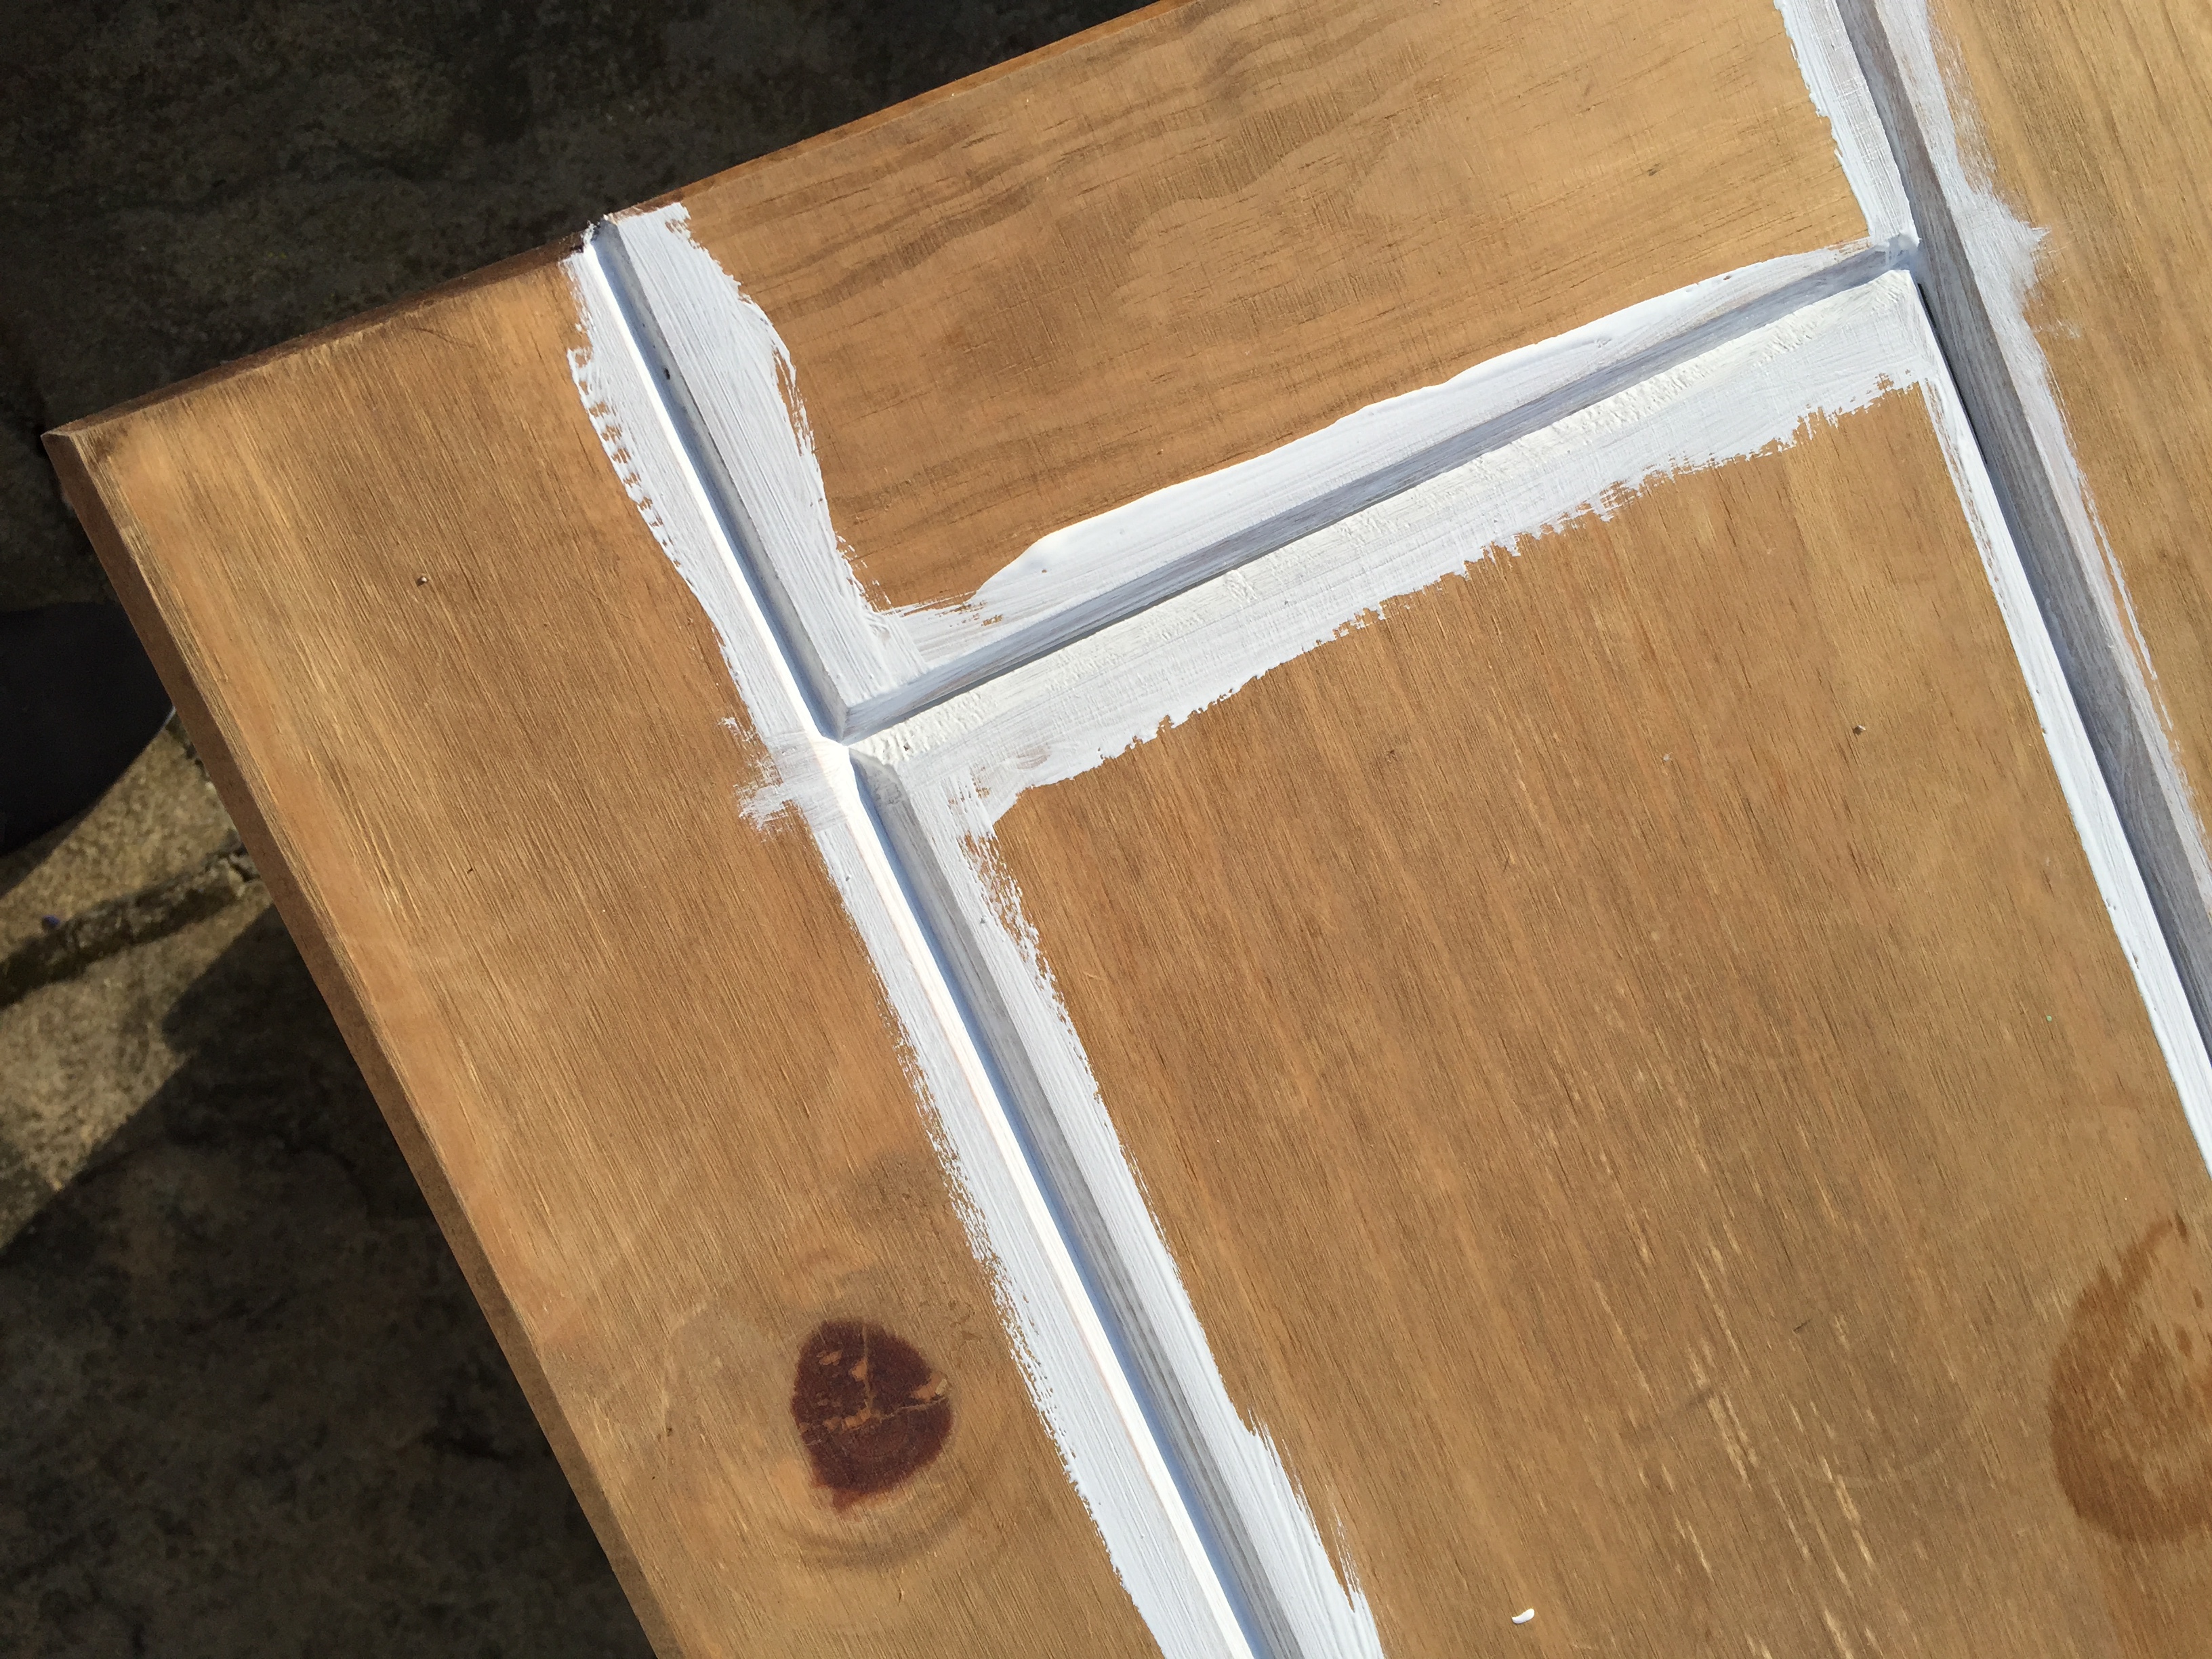
Once that was done I moved straight onto painting. Like I said I just used a plain white emulsion as my bedside table was wood. If the piece you are painting is melamine or any kind of shiny surface you would need to use the correct type of paint to prevent it from chipping and scratching off. I used a brush to paint in the crevices and then used a small foam roller on the flat surfaces to give a smooth, brushstroke free finish. I gave the cabinet, door and drawer three coats of paint, letting each coat dry completely before painting the next. I then put the door back on and re added the hardware as I wasn’t sure if I was changing it at this point.
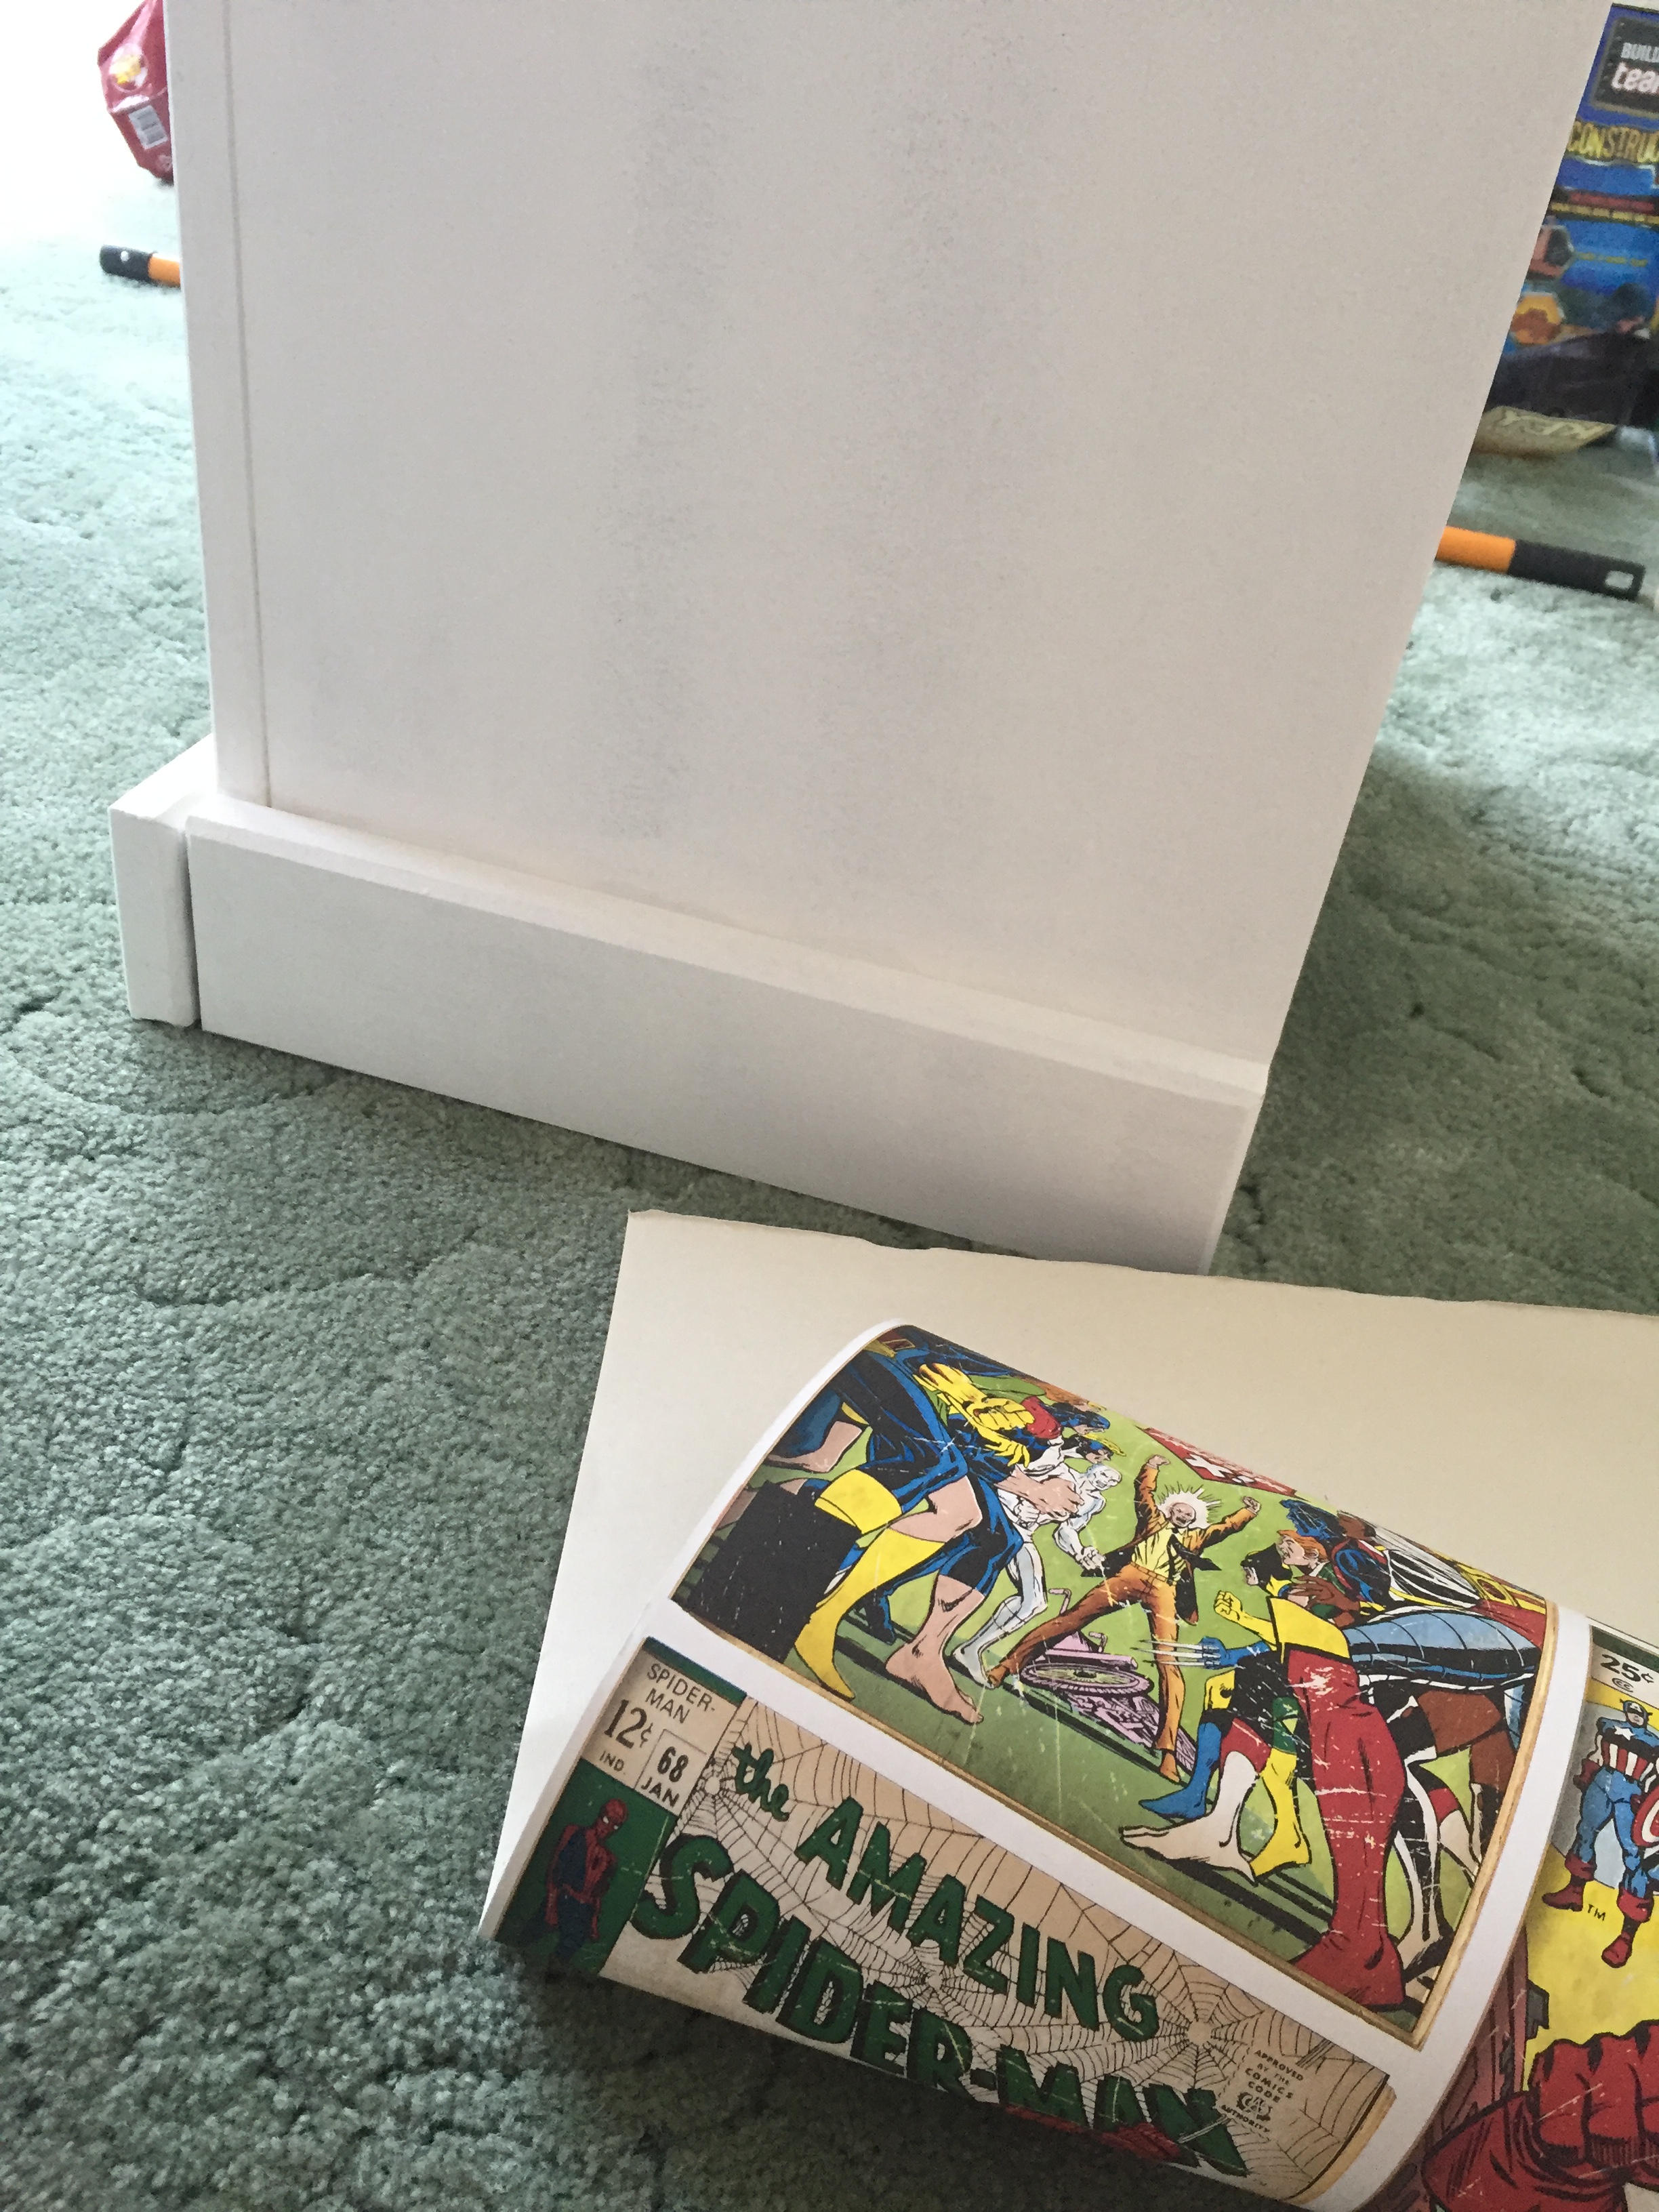
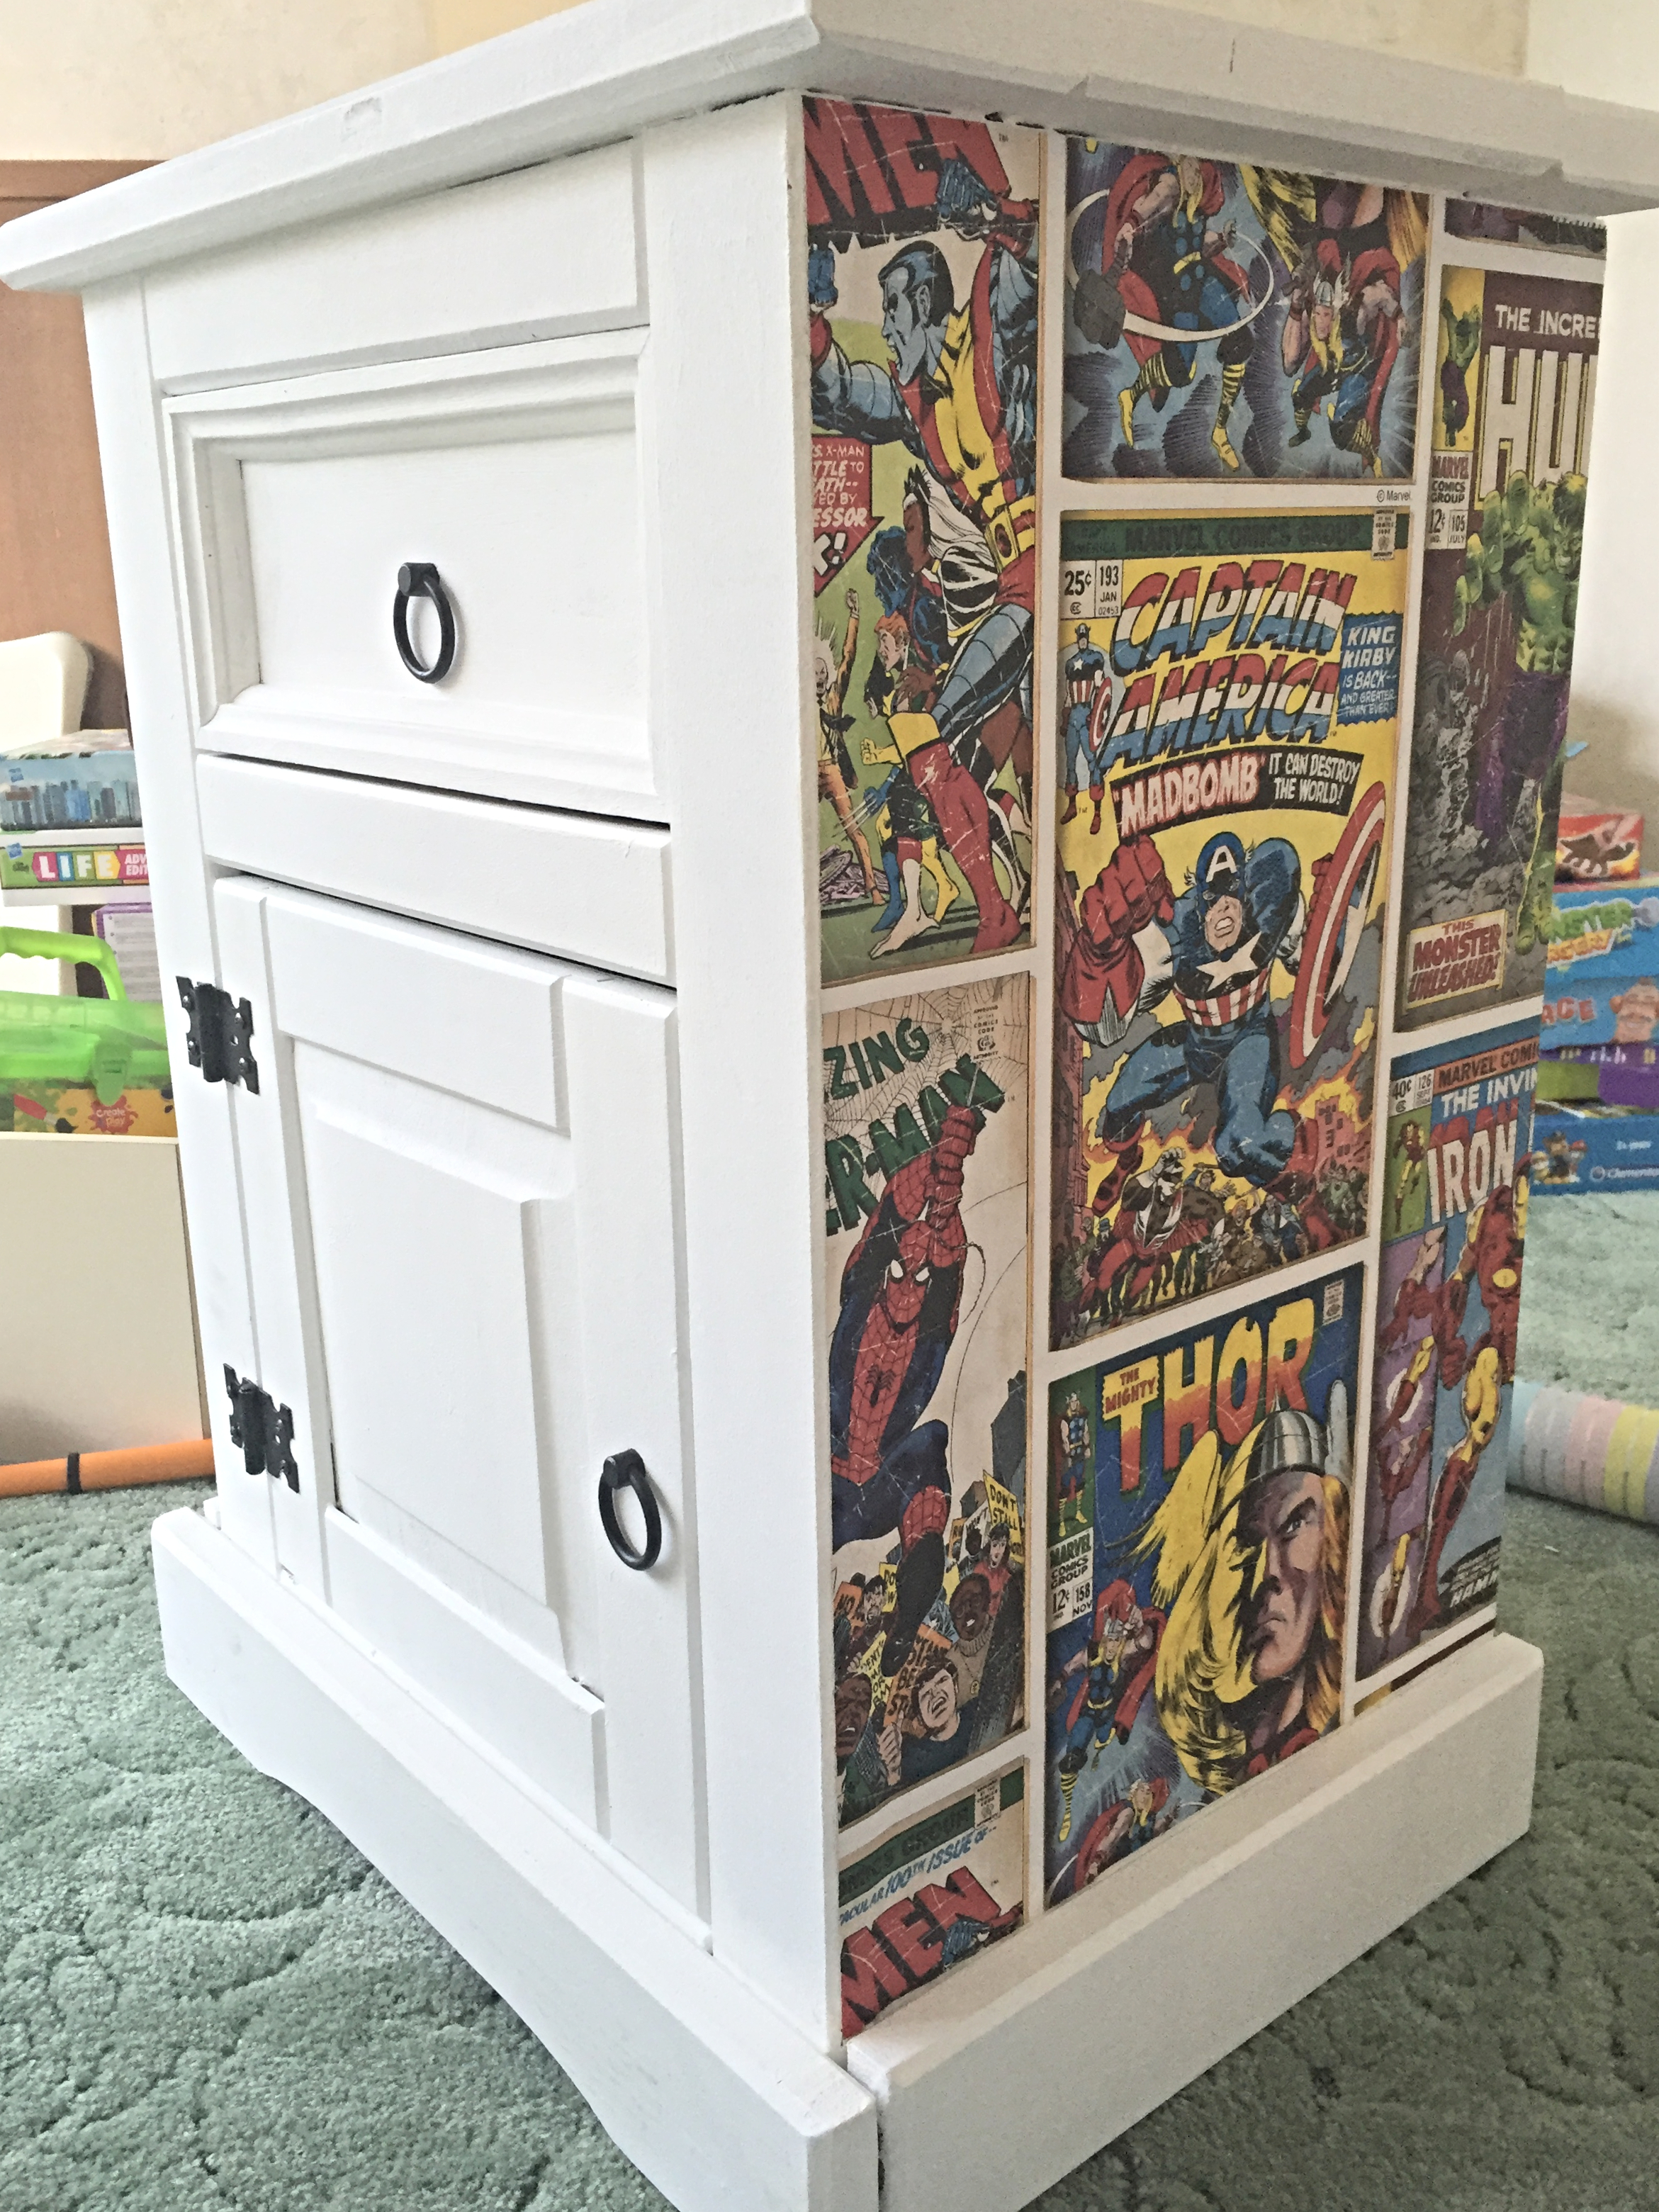
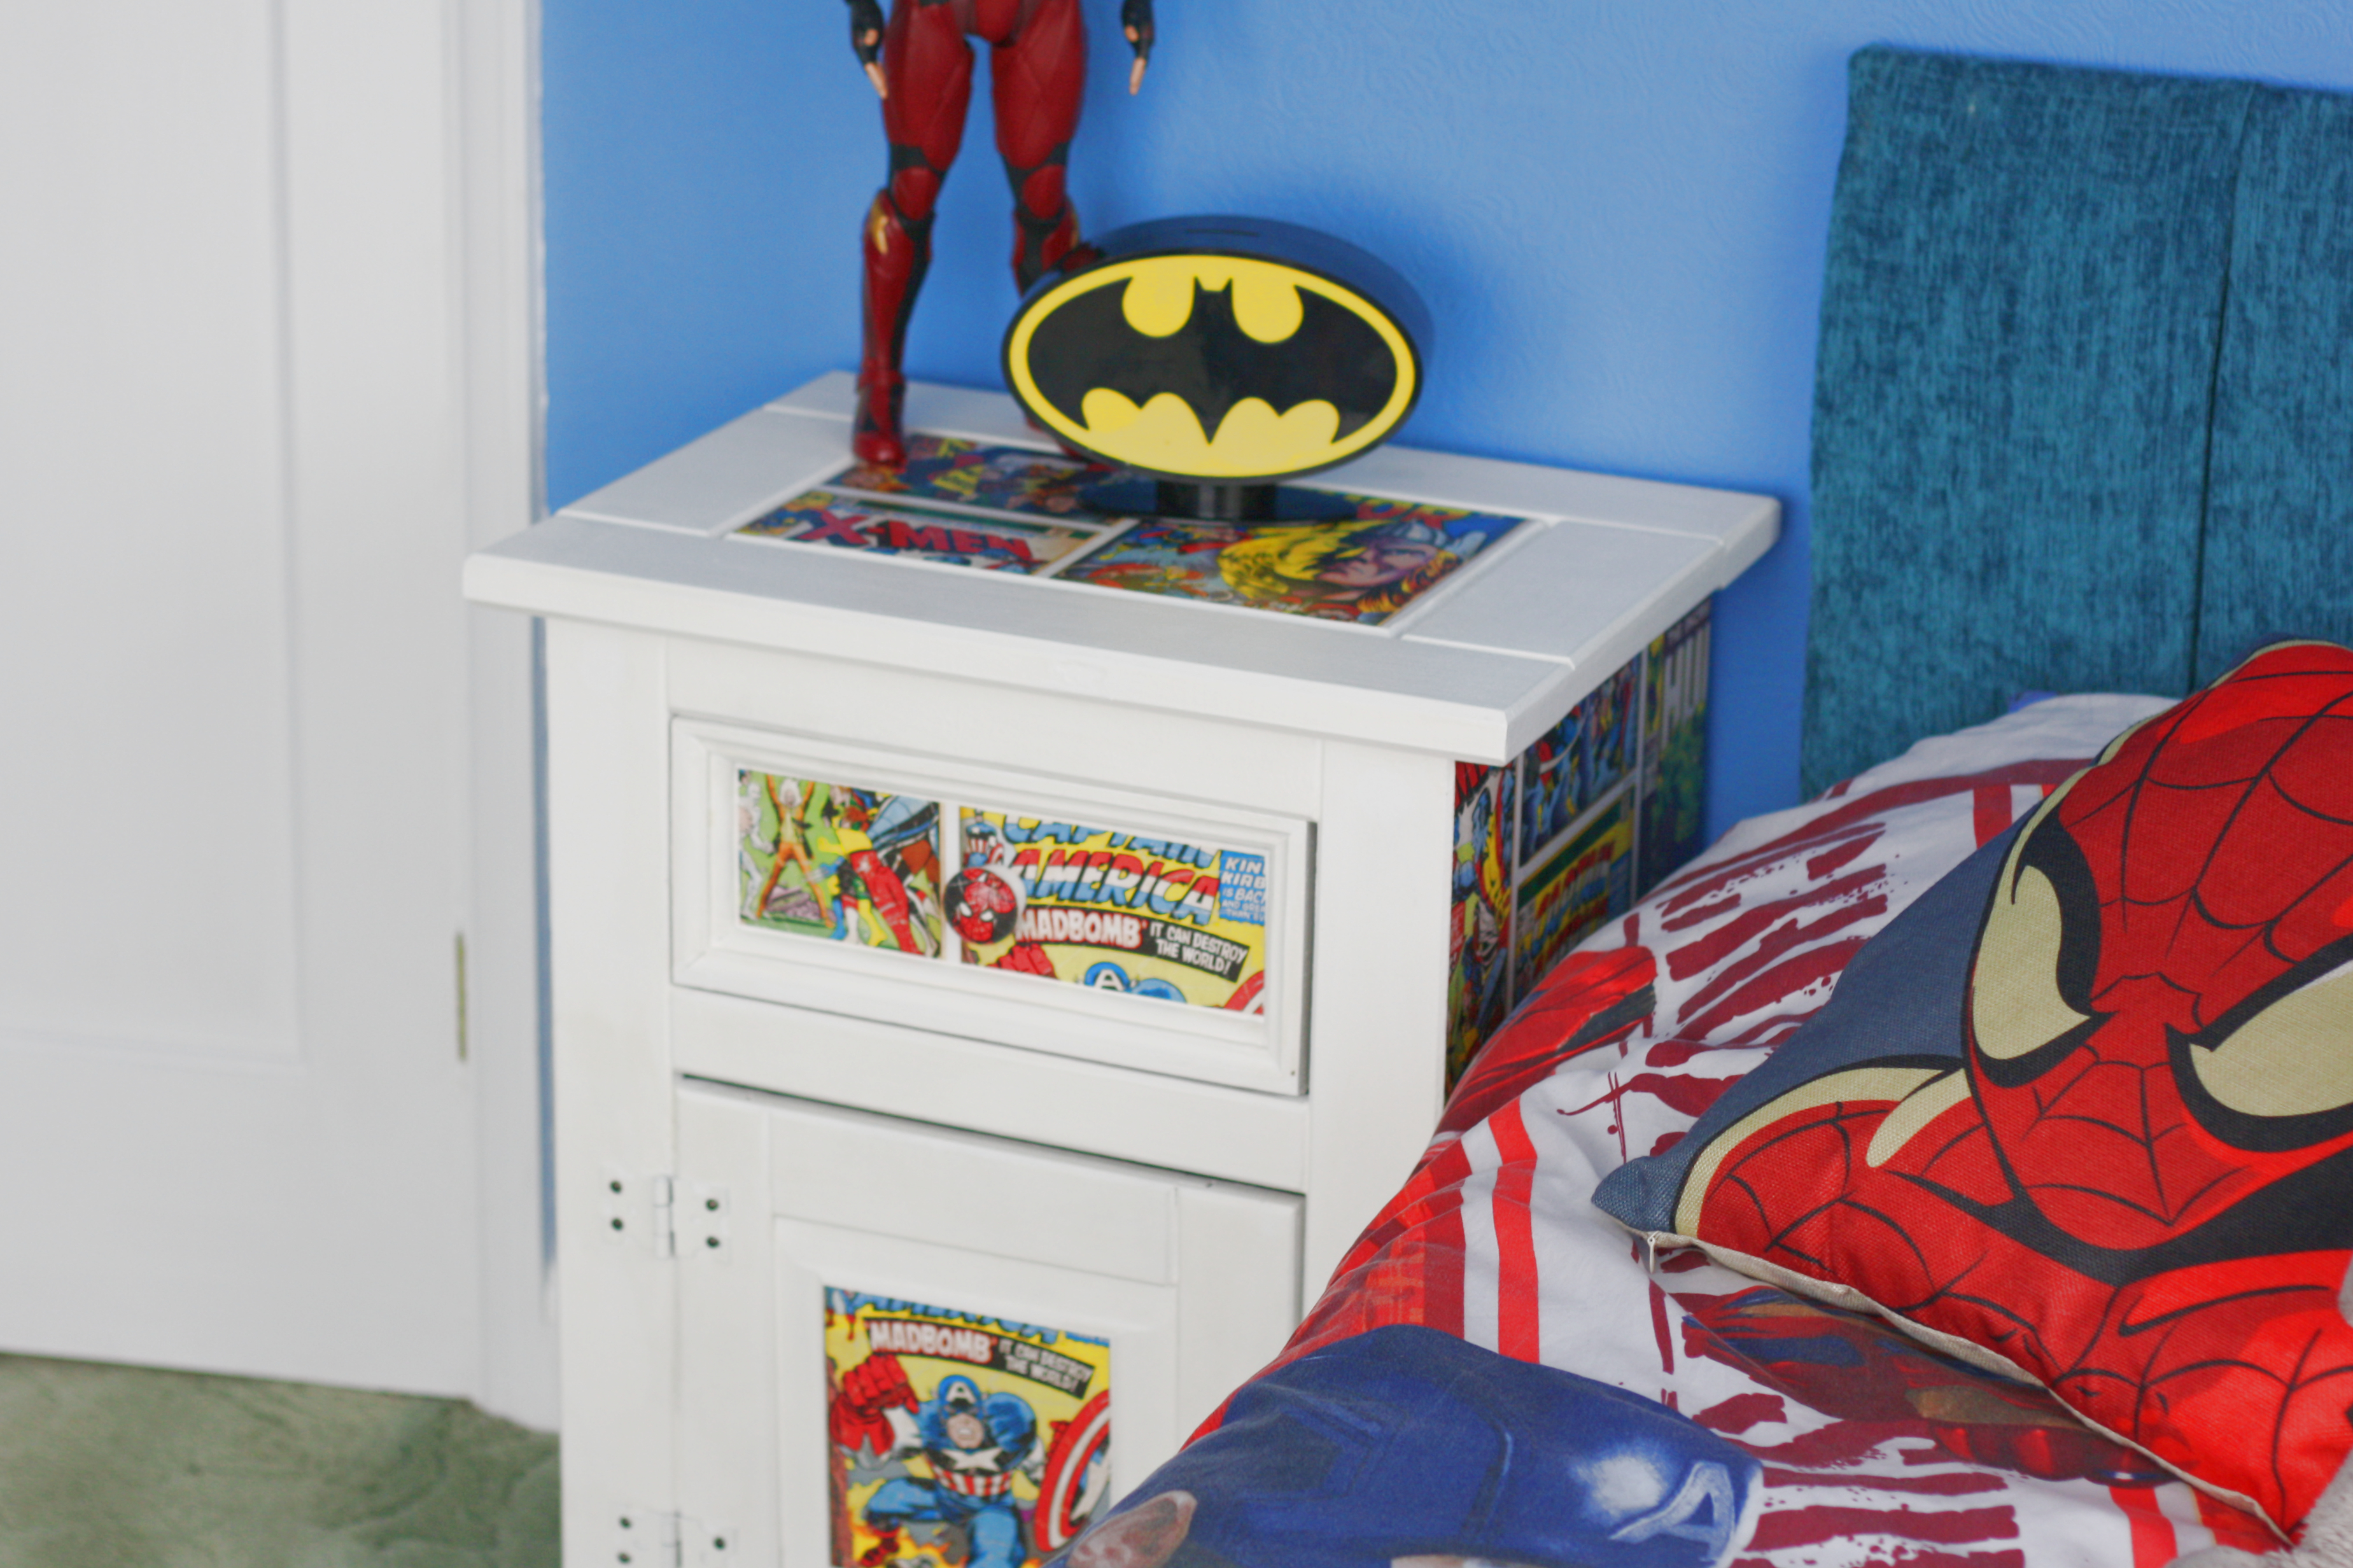
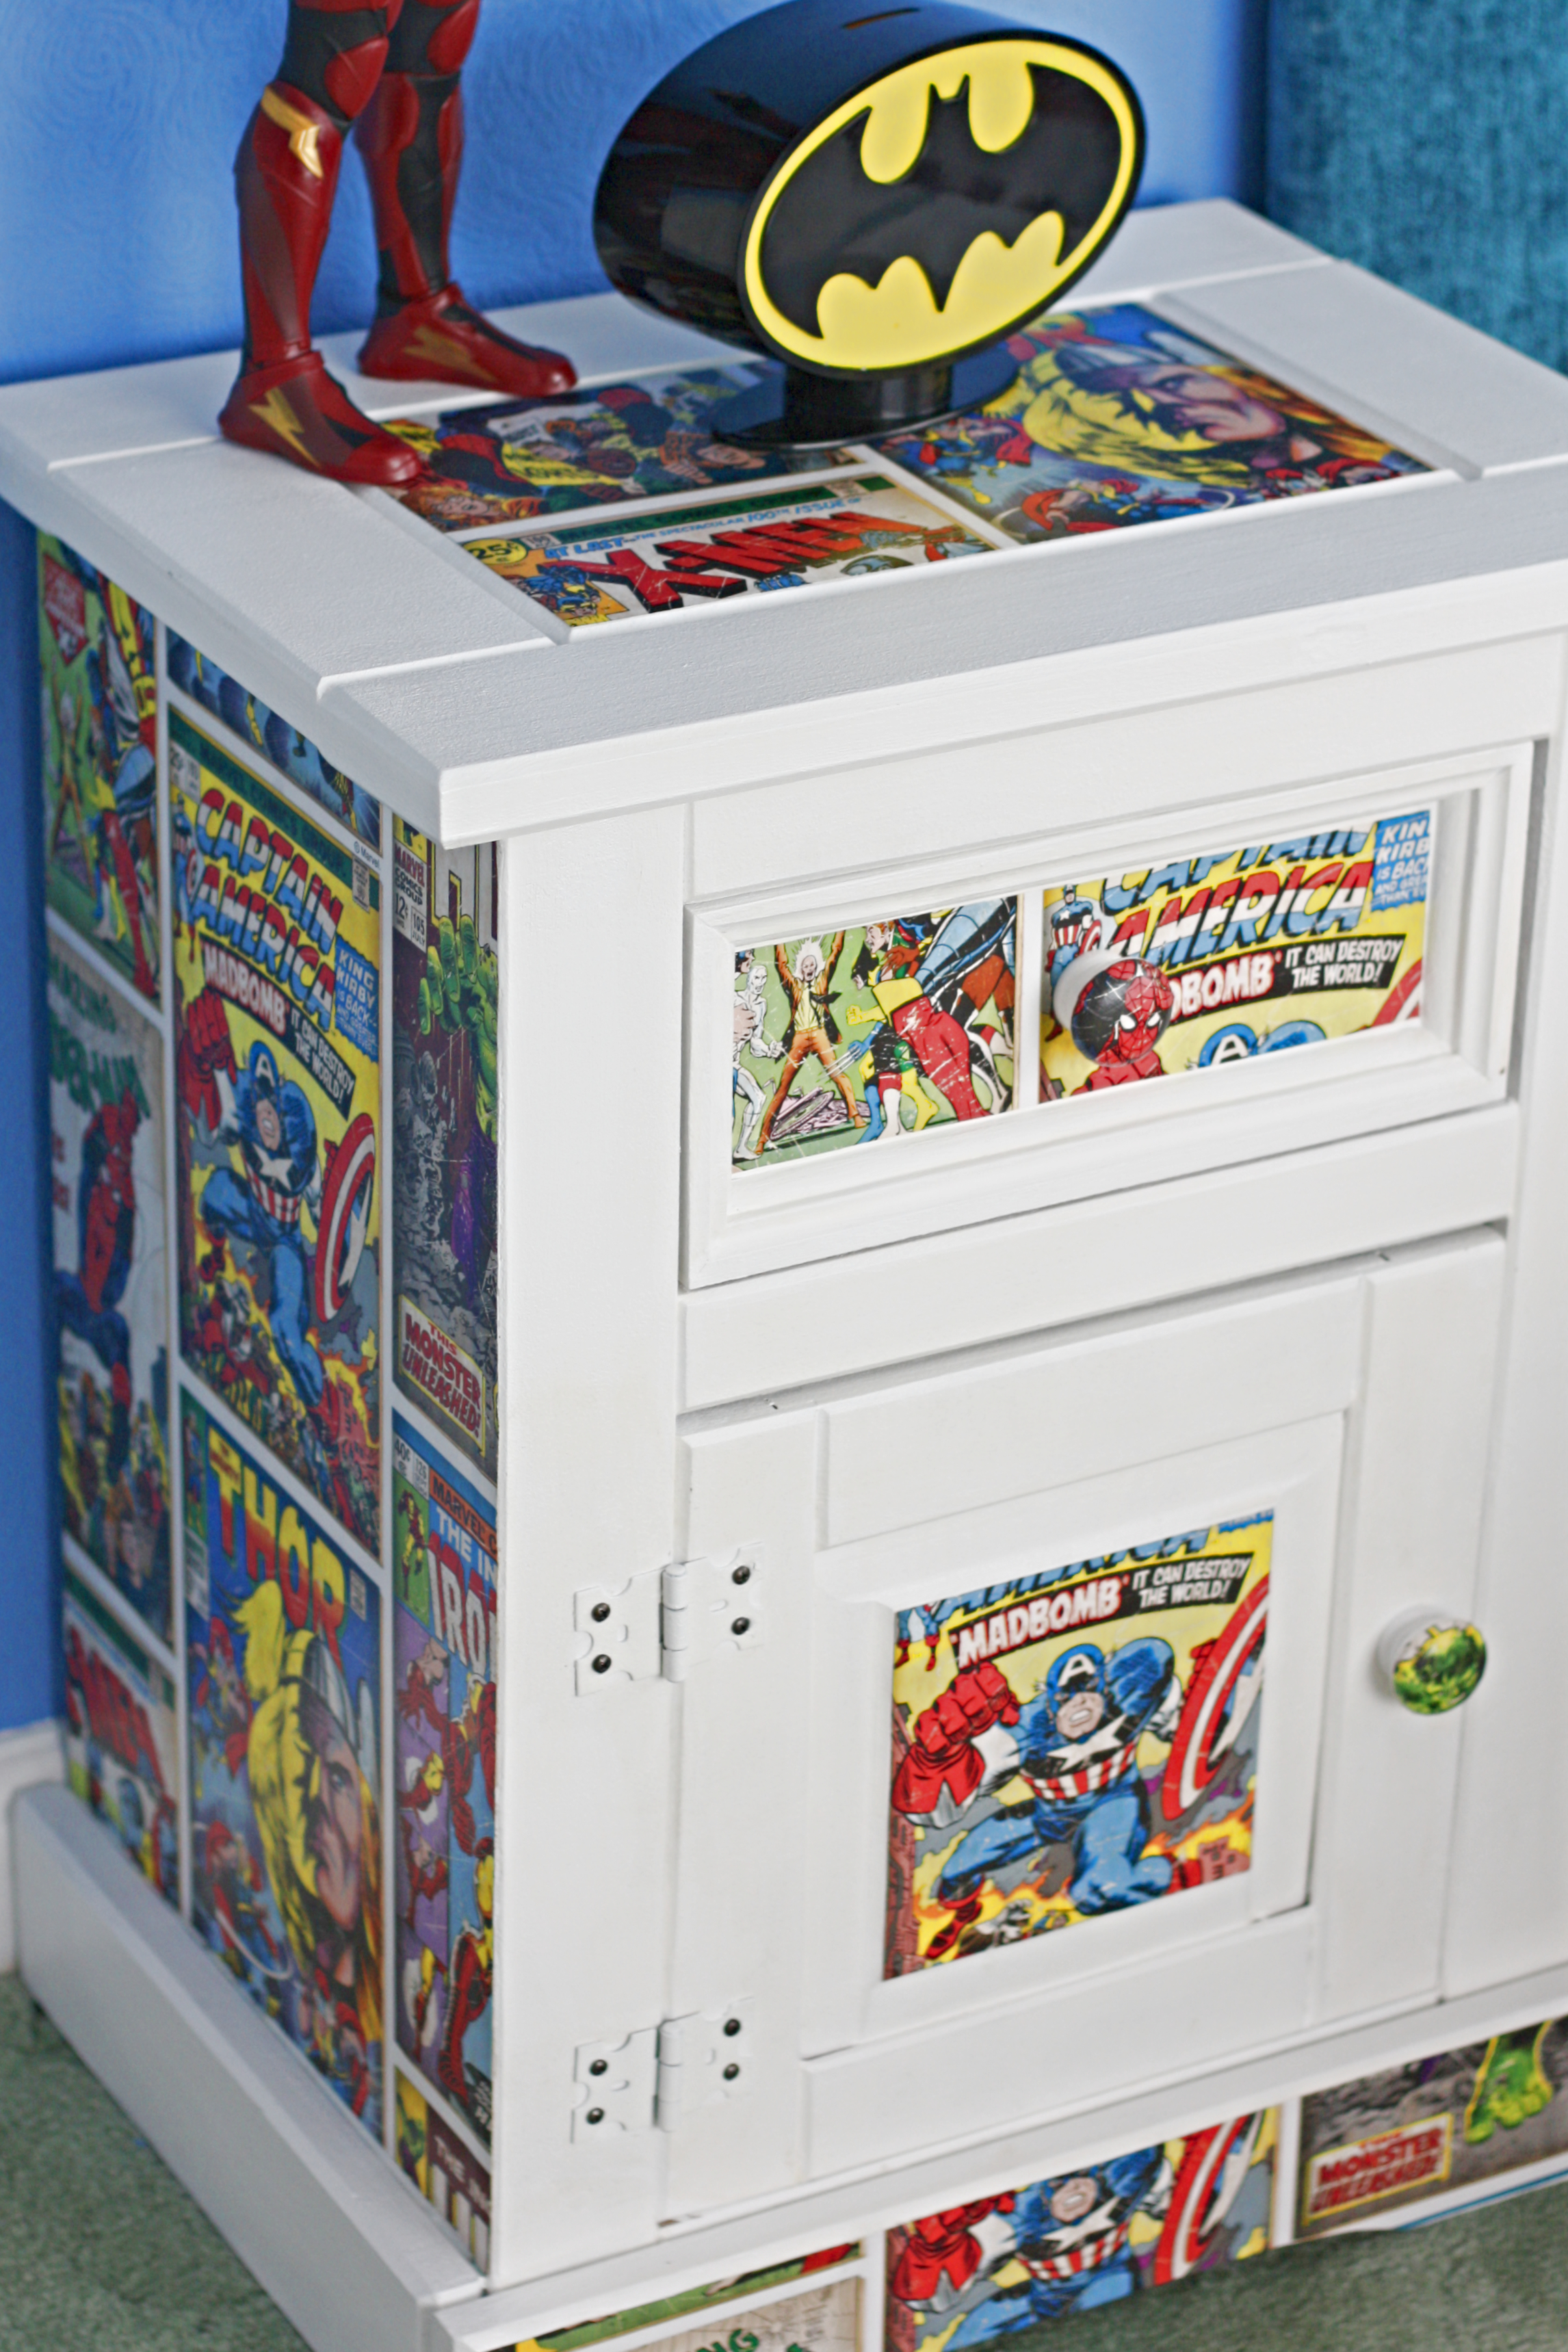
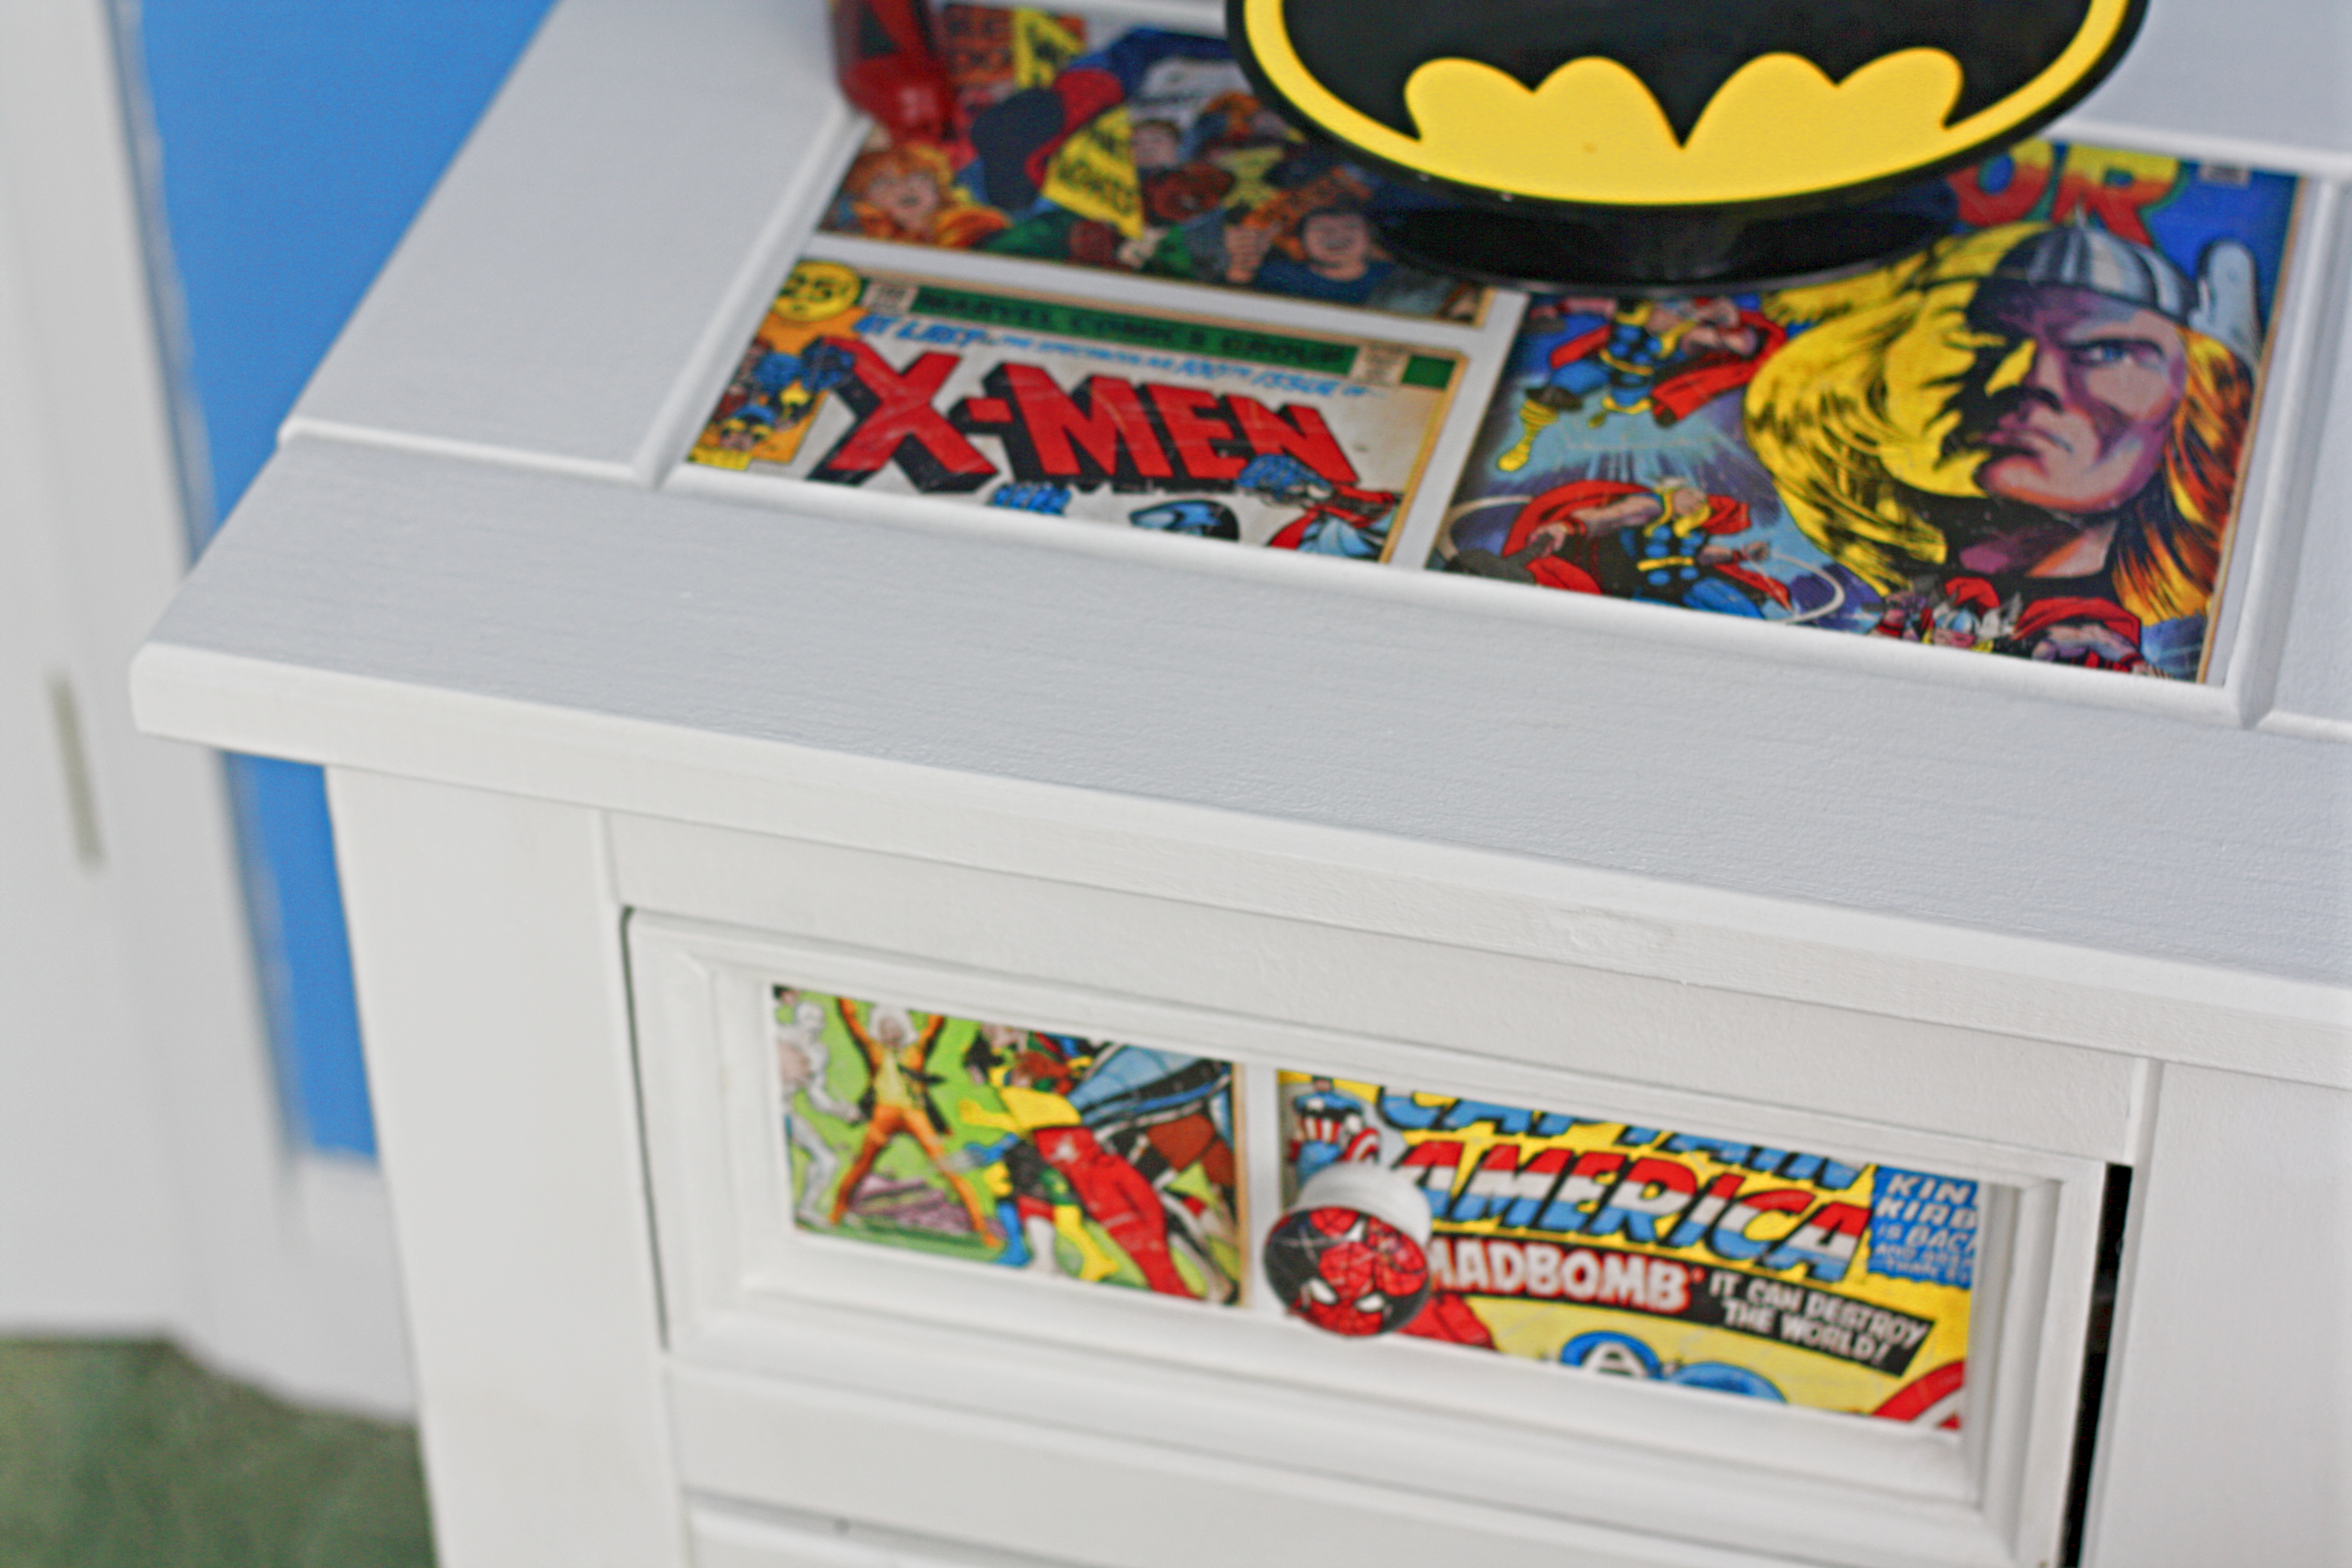
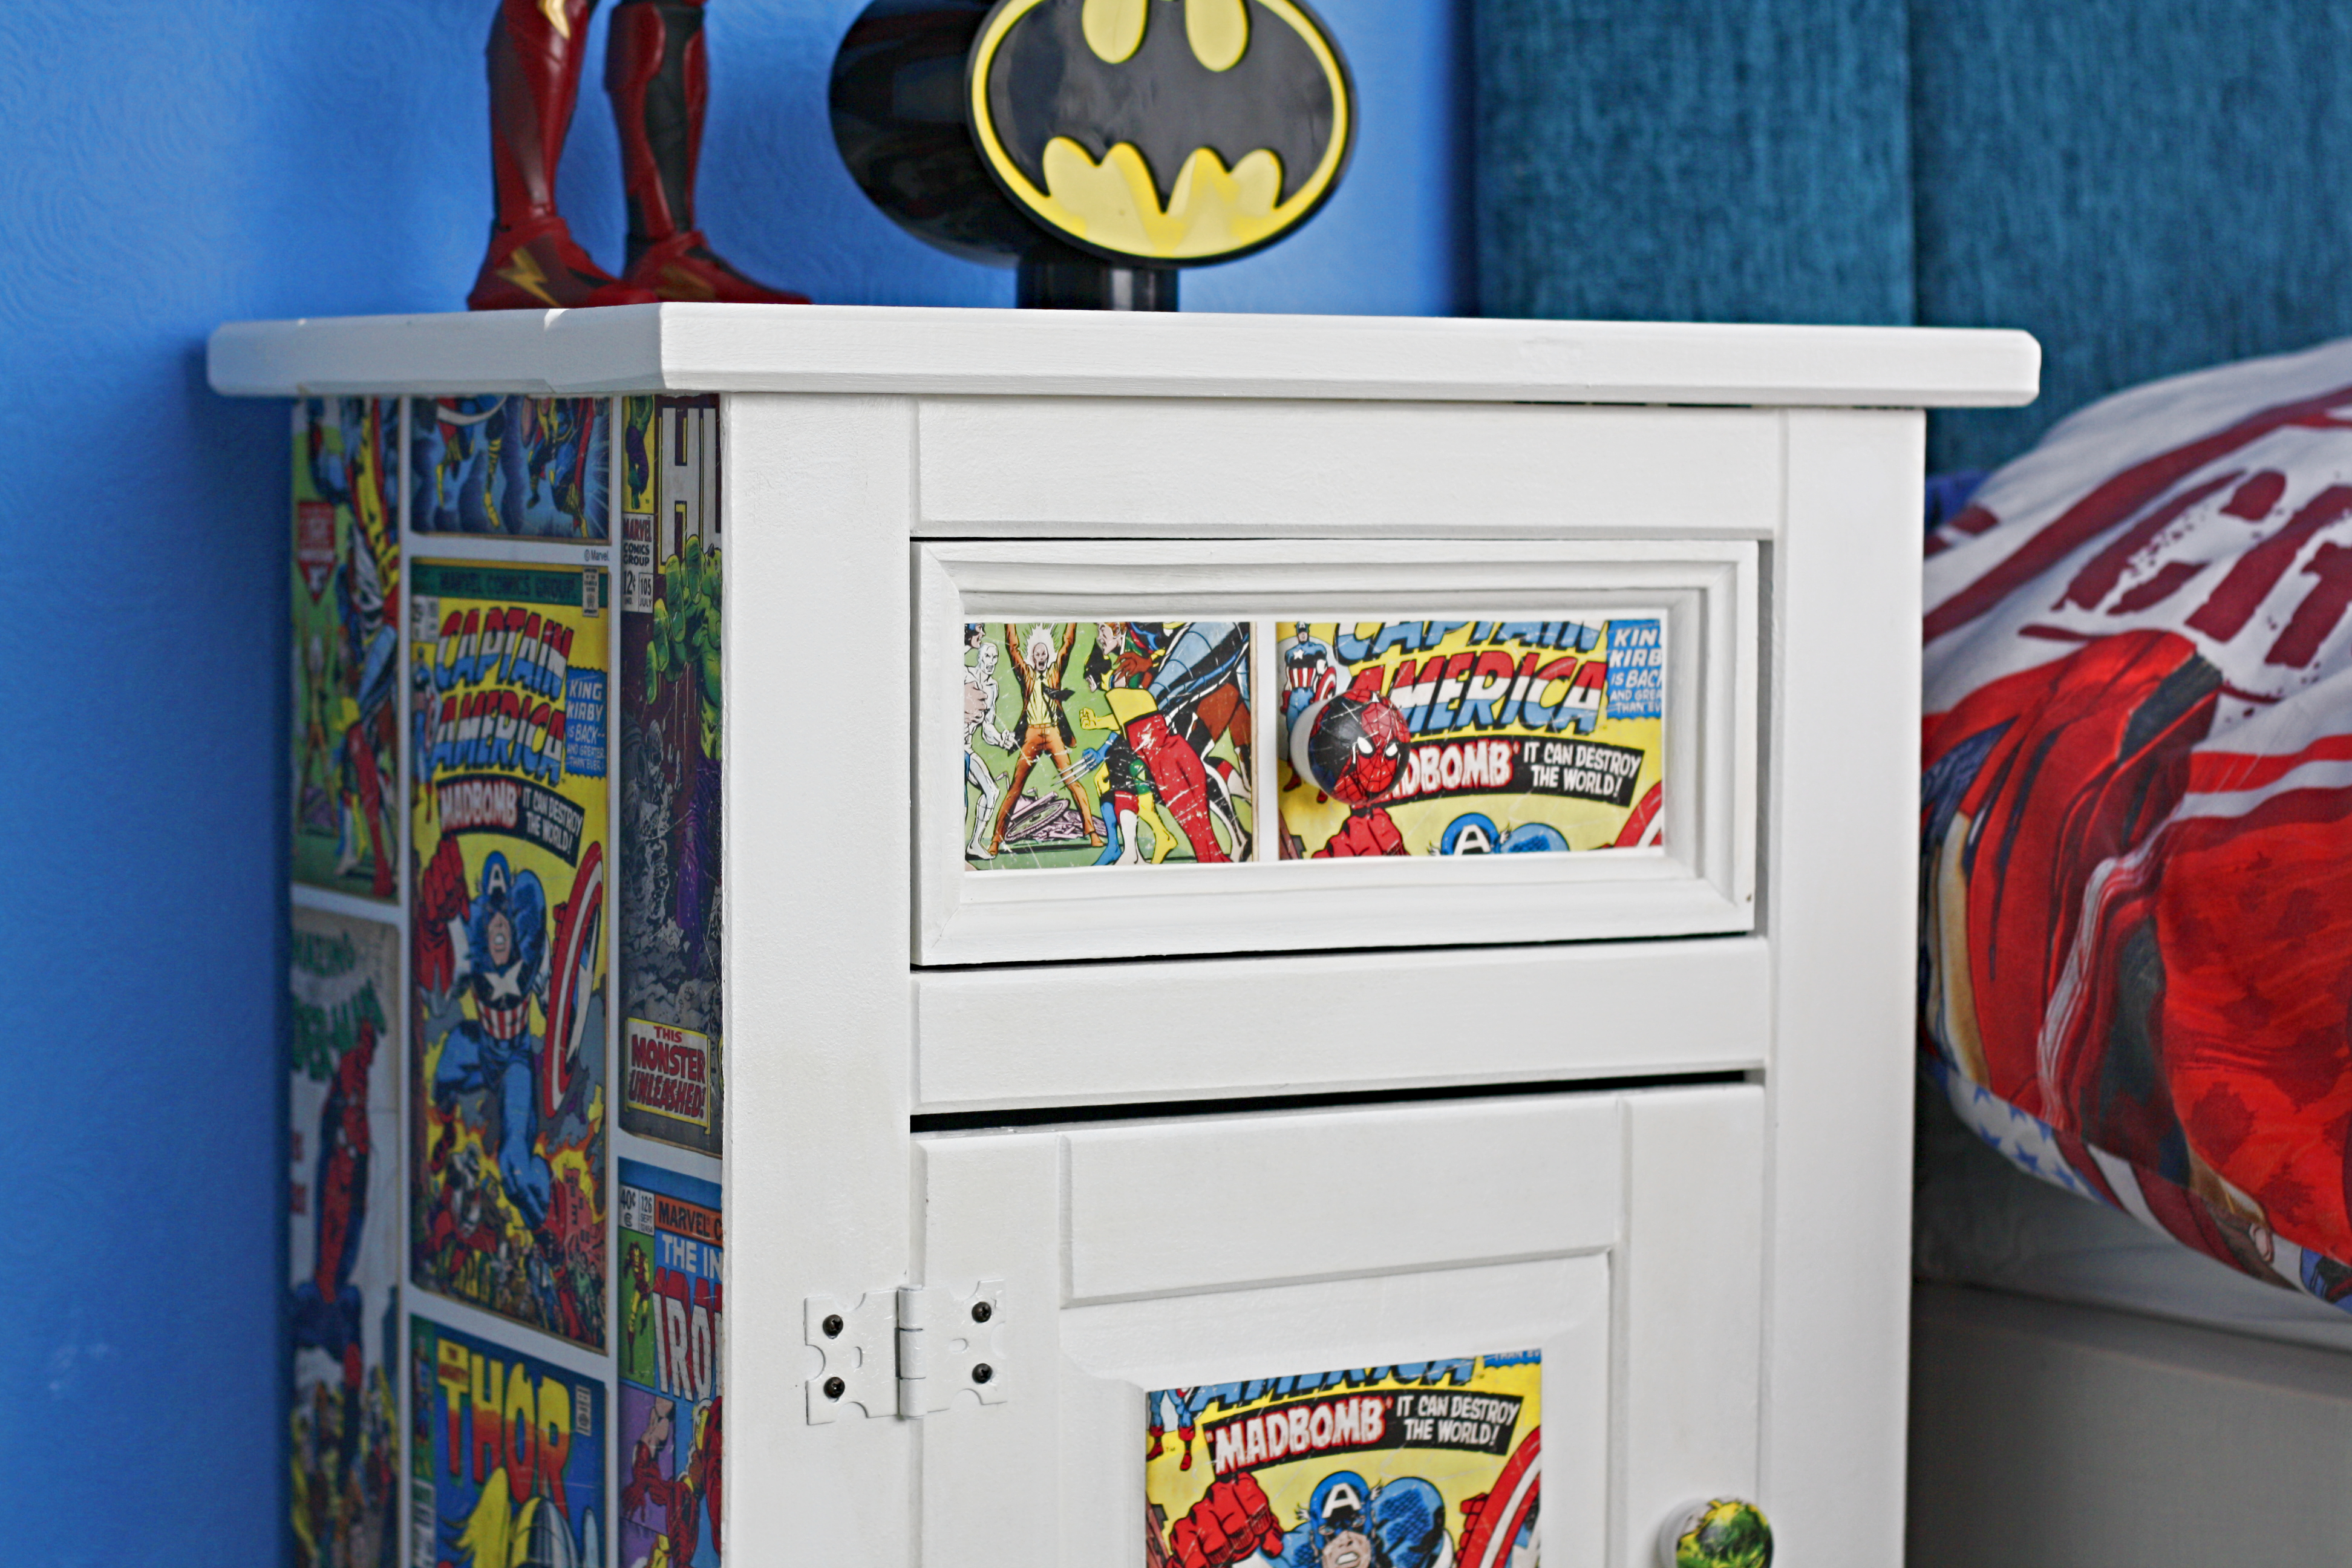
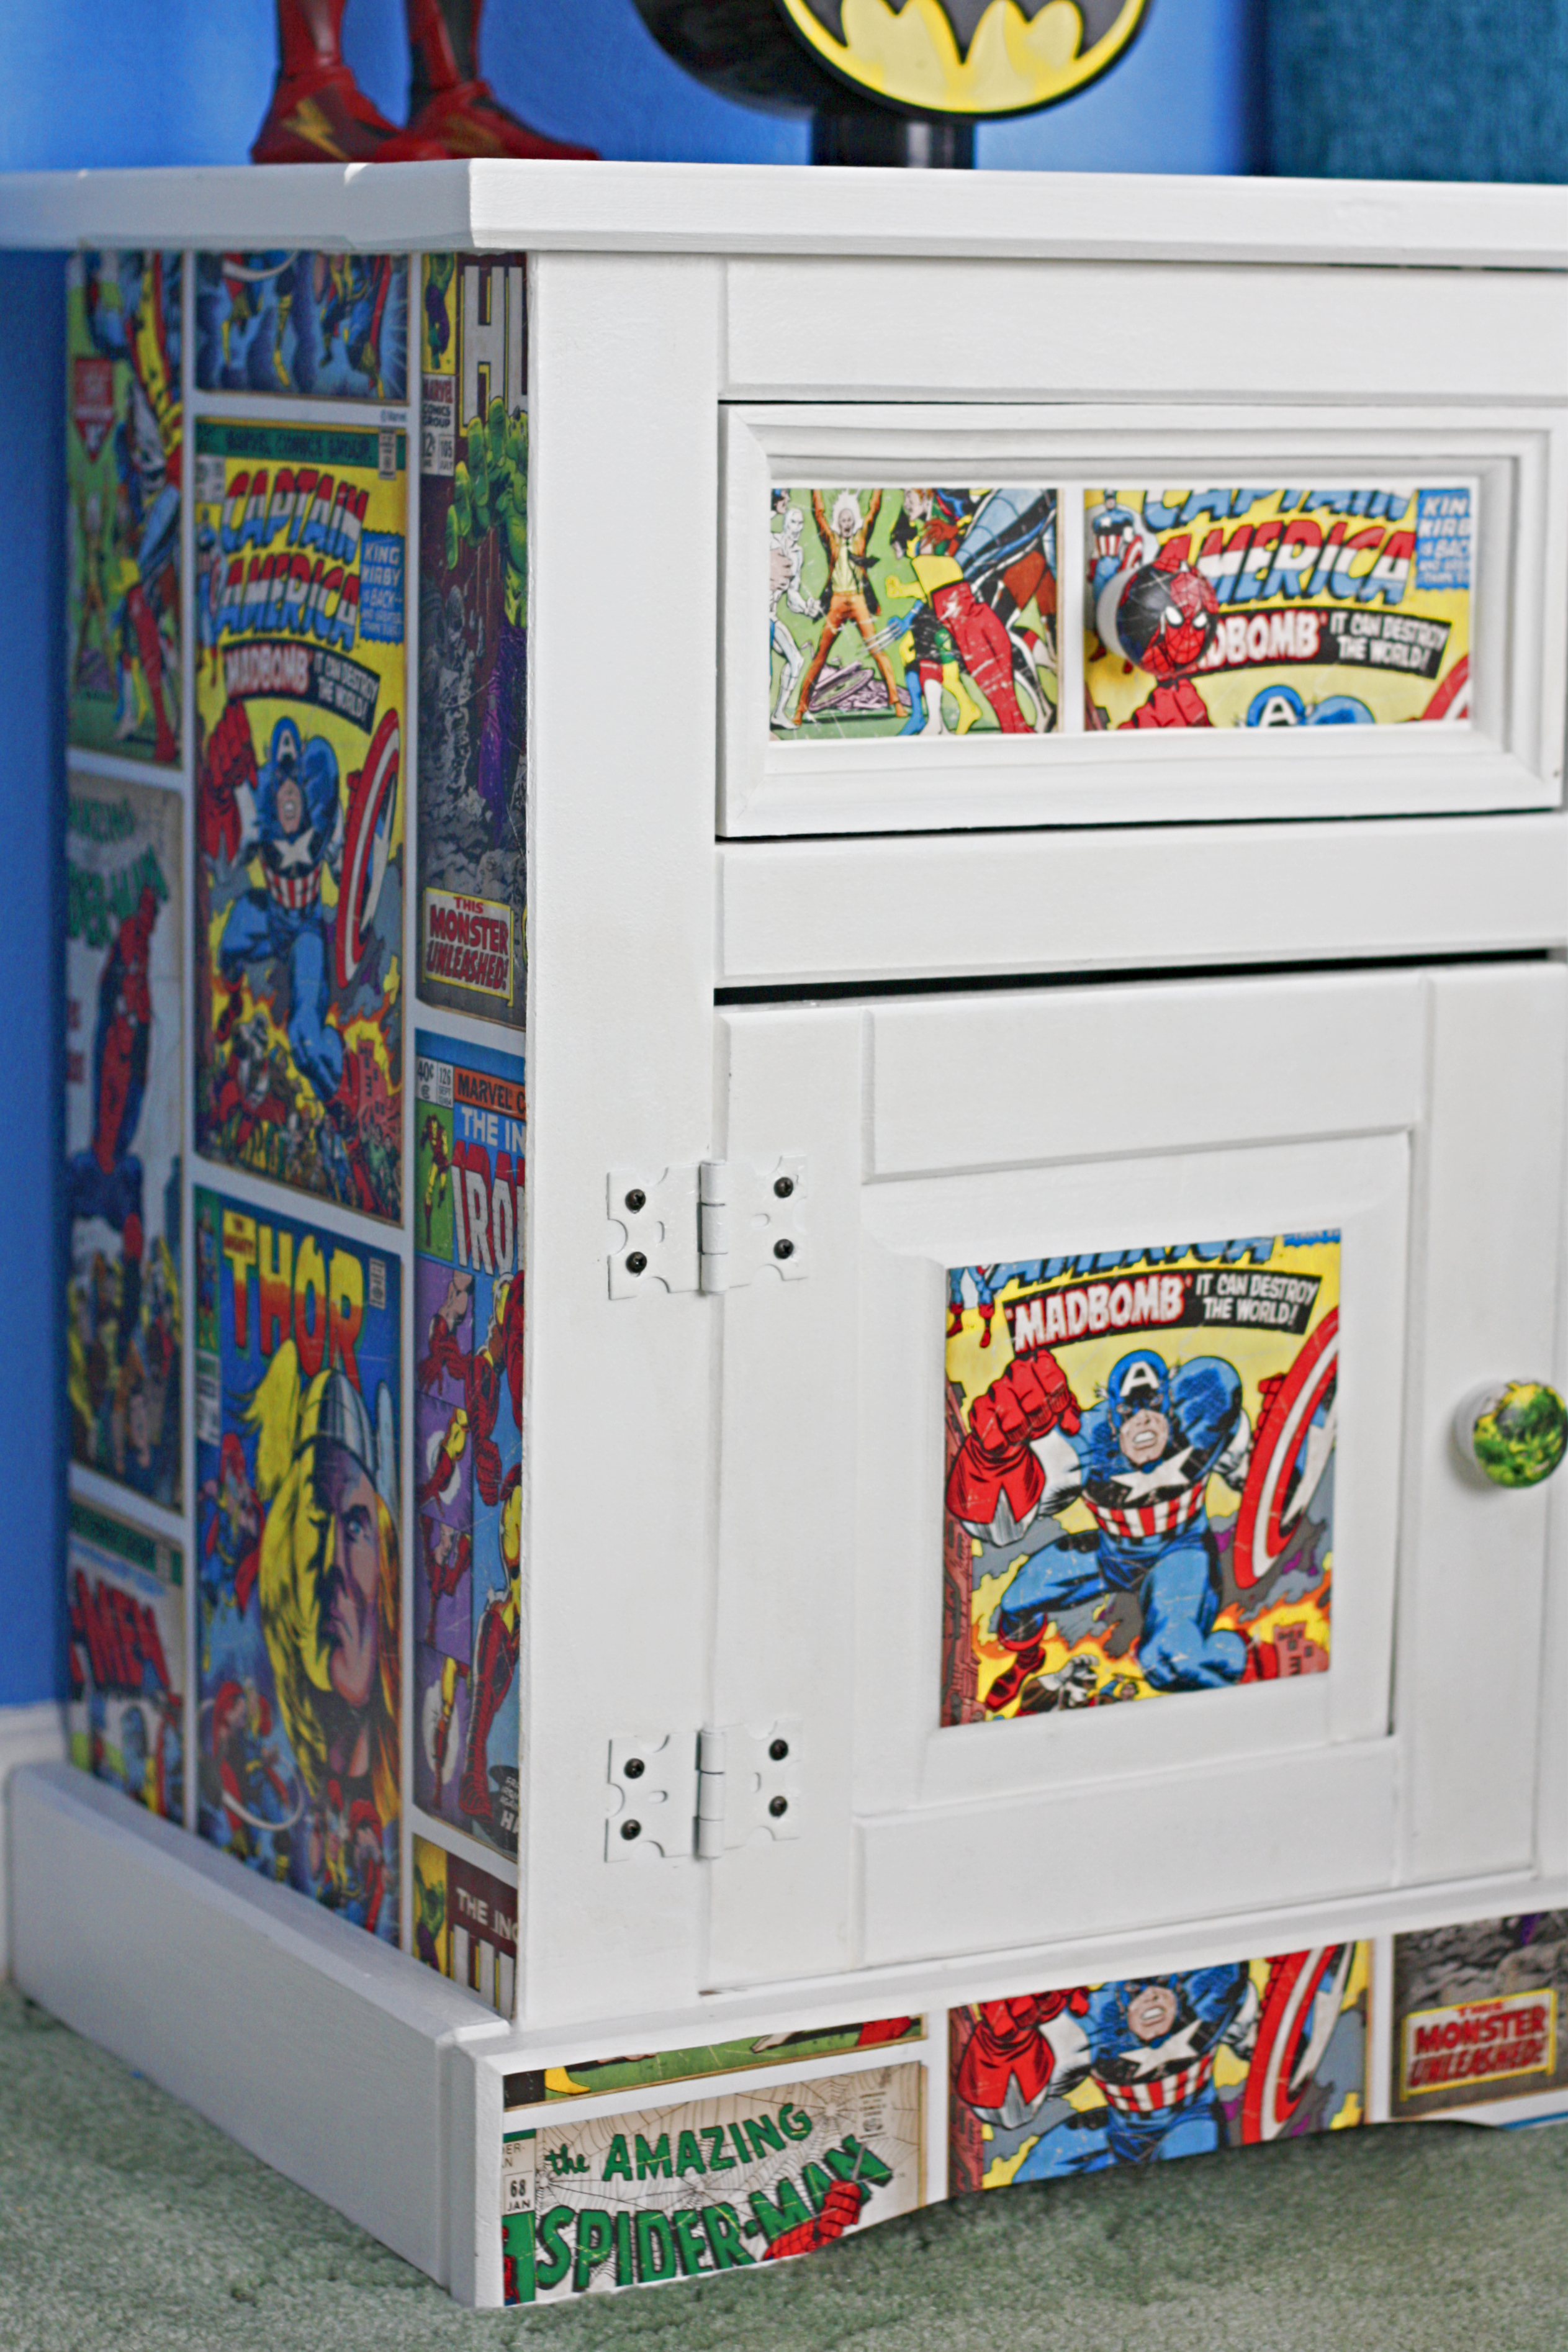
To make the bedside table fit in with the super hero theme I wanted to add this wallpaper (I’ll add the links to everything I used further down the post!) to the sides. I measured the sides of the cabinet and then measured and cut out the piece of wallpaper I would need. I fixed this to the sides with regular wallpaper paste the same way I would if I was papering a wall.
Here is what the Super Hero Bedside Table Upcycle looked like at this point. I wasn’t 100% happy with it, I felt like it needed something on the front so I had a look online for some super hero themed handles. All of the ones I could find were on etsy and some kind of decoupaged handles so I decided to make my own. (I will add the tutorial for how I made these next week!) I also wasn’t happy with the black hinges so I took these back off and sprayed them with white radiator paint, it took three coats to get a solid white colour.
I do have a picture of the next step but for some reason it won’t let me upload it!!! So at this point it looked the same as above but with the super hero handles, and the white hinges instead of black. The bedside table was still not giving me the wow factor that I wanted, so I went back and added wallpaper to the drawer front, top and cupboard door front. Finally I was happy with how it looked so I gave the whole thing a coat of clear satin varnish to seal everything and my Super Hero Bedside Table was complete! Here are some links to items that I used, I’ve included a link to the actual wallpaper I used in the US links but as this is a little pricey I’ve also added a link to a similar wallpaper.
UK Links:
US Links:
The finished Super Hero Bedside Table
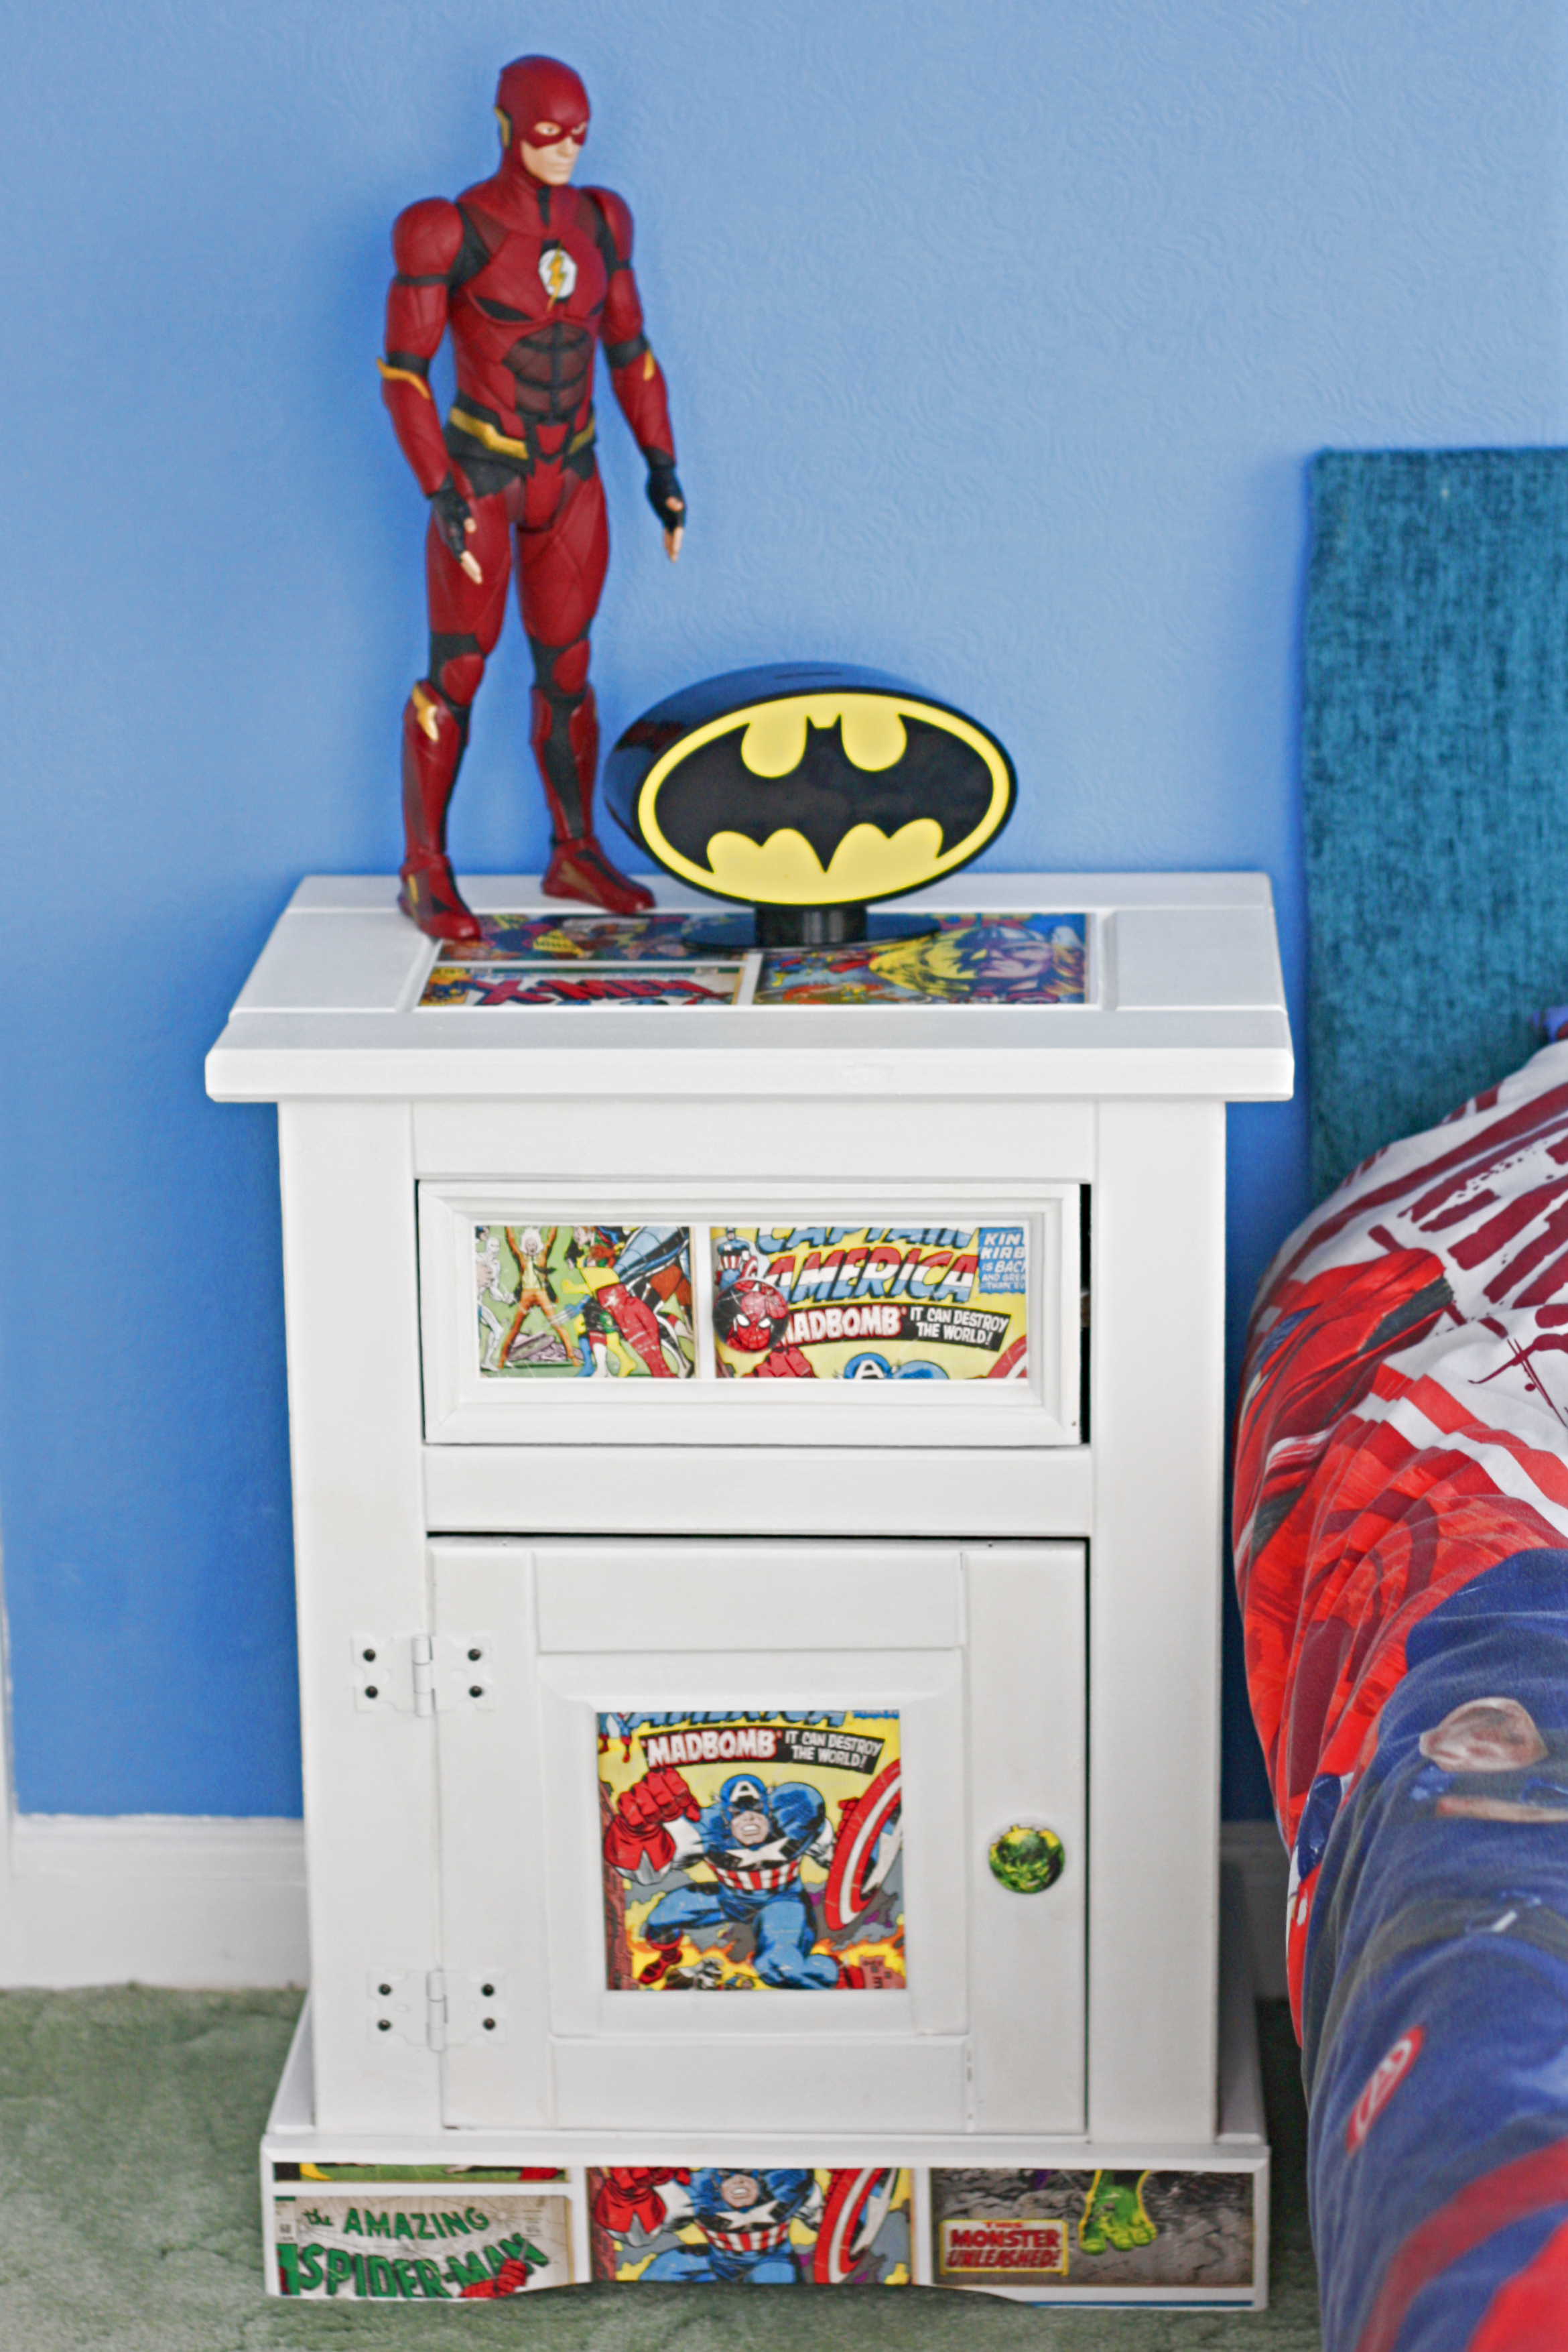
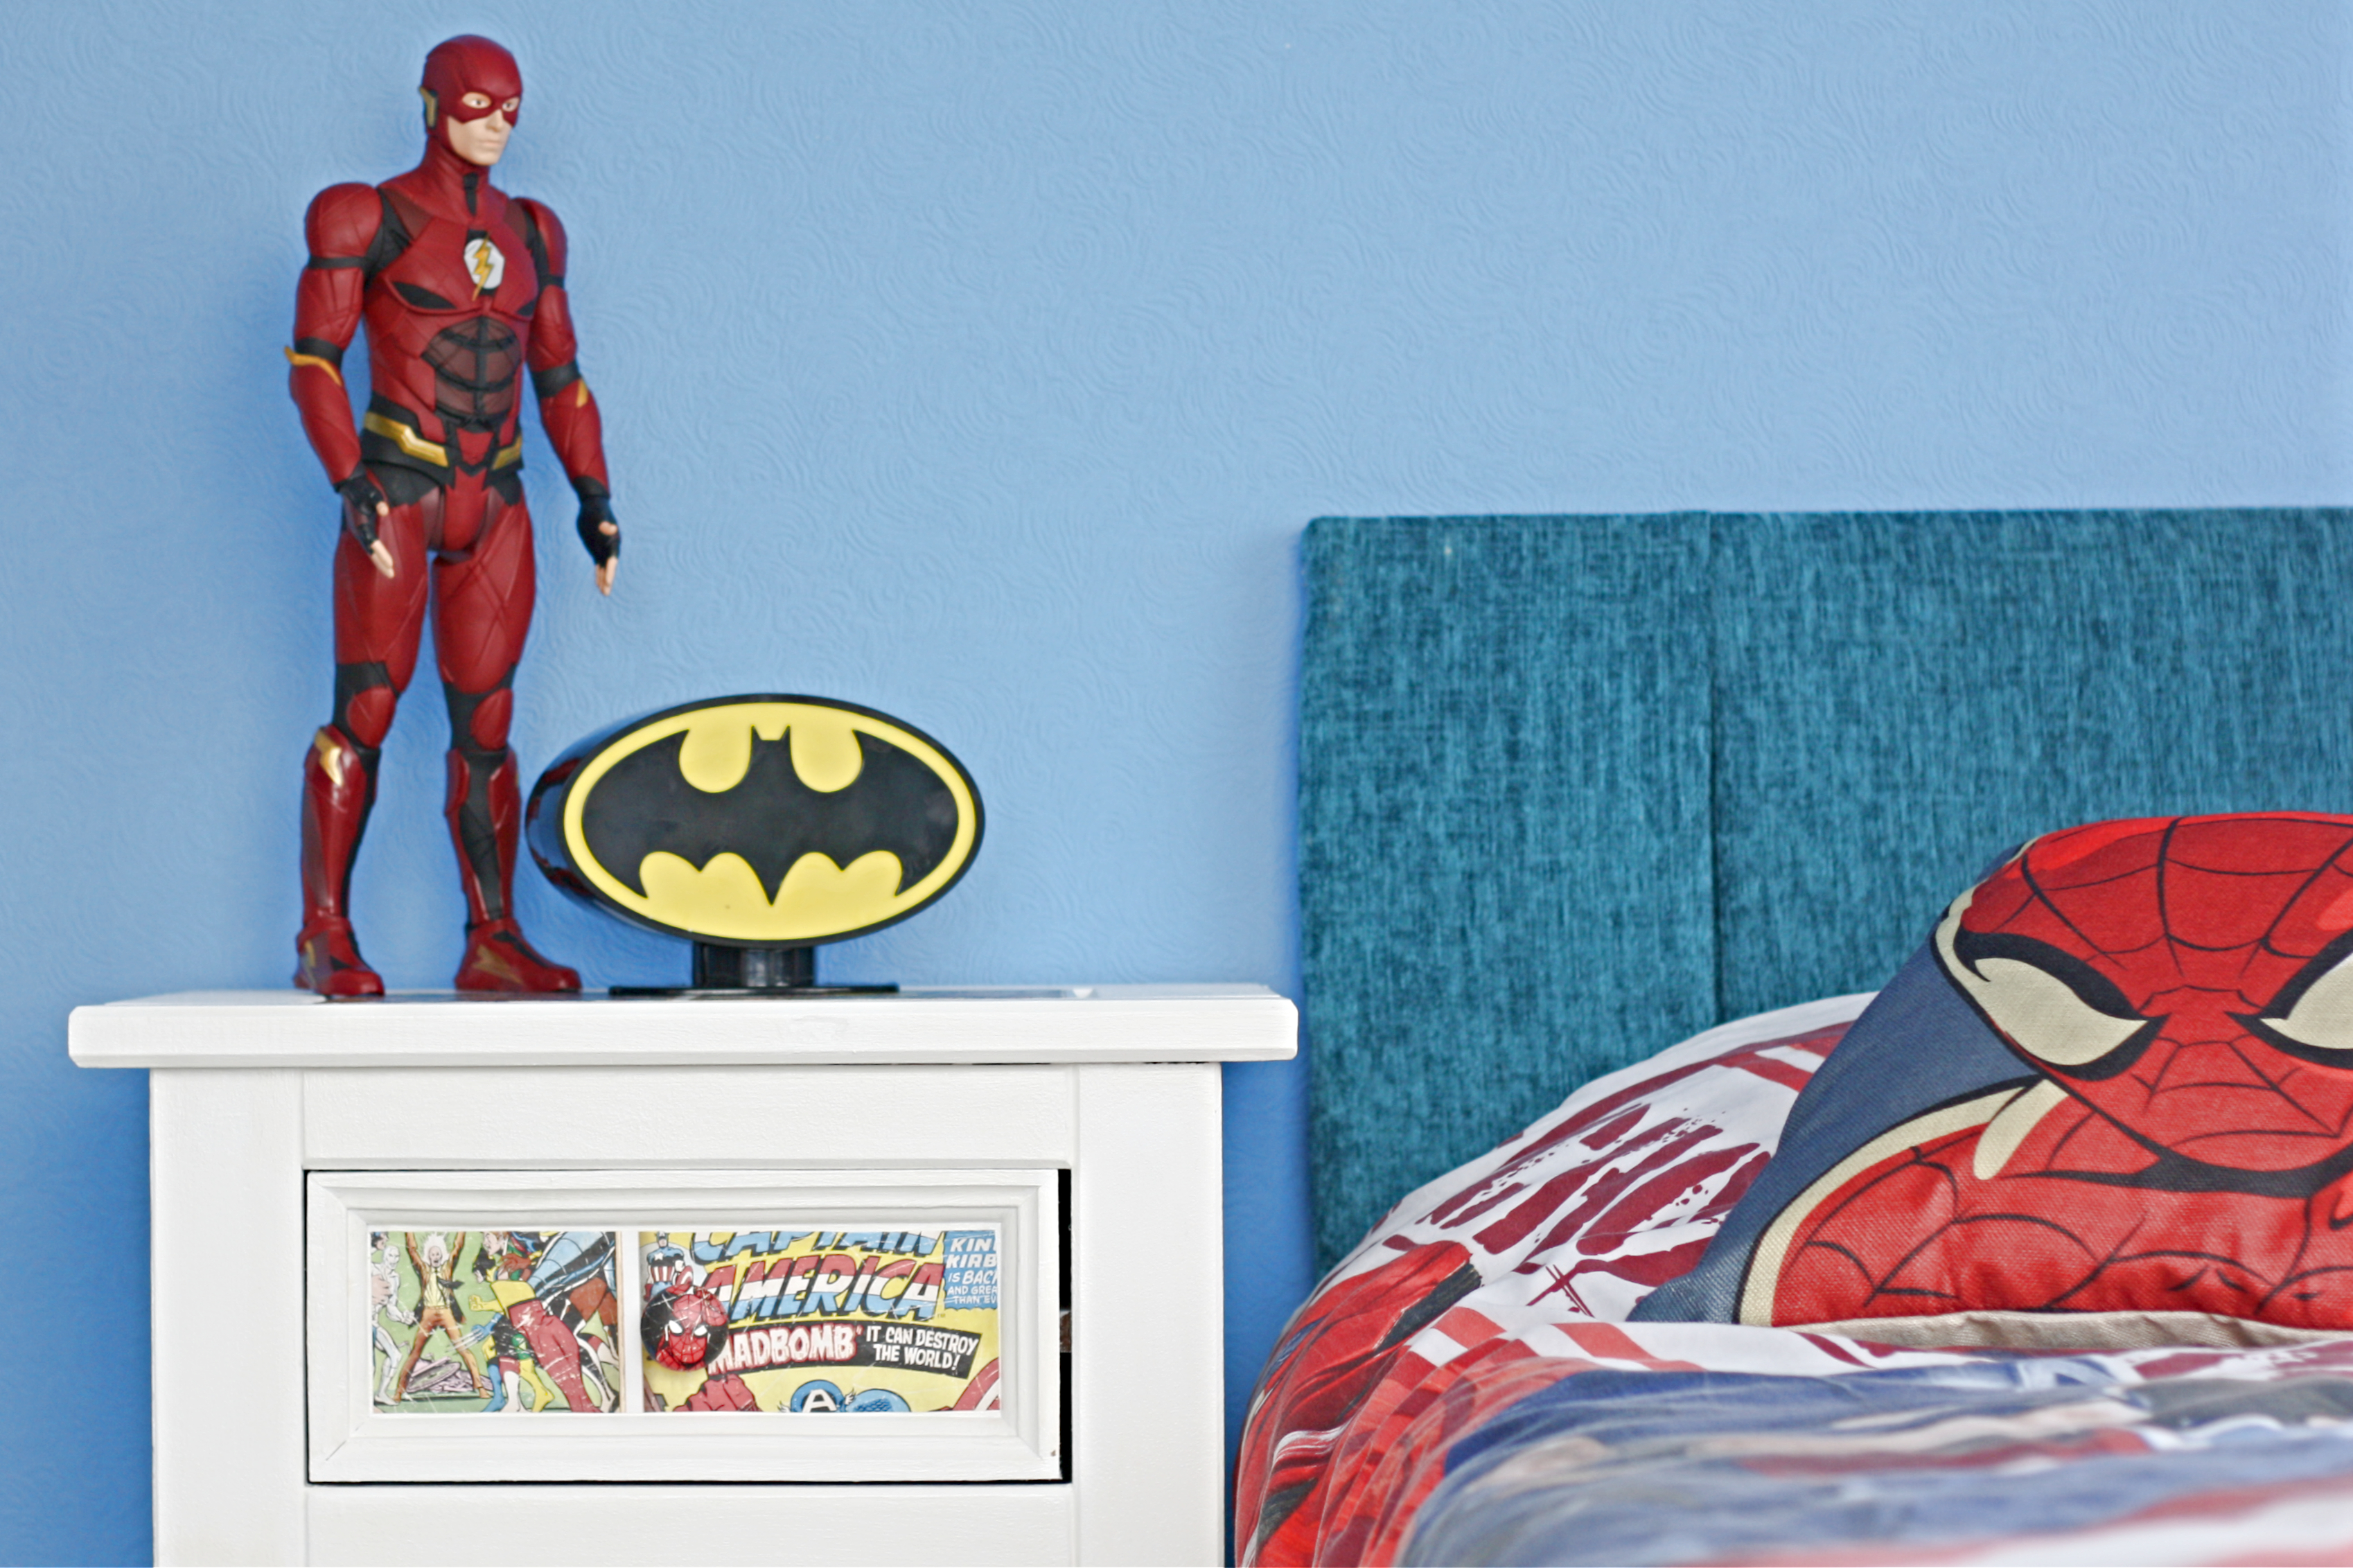

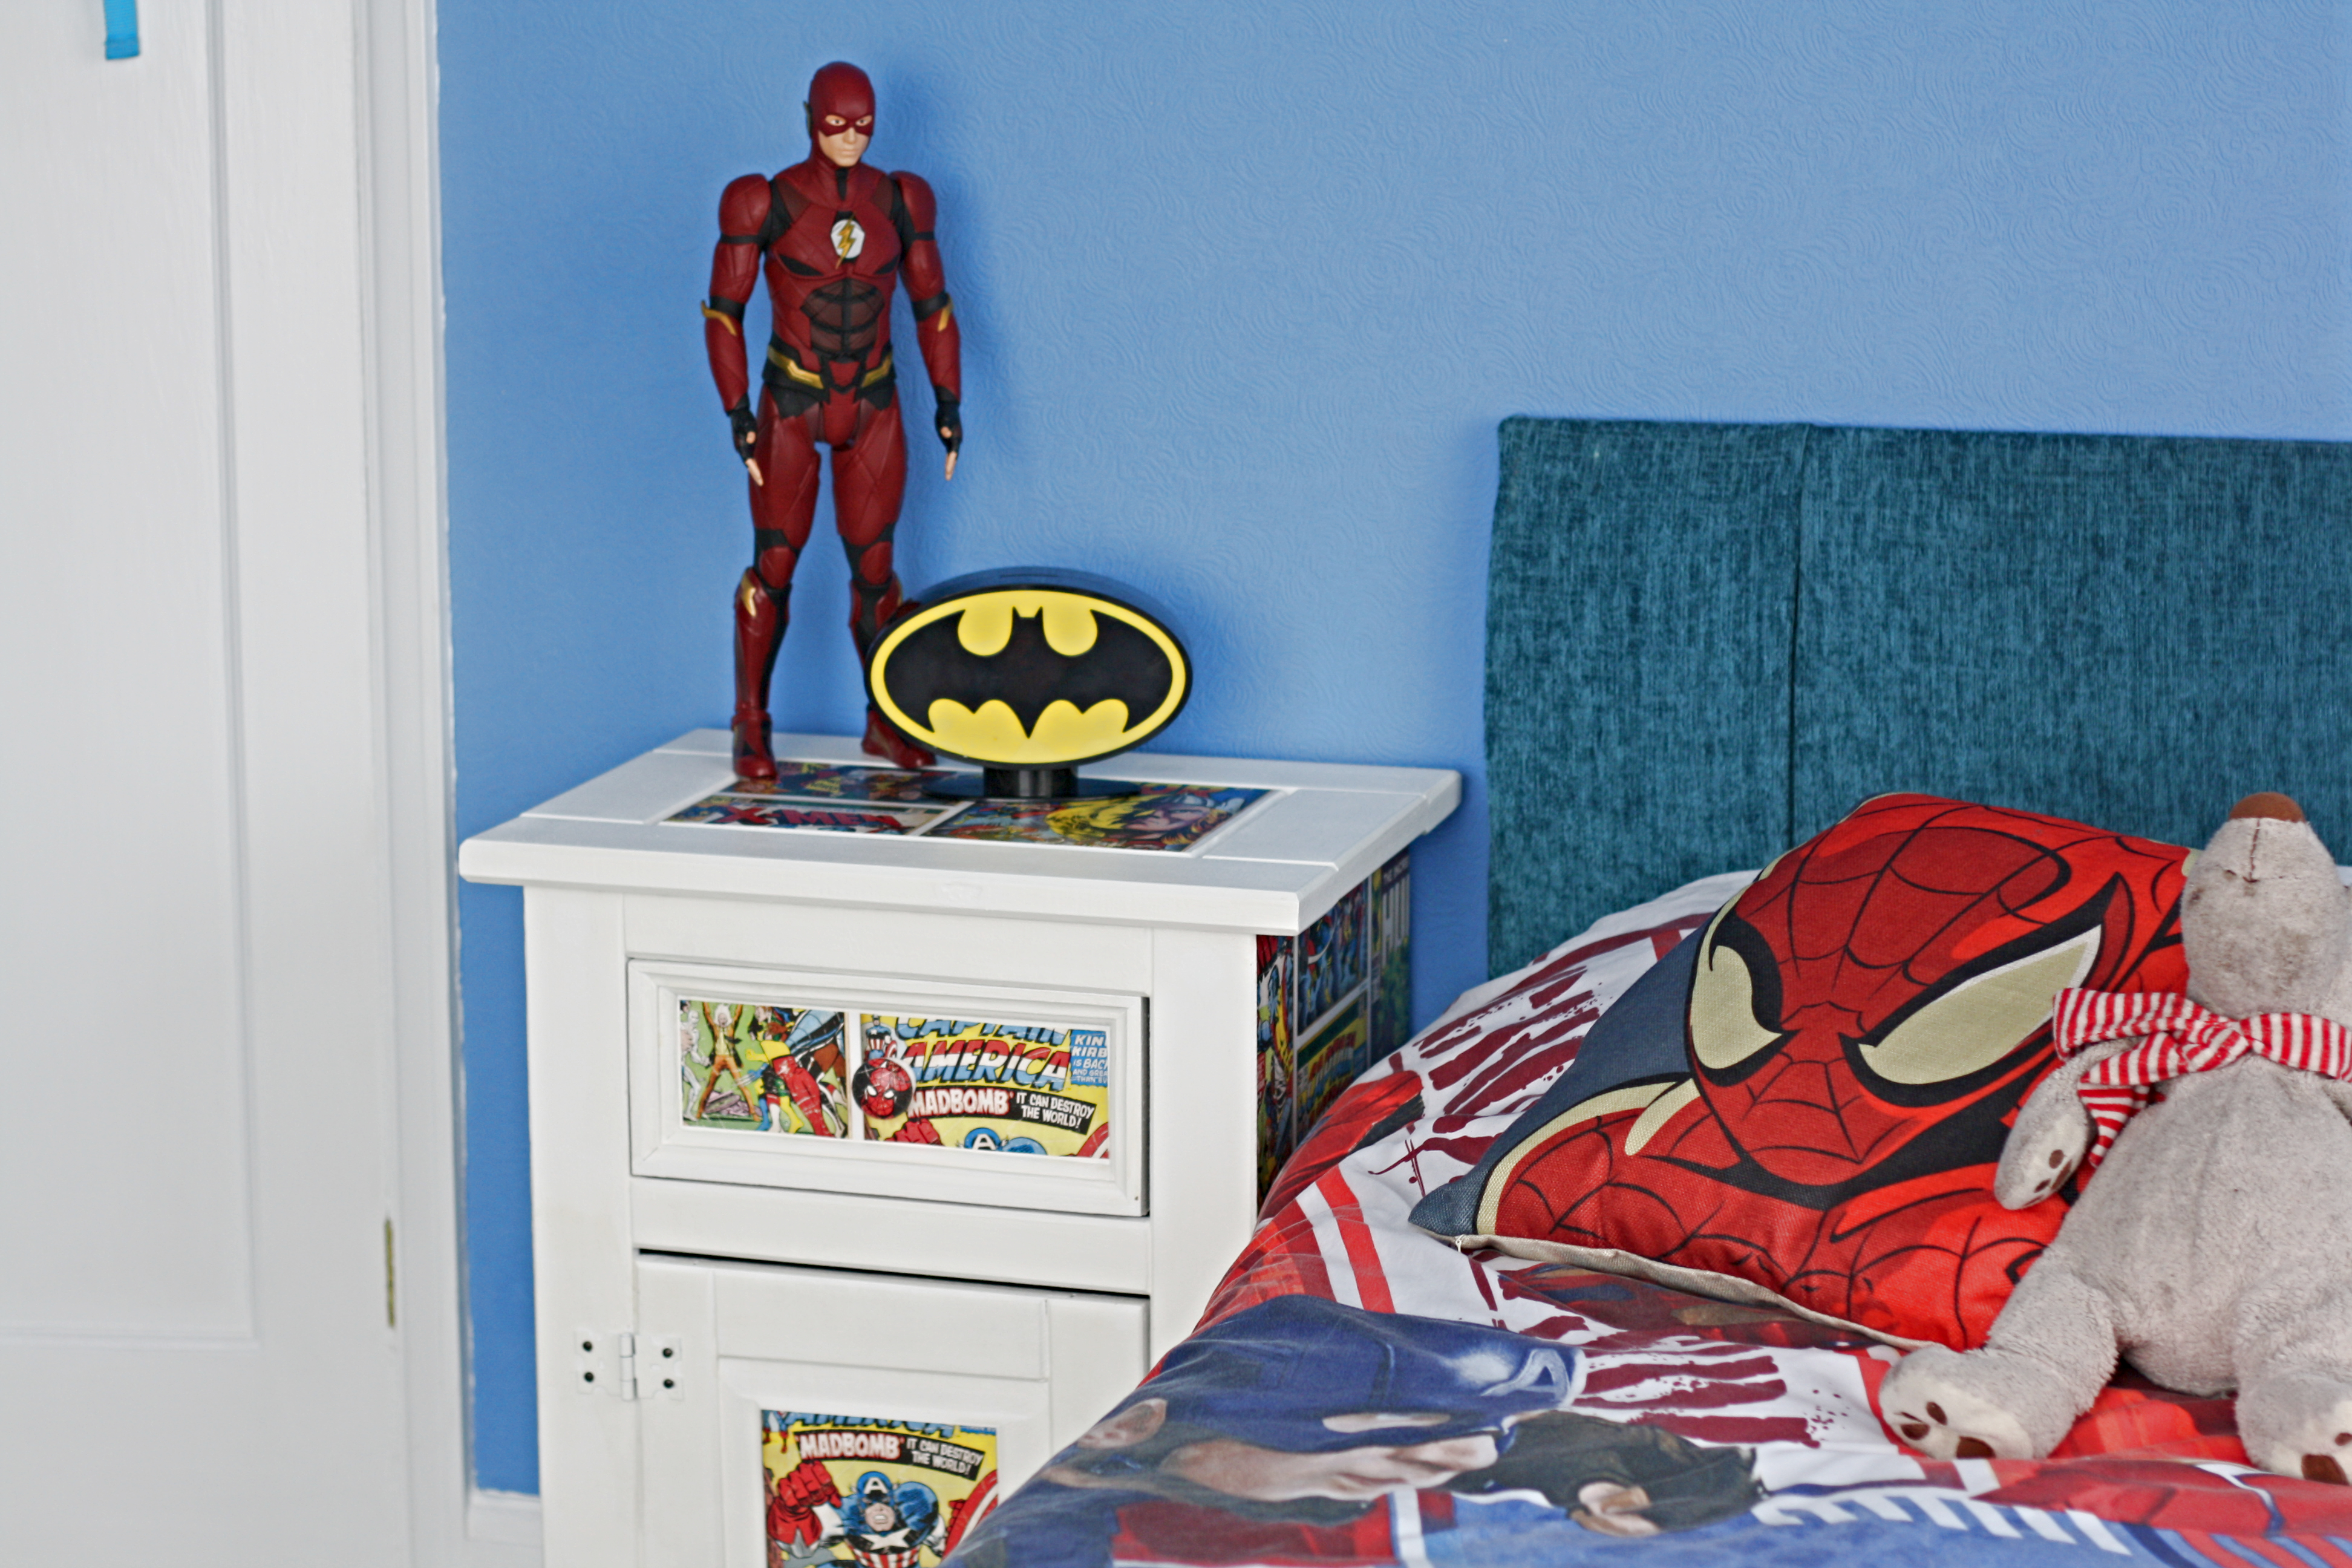
I’m so pleased with the finished piece and so is Mason, he already tells me he has the best super hero bedroom ever and it’s not even finished yet! If you love this post please let me know, find me on Facebook, Instagram and Twitter. Now this Super Hero Bedside Table is finished we just need to do the same thing to his wardrobe!!
Lianne x
Pin Super hero Bedside Table Upcycle to save it for later!