Hello everyone, I hope you’re all ok and excited for this weeks new post which is our Welsh Dresser Upcycle. Now I have distinct memories of taking photos while I was doing this upcycle. But can I find those photos on any of my memory cards? Of course I can’t! I did have a memory card break on me a couple of weeks ago and I wasn’t too bothered at the time as I thought it was empty, but now I have a suspicion it was not. What I do have is the video footage I took to put a reel together for Instagram so I will be sharing that instead.

So here is the dresser we bought. We managed to pick it up from our local British Heart Foundation (charity shop/ thrift store) for £40 but the only way we could get it home was to pay for delivery and apparently The British Heart Foundation are daylight robbers because it was £20 for 10 minutes down the road. But even at £60 all in I think this was a good price really. Looking at this now there are many cons, it’s very brown, there are scratches, one of the handles was broken, it’s very brown……..
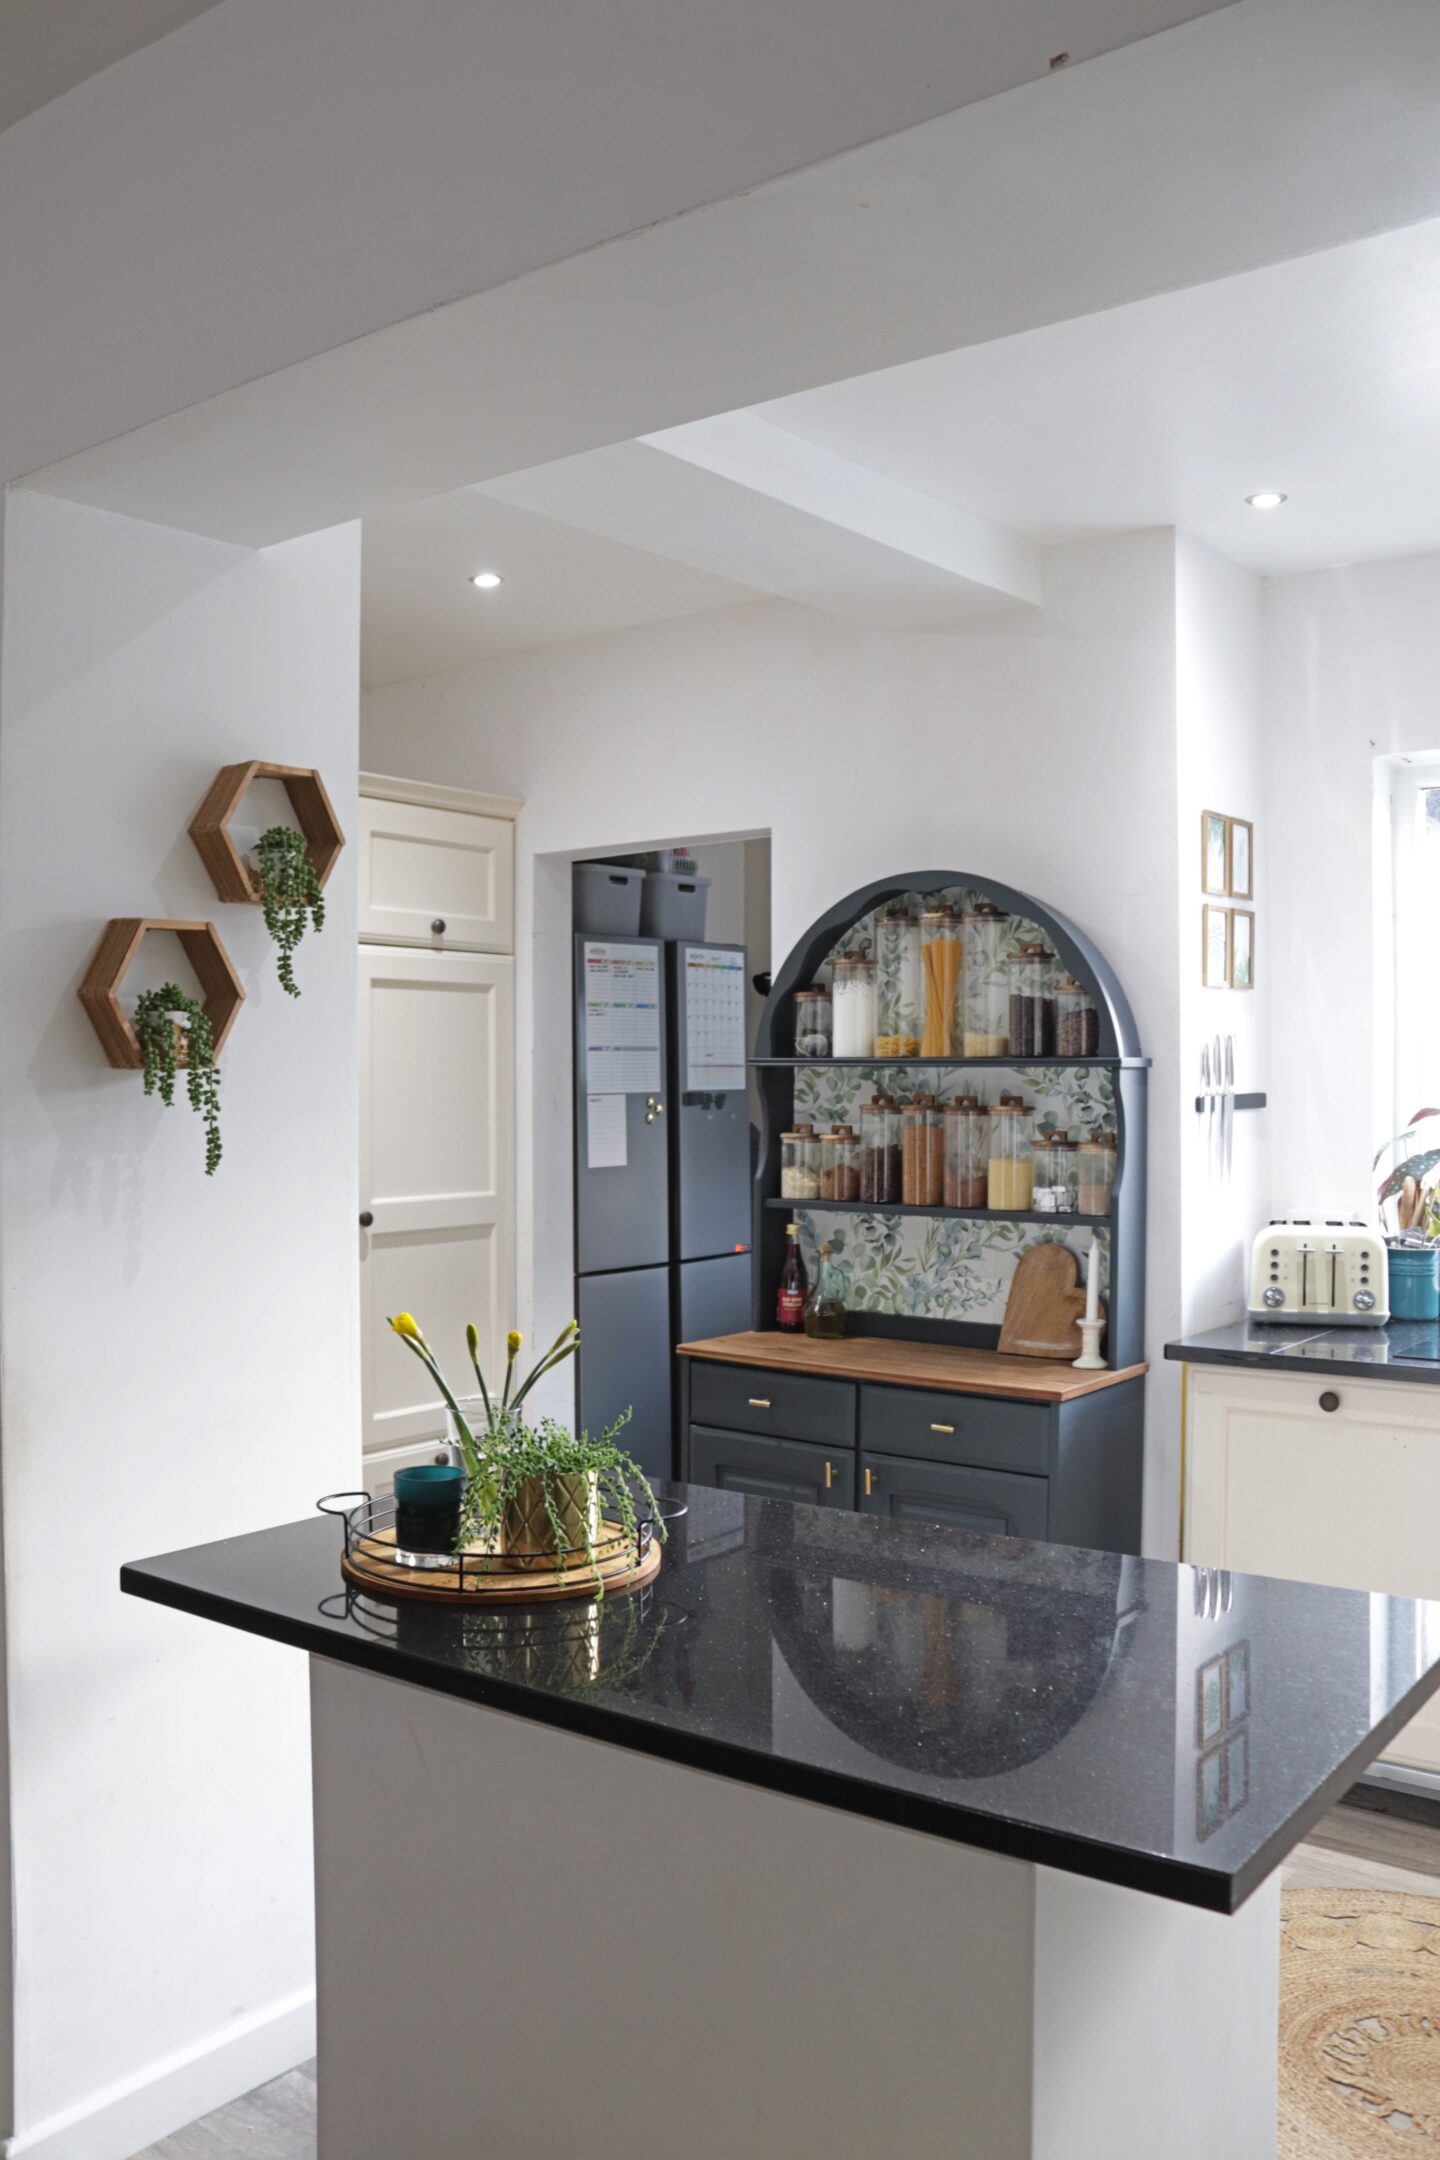
But I could see the potential. I wanted it to go in the kitchen as an open shelve pantry type situation so the fact that the shelves are quite shallow was exactly what I needed. I just wanted to put a single row of jars on each shelf. It wasn’t too deep, some I had looked at were a lot deeper and because of the kitchen lay out I didn’t want it to feel like it was creeping into the walk space. And the thing I loved the most was the arch shape and scalloped detail at the top. I knew it could look beautiful.
When it came to the colour you know I went with black, do I ever paint anything any other colour any more? 😀 We used Rustoleum Washable Matt Furniture paint in the colour Black Sand. Because I’m a lazy upcycler the fact that this has the primer and sealer included was a win for me. It was our first time using this paint though so you never know what it’s going to be like but I really loved working with it. It went on smooth, dried quickly and it self levelled really well so it didn’t leave lots of brush marks. One thing I will say about this colour though is that it’s not a true black. It’s more like a very dark grey.
You can see in the video above that we (Shaun helped with this project) took the top part and the drawer fronts off to paint them. We didn’t sand it down at all but we did give it a really good clean to make sure it was dust and grease free.
When painting furniture, Especially if you’re using a chalk based paint, I recommend using a round brush with natural bristles. They are so good for thin coats of paint which is always what you want. And they leave less brush stroke lines in the paint than if you were just to use a regular brush. I painted 4 coats on this piece all together. Always do the thinest coat of paint possible, 4 thin coats might feel like a lot of work but it is always going to look better than 2 thick coats of paint. You can see that I didn’t paint the back of the shelves as I knew I wanted to wallpaper these.
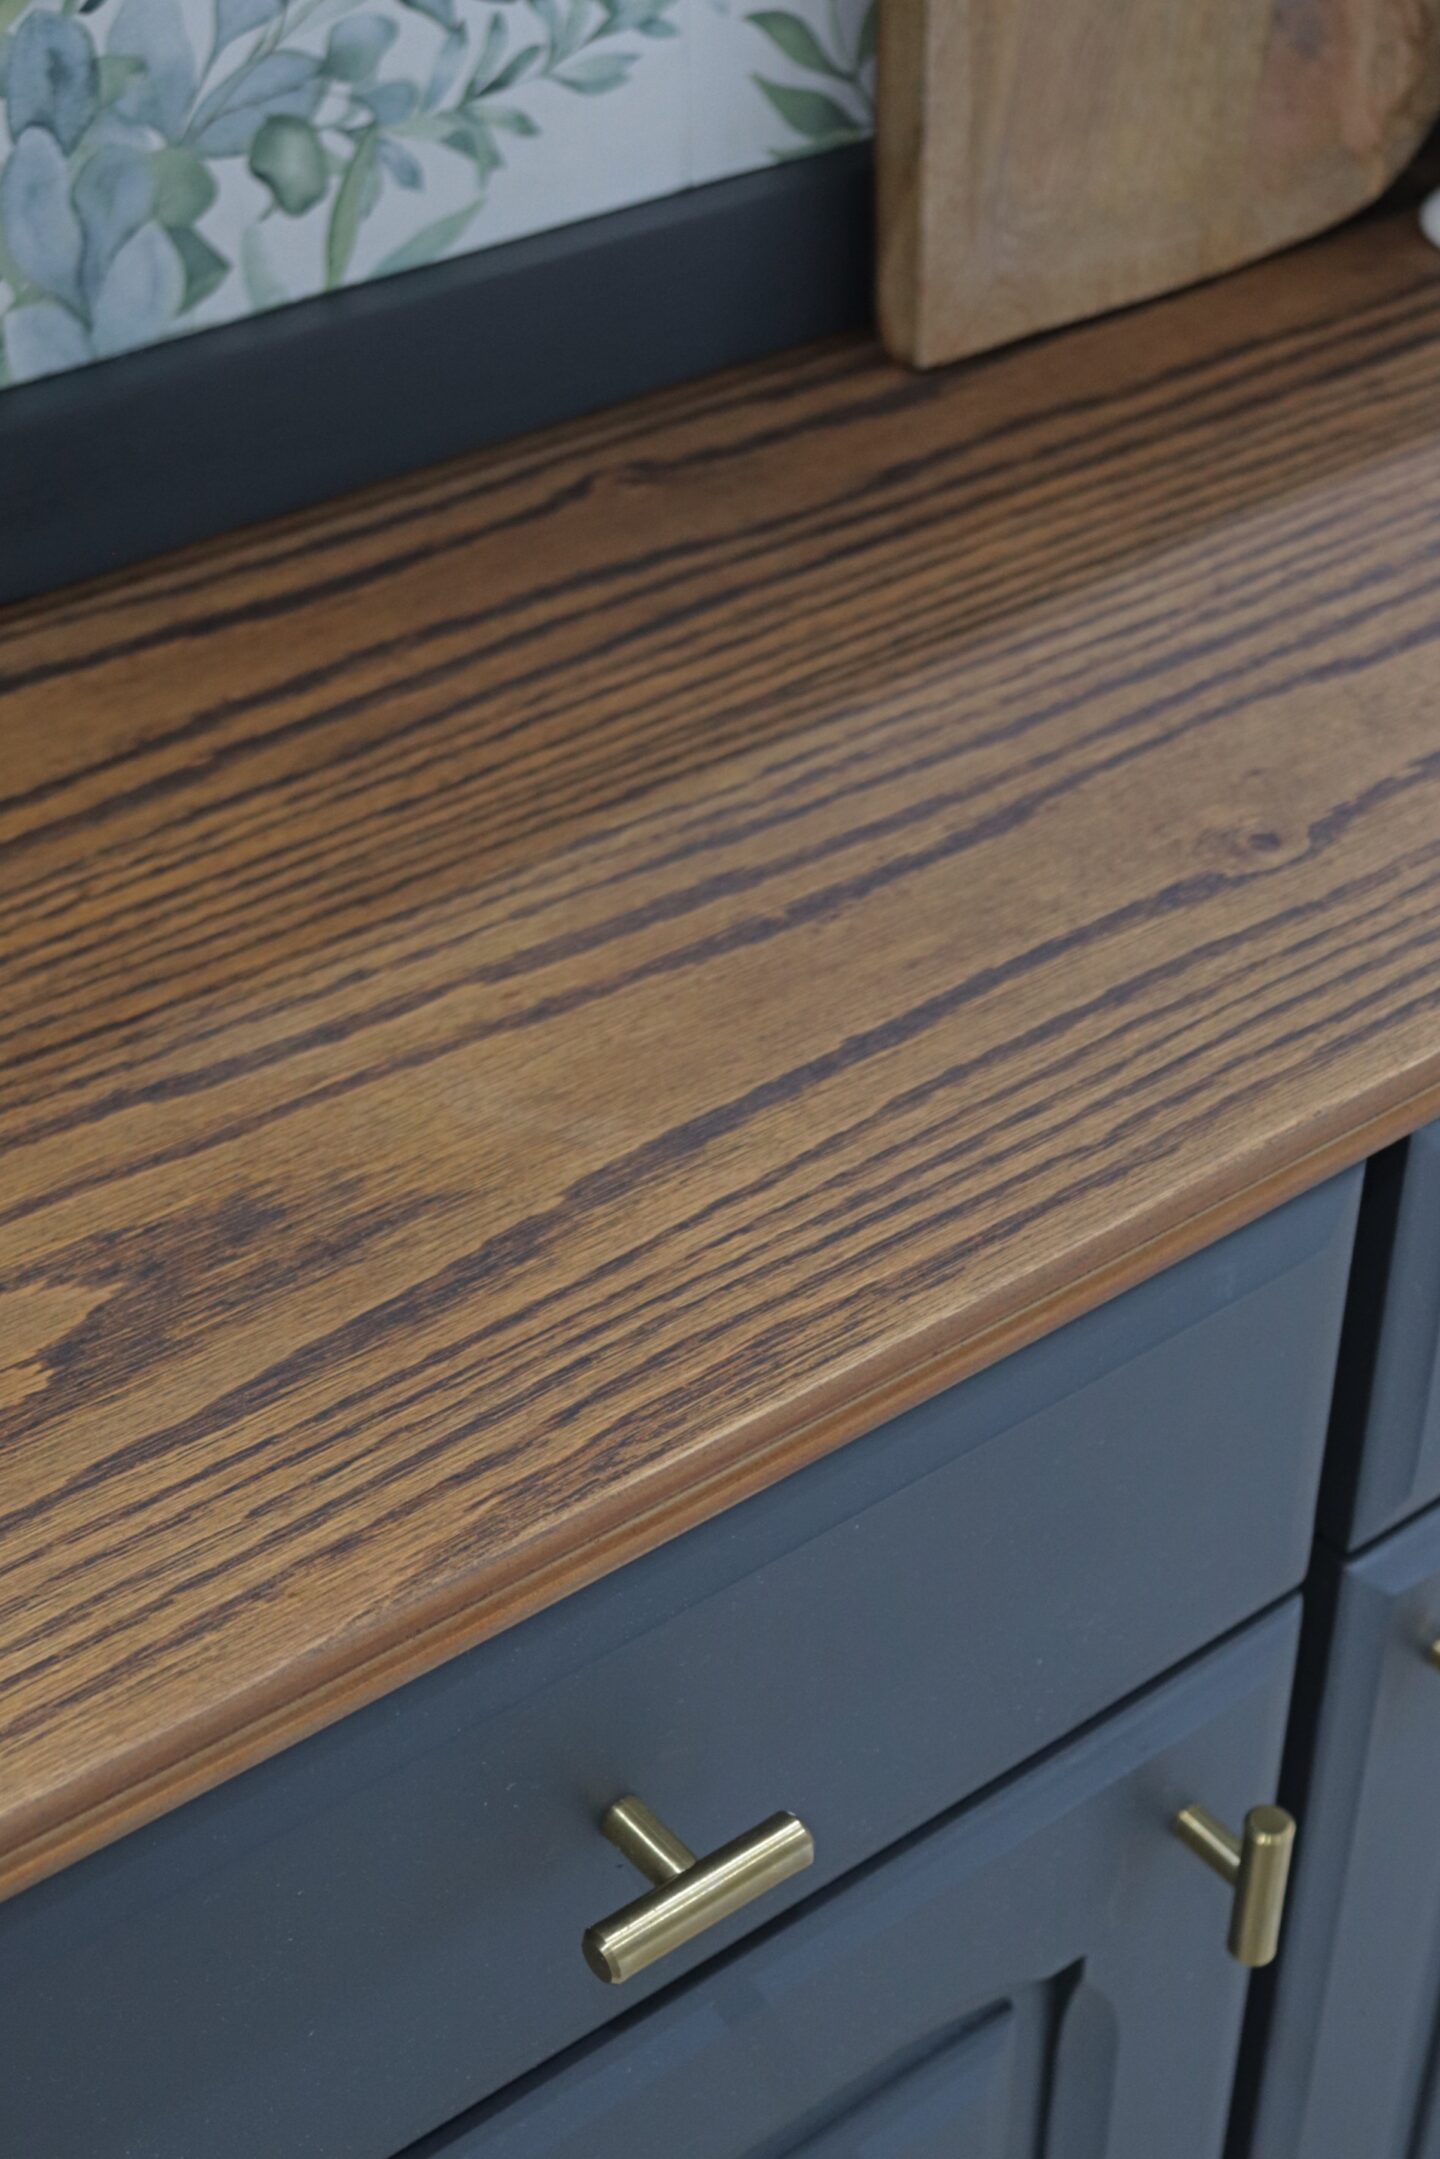
While I was working on the top half of the Welsh dresser Upcycle, Shaun was working on the bottom, cupboard part of it. Our plan for this part was to sand the top, this would be stained and left as the natural wood. Then paint the rest of it black. So it was Shauns job to sand the top, he started off with a rough grit to get the varnish off. Then worked his way down to a fine grit to get it nice and smooth. It might have been a better idea to strip off the varnish first as it did take a few sanding pads. Just something to think about if you are doing the same thing at all.
The other job Shaun worked on was to fill the existing handle holes on the cupboard doors and to drill new ones. If you look back at the before picture the handles were in the middle of the door and I wanted them to be in the top corner.
It was then my job to get the bottom cupboard painted. It took four coats again with the same natural bristle brush. At some point I would also like to paint and line the inside of this cupboard but for now we have just focused on the visible, outside areas of it.
Once all the paint was dry it was time to move onto the back of the top shelf part. The area this is going in the kitchen is against the wall as you are walking towards the utility room and downstairs shower room (you can see the layout of my ground floor in my ground floor tour). I plan on papering the back wall of my laundry room and had already purchased 2 rolls of wallpaper on clearance from Wilko for the one small wall. I decided to use some of this on the back of the Welsh dresser Upcycle because when you face it you will also be able to see the papered wall in the laundry room and I thought it would be a nice way to make the two spaces flow. It’s also nice and light with the white background and the green leaves so I thought it would be a great contrast with the black and really make that scalloped edge pop. Wilko no longer sell this particular wallpaper but I will link some similar alternatives at the end of the post for you.
I didn’t have any wallpaper paste to stick the paper so I decided to just try it with Mod Podge instead and it actually worked really well. It was tricky to get the paper on as you need to cut out the right size piece to fit but also match up the pattern at the same time. My advice if you are doing something simpler would be not to rush. Measure twice, cut once!
My favourite finishing touch when working with wood is the stain, I just love watching it bring the wood to life! Once the wood was stained the only things left to do was reattach the top shelves and to put on the new handles which you will see in the after photos. We just went with simple brass T bar ones which look good but are very inexpensive.
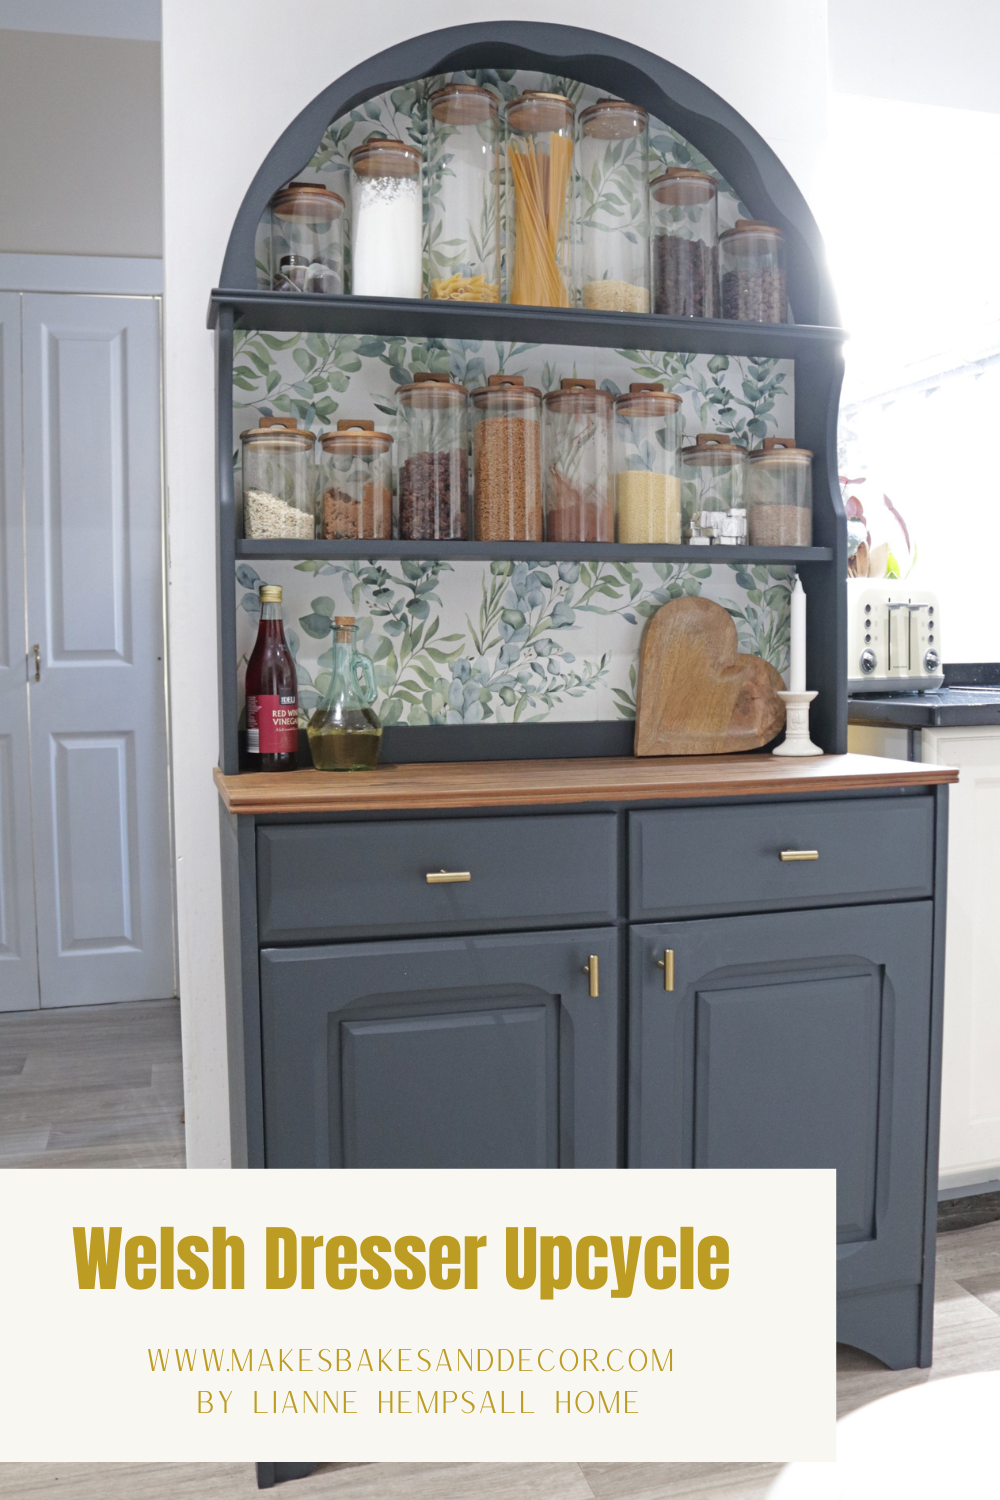
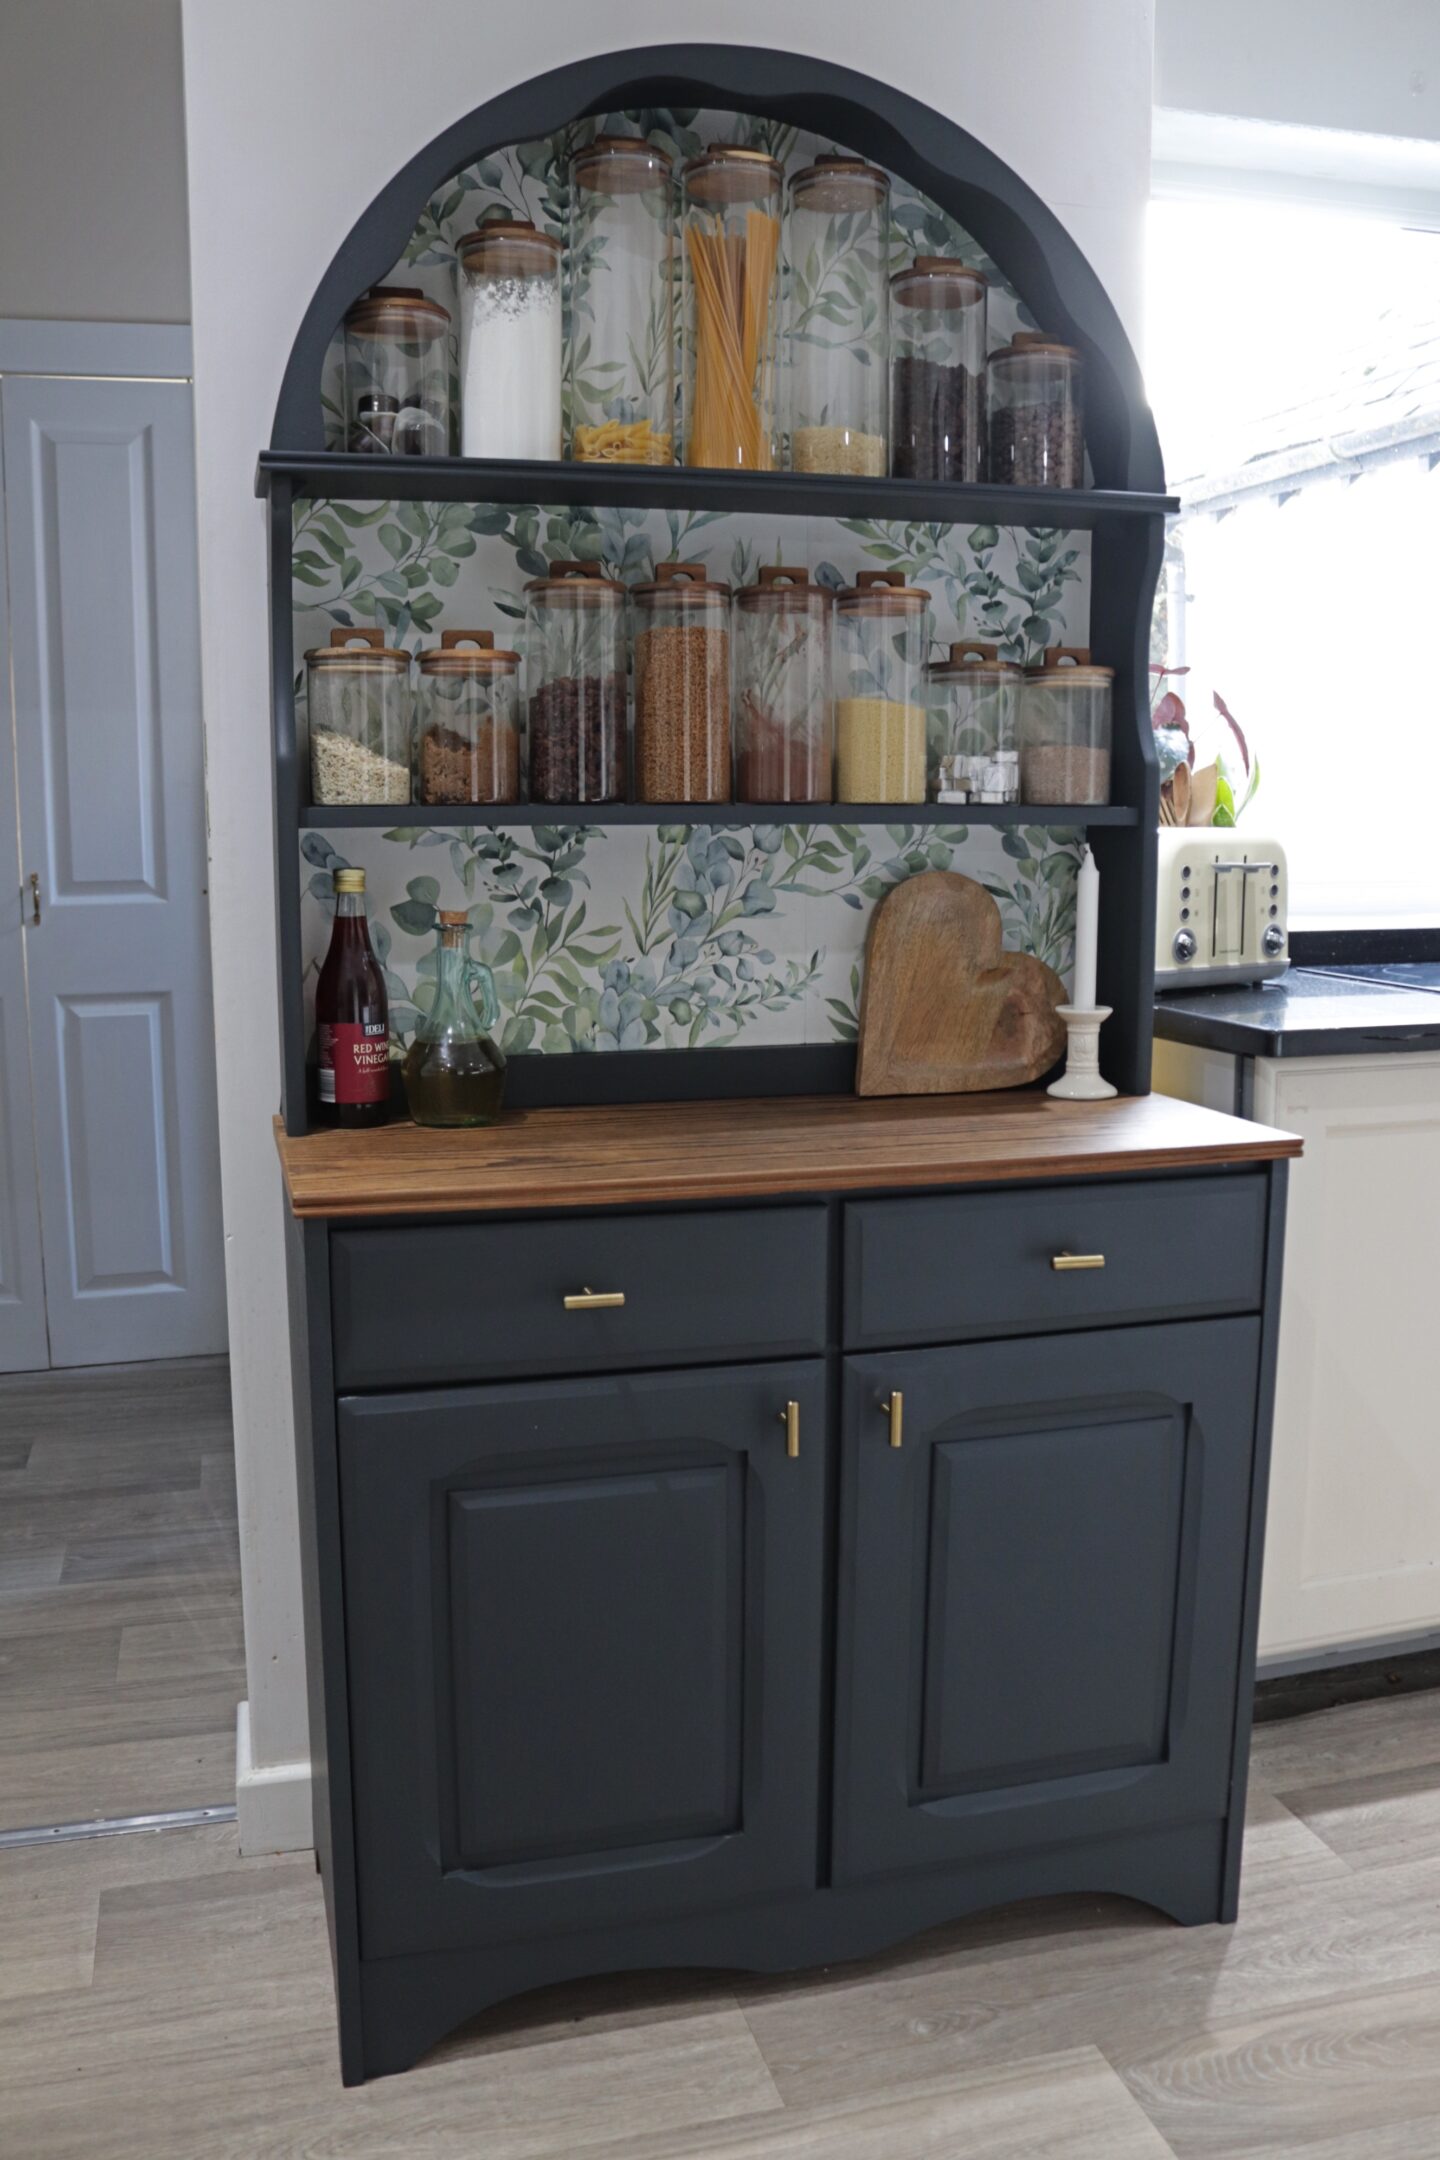
And now it’s time for the finished reveal photos, we are so happy with the final product. A couple of weeks after it was done I found the perfect storage jars in the middle aisle at Aldi. They were exactly the width I needed and had beautiful acacia wood lids too. I convinced Shaun we needed them straight away and now our open pantry is complete.
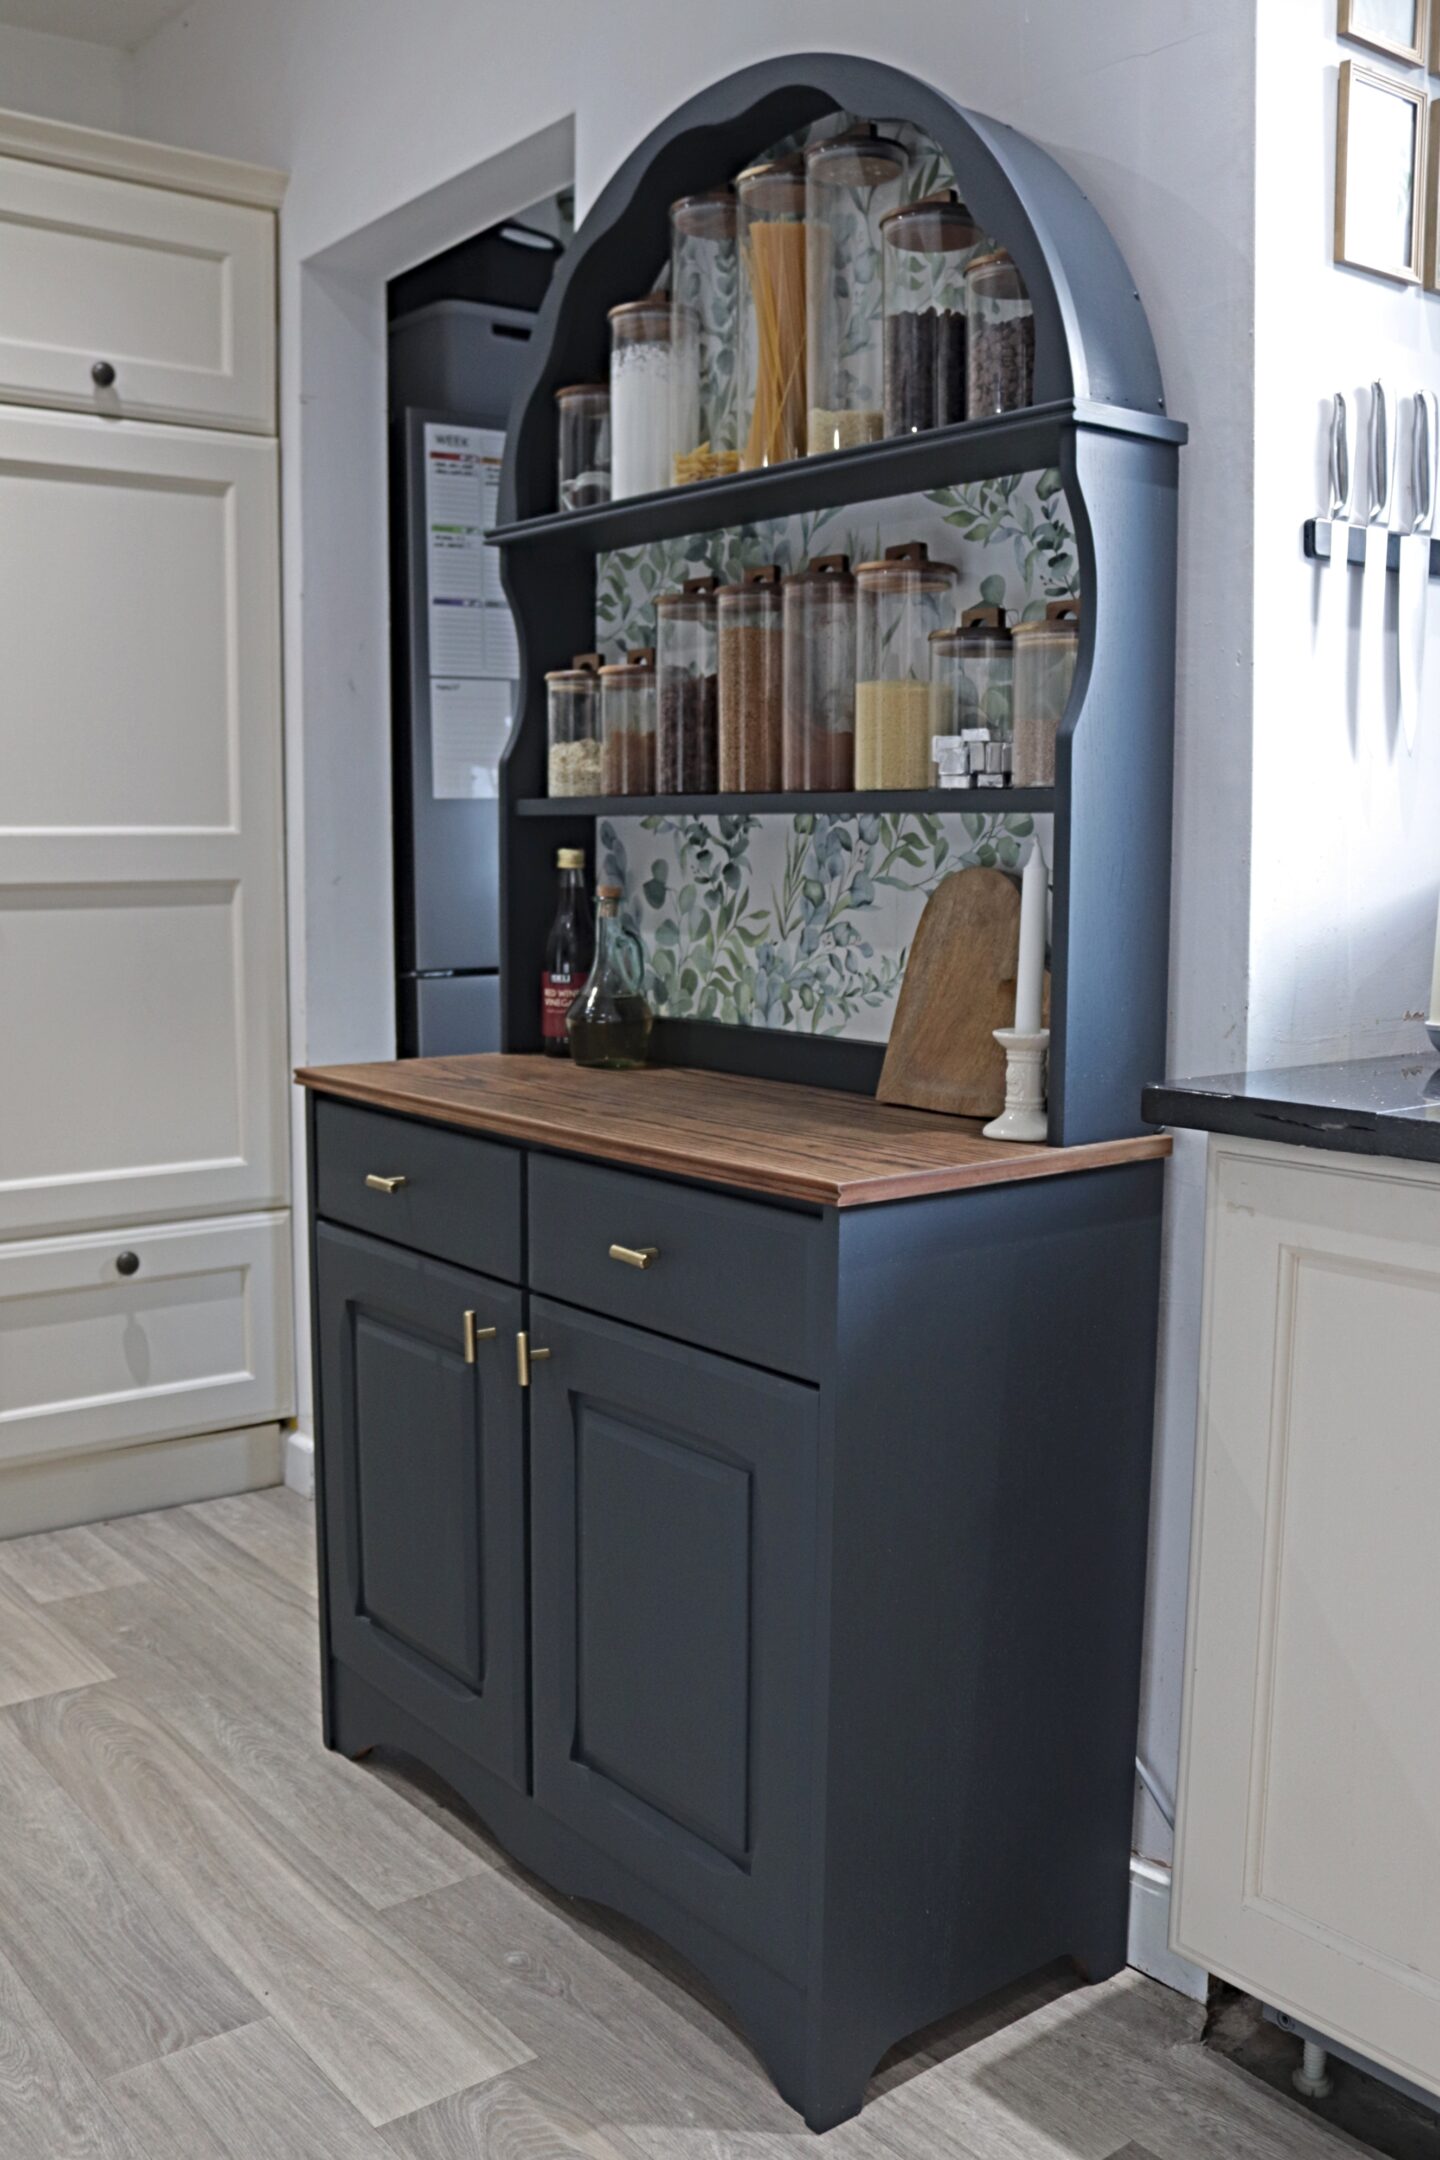
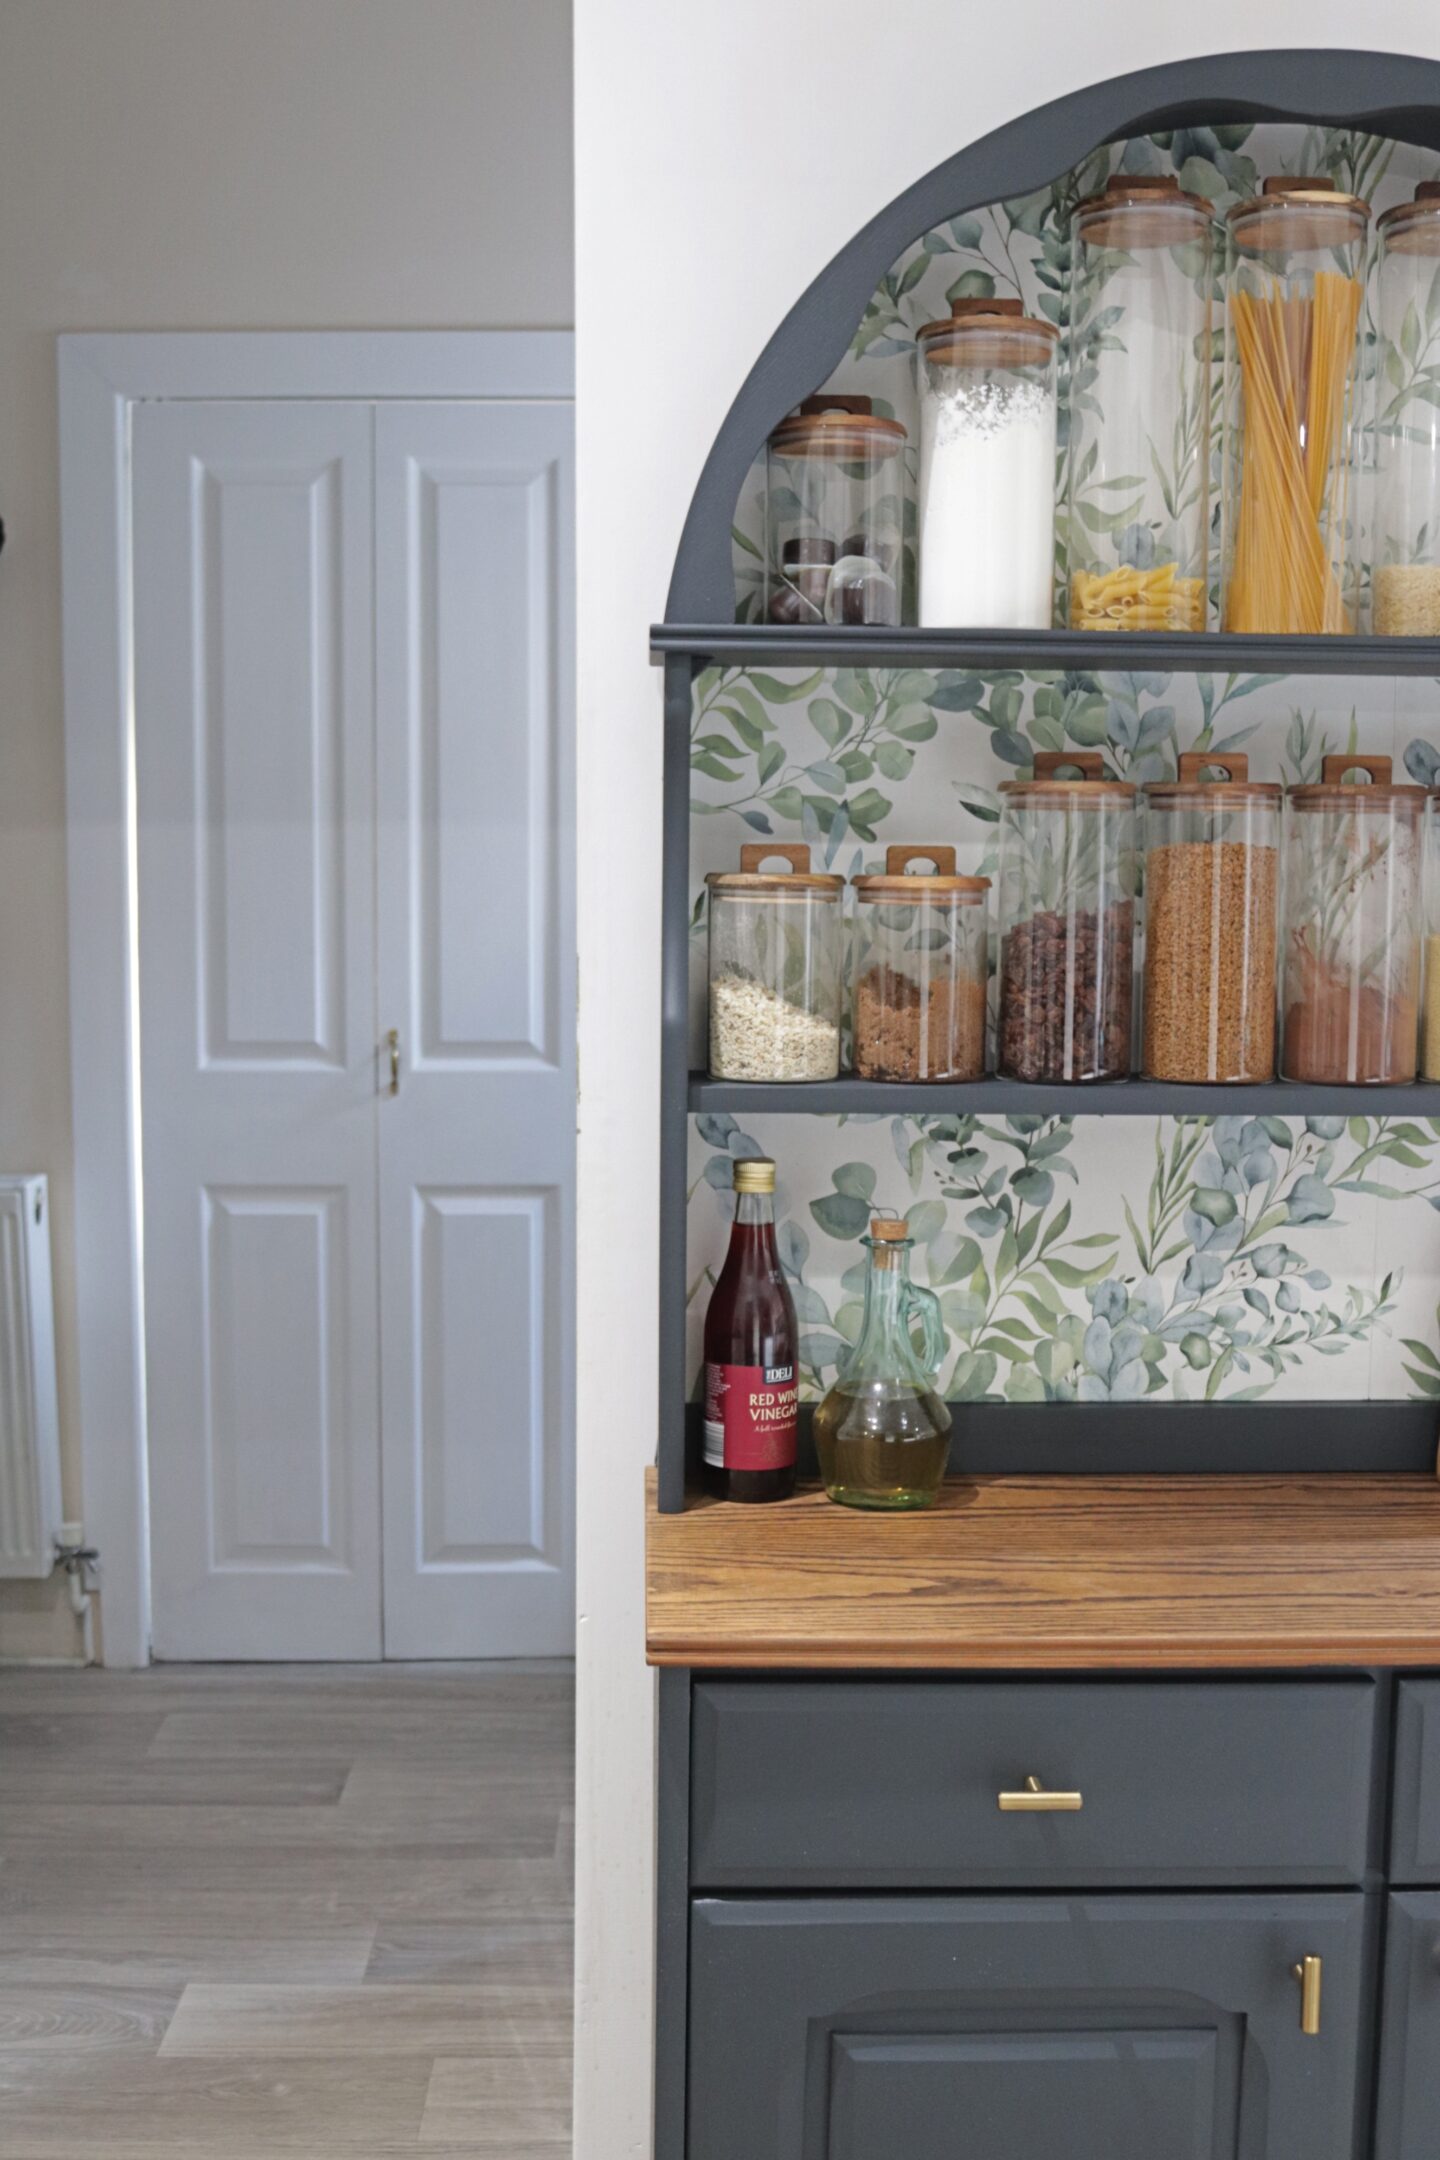
This is the view that I mentioned looking into the laundry room. Just imagine when that back wall has the same wallpaper on it!
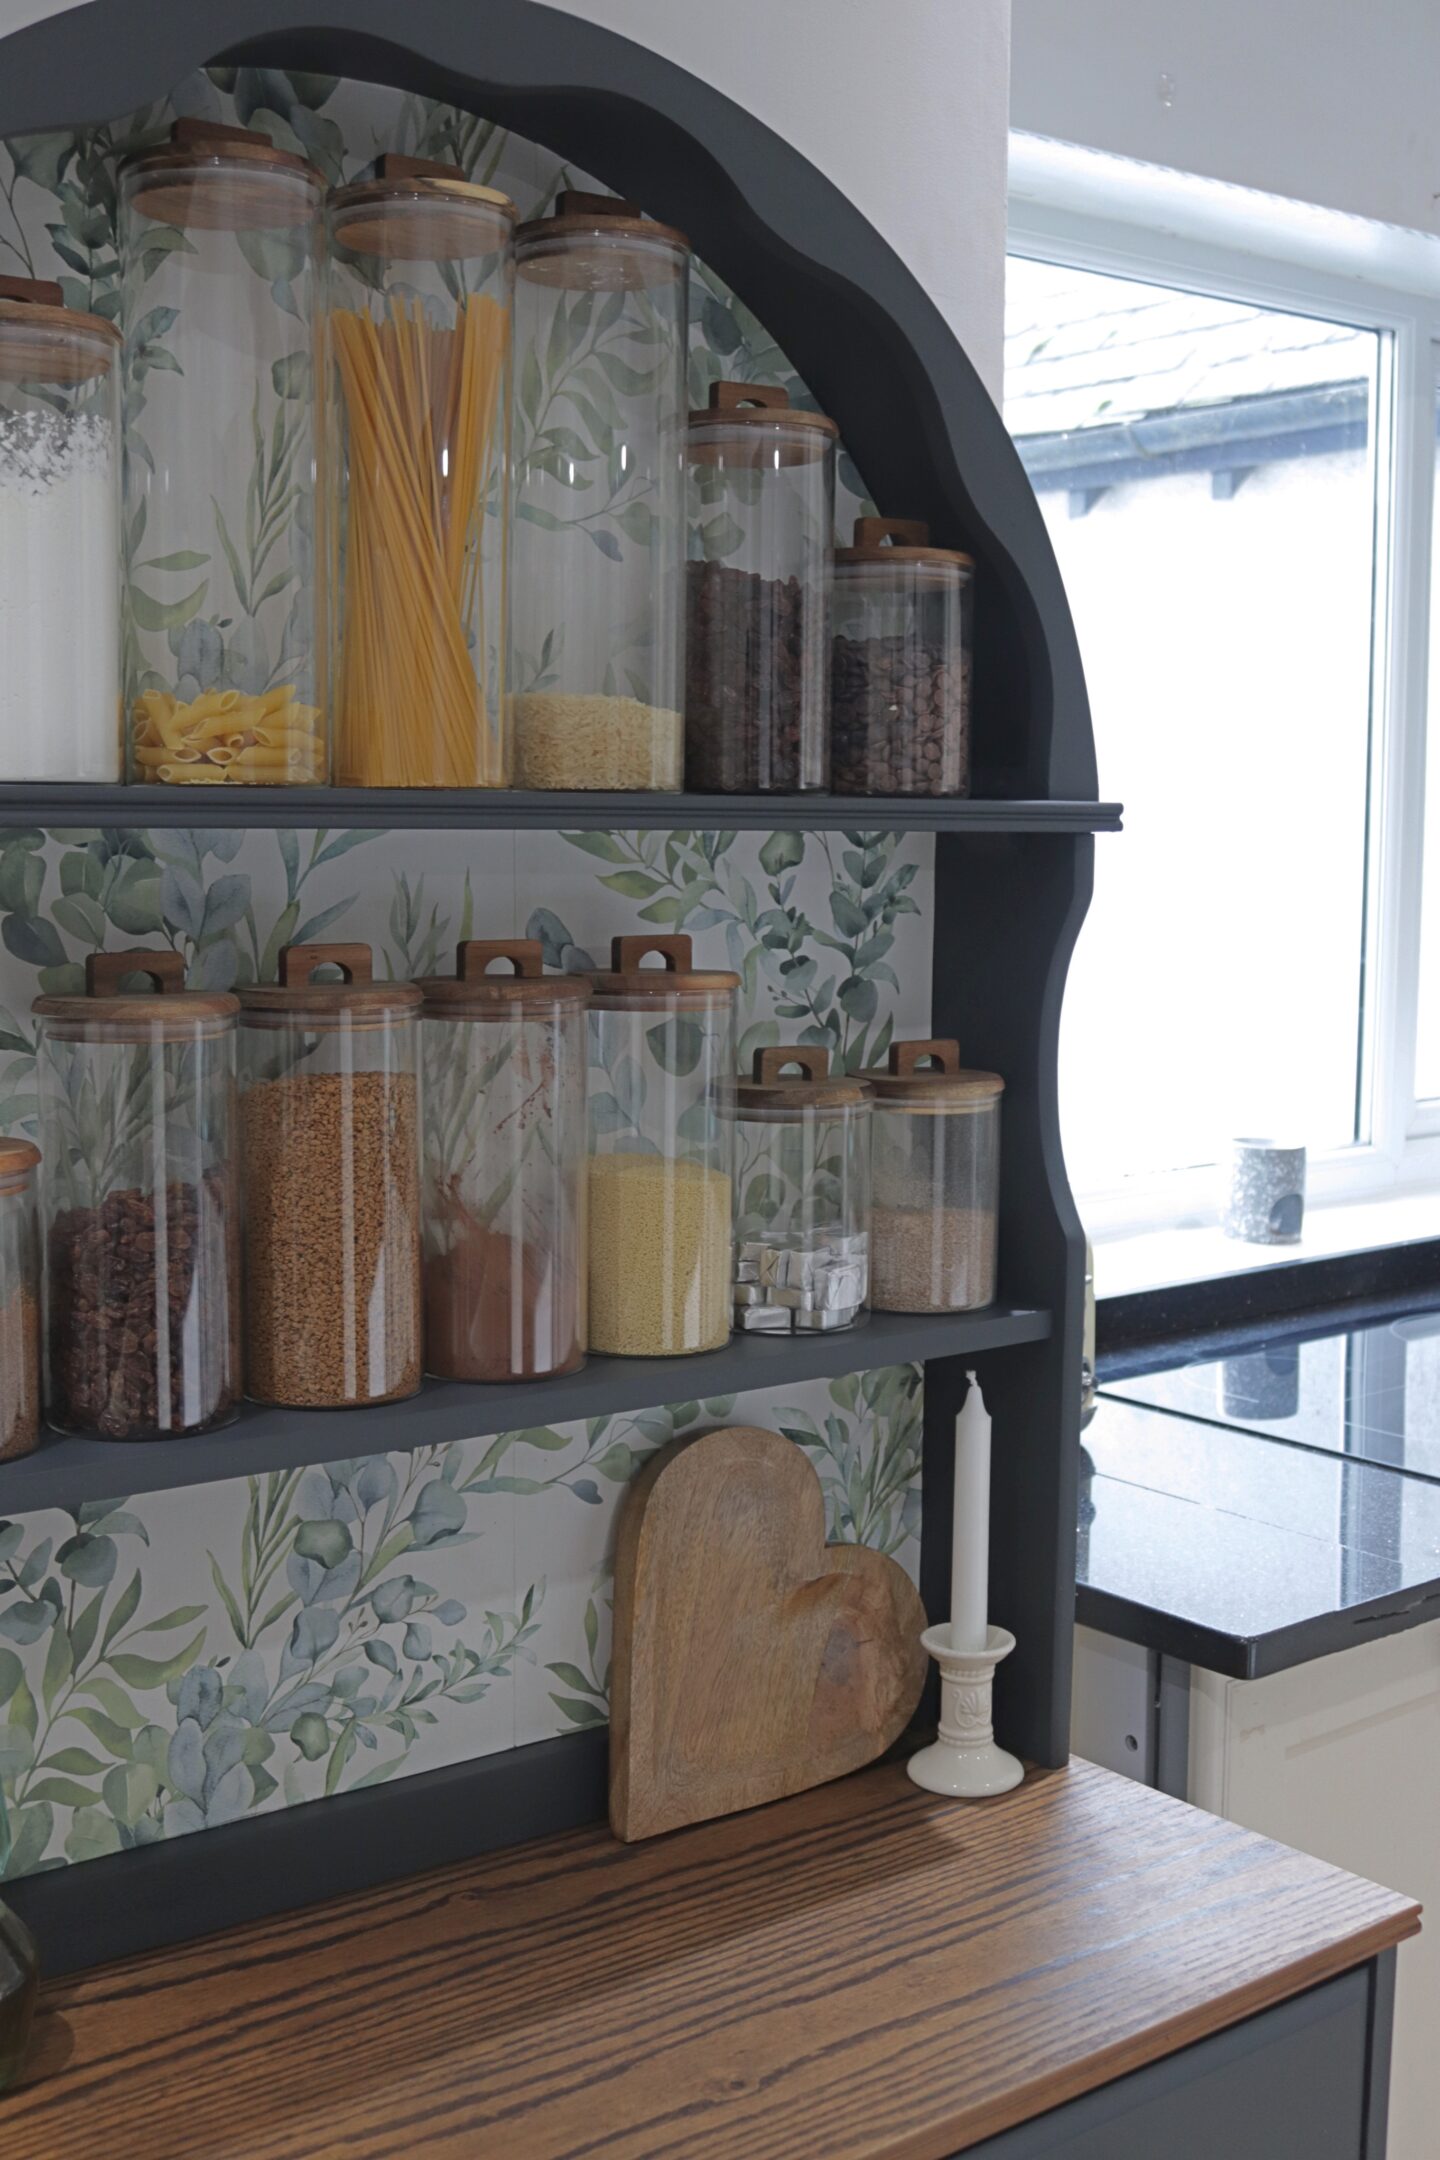
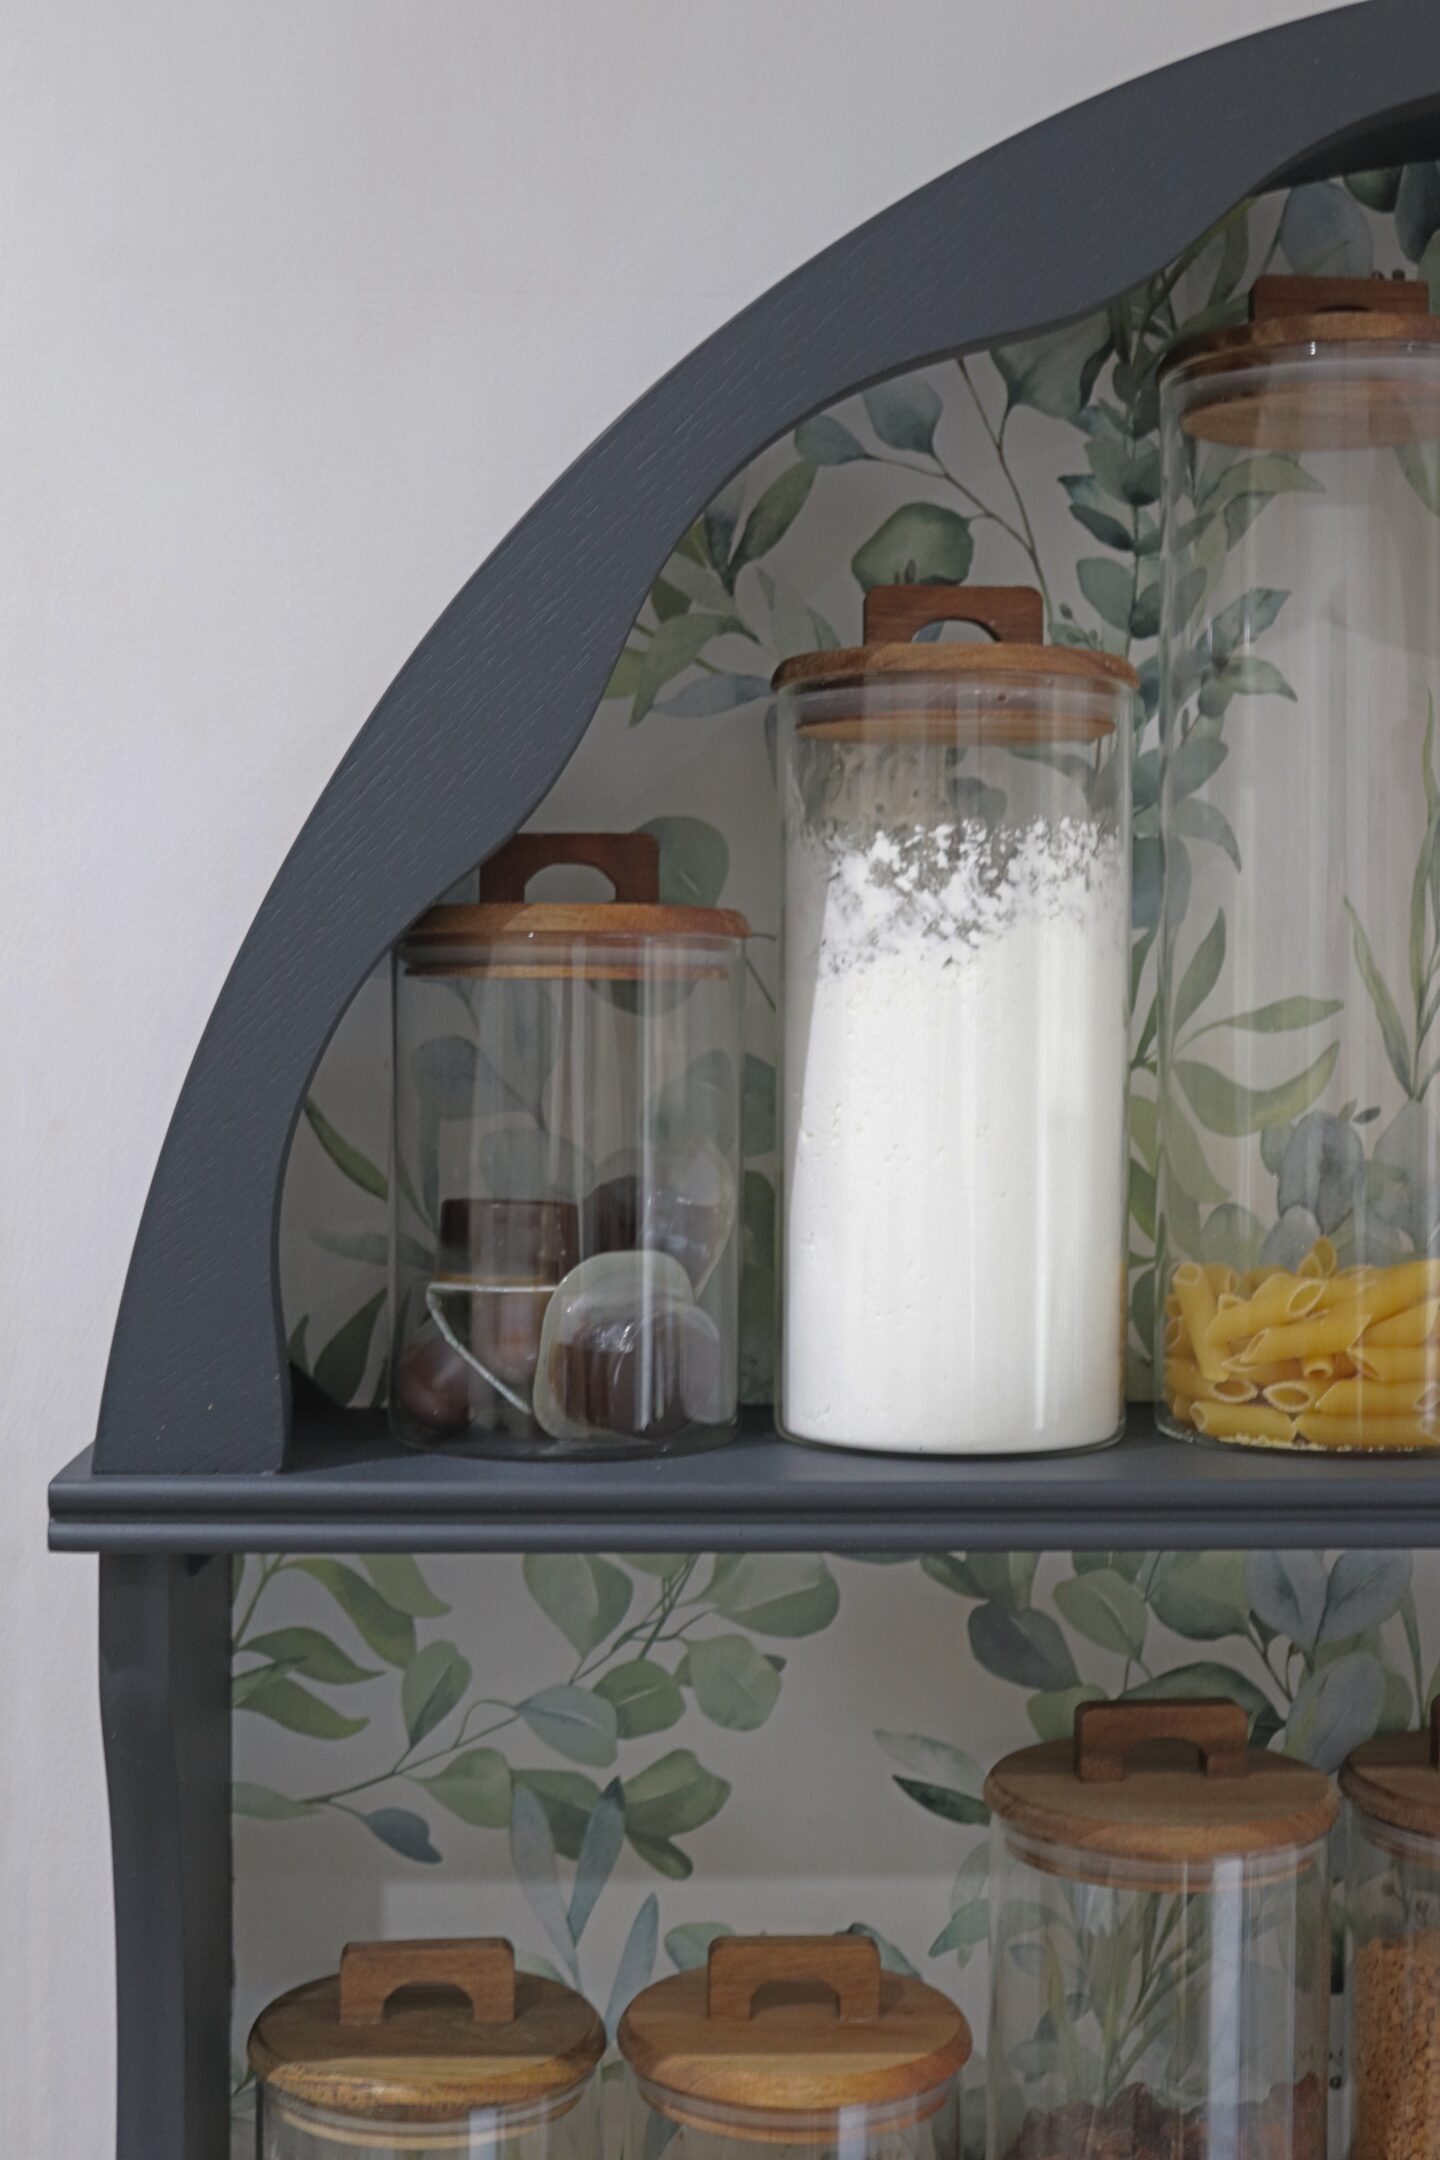
And the scallop detail that I knew would pop once it wasn’t all one colour.
Can you believe the transformation! It’s no longer very brown 😀 and it’s my favourite thing in the kitchen. I love how putting our dried goods on here has also freed up so much cupboard space and reaching for things whilst cooking is just so easy. Have you ever tried this kind of upcycle? Can you see the potential in older pieces of furniture or do you prefer to buy new? If you are interested in seeing more of my upcycle projects then you should have a look at my Electric Fire Upcycle, Super Hero Bedside Table Upcycle and my Navy and Gold End Table Upcycle. I’ve also linked products I’ve used and some products that might be helpful for your own project after the post.
If you have enjoyed this post and want to know whenever I post something new be sure to subscribe to my email. You can also follow me on Instagram where I share day to day life, cleaning and more home inspo. Sometimes things make it onto the gram before they do here! My Facebook page shares updates whenever I’ve posted something new and if you enjoy cleaning content I recently started a channel over on YouTube and I would love to see you there too (I’m @Liannehempsallhome across all my social media). Have a great day and I will be back soon for a new post.
Lianne x
Products that helped with the Welsh Dresser Upcycle
Pin my Welsh dresser Upcycle to save it for Later!