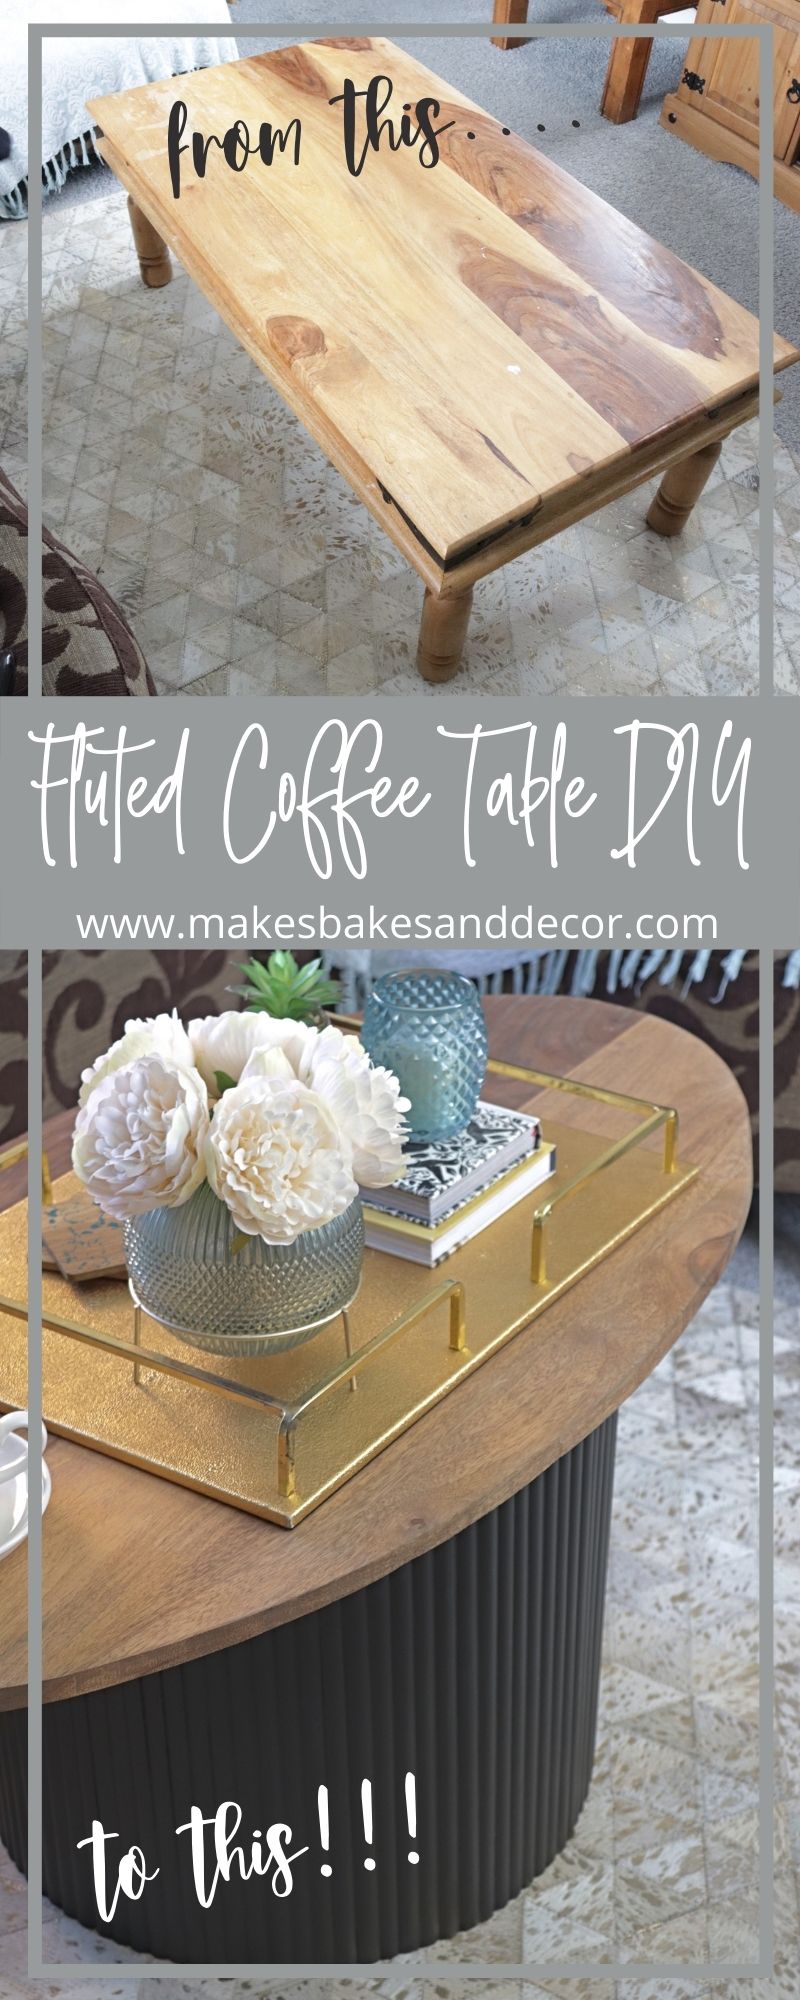
I want to start by saying that I am so unbelievably excited to be sharing this fluted coffee table DIY with you today. We bought the original coffee table about 5 years ago while we were living at Seaways and I never liked it. But I wanted a coffee table and this is what we could afford at the time. And I’ve lived with it. All. This. Time. I’m being dramatic I know, it just didn’t fit my style and I wanted to upcycle it in some way for ages. I did have another plan originally and I am so very glad I didn’t get around to doing that because what we did in the end is soooo much better. I’m sure you’ve seen our coffee table before but here is a reminder of what it looked like.
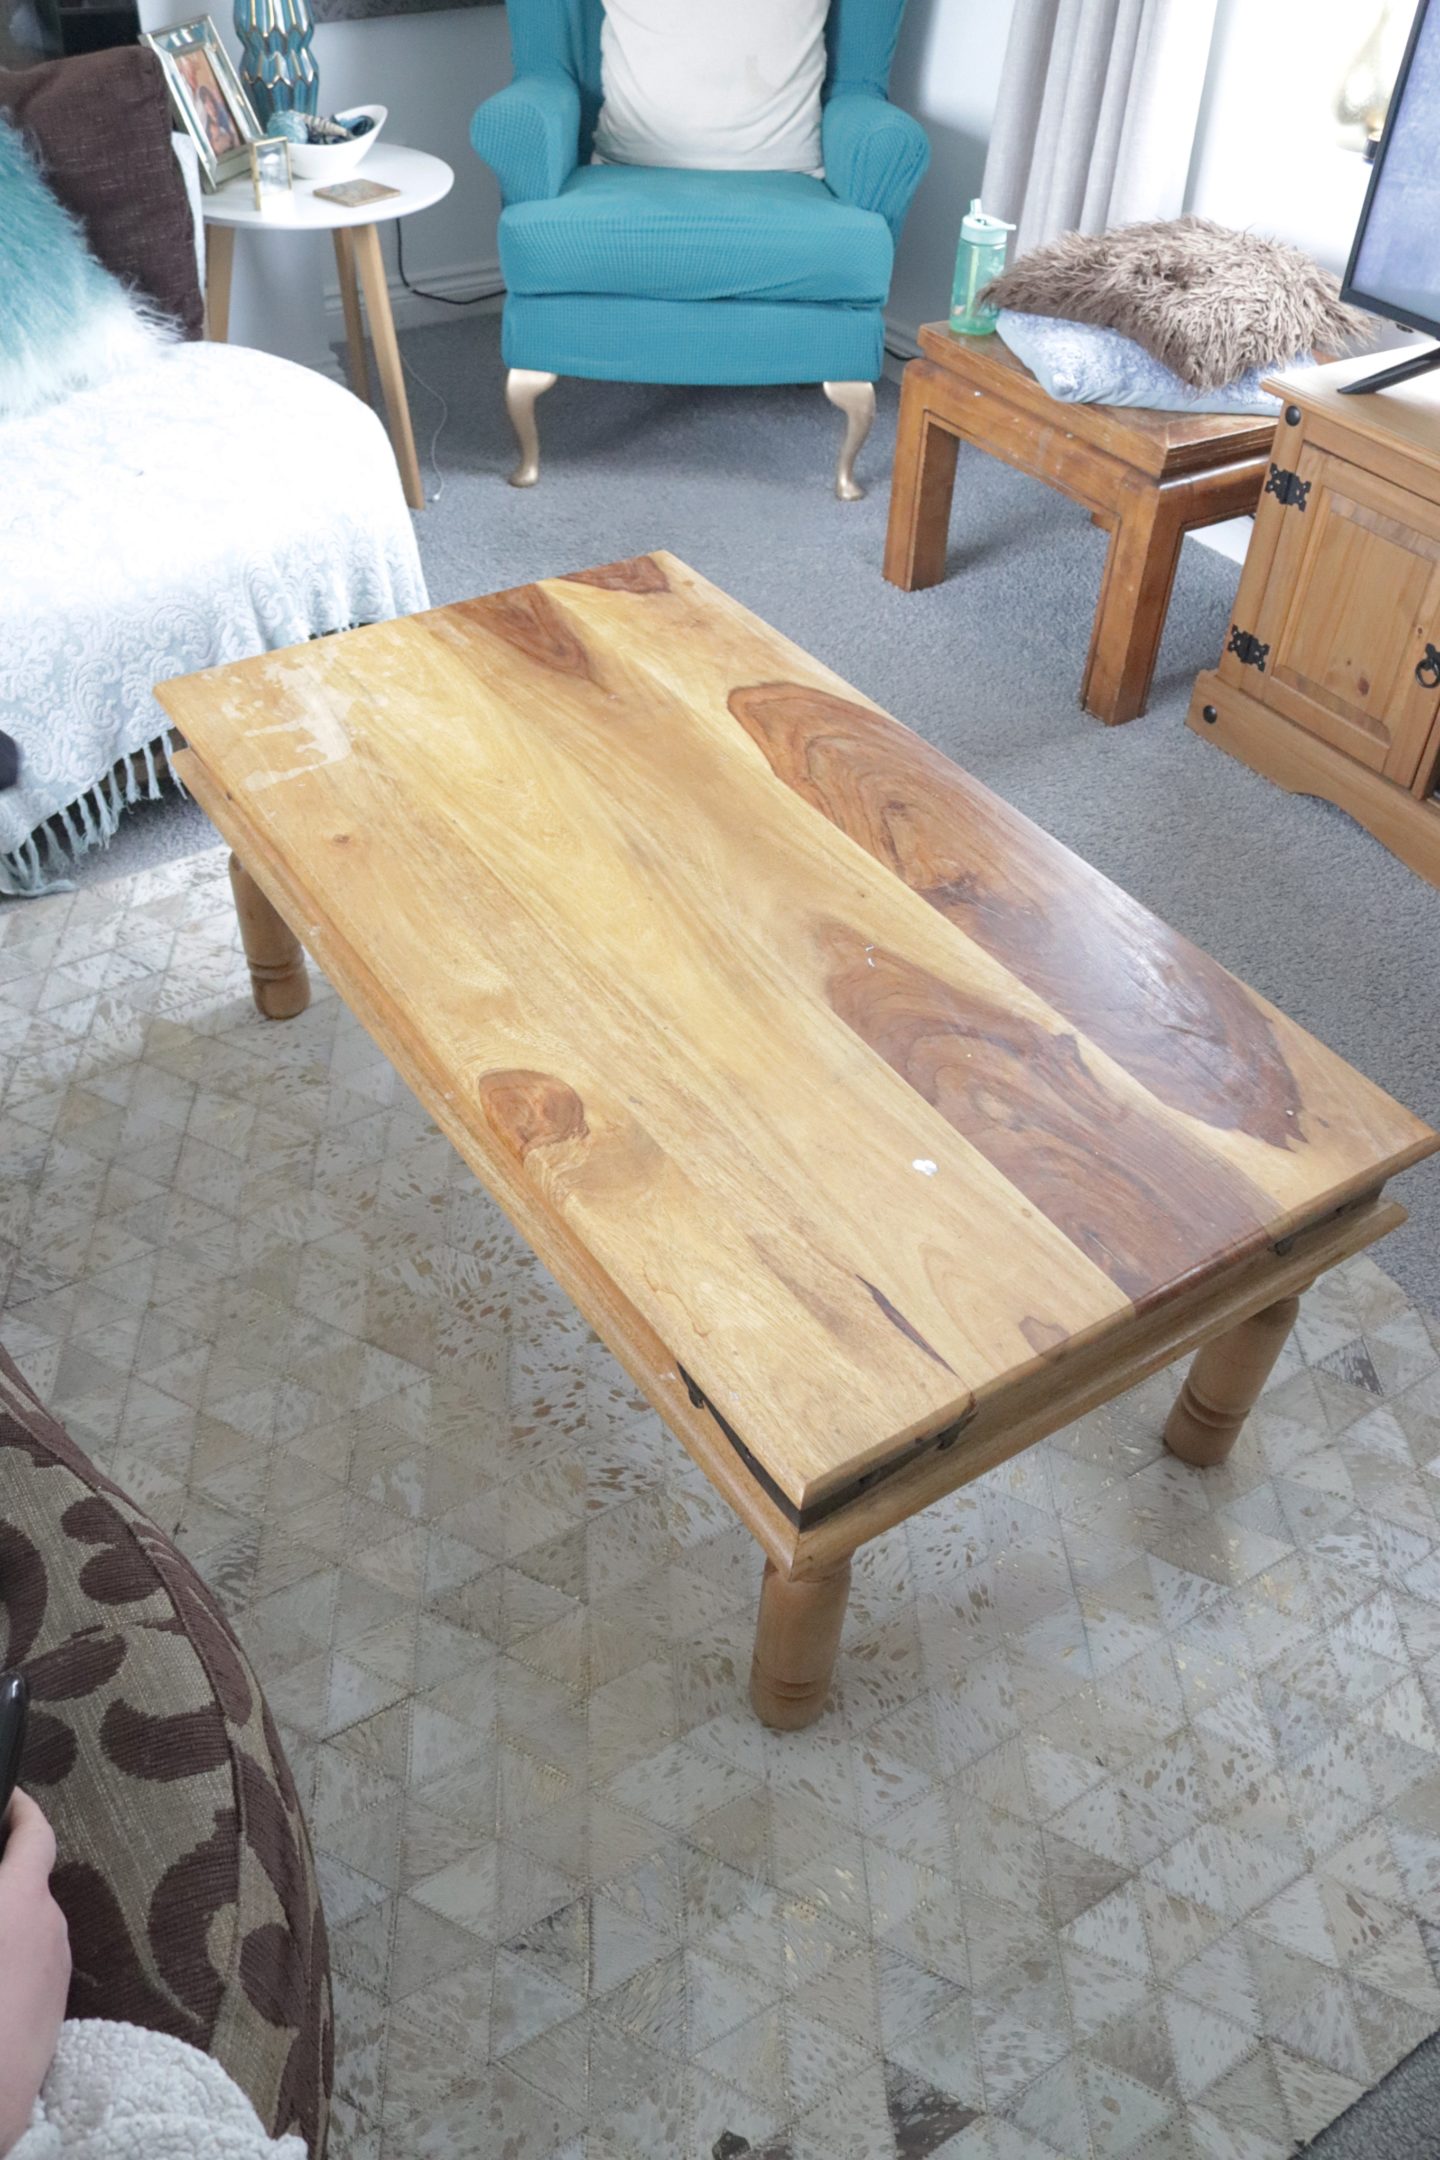
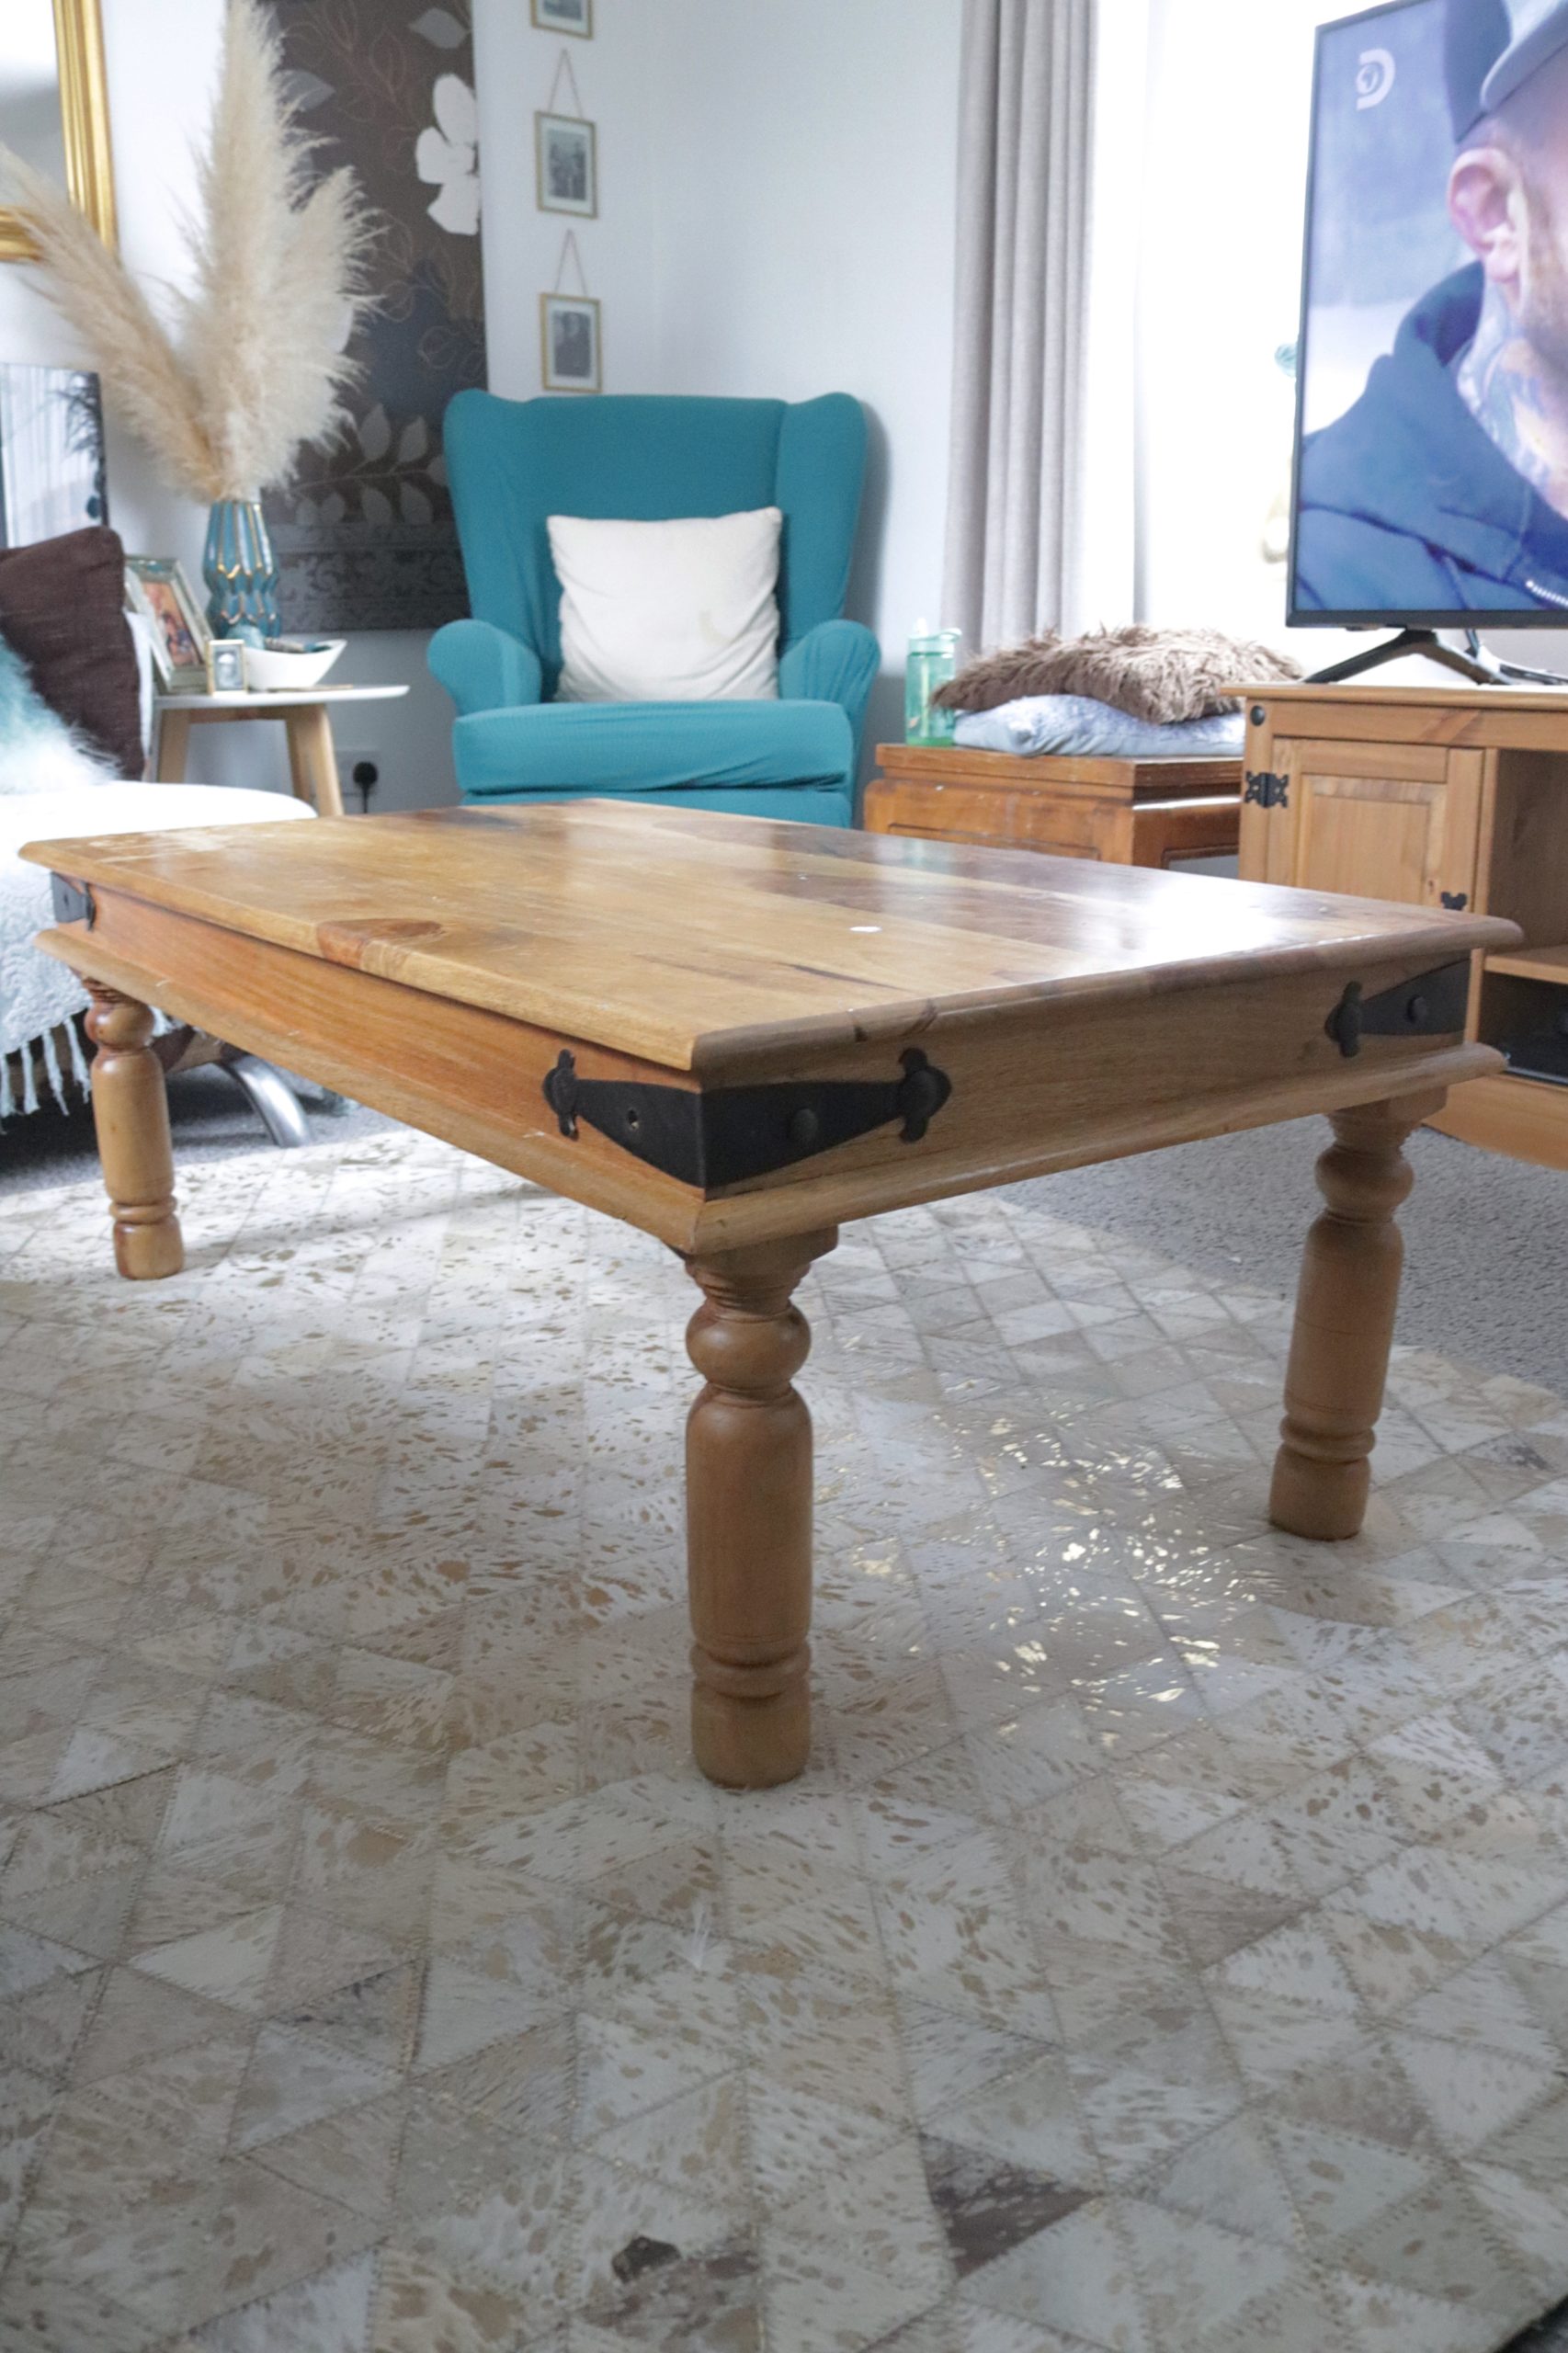
Oh god! Just look at those legs! I hated those legs 😀 😀 So the new plan for the coffee table was inspired by the lovely Michaela who shares her home on Instagram at @mishcashoe. Her home is absolute goals and its her style in general that has inspired the changes were making in the living room (catch up on those by reading Living room plans and Teal and gold living room). So our coffee table is based on what Michaela did with her dining table that you can see below. But instead of building it from scratch we used the existing table parts as much as possible. The base of our coffee table will be fluted like Michaela’s and then our top will be oval.
So now you know the plan let’s get started on our Fluted Coffee Table DIY. Below you can see that first thing was to remove the legs and the black hardware from the sides.
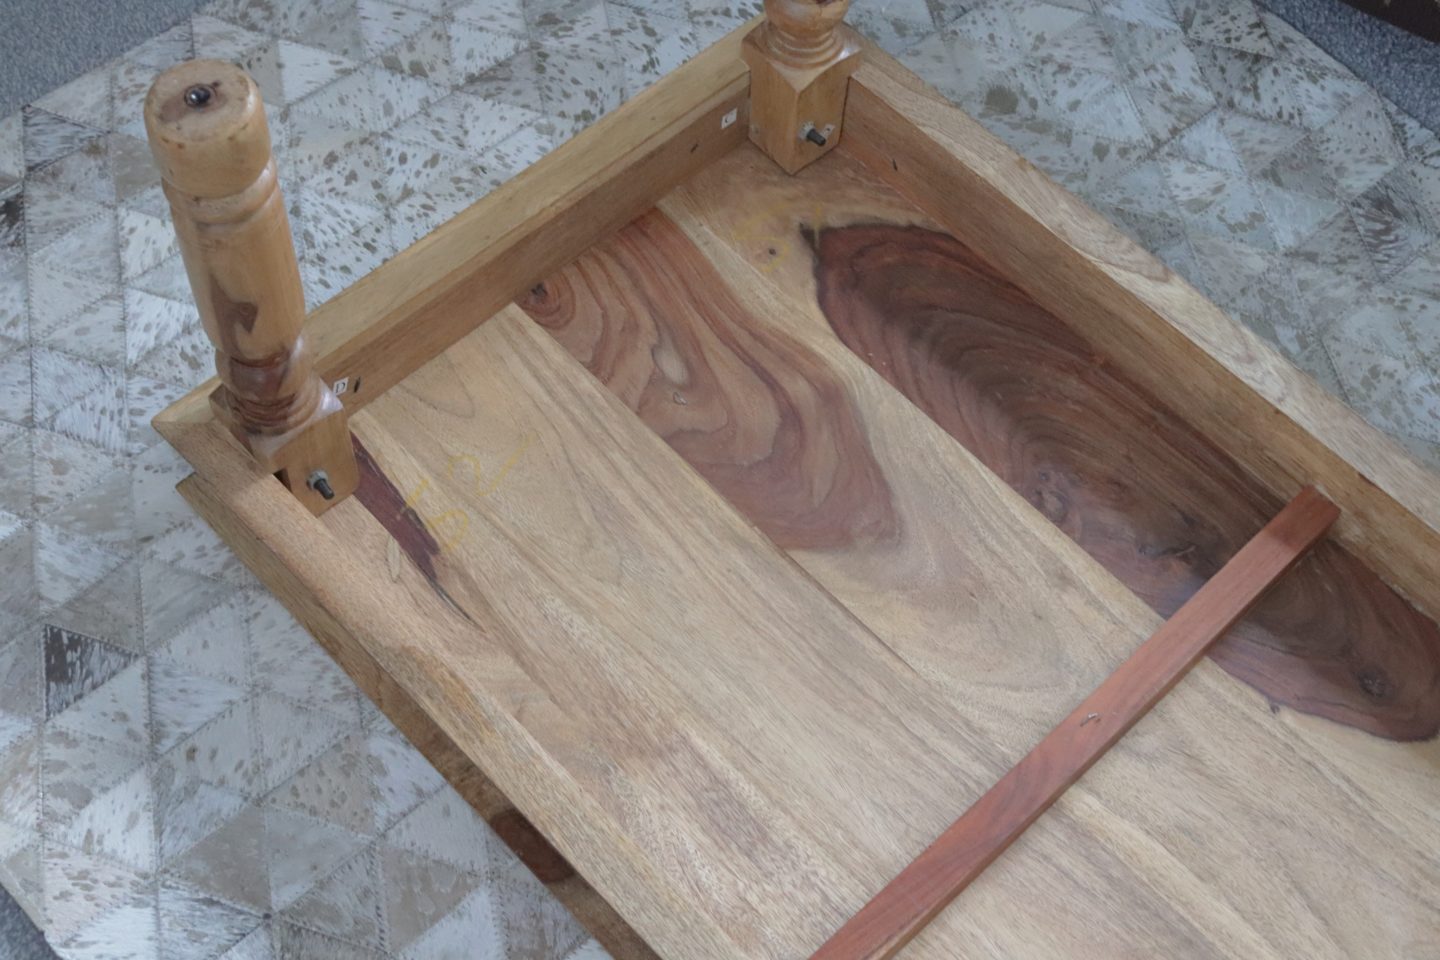

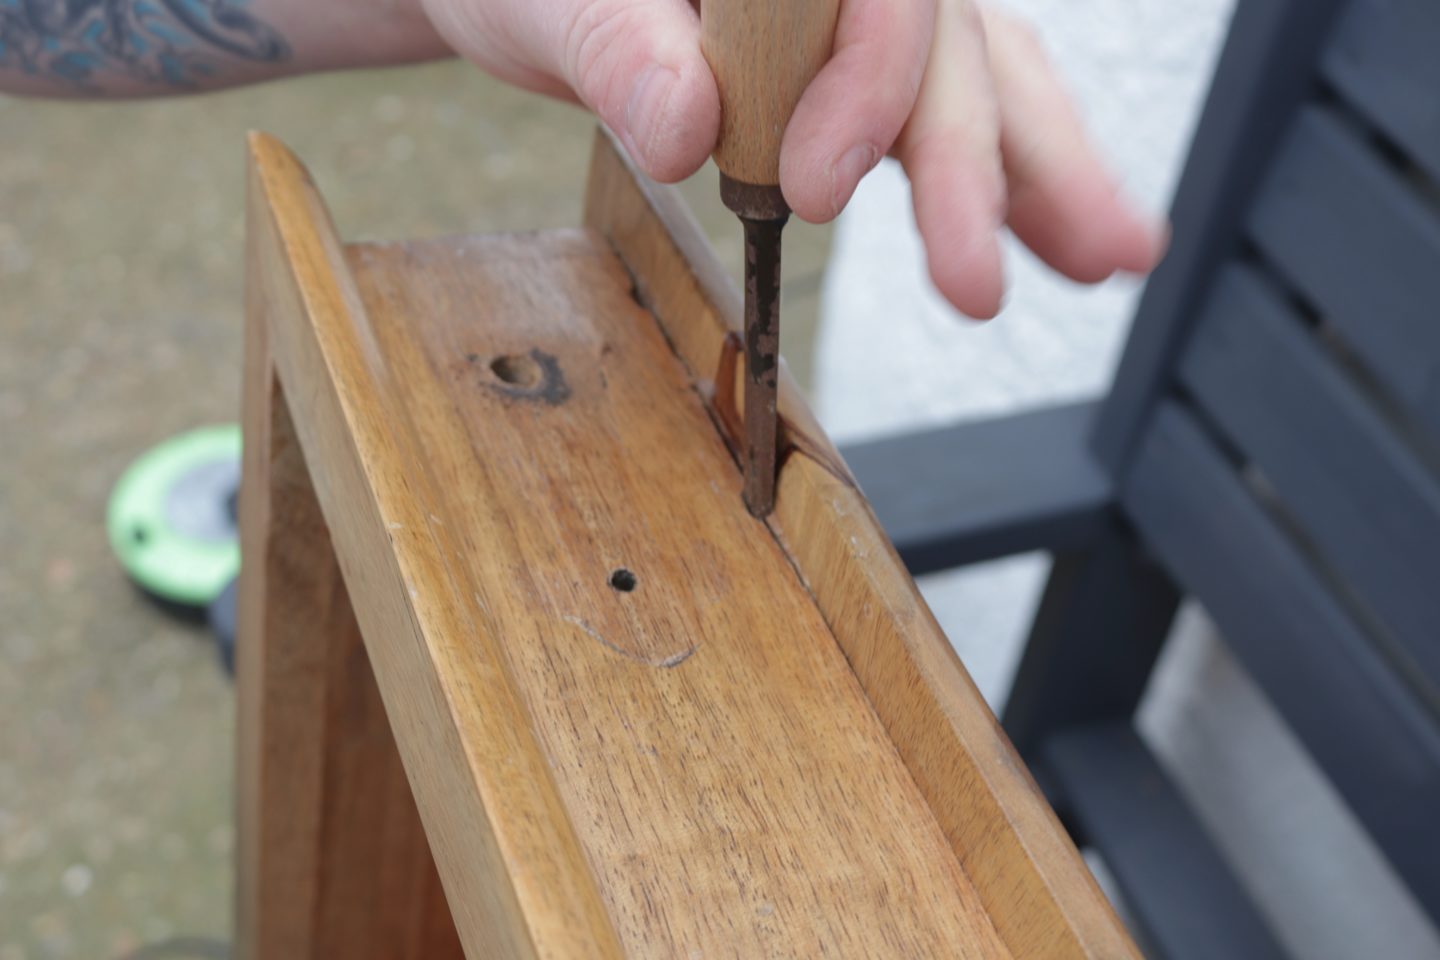
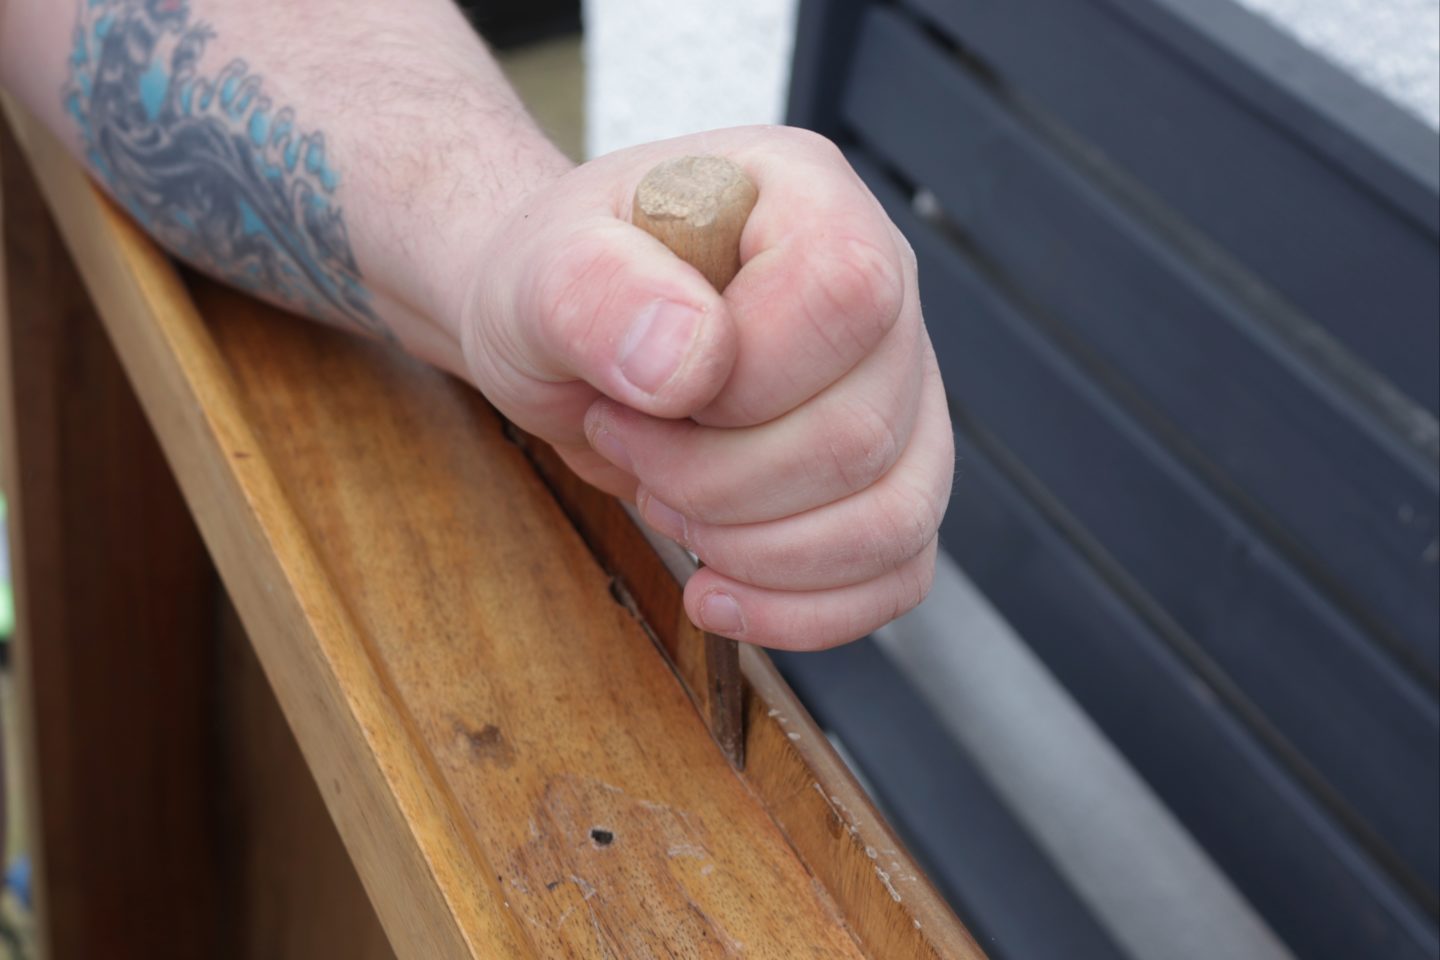
We then used a chisel and a hammer to carefully remove the very top of the table. This was attached with glue and nails so we had to move slowly around the edge loosening it gradually.
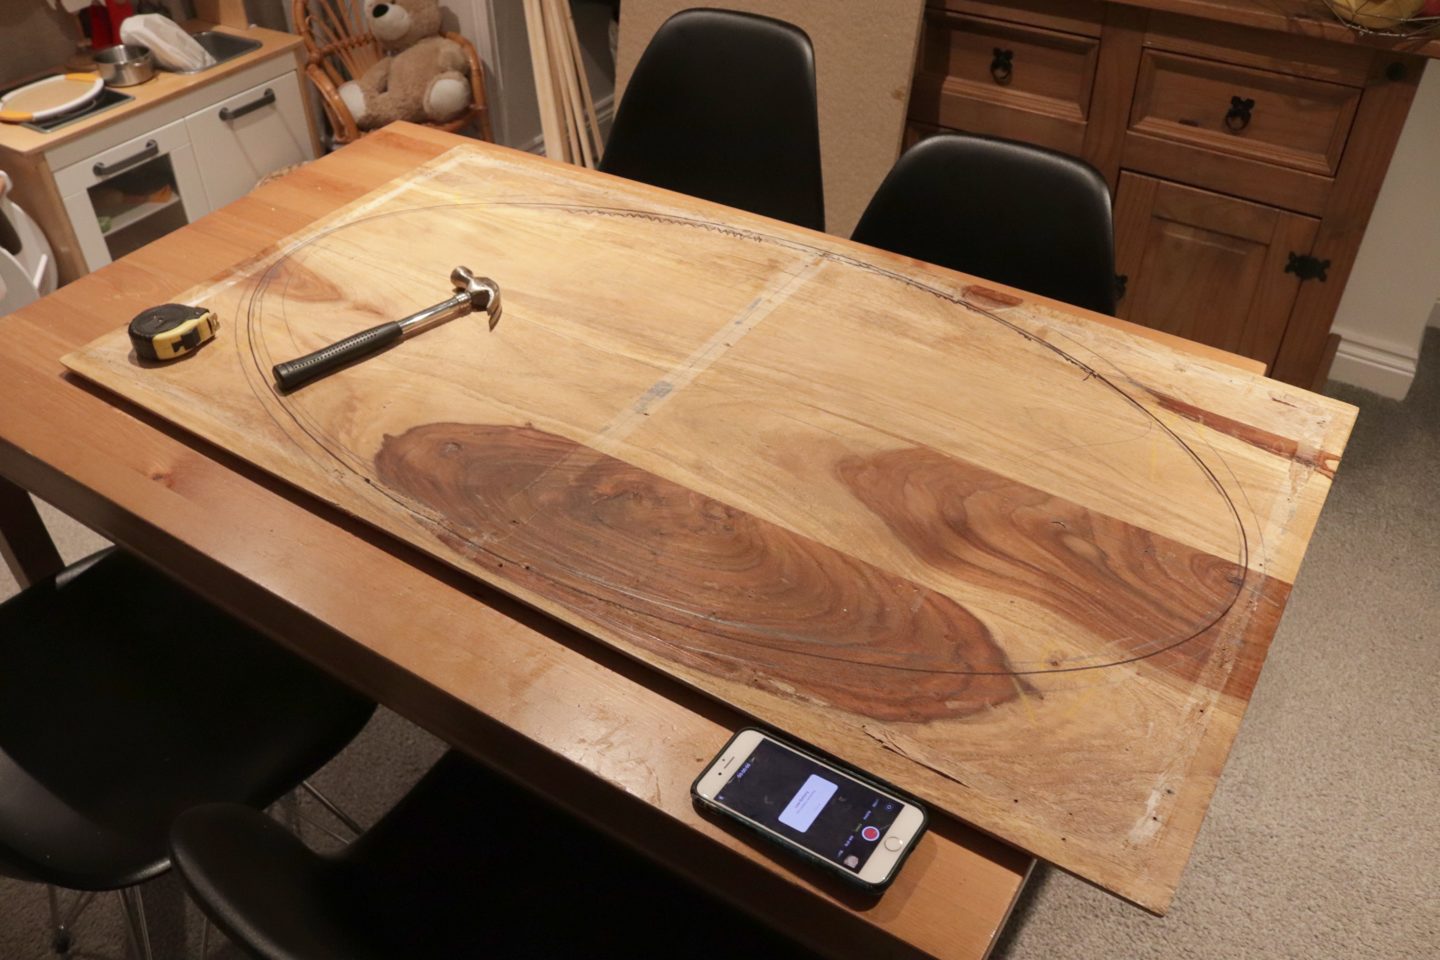
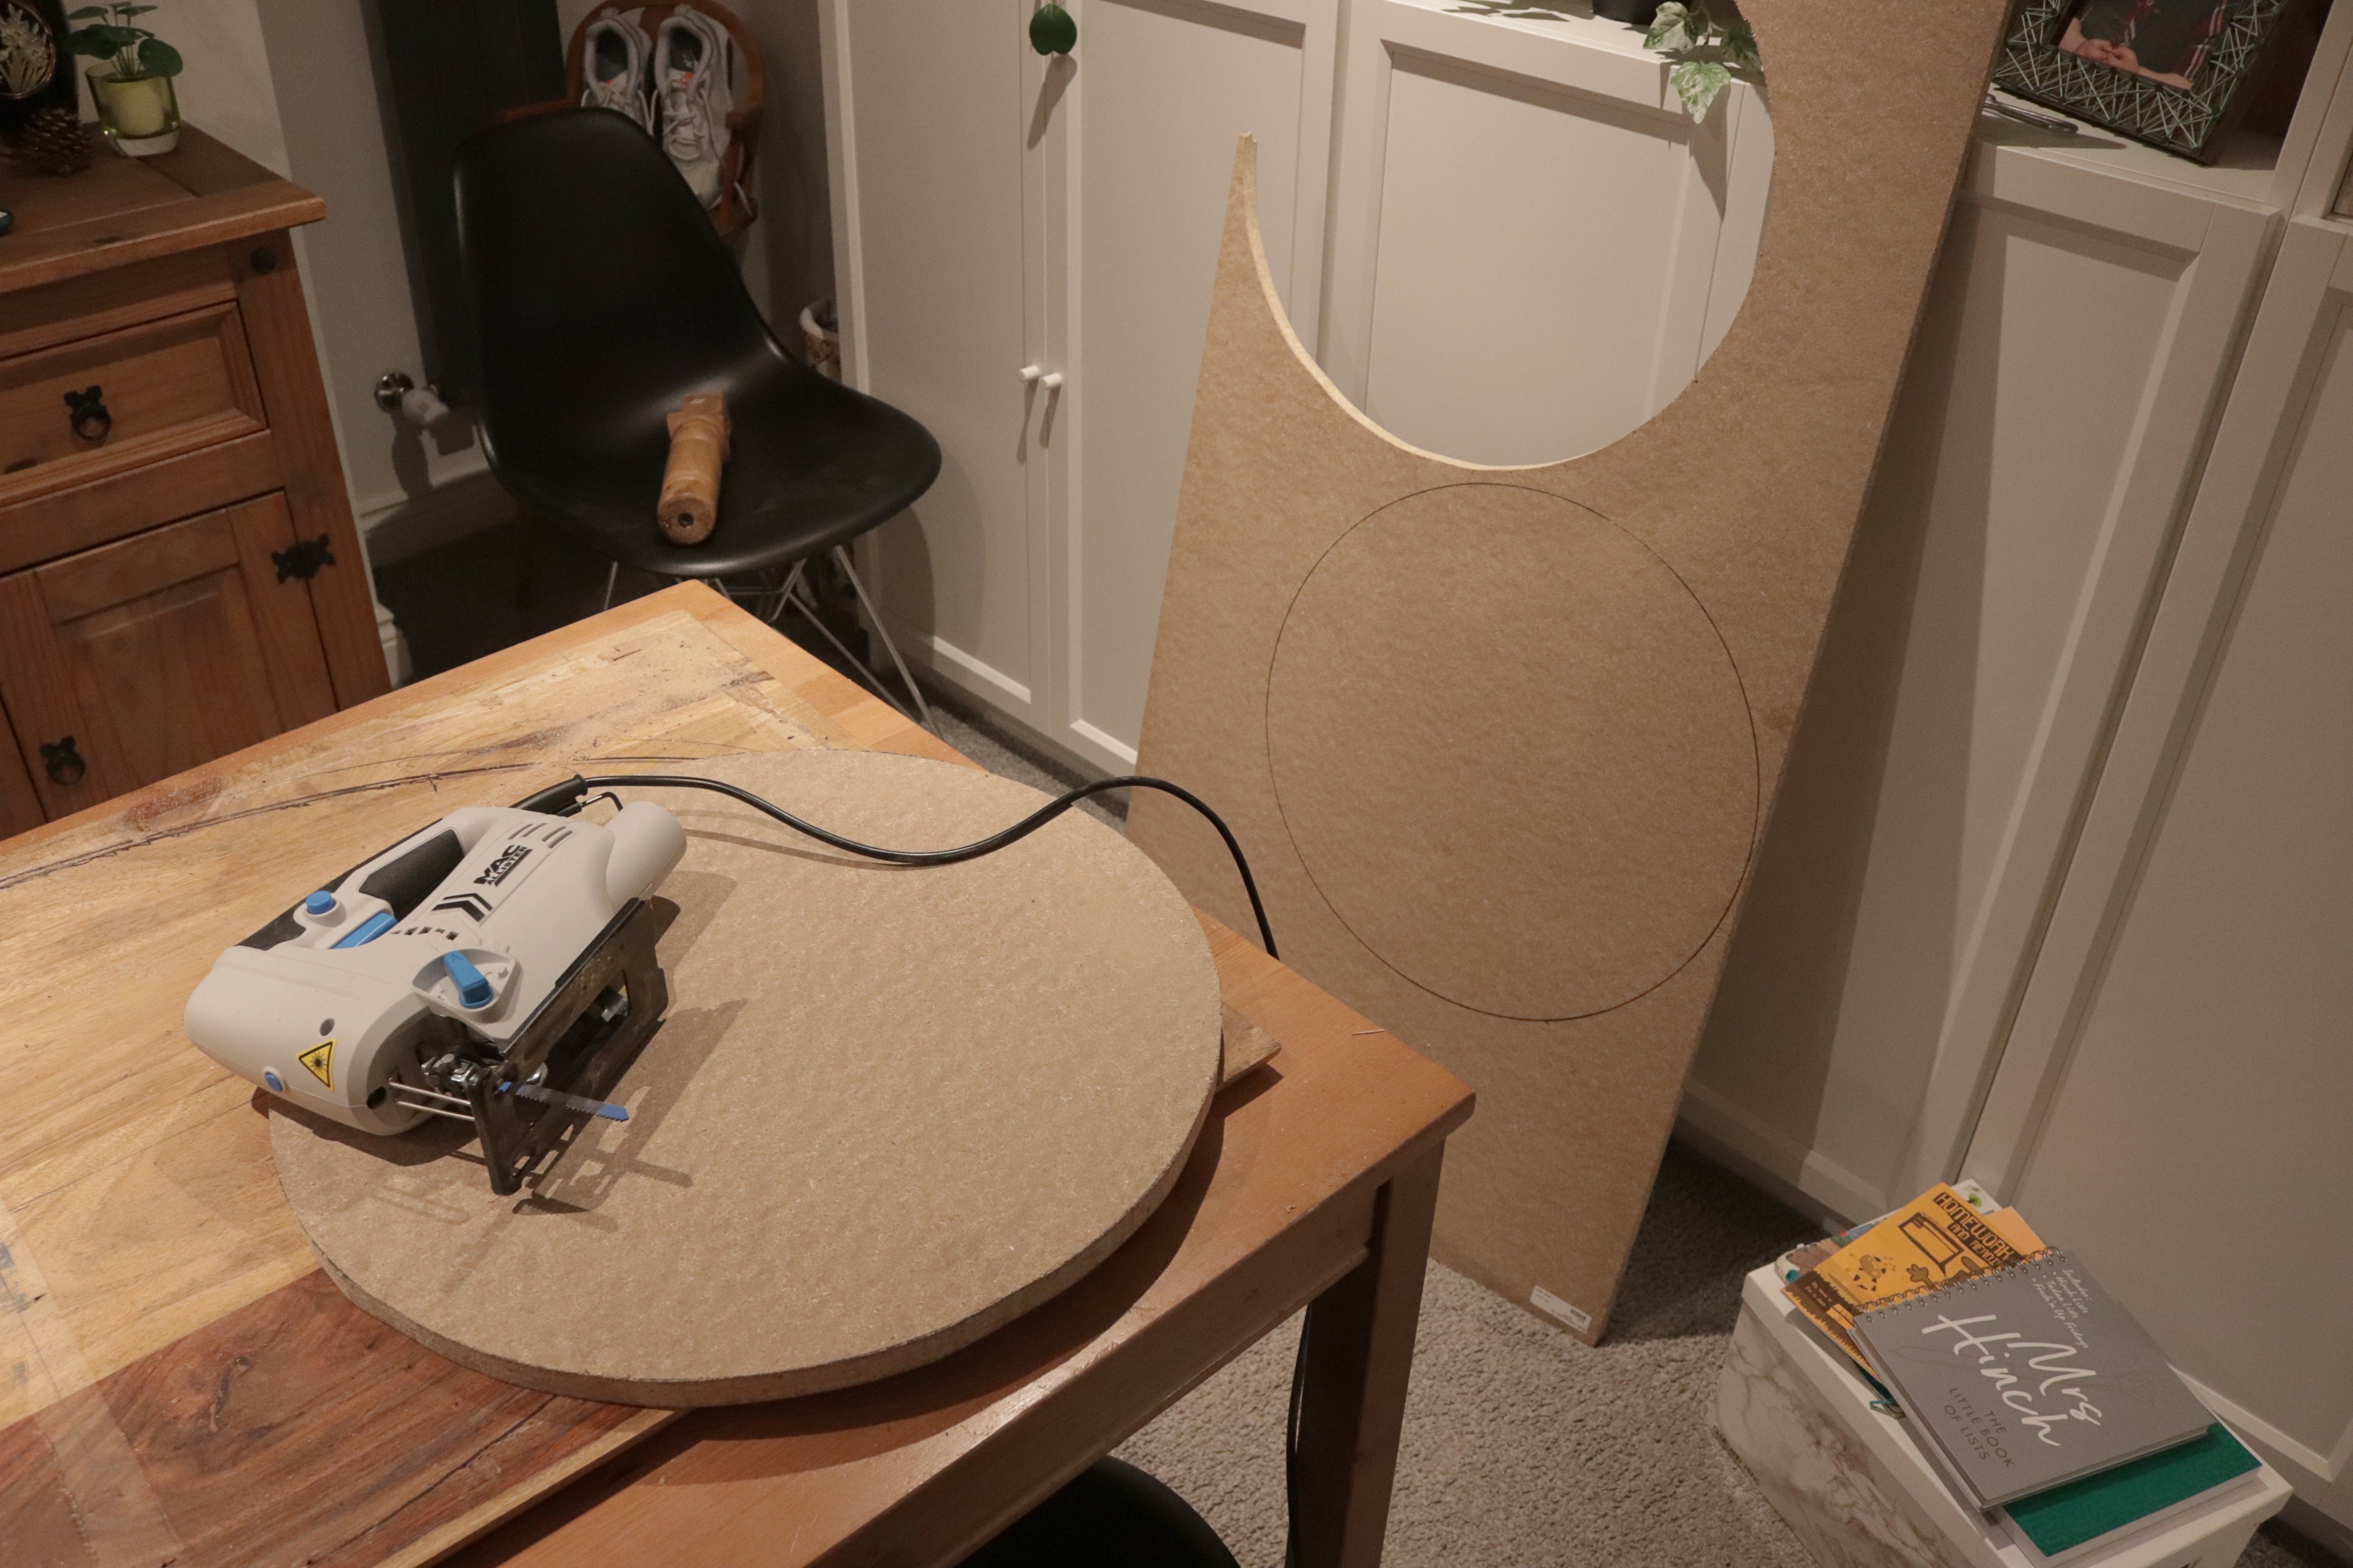
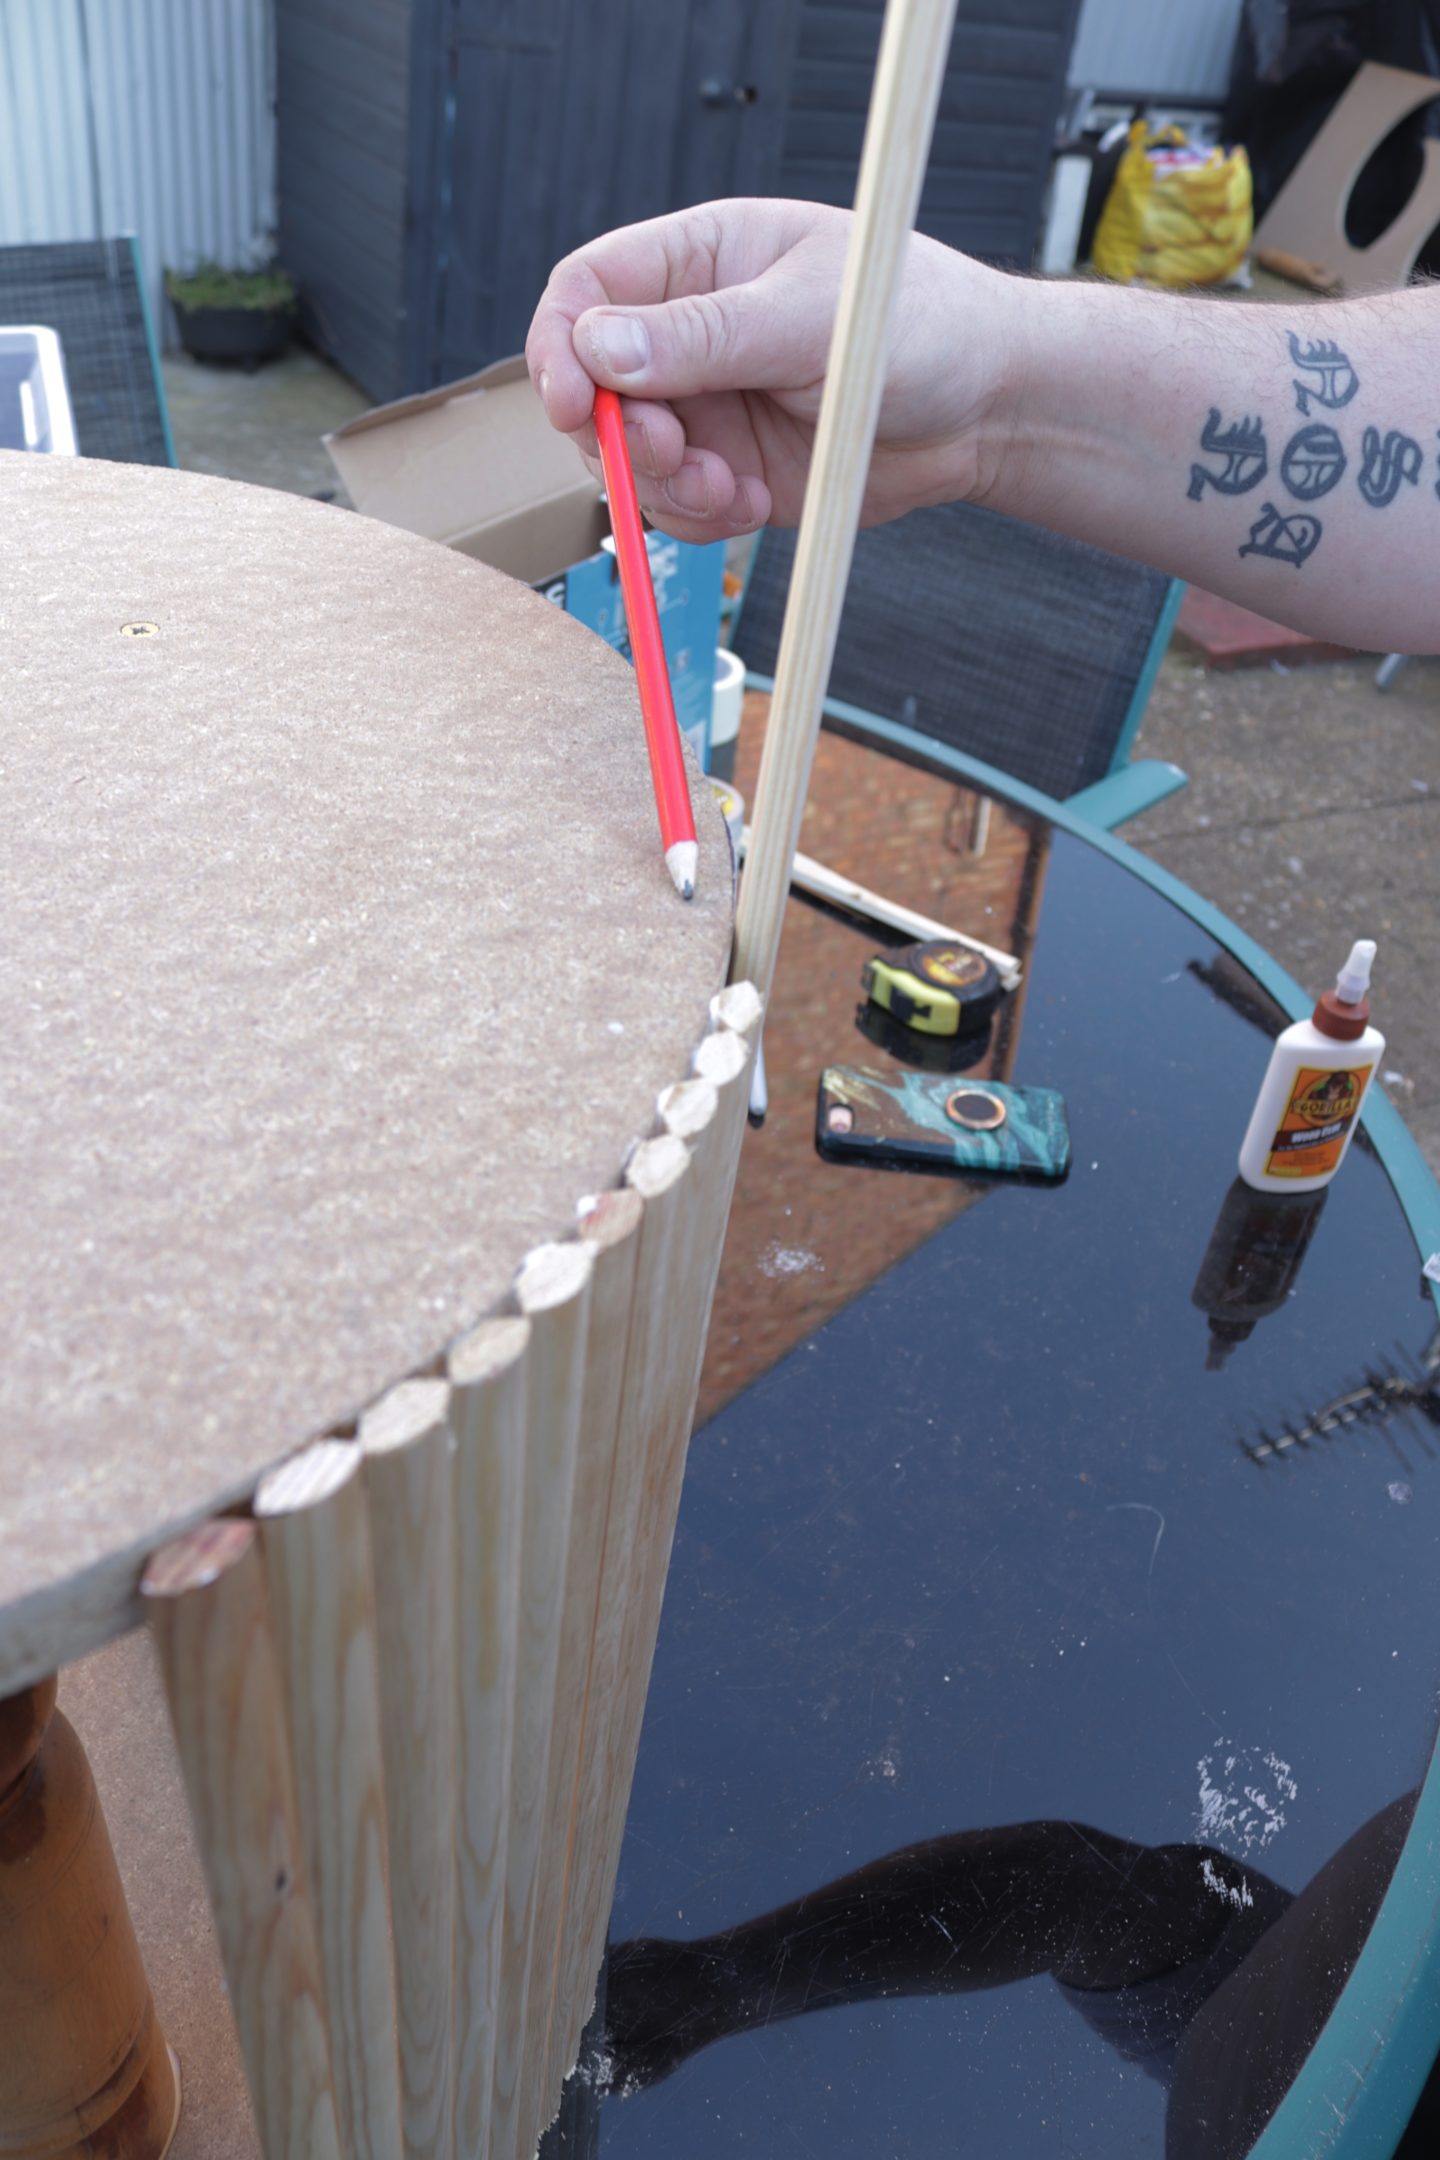
This very top part of the table would be our final table top but we wanted to make it an oval. I have no idea how to put into words the technique we used to draw out the oval. We found a video on YouTube by a very annoying man with very bad editing graphics but he also had very easy steps to follow that I will link here for you. I then used the jigsaw to cut it out. I was a little nervous as it’s only the third time I have used a jigsaw (I used it to make my DIY plate rack and cut down my Ikea forhoja trolley) and it’s the first time that I cut something and needed it to be perfect!
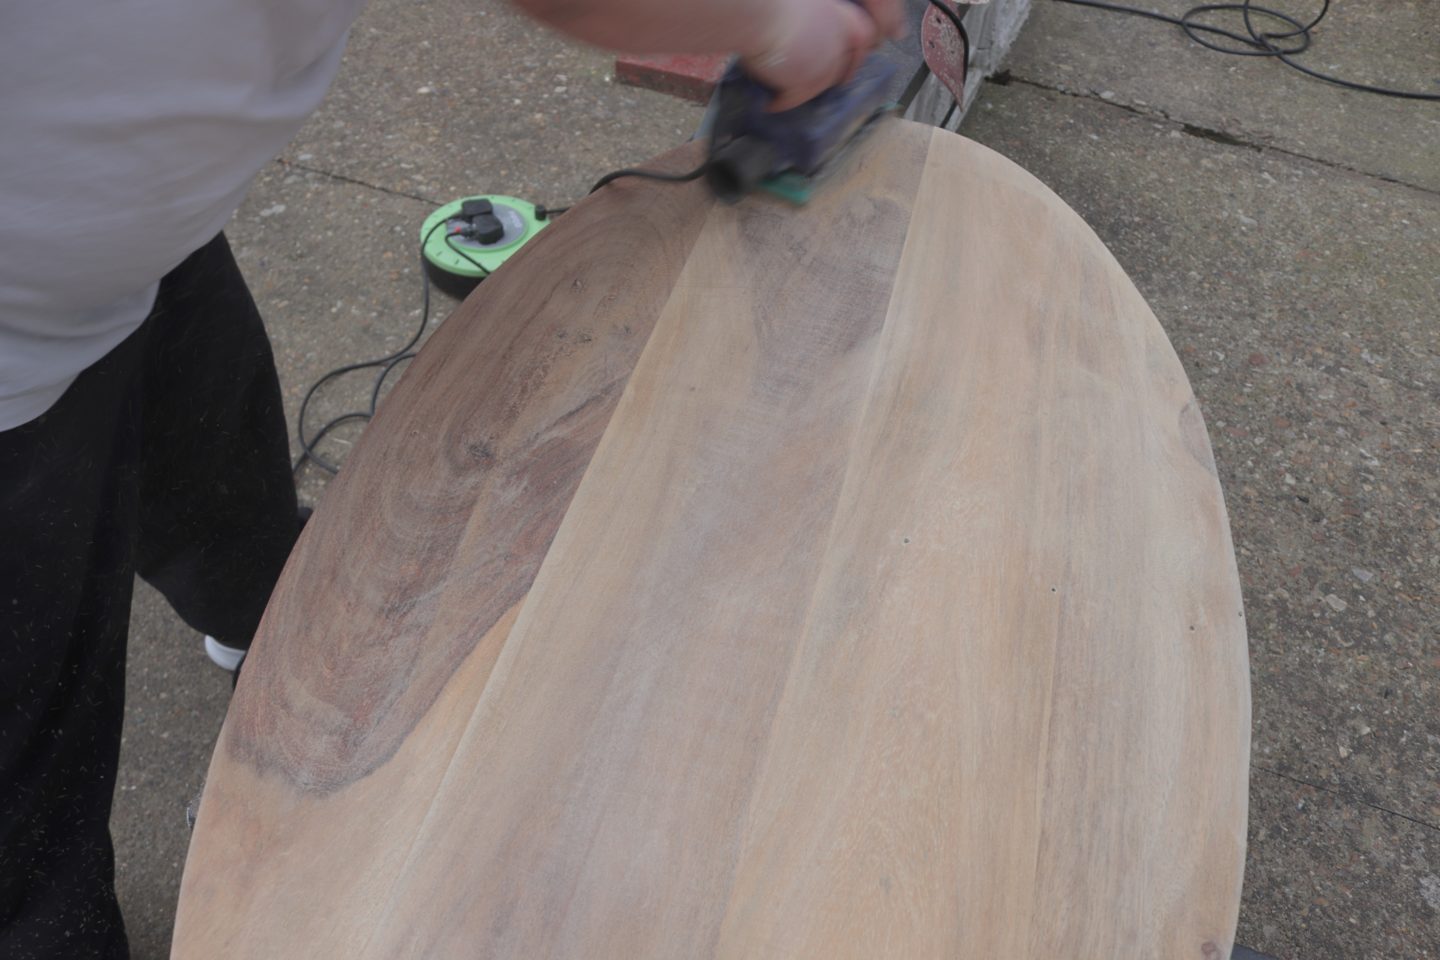
Once we had our oval it was time to sand it down. We wanted to get rid of the varnish and make it super smooth so started off with a course grit paper and the belt sander to remove the varnish. Then switched to our mouse sander, first with a medium grit and then again with a fine grit until the top was perfectly smooth. We also sanded the edges to get a perfect oval.
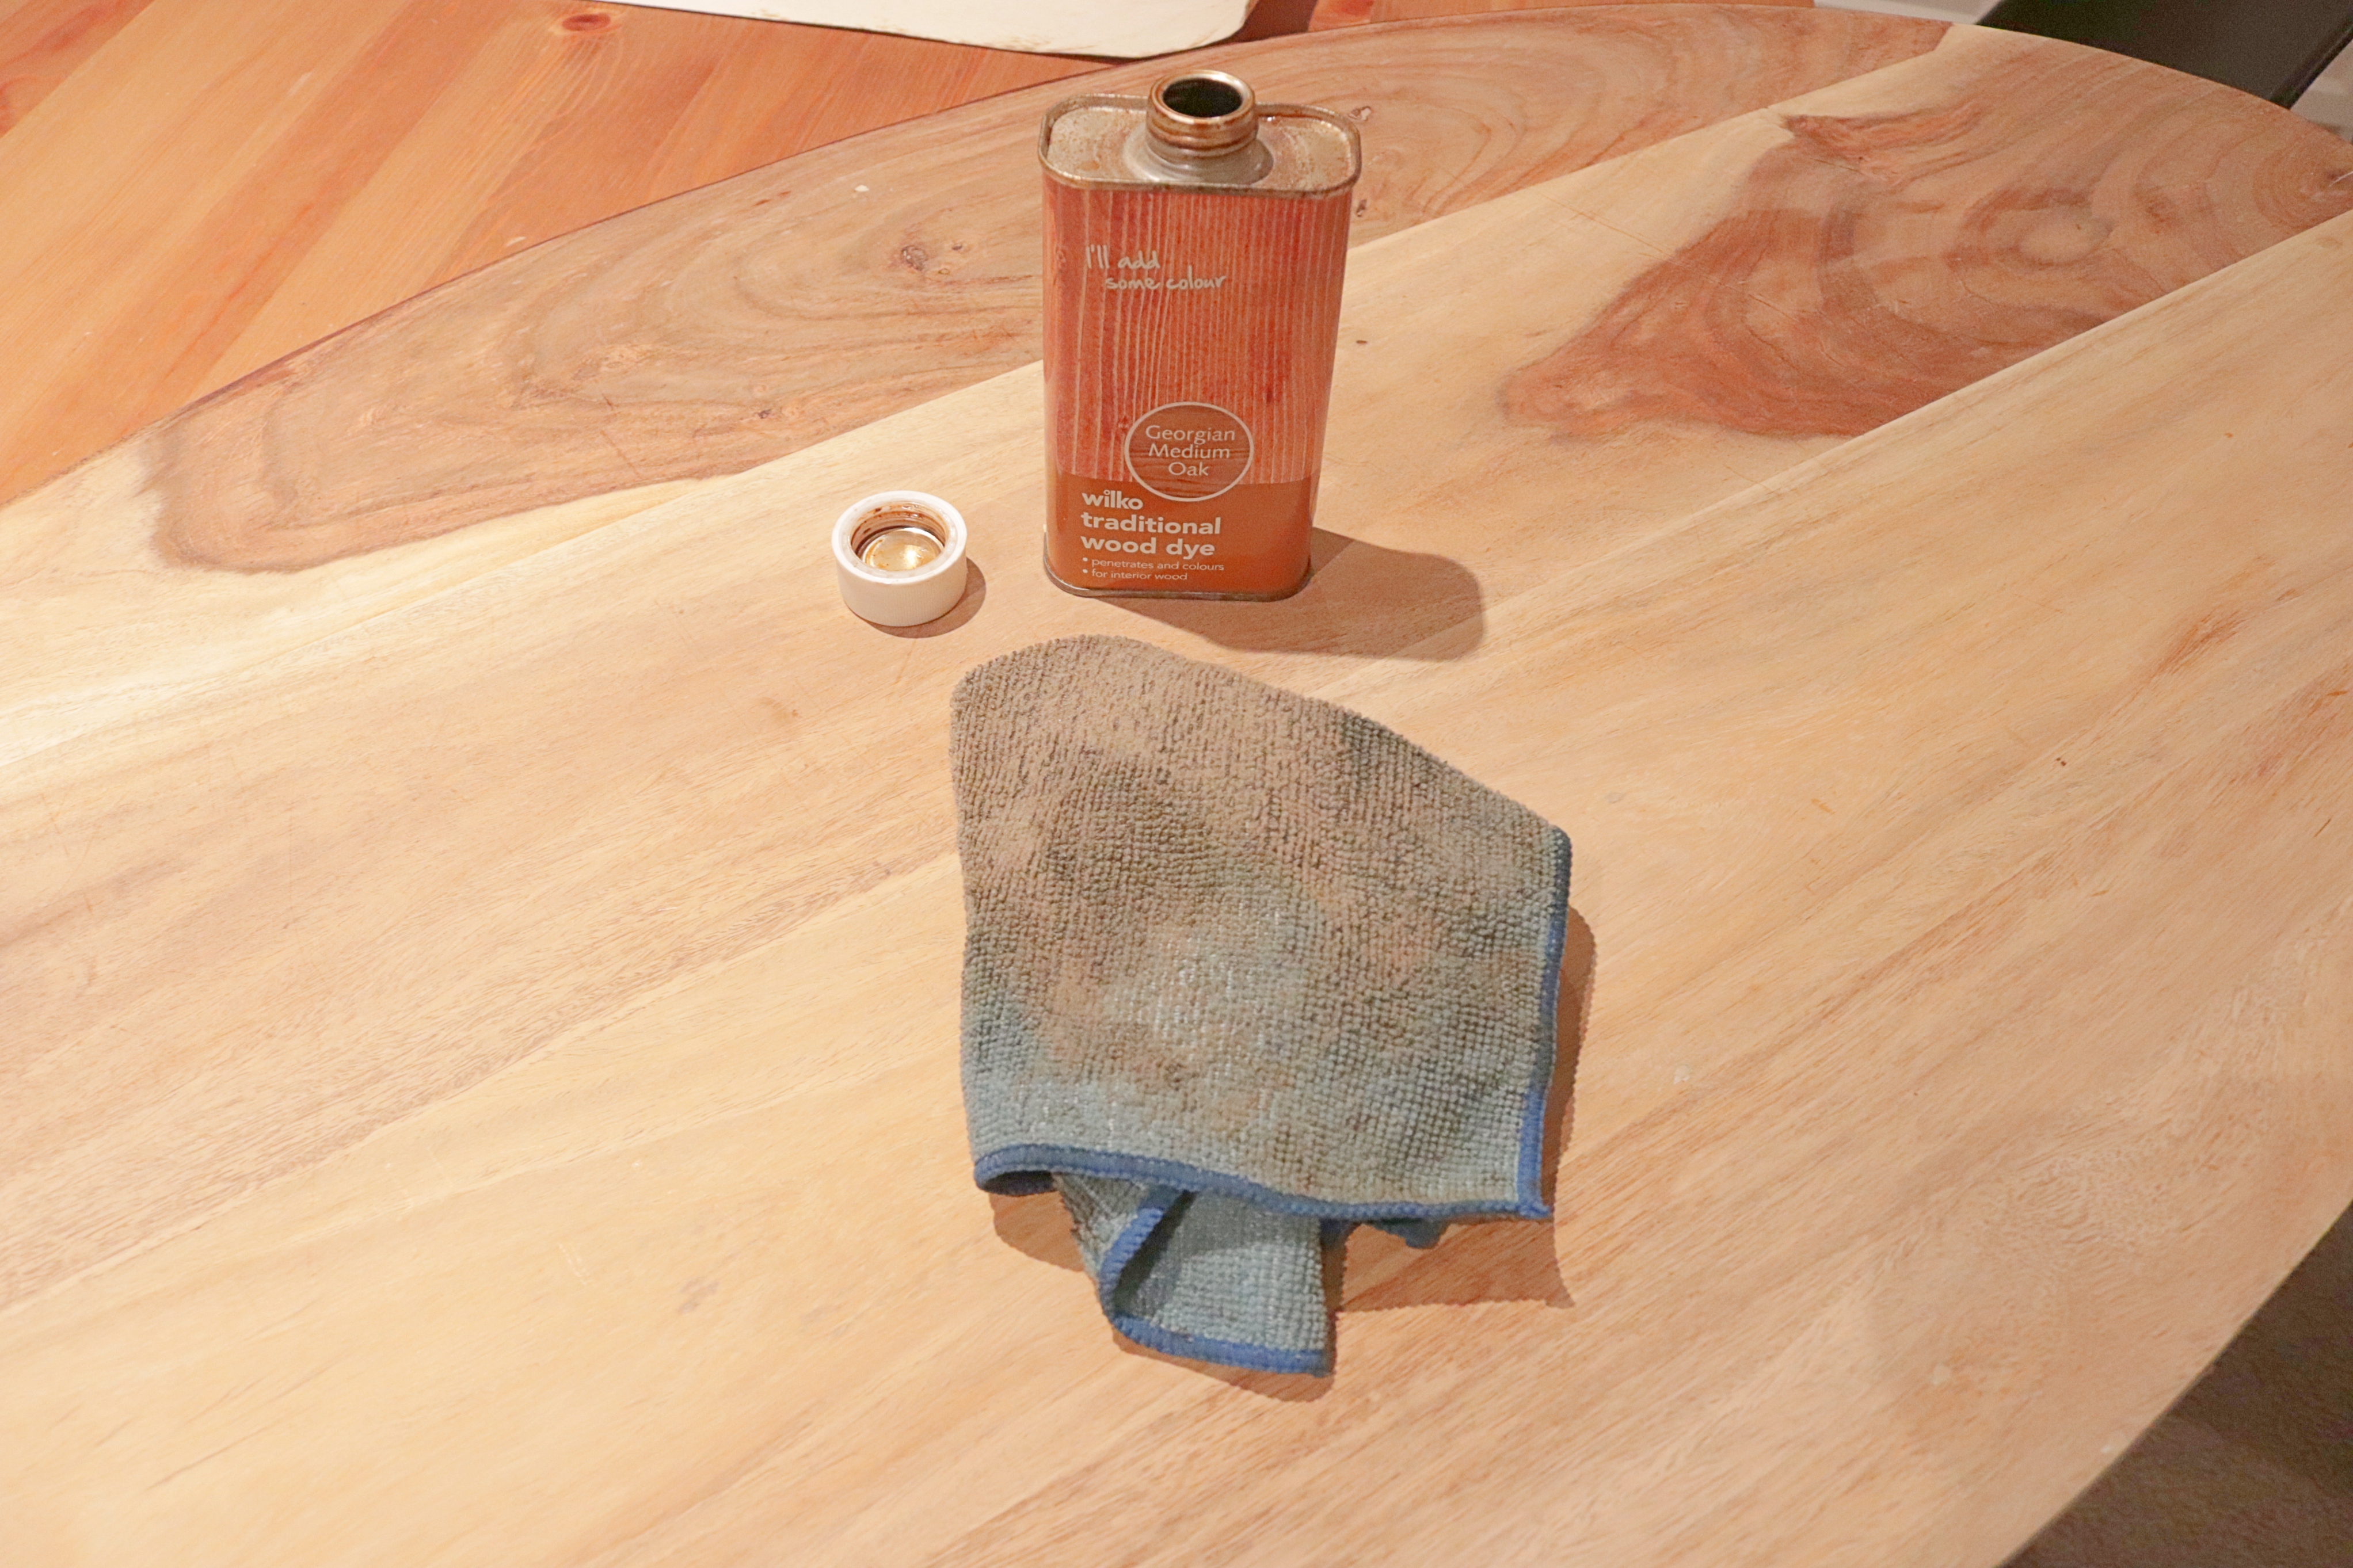
The last step for the table top was to stain it. I used this Georgian medium oak from Wilko which is what I use on any wood finish in my home so it’s coherent throughout.
Moving on to the base, first we needed to decide how big we wanted it to be. We decided on making ours about three inches smaller than the shortest width of the oval (once the trim was on this made it about an inch smaller each side of the oval) we wanted to make the base as big as possible so that if one of the kids lent on the ends it didn’t tip up.
I’ve not given any measurements for this project because I think if you were to try it yourself you could just make it fit to what you have/how big your space is. Our measurements are specific to this table that we were working from. What you do need to know is that you need to cut out two circles of the same size. We used chip board that was an inch thick and used our jigsaw to cut them out.
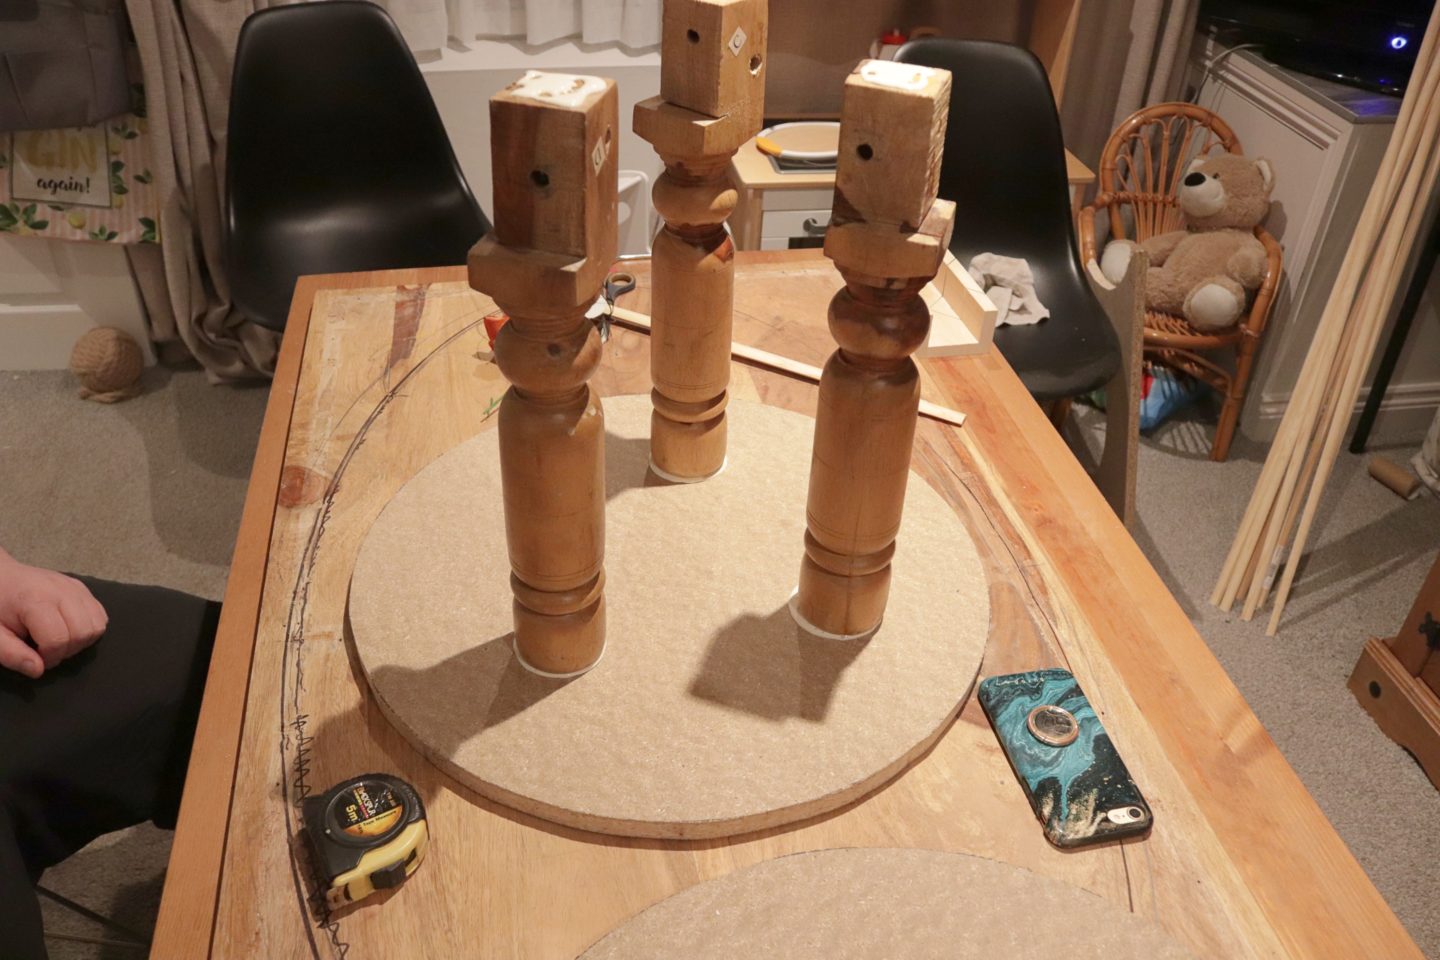
We used the old legs as structure for the base. We laid down one circle and wood glued on three of the legs. Then we added more wood glue to the other side of the legs and put the other circle on top. We started out just using glue as you need the top and bottom circle to line up perfectly. Once we put the top on we used one of the trim pieces as a guide to line them up and then we left it to dry completely over night.
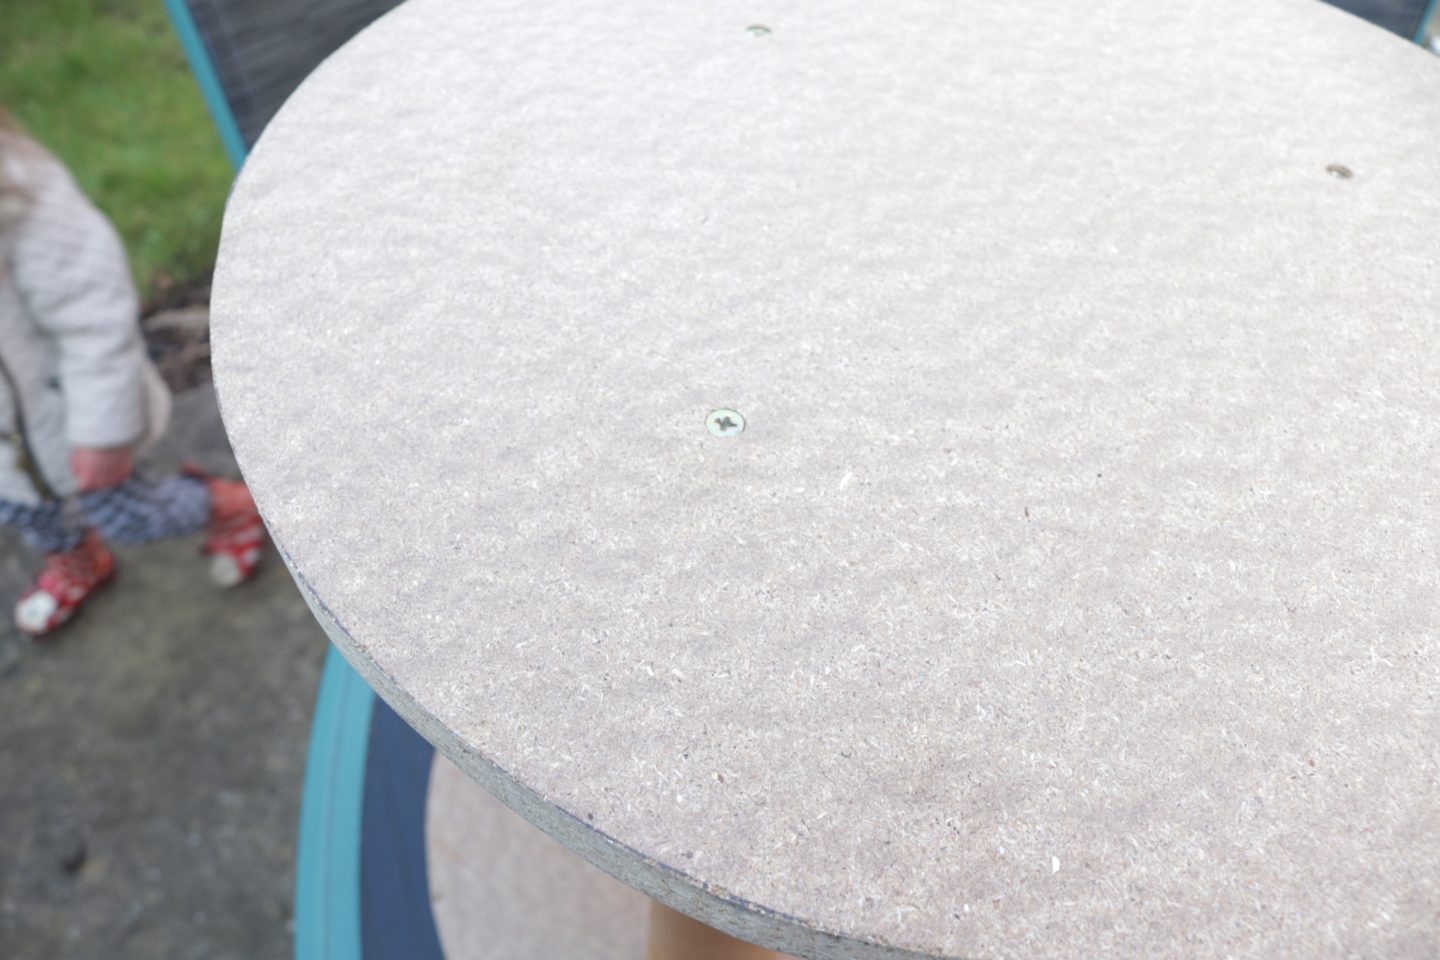
The next day we also added screws to make sure it wasn’t going to come apart. We just drilled a pilot hole and then screwed the screws through the top and into the legs and then the same again on the bottom.
We used 15mm pine quadrants for the fluting. A full dowel would give you a more defined flute but it would also double the price and you need a LOT of trim. We bought 8 originally (they were around 2.5m long), Shaun then went to get 10 more and when we were almost finished realised we still didn’t have enough and Shaun had to rush to B&Q to pick up one more before they shut!
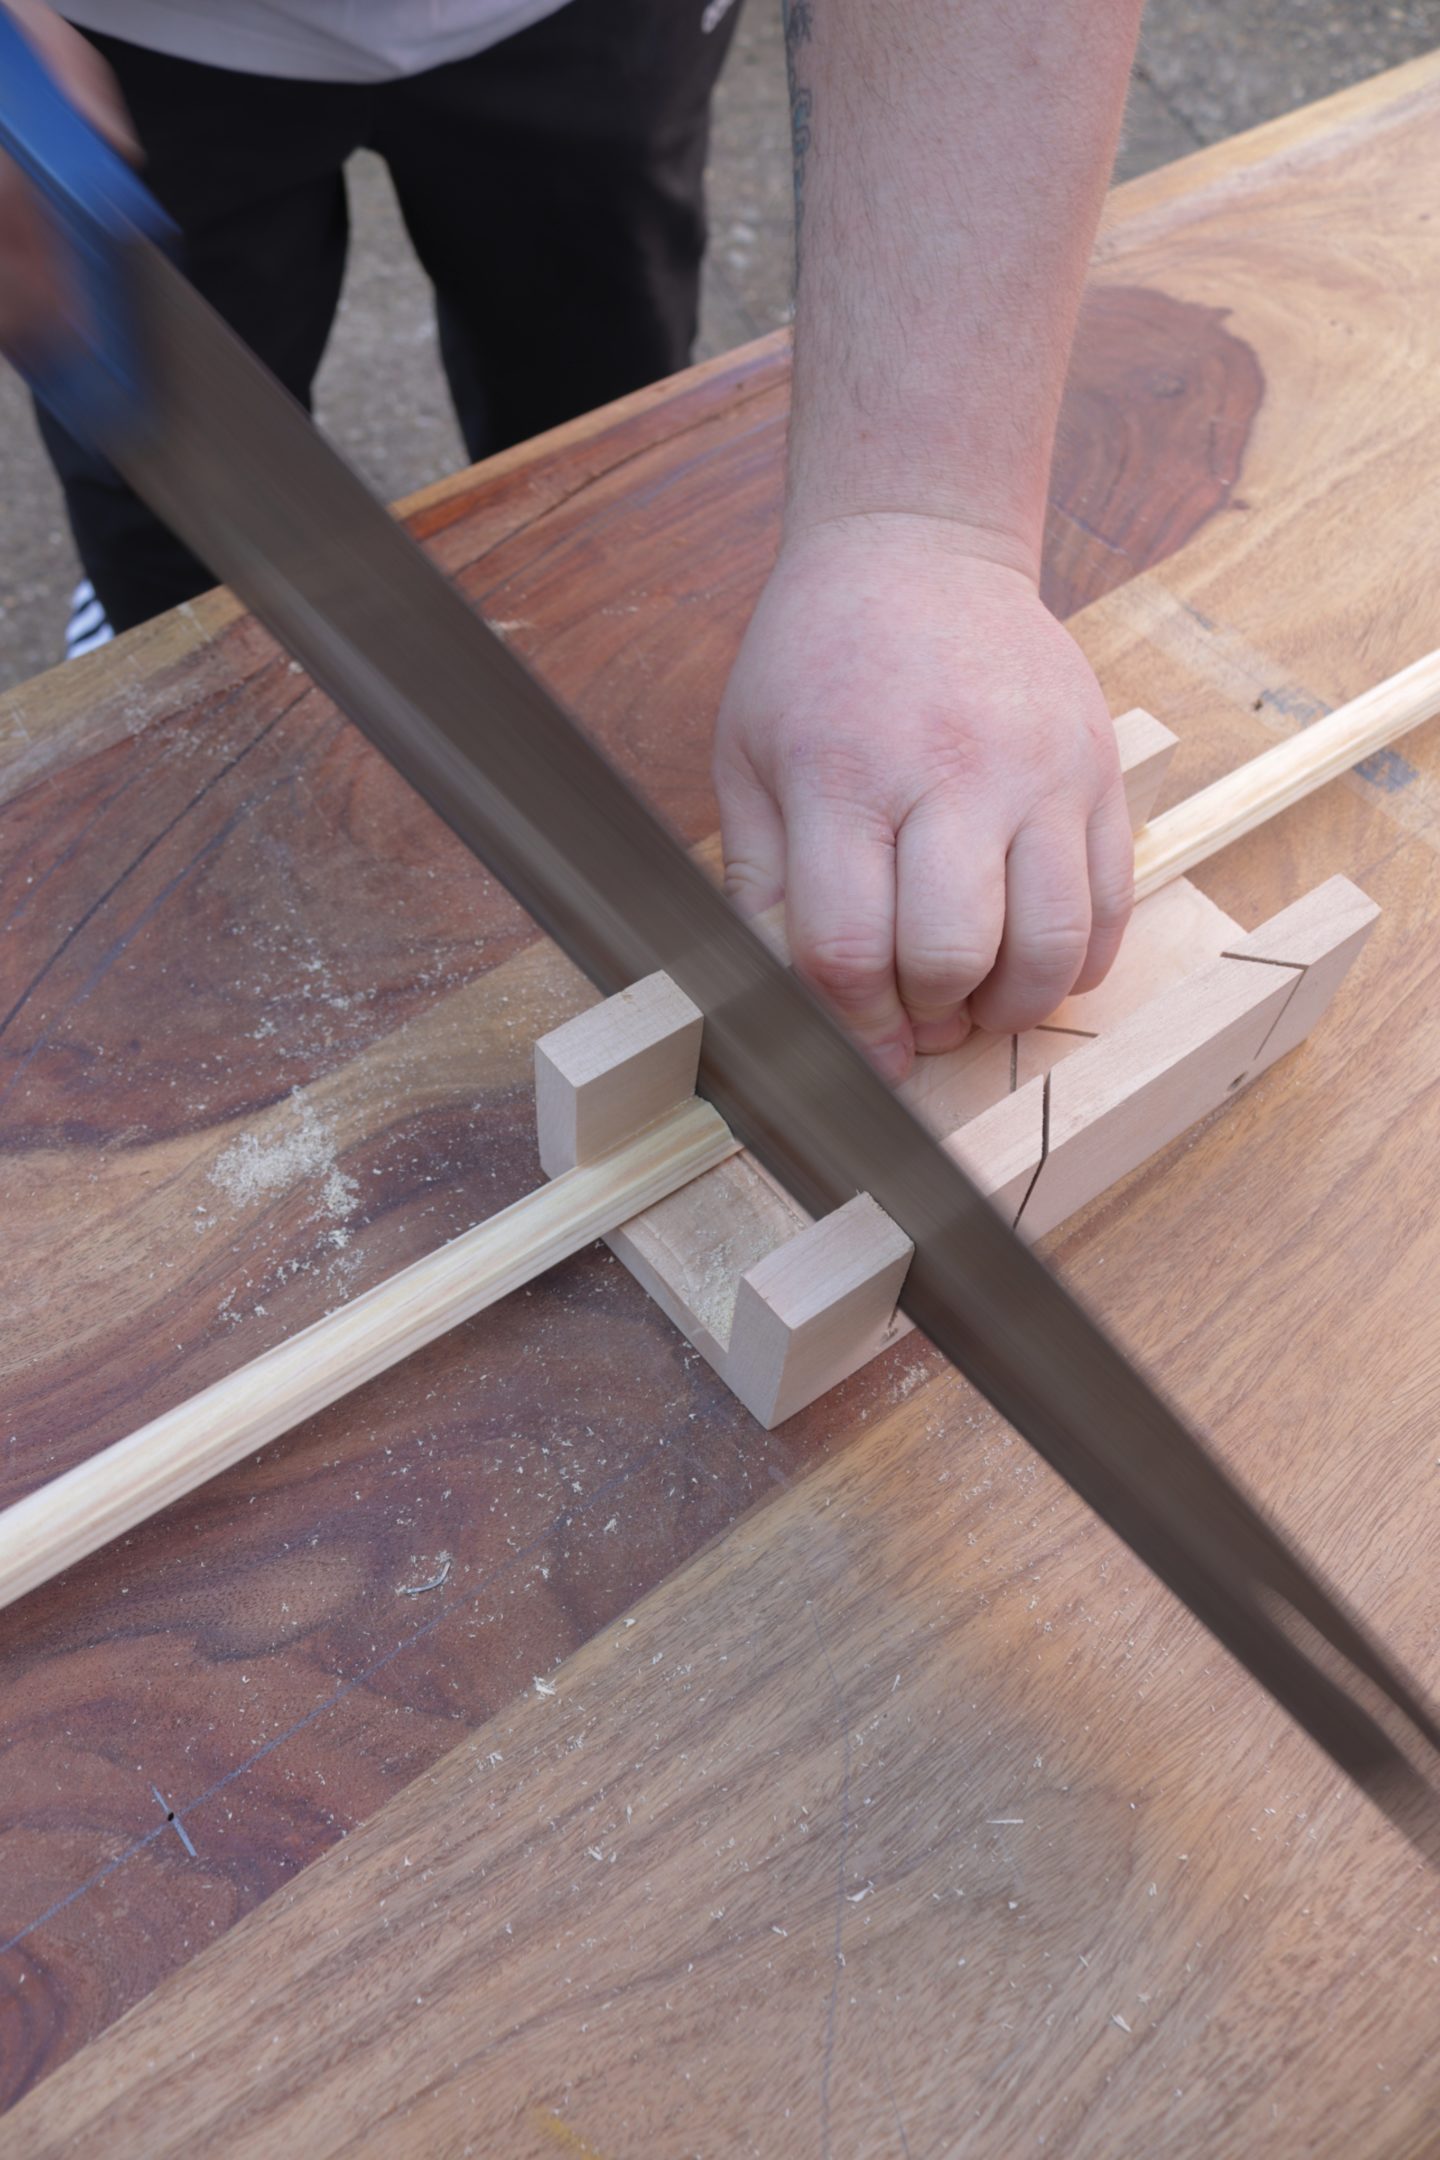
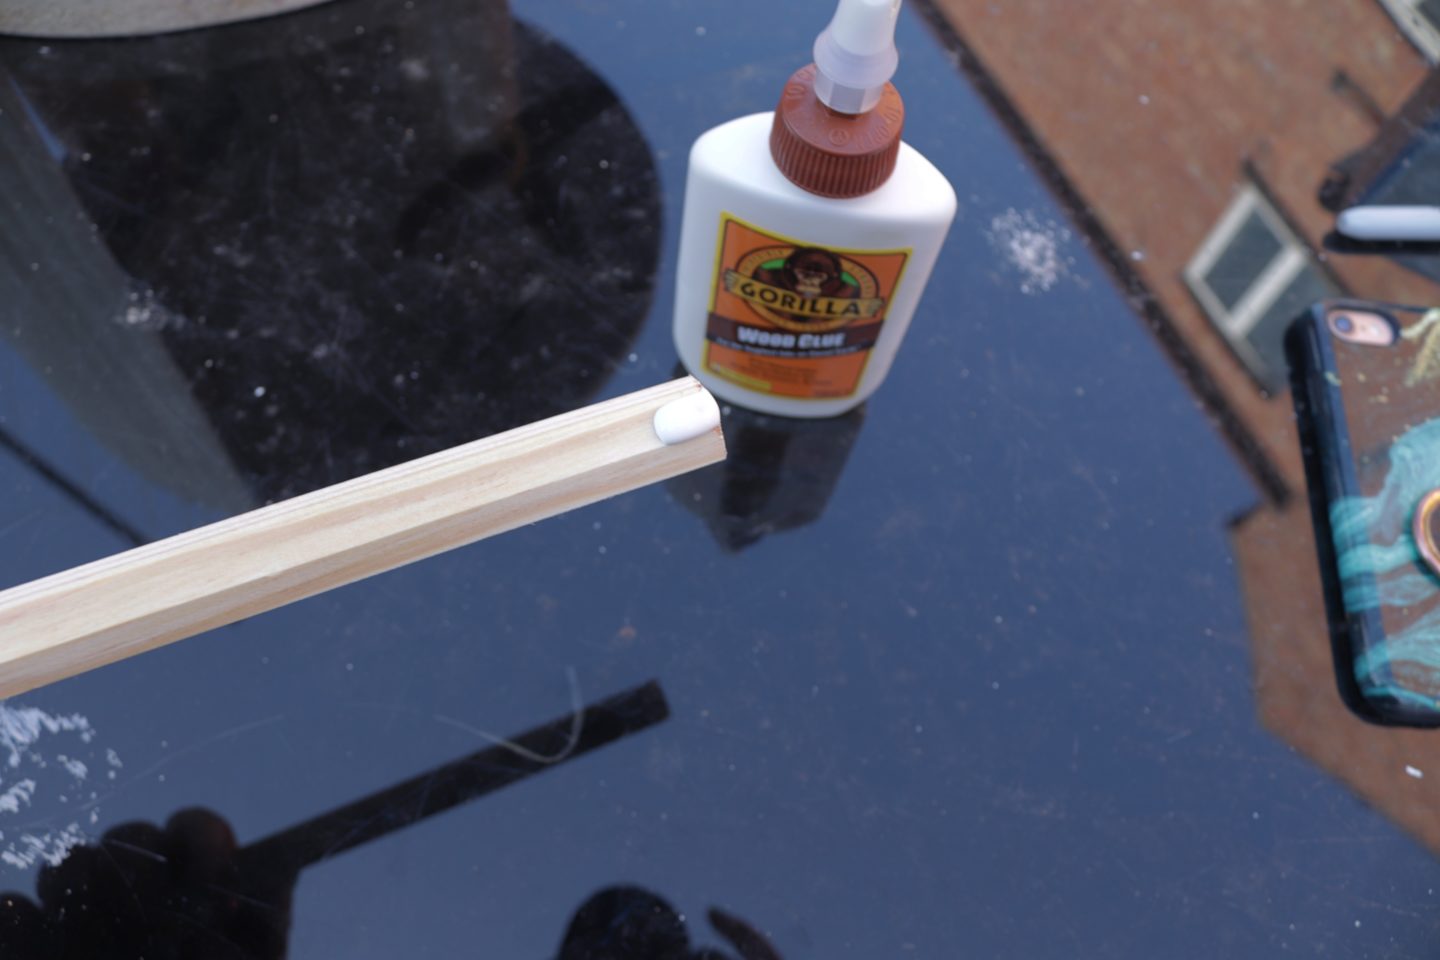
Our technique was to hold the trim up to the base and mark with a pencil where to cut. Shaun would then cut the trim using a mitre box and I would attach the dowel to the base by adding a bead of wood glue to each end and stick it on. We had about 8 pieces of trim on before we realised that glue on its own wasn’t enough, they kept moving about. So we then used some tiny, tiny tacks on each end as well as the glue but I forgot to get close up pictures of this. So we measured, cut, glued and nailed in over and over and over again!! It takes a lot of trim and time to get all the way around!
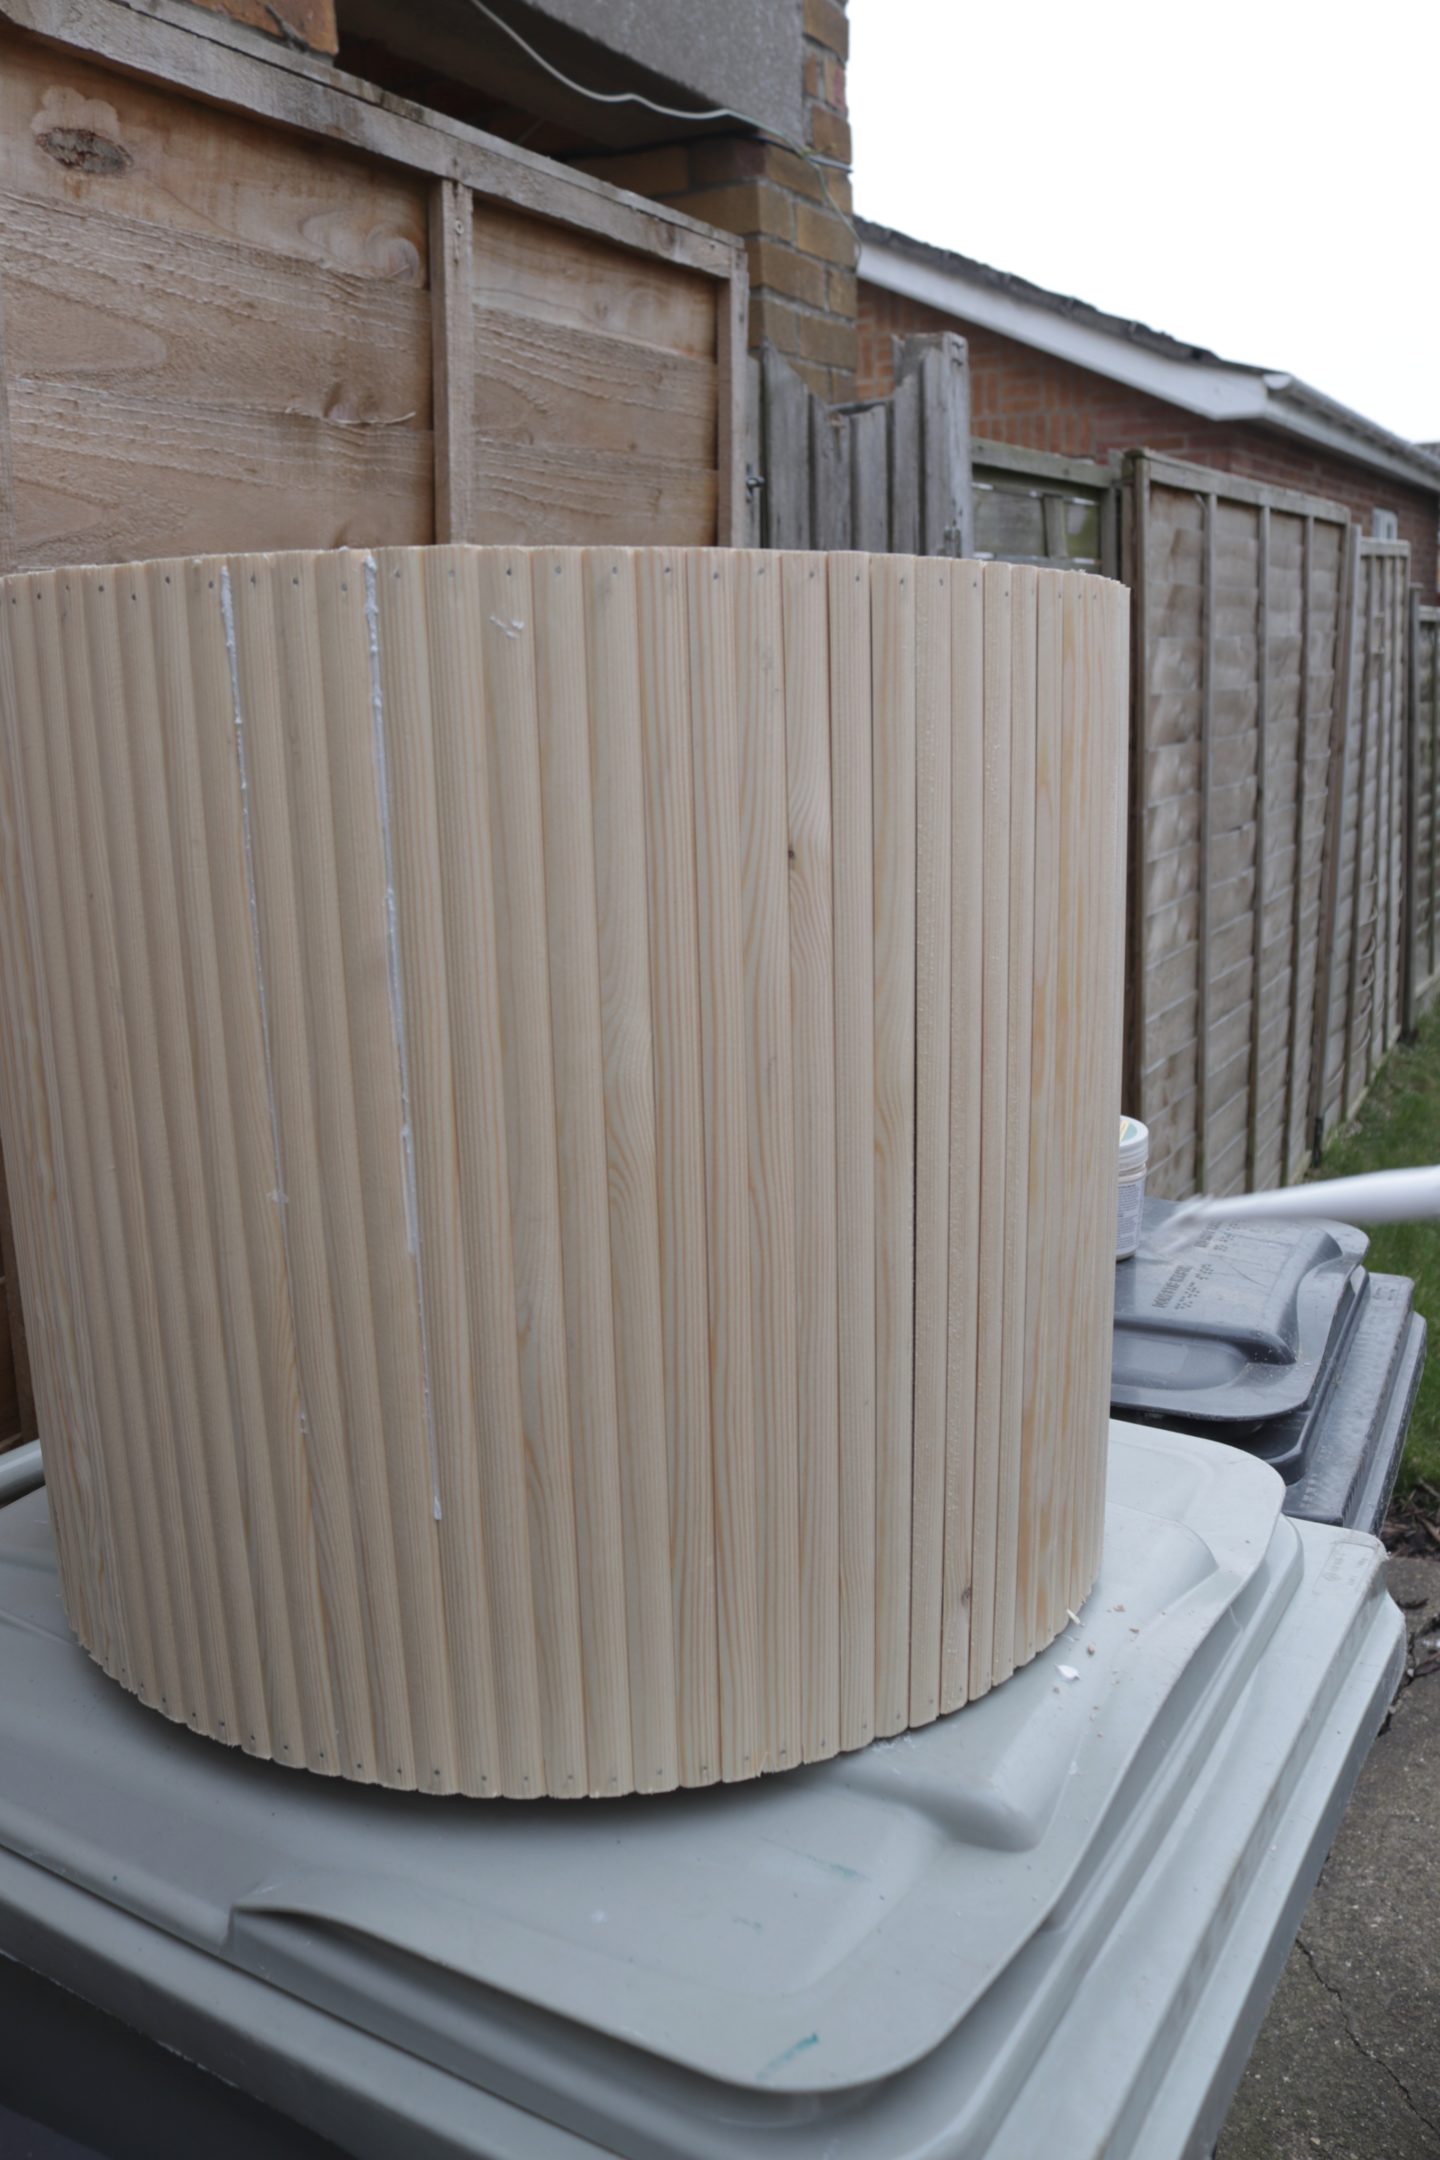
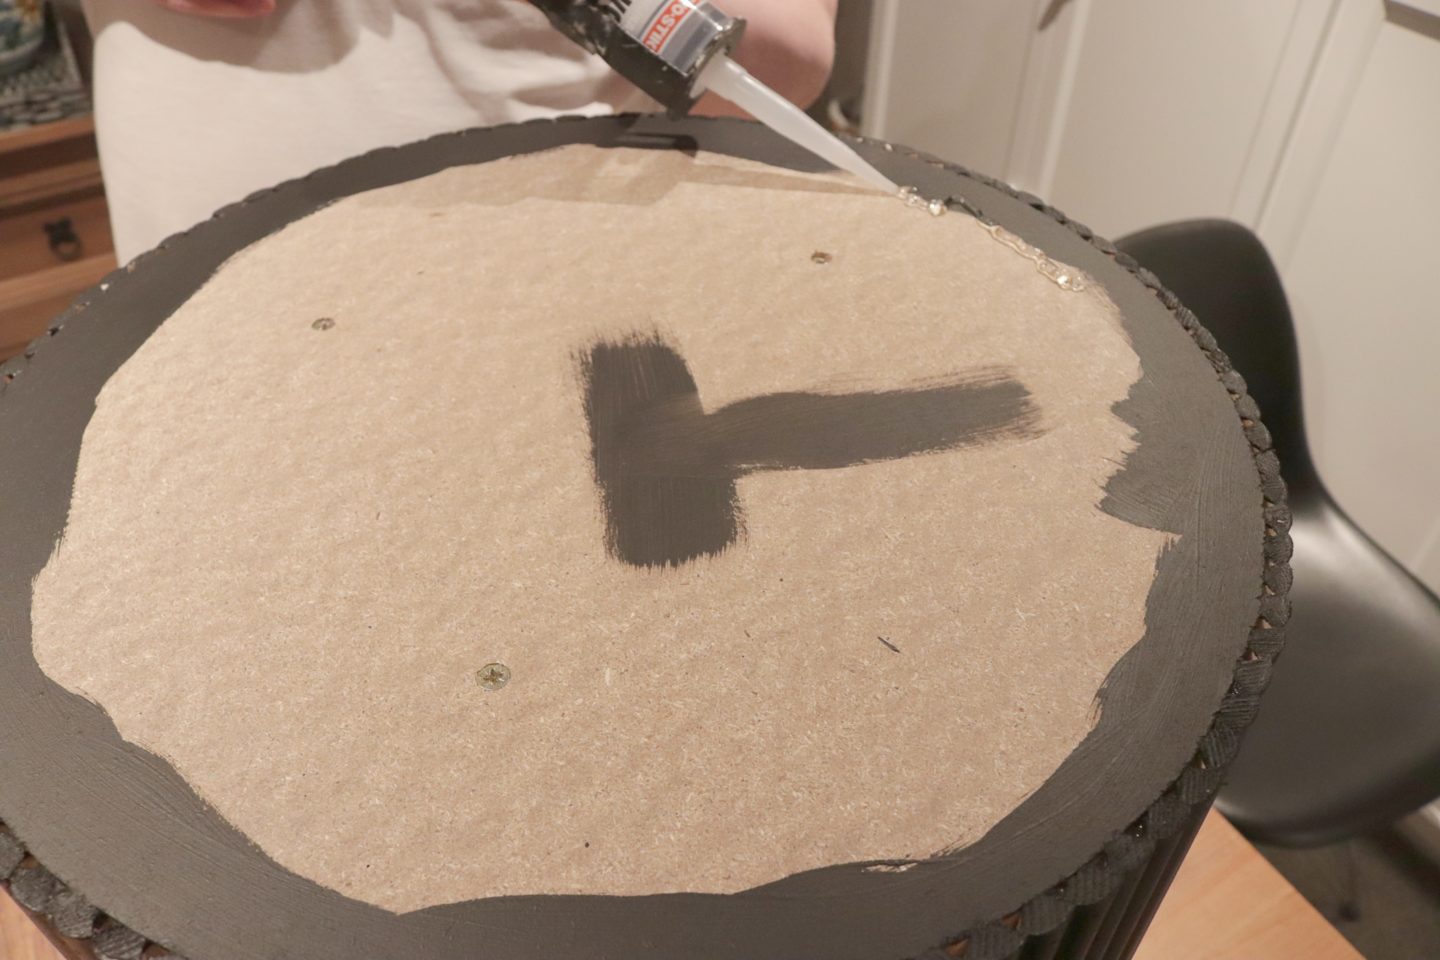
Once all the trim was attached we used a small amount of caulk down each ridge to fill any gaps, left it to dry and then gave it a quick sand to remove any excess. You can also see the tiny tacks around the top and bottom in the picture above but we weren’t worried about these as we were paining the base.
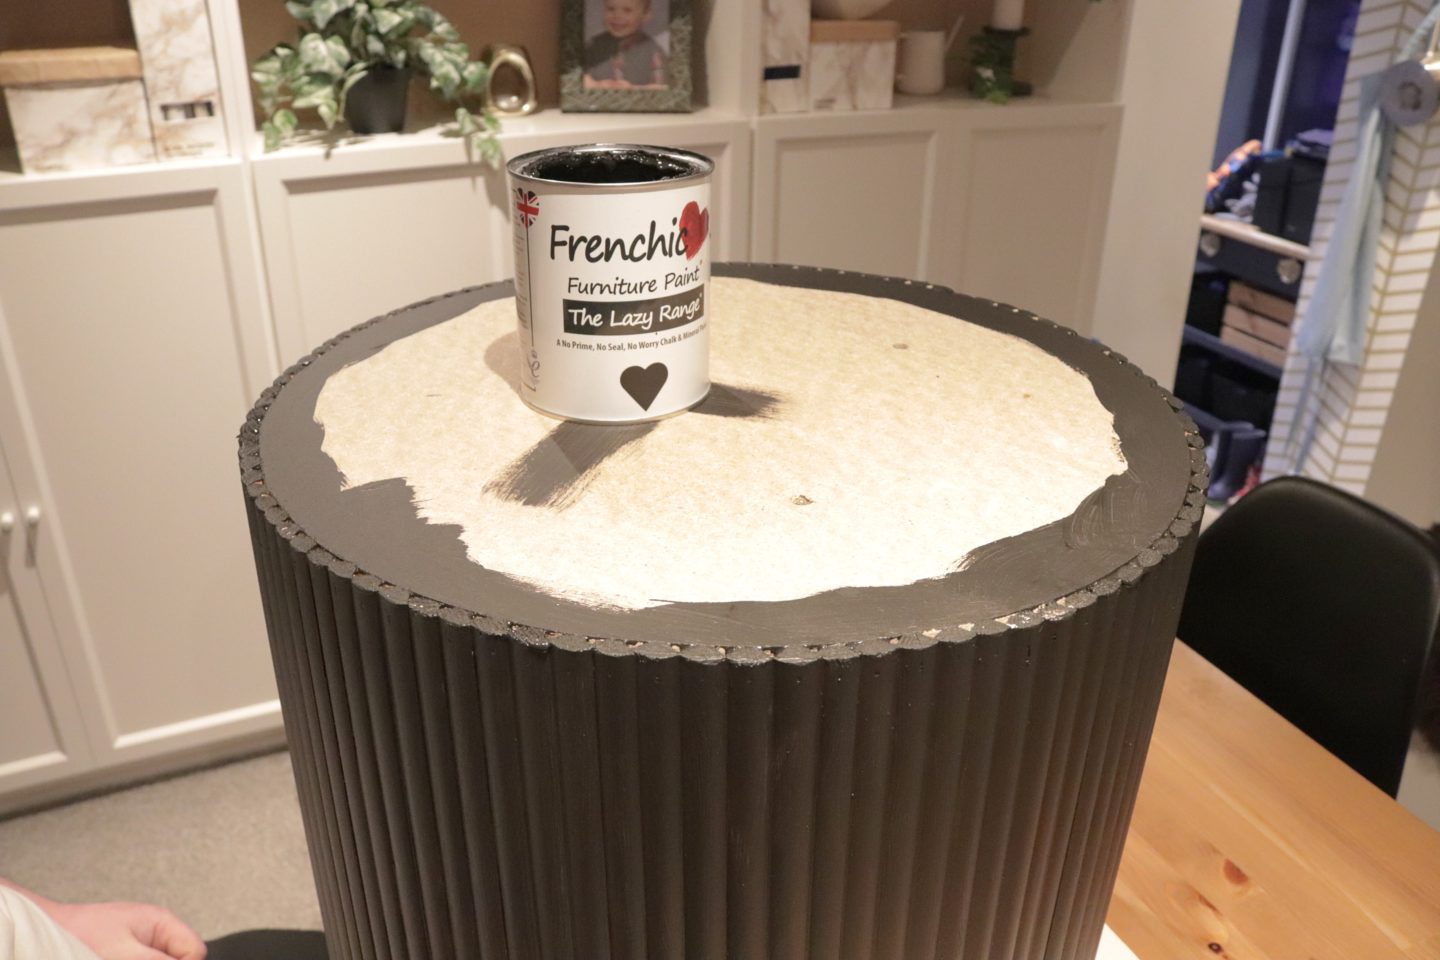
The final step for the base was to paint it. We gave it two coats of Frenchic lazy range in the colour loof.
The only thing left to do is put the two pieces together. We laid down the table top with the bottom facing up. Added a LOT of clear no more nails type of adhesive to the top of the base. Then literally just put the base onto the top. We did this upside down so that we could make sure we positioned the base in the very middle of the table top. We left the table upside down with some weight on top of the base overnight for the adhesive to dry. The next day we flipped it over and that it! We were done and I was in love! Are you ready to see what it looks like now?
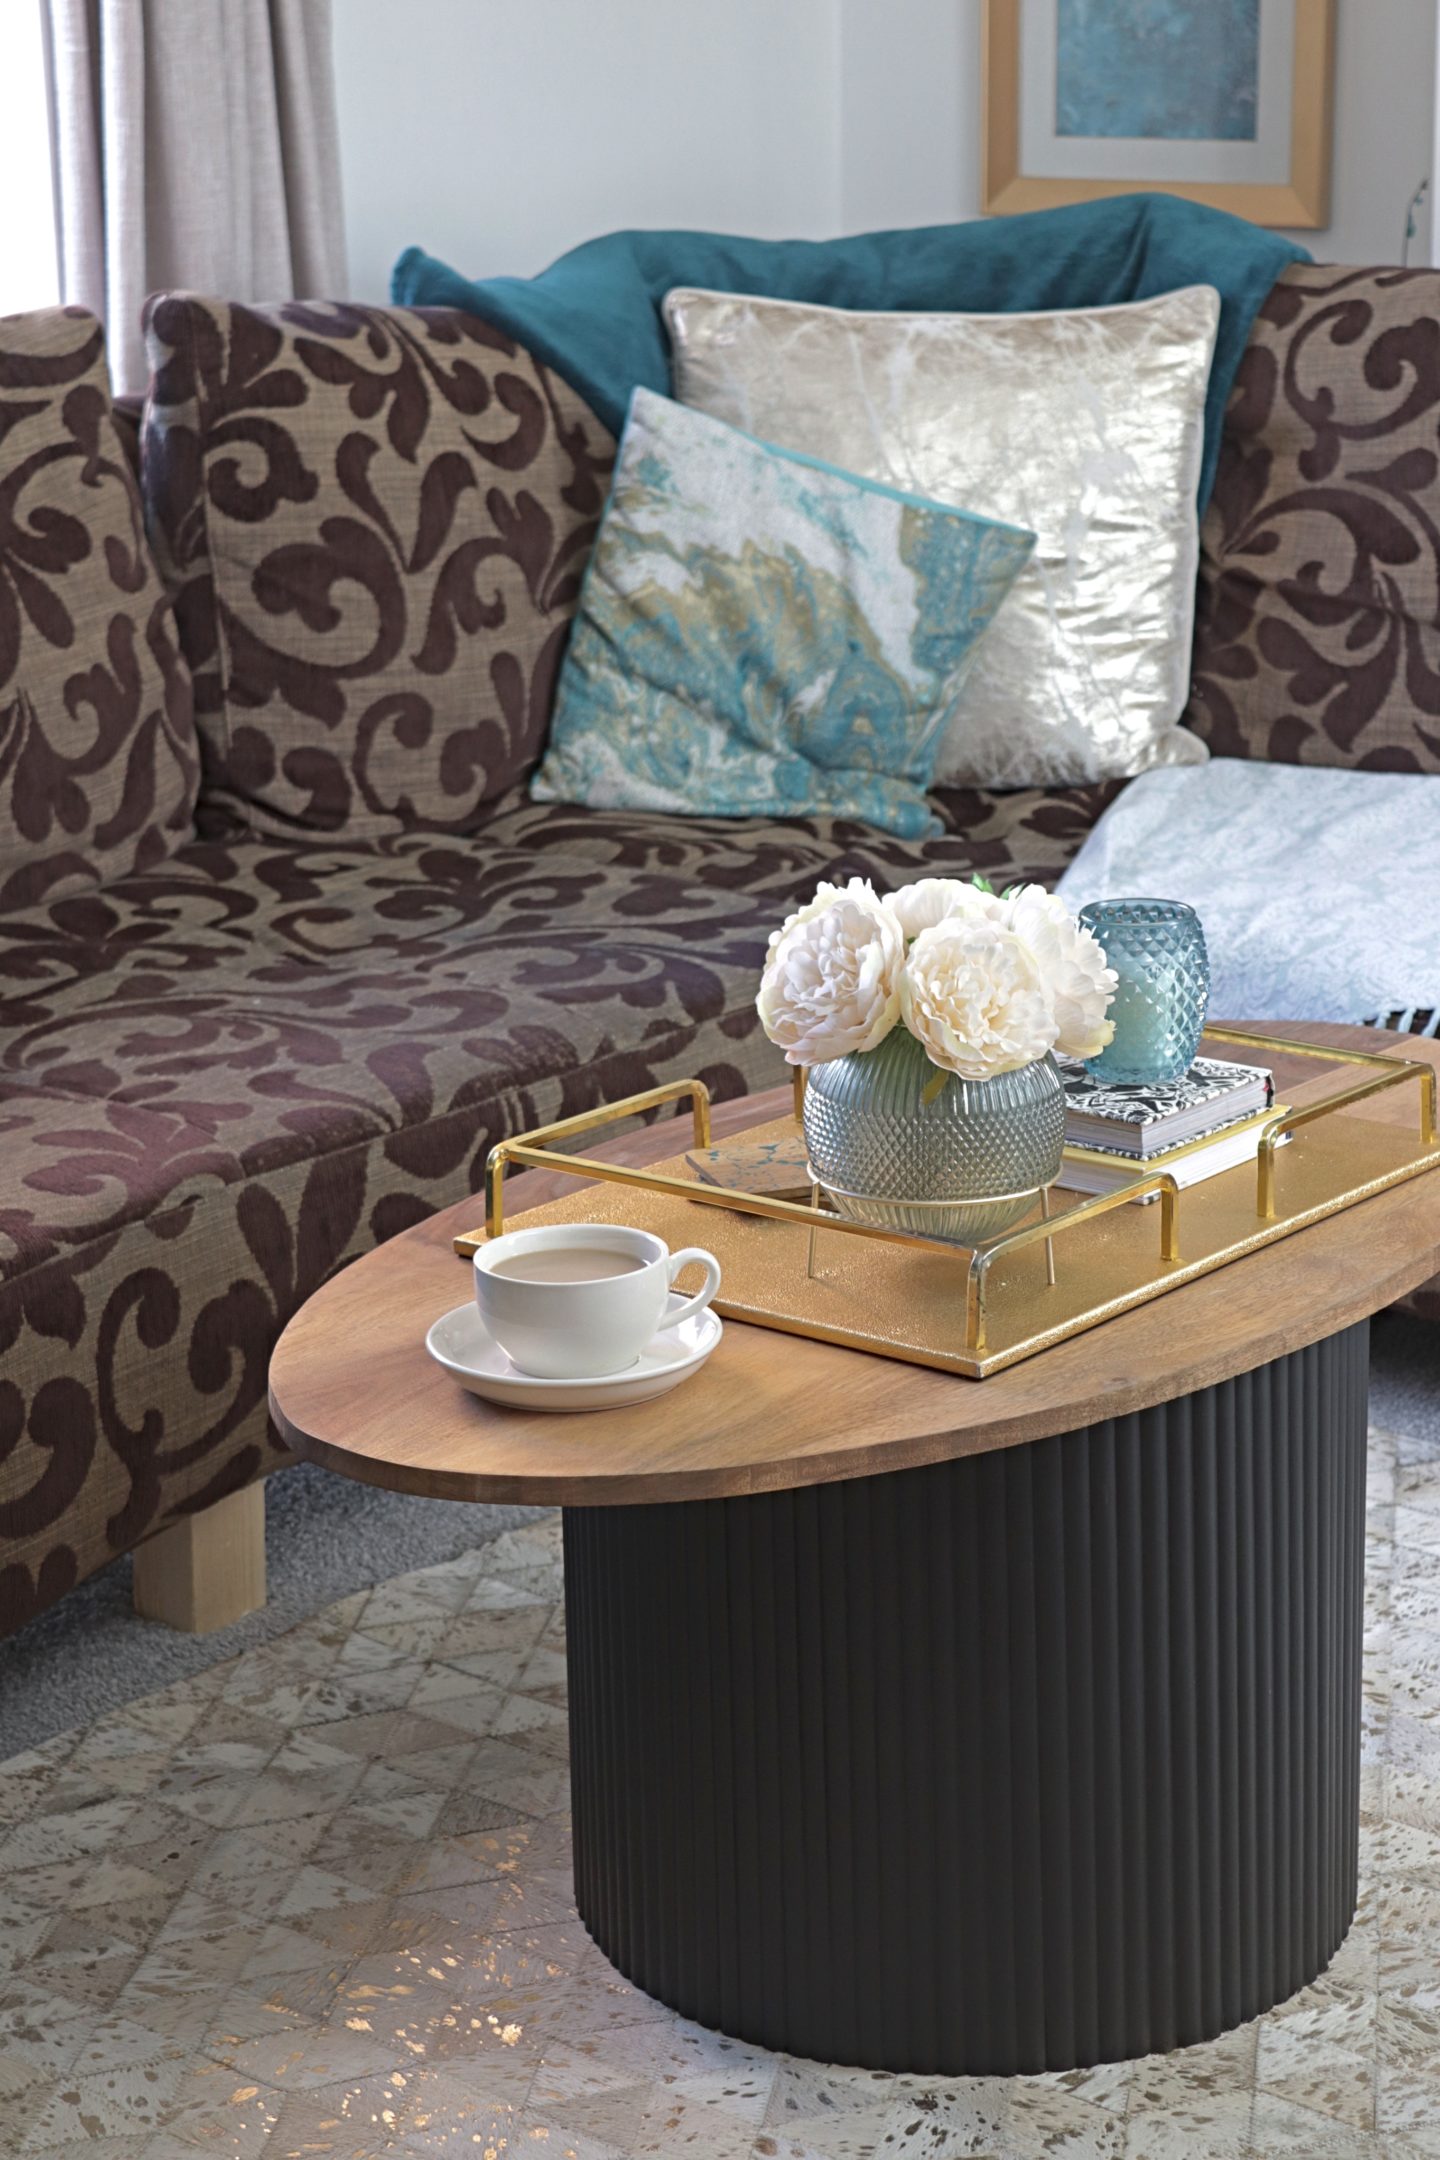
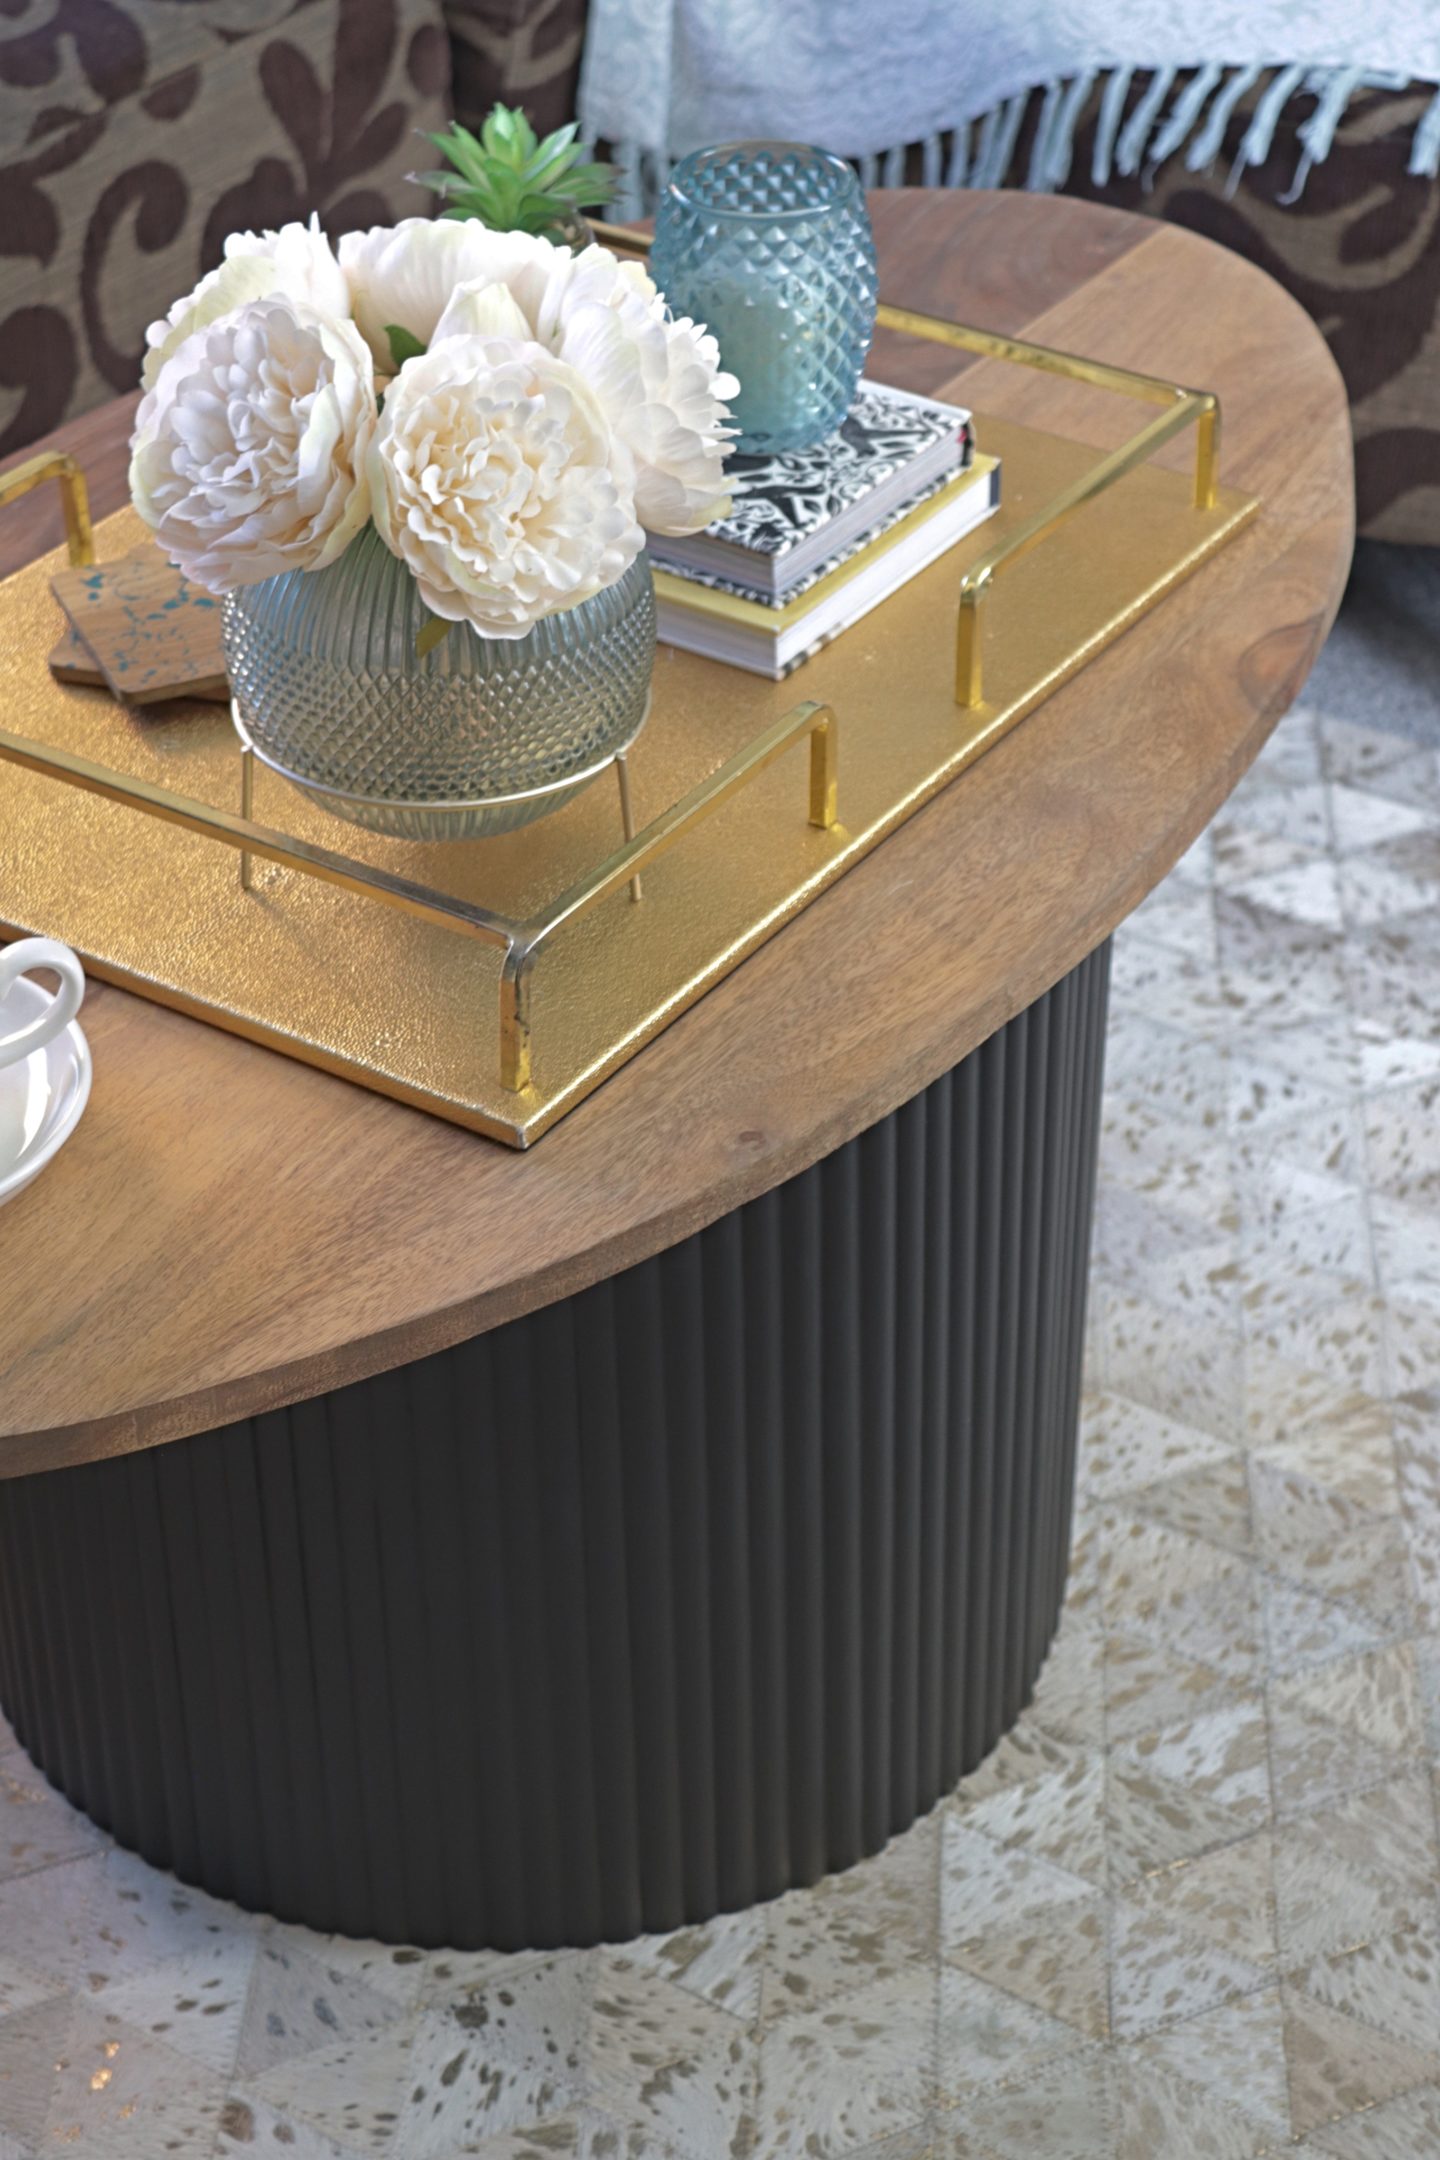
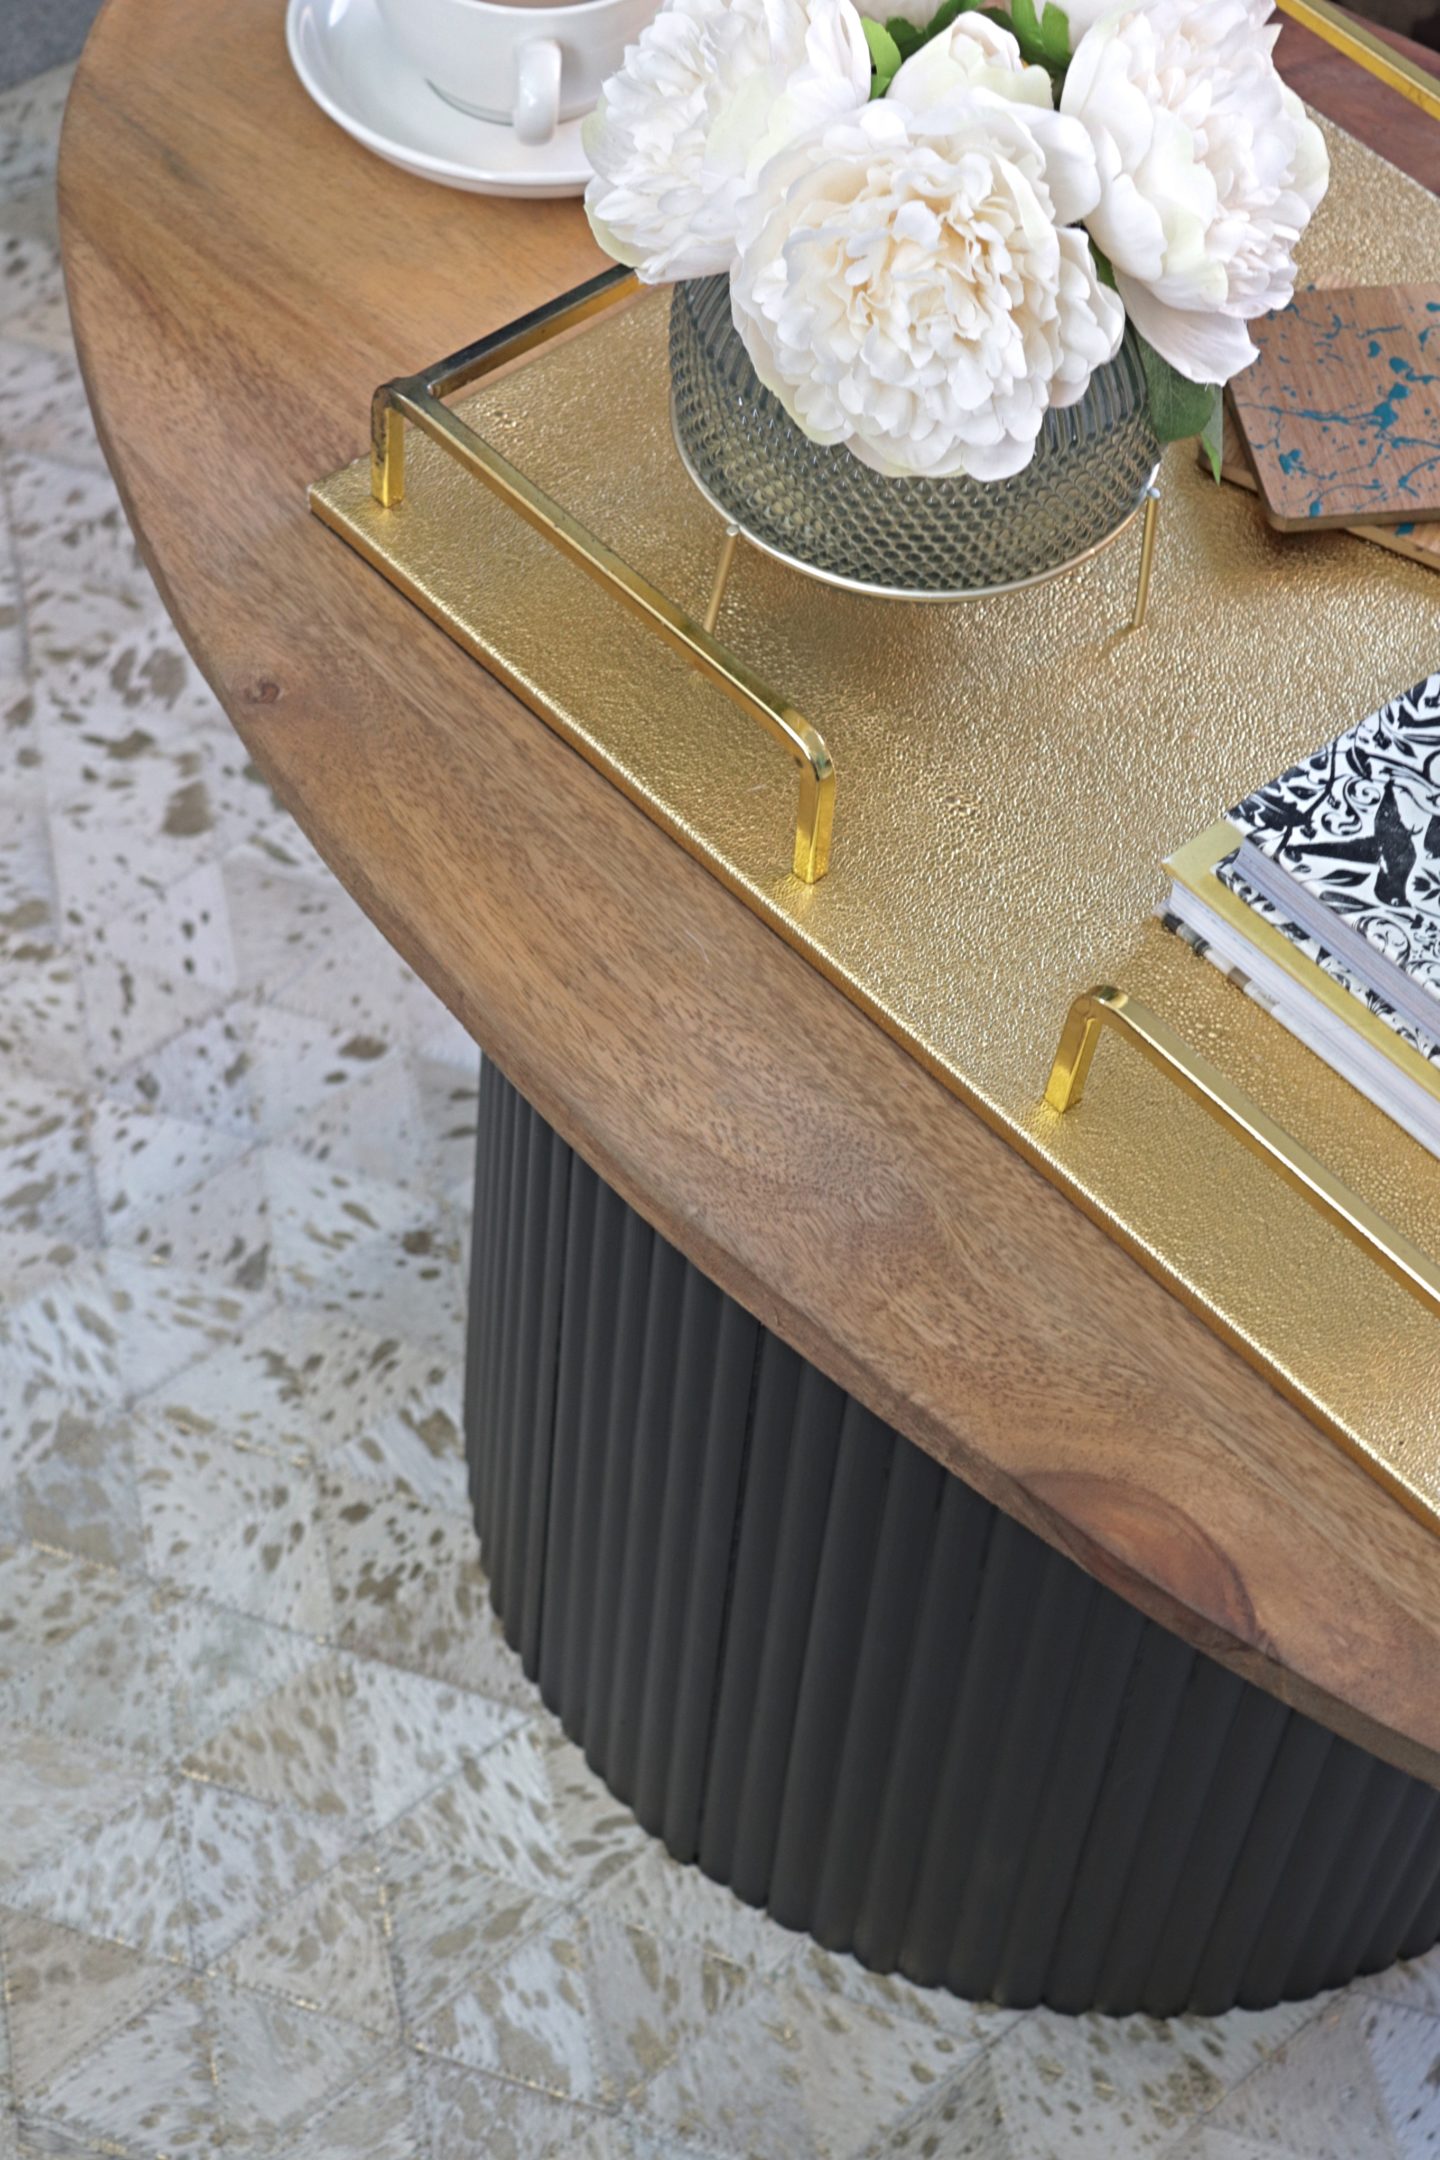

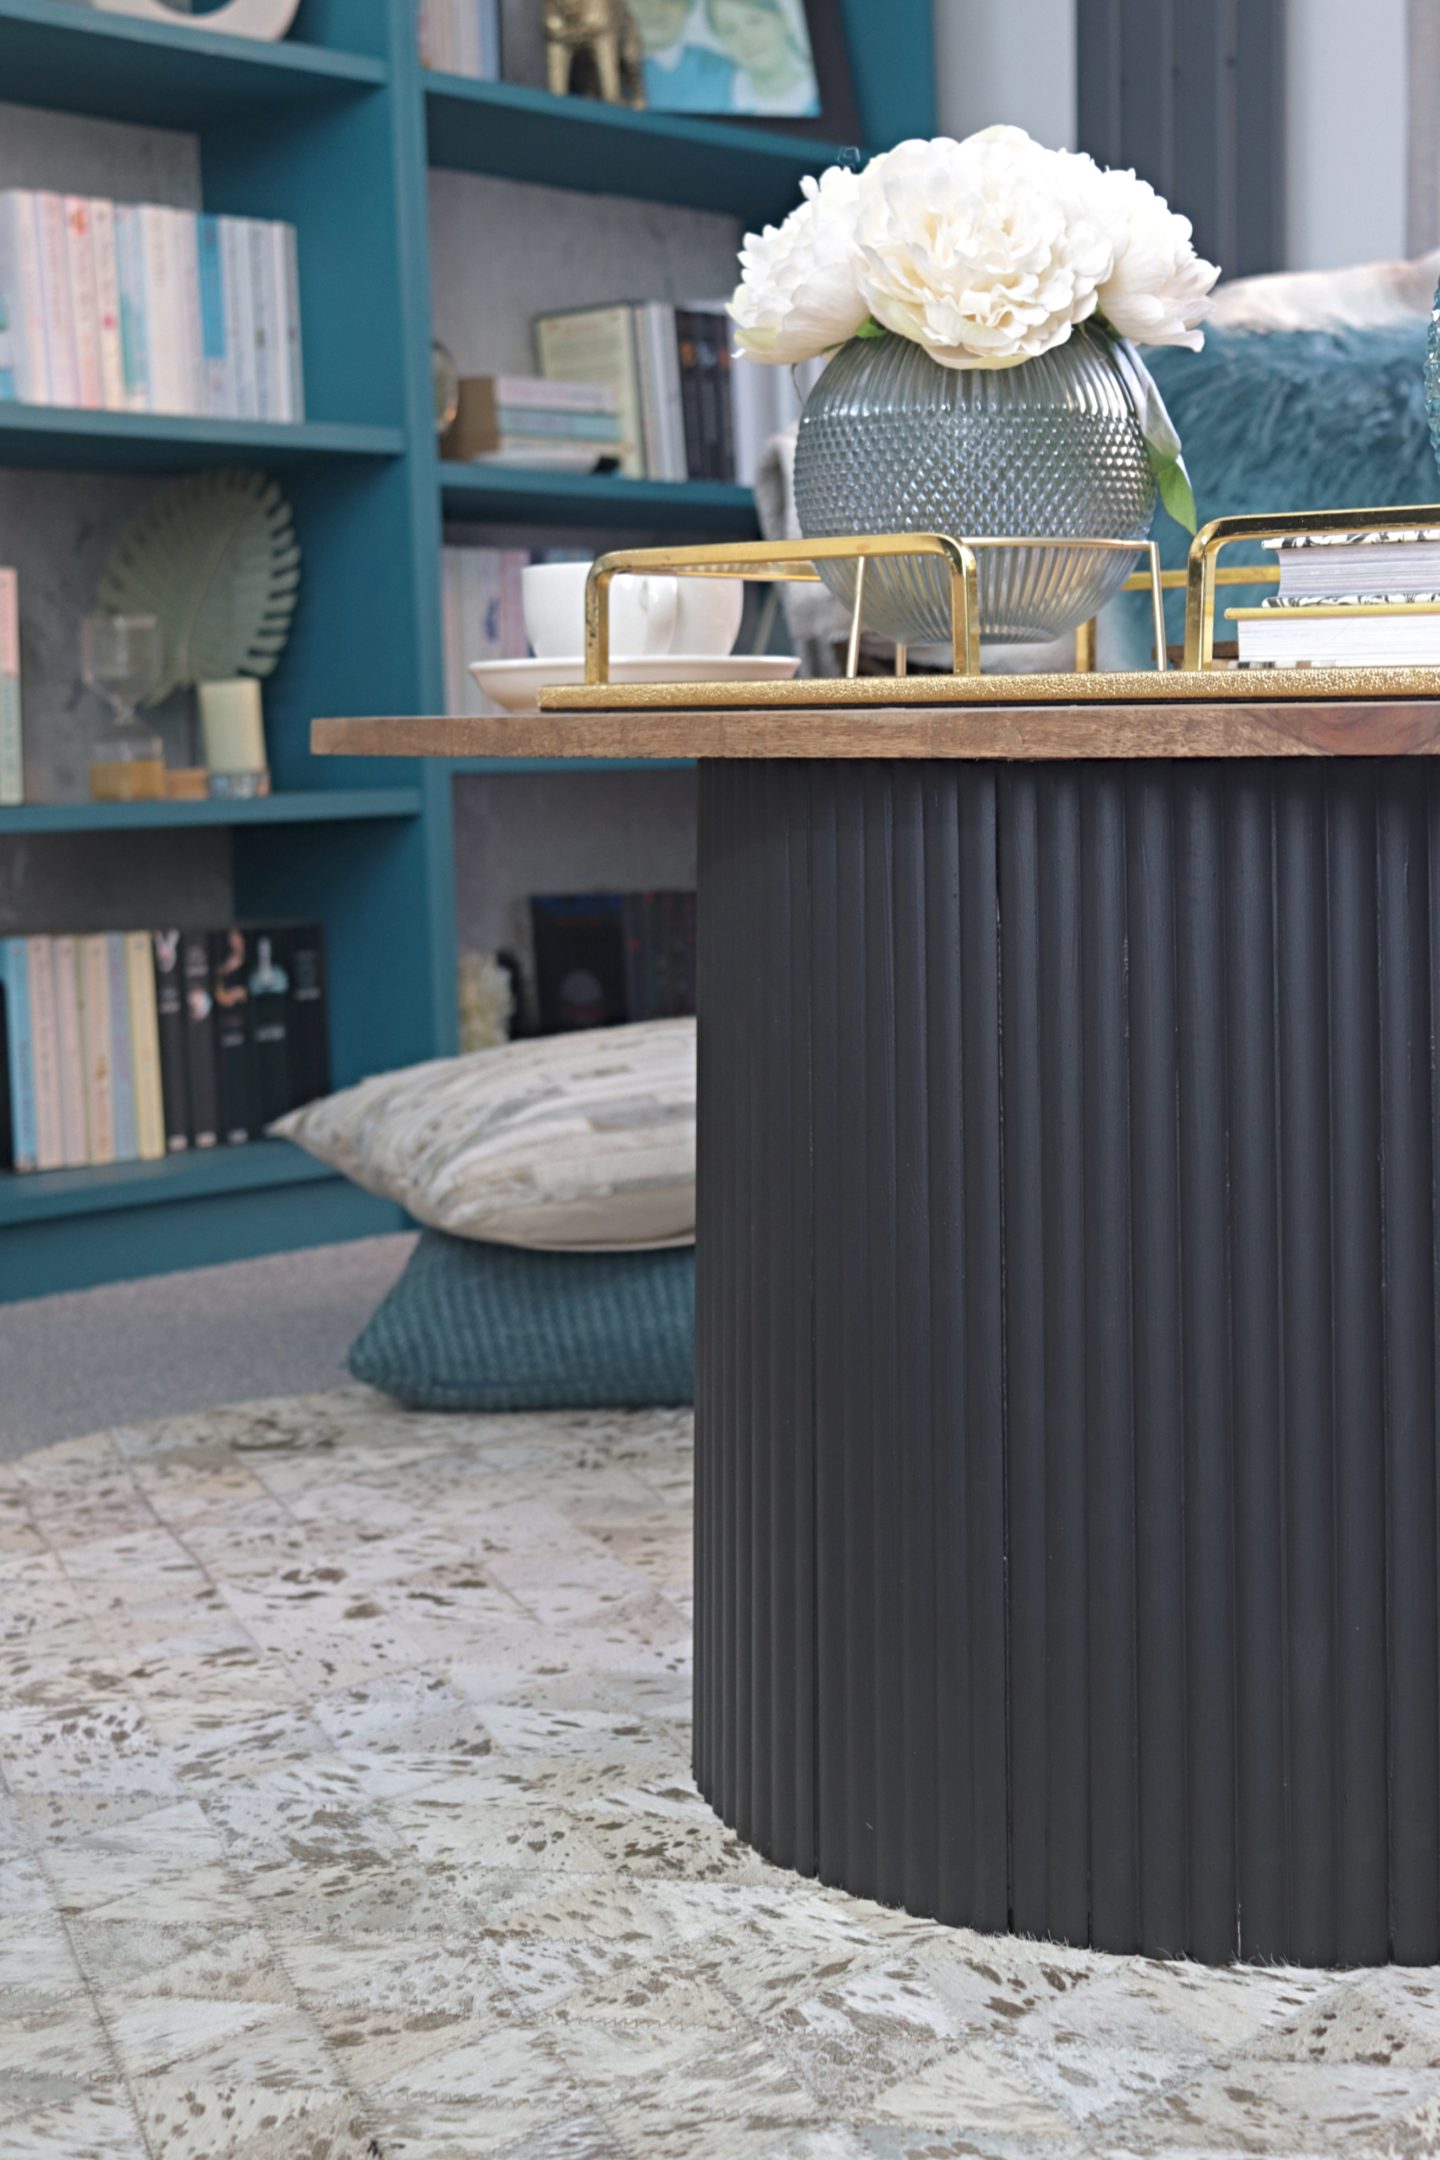
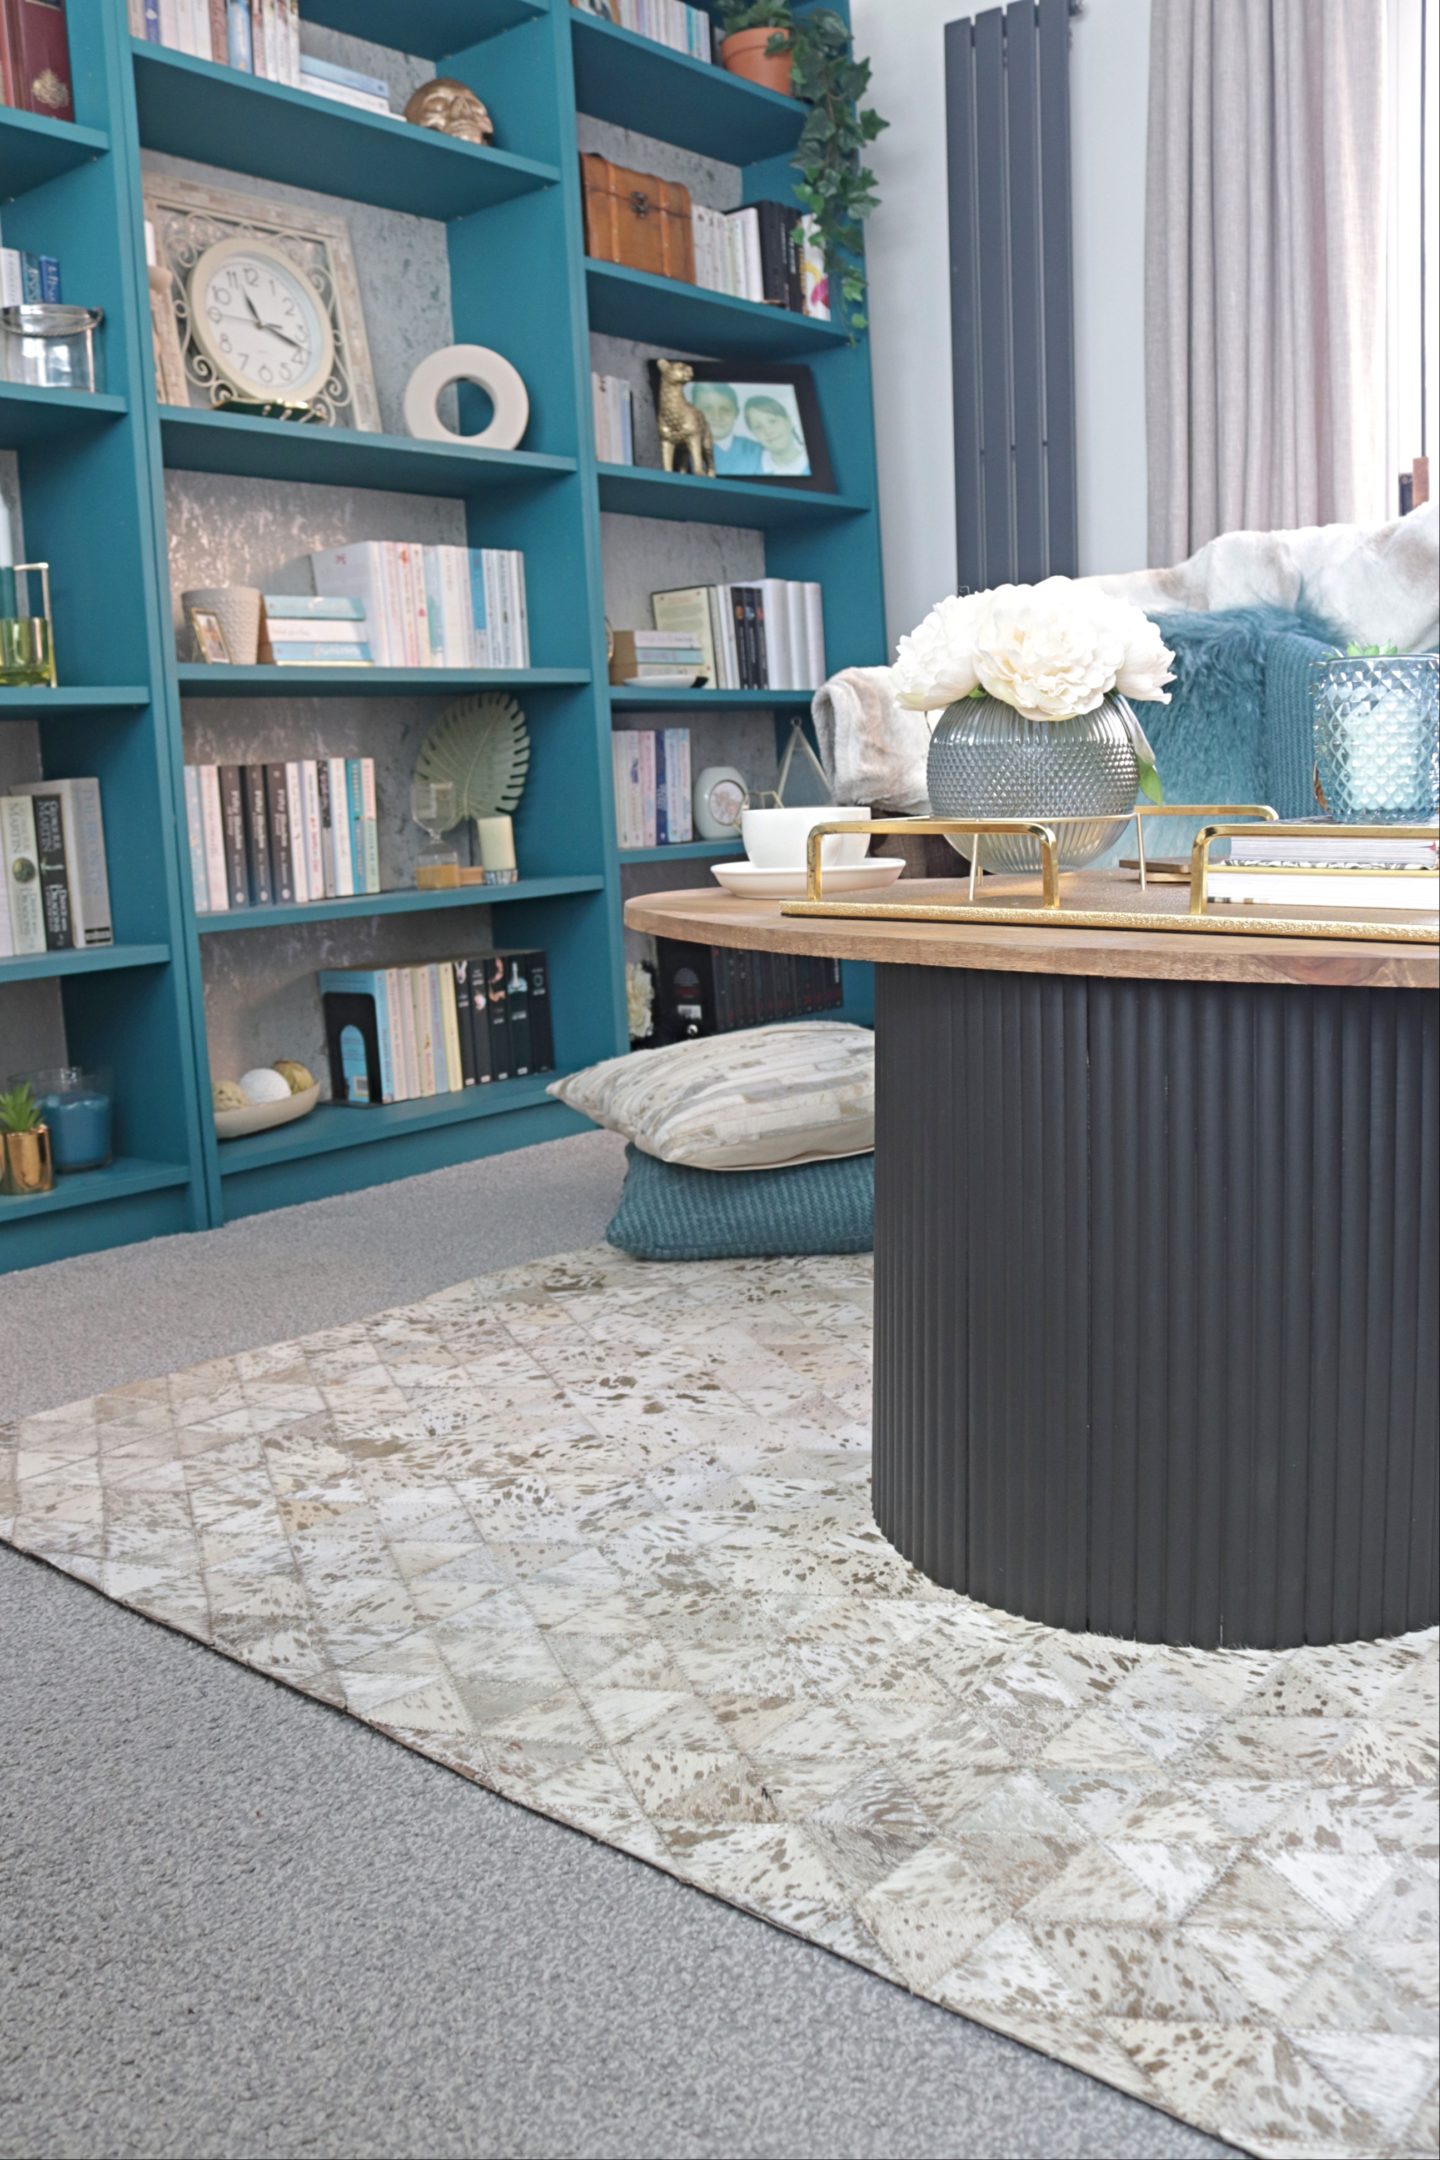

I could not be happier with how this Fluted Coffee Table DIY turned out! I still do a double take every time I walk into the living room and see it because I just cannot believe that it came from the same table I showed you at the beginning of the post. It is essentially an upcycle but I wanted to describe it as a DIY in the title because you could easily make this from scratch. You would just need to buy a sheet of wood for the table top and use wooden planks as the structure for the base. You could also use any table you already have as a starting point to make your own version of this. We spent around £55 on the materials needed to make this which means it’s not a cheap upcycle but you could never buy a coffee table in this design for that kind of money! Please let me know if you love it as much as I do in the comments below and thanks for reading.
Lianne x
Materials and equipment you might need to complete this project
Pin my Fluted Coffee Table DIY to save it for later!