
Making this Wooden Plate Rack has been on my to do list for a good while now. My kitchen is very small and when we moved in I quickly realised that there was not enough space in my cupboards to store my plates and bowls. I purchased a plastic plate rack from Amazon and my plates have been stored on it ever since. It was perfectly functional but I wanted something that looked prettier and something that was a little stronger as the top shelf bowed slightly from the weight of my bowls. So I decided a DIY was on the cards. You can see my amazon plate rack (the before) below.

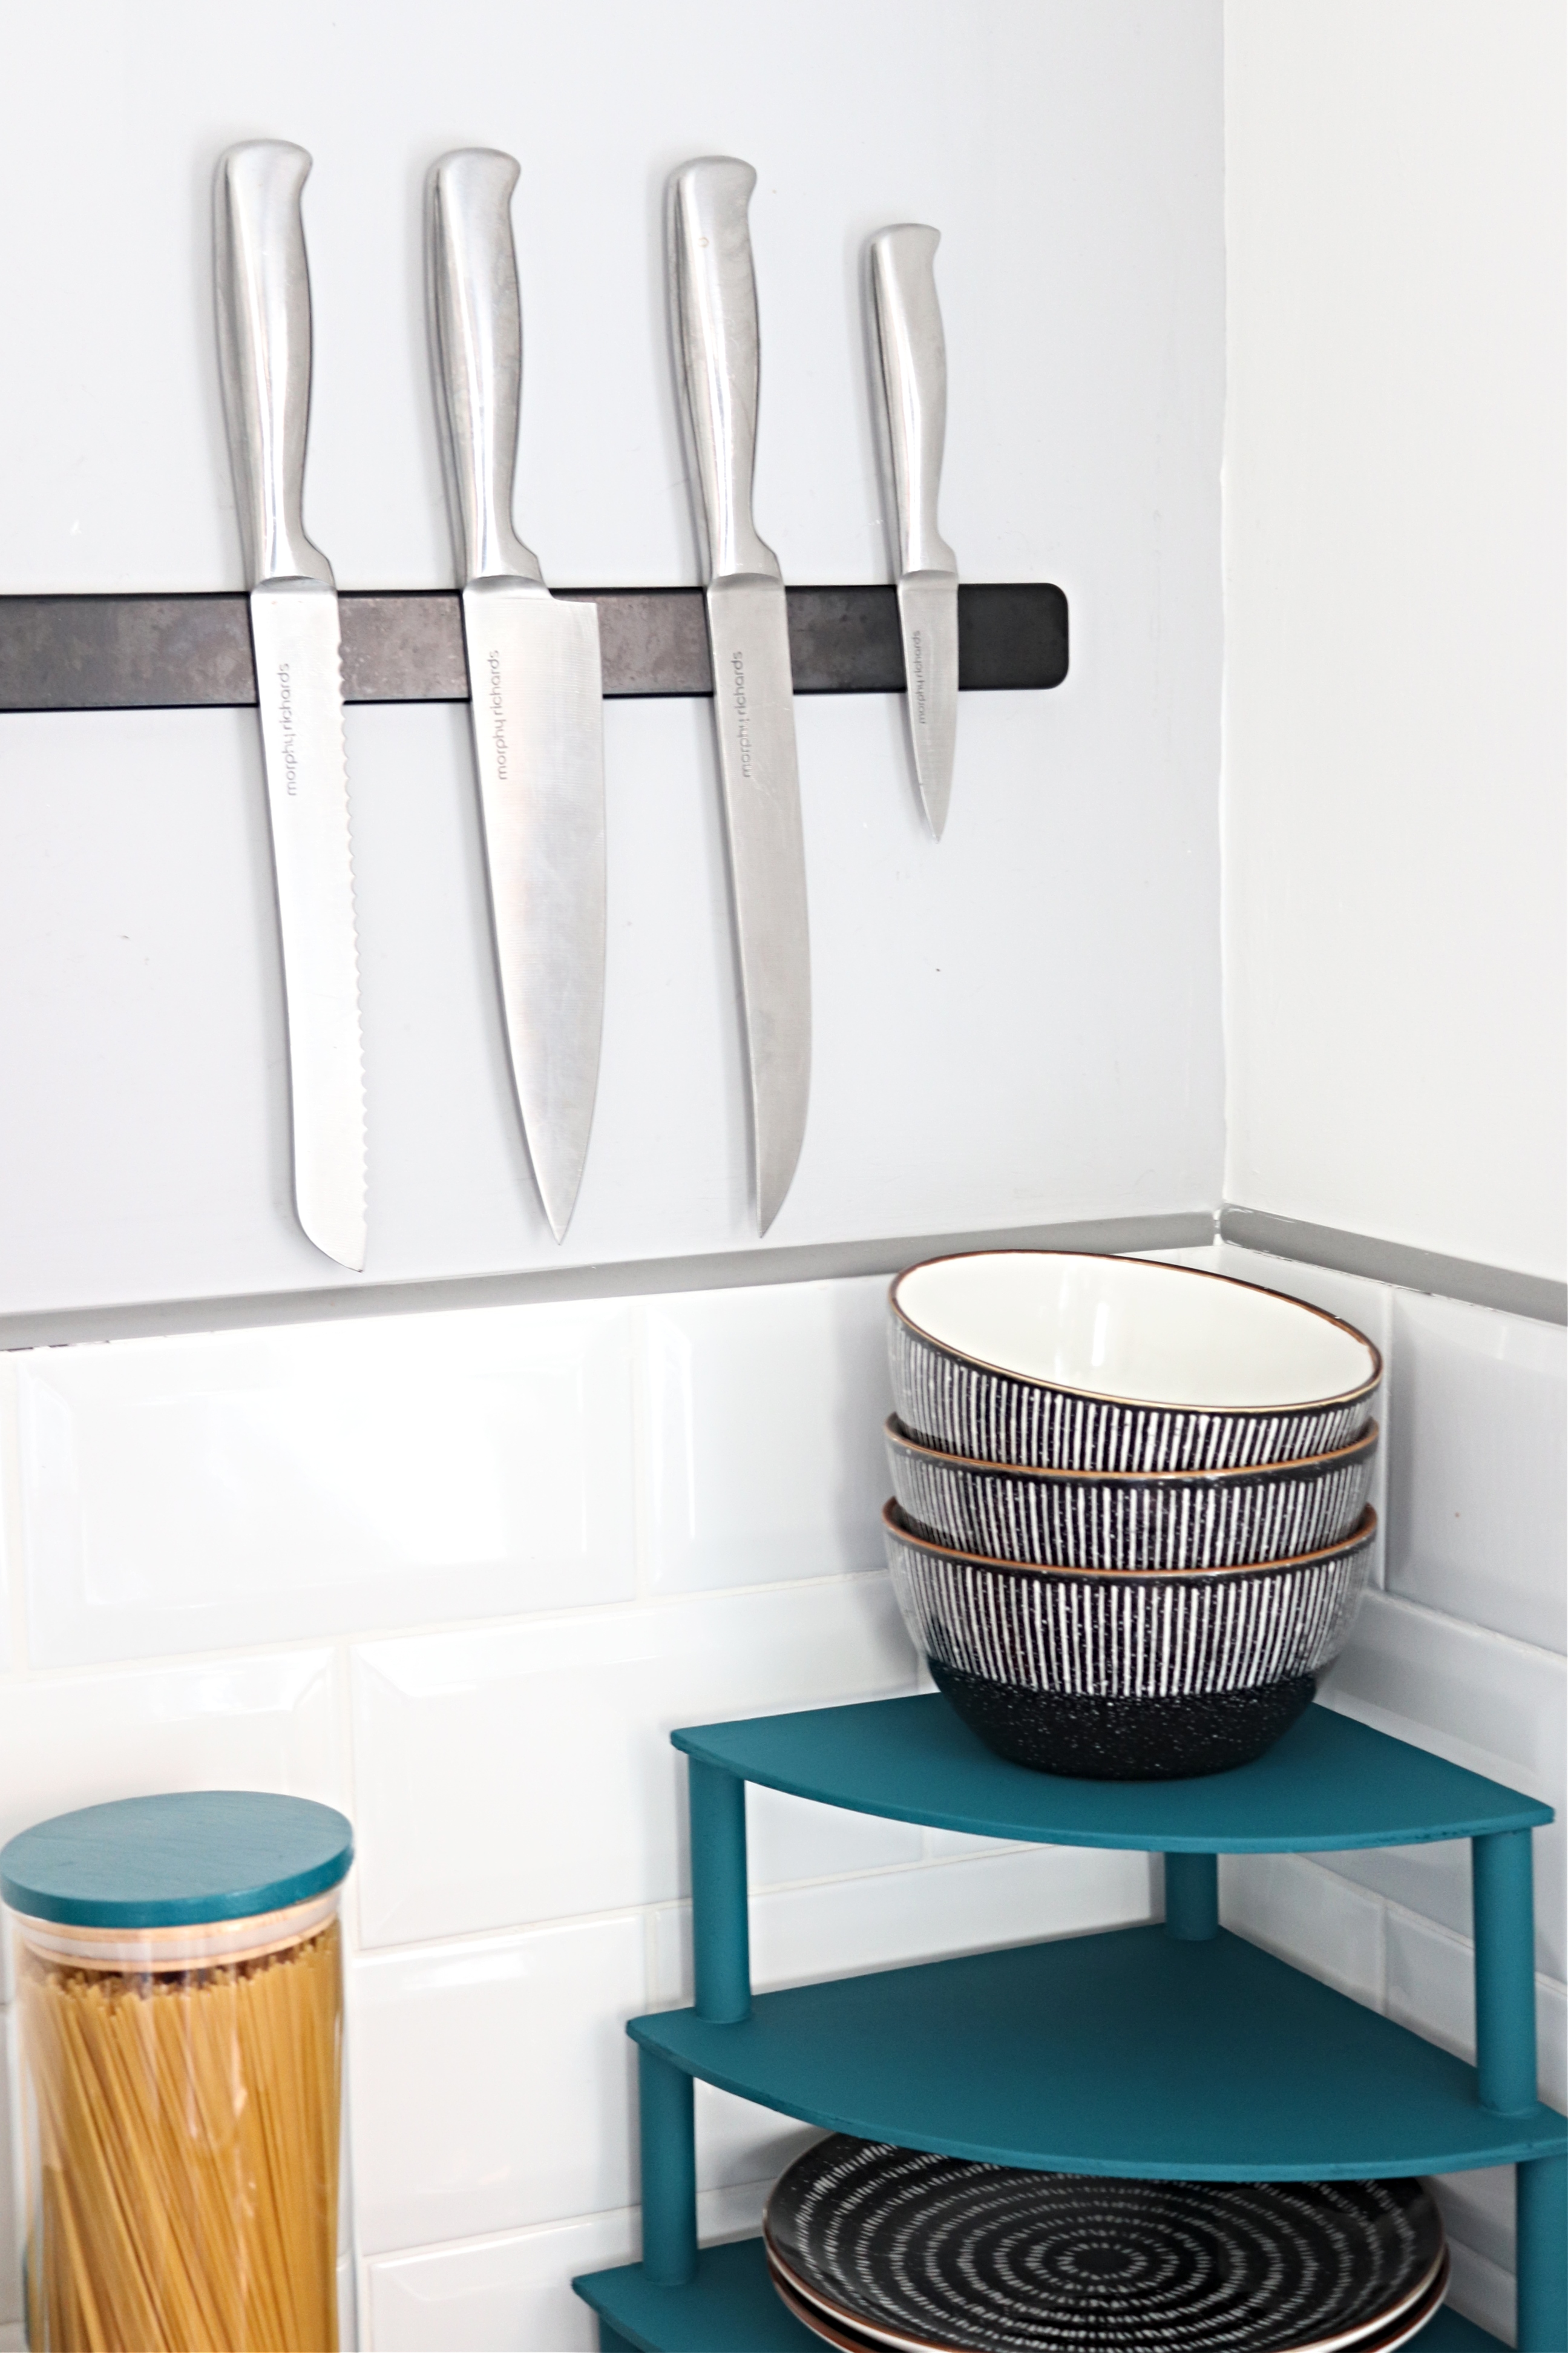
I wanted to create the same sort of thing but add an extra shelf because there are some pasta bowls I have my eye on!
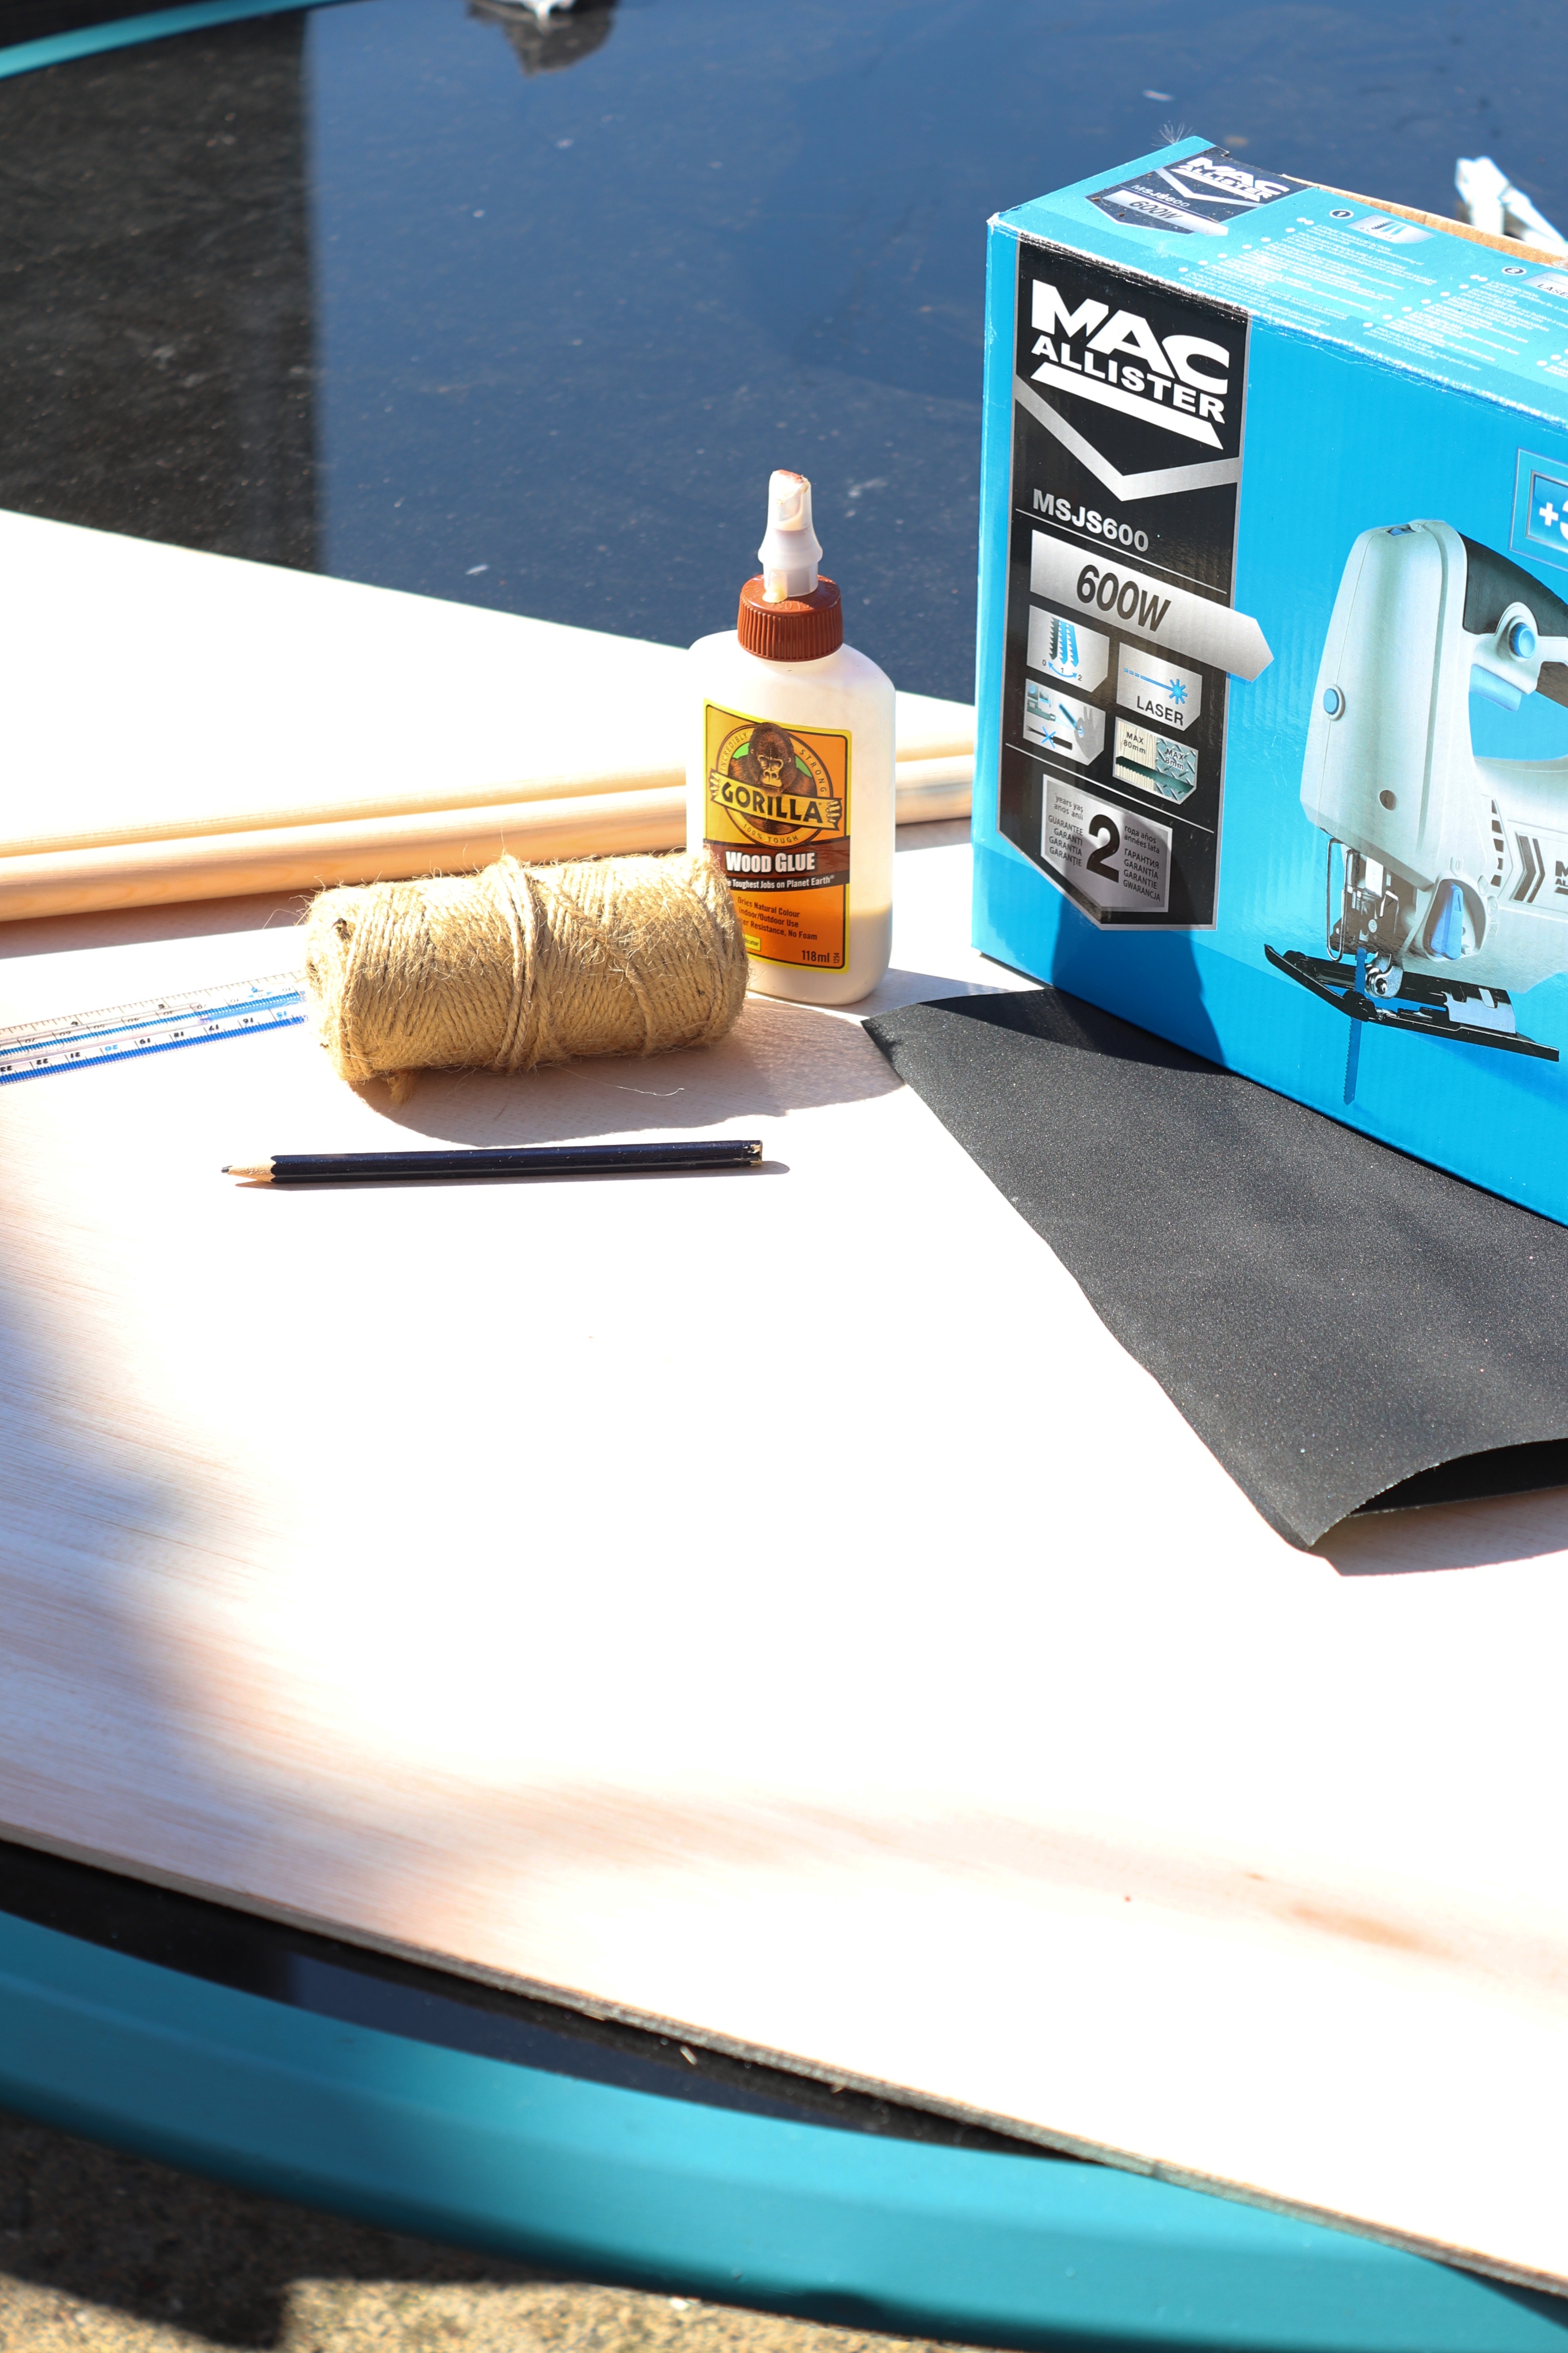
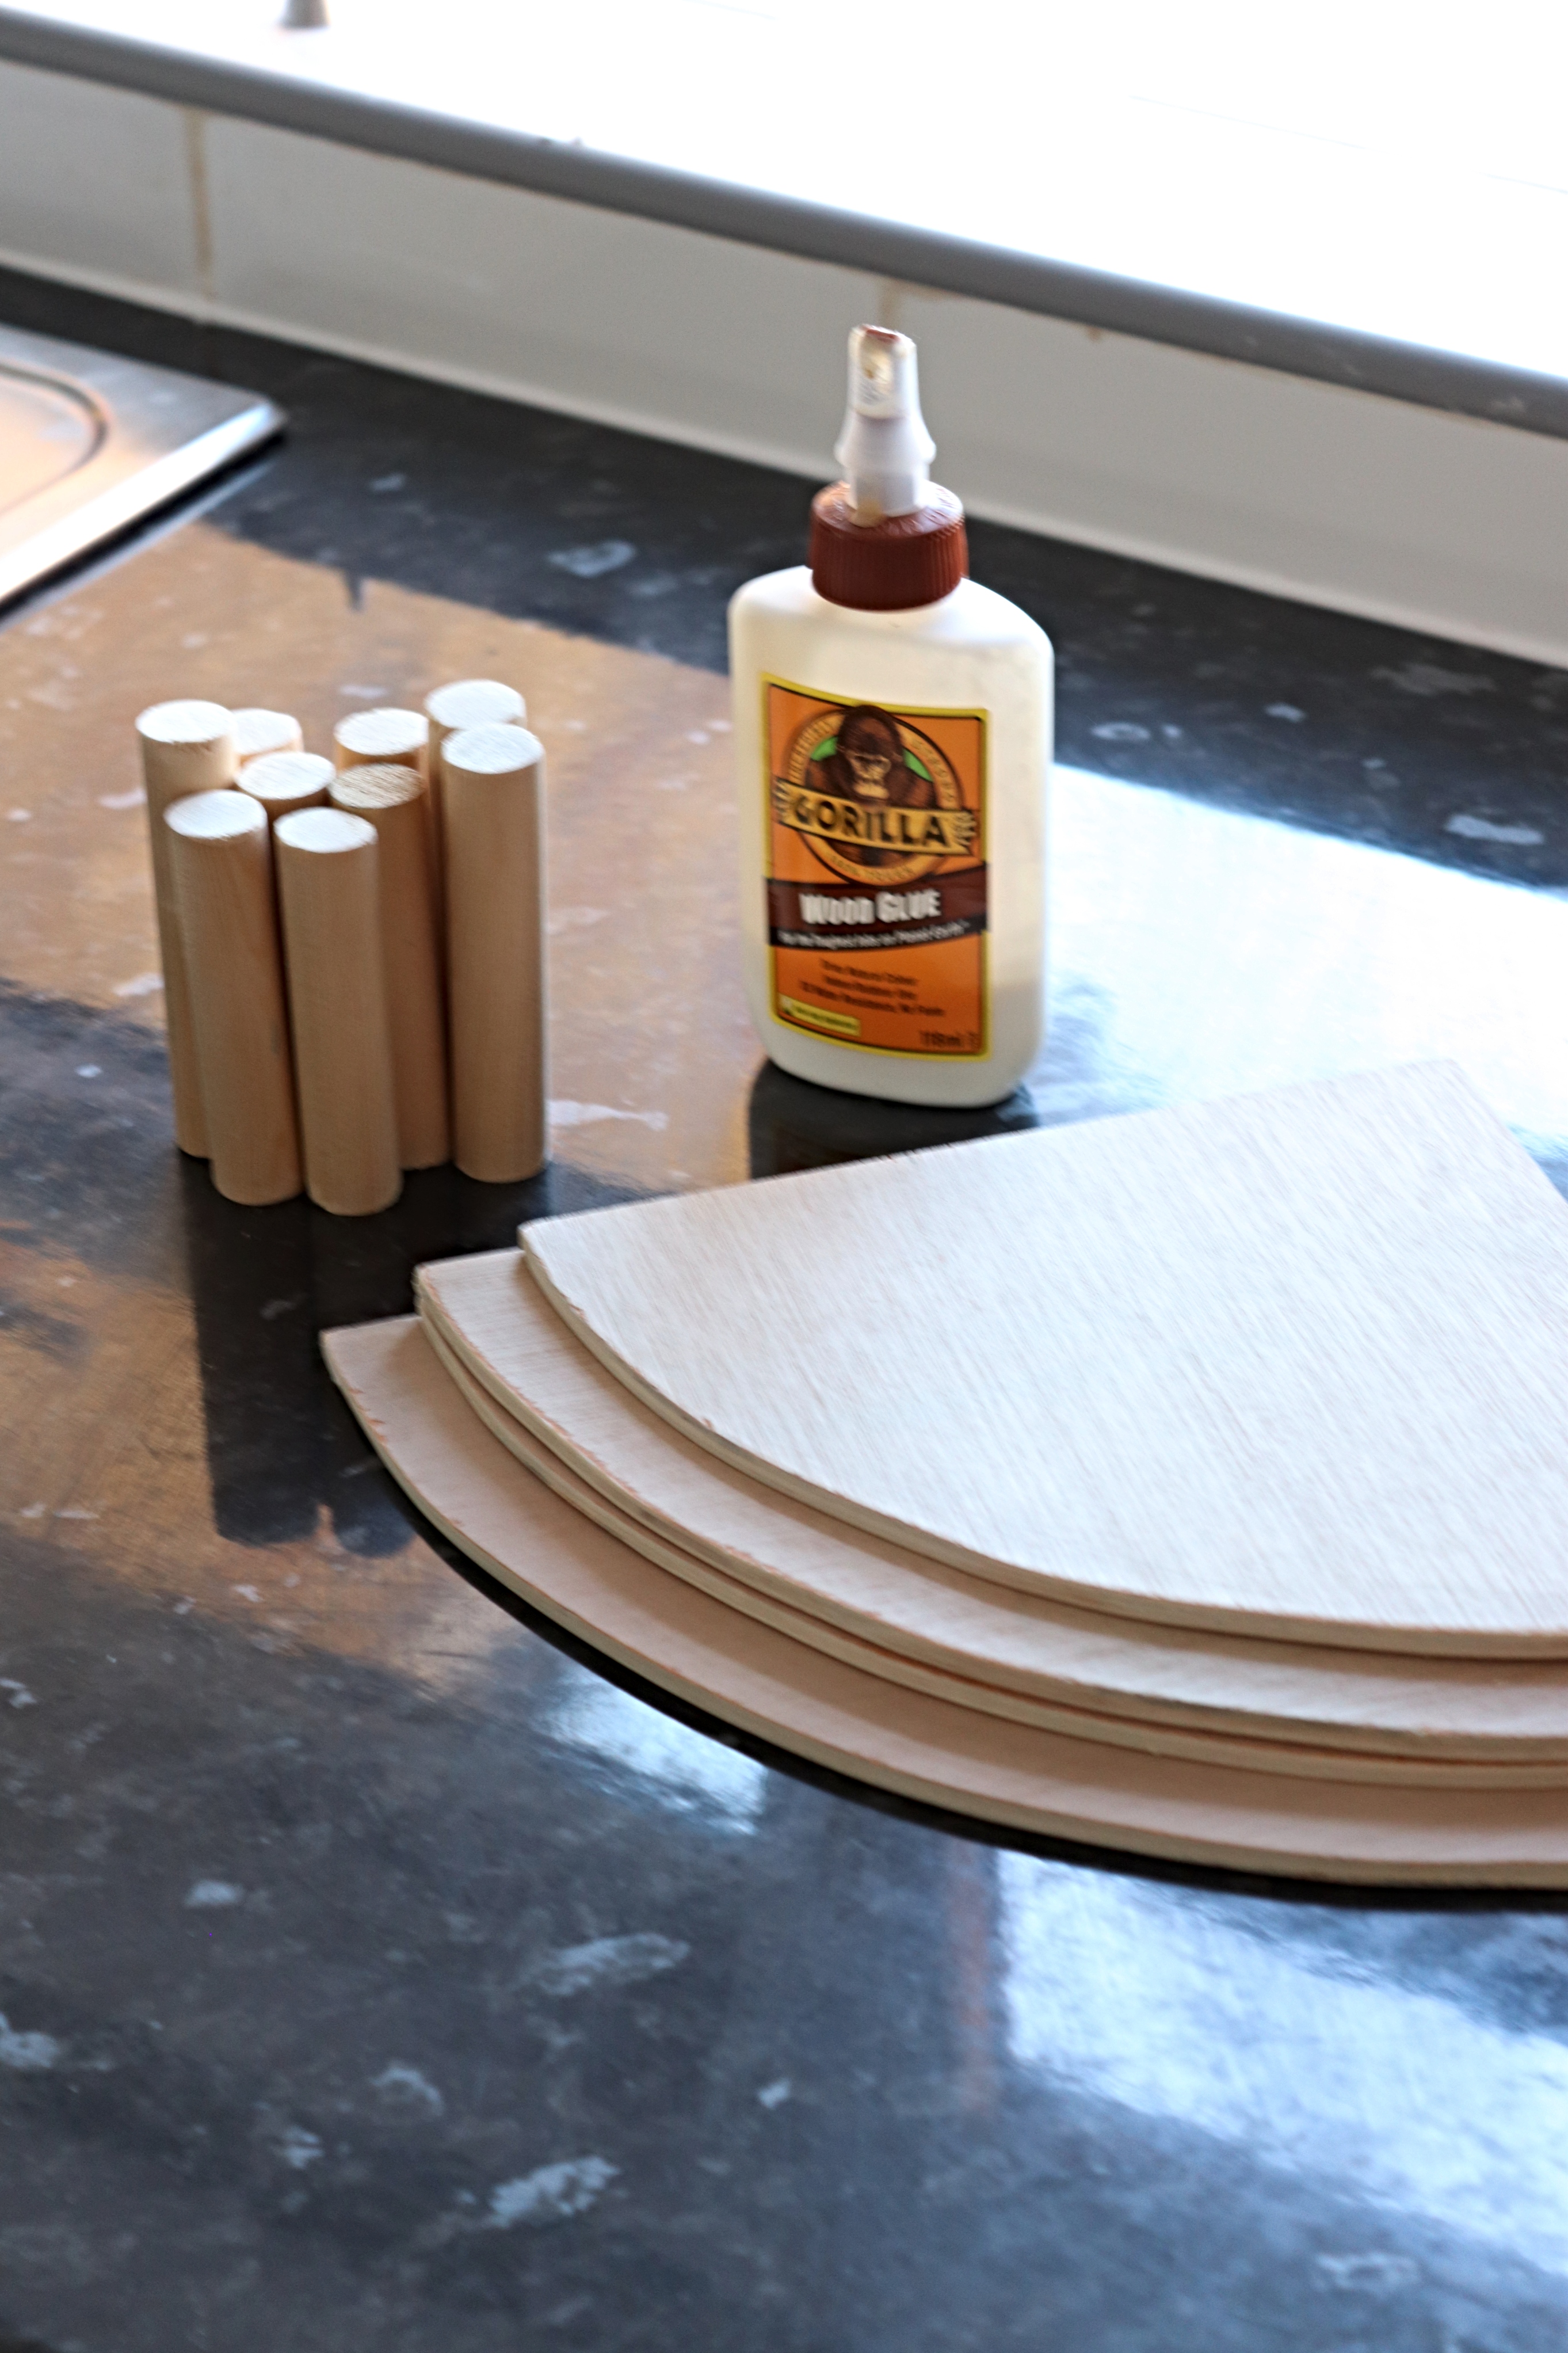
To make my plate rack I purchased some 5mm plywood board and 2cm wide dowling. I also used a jigsaw cutter, a sander, paint and paintbrush, wood glue, a pencil and ruler and a length of string.
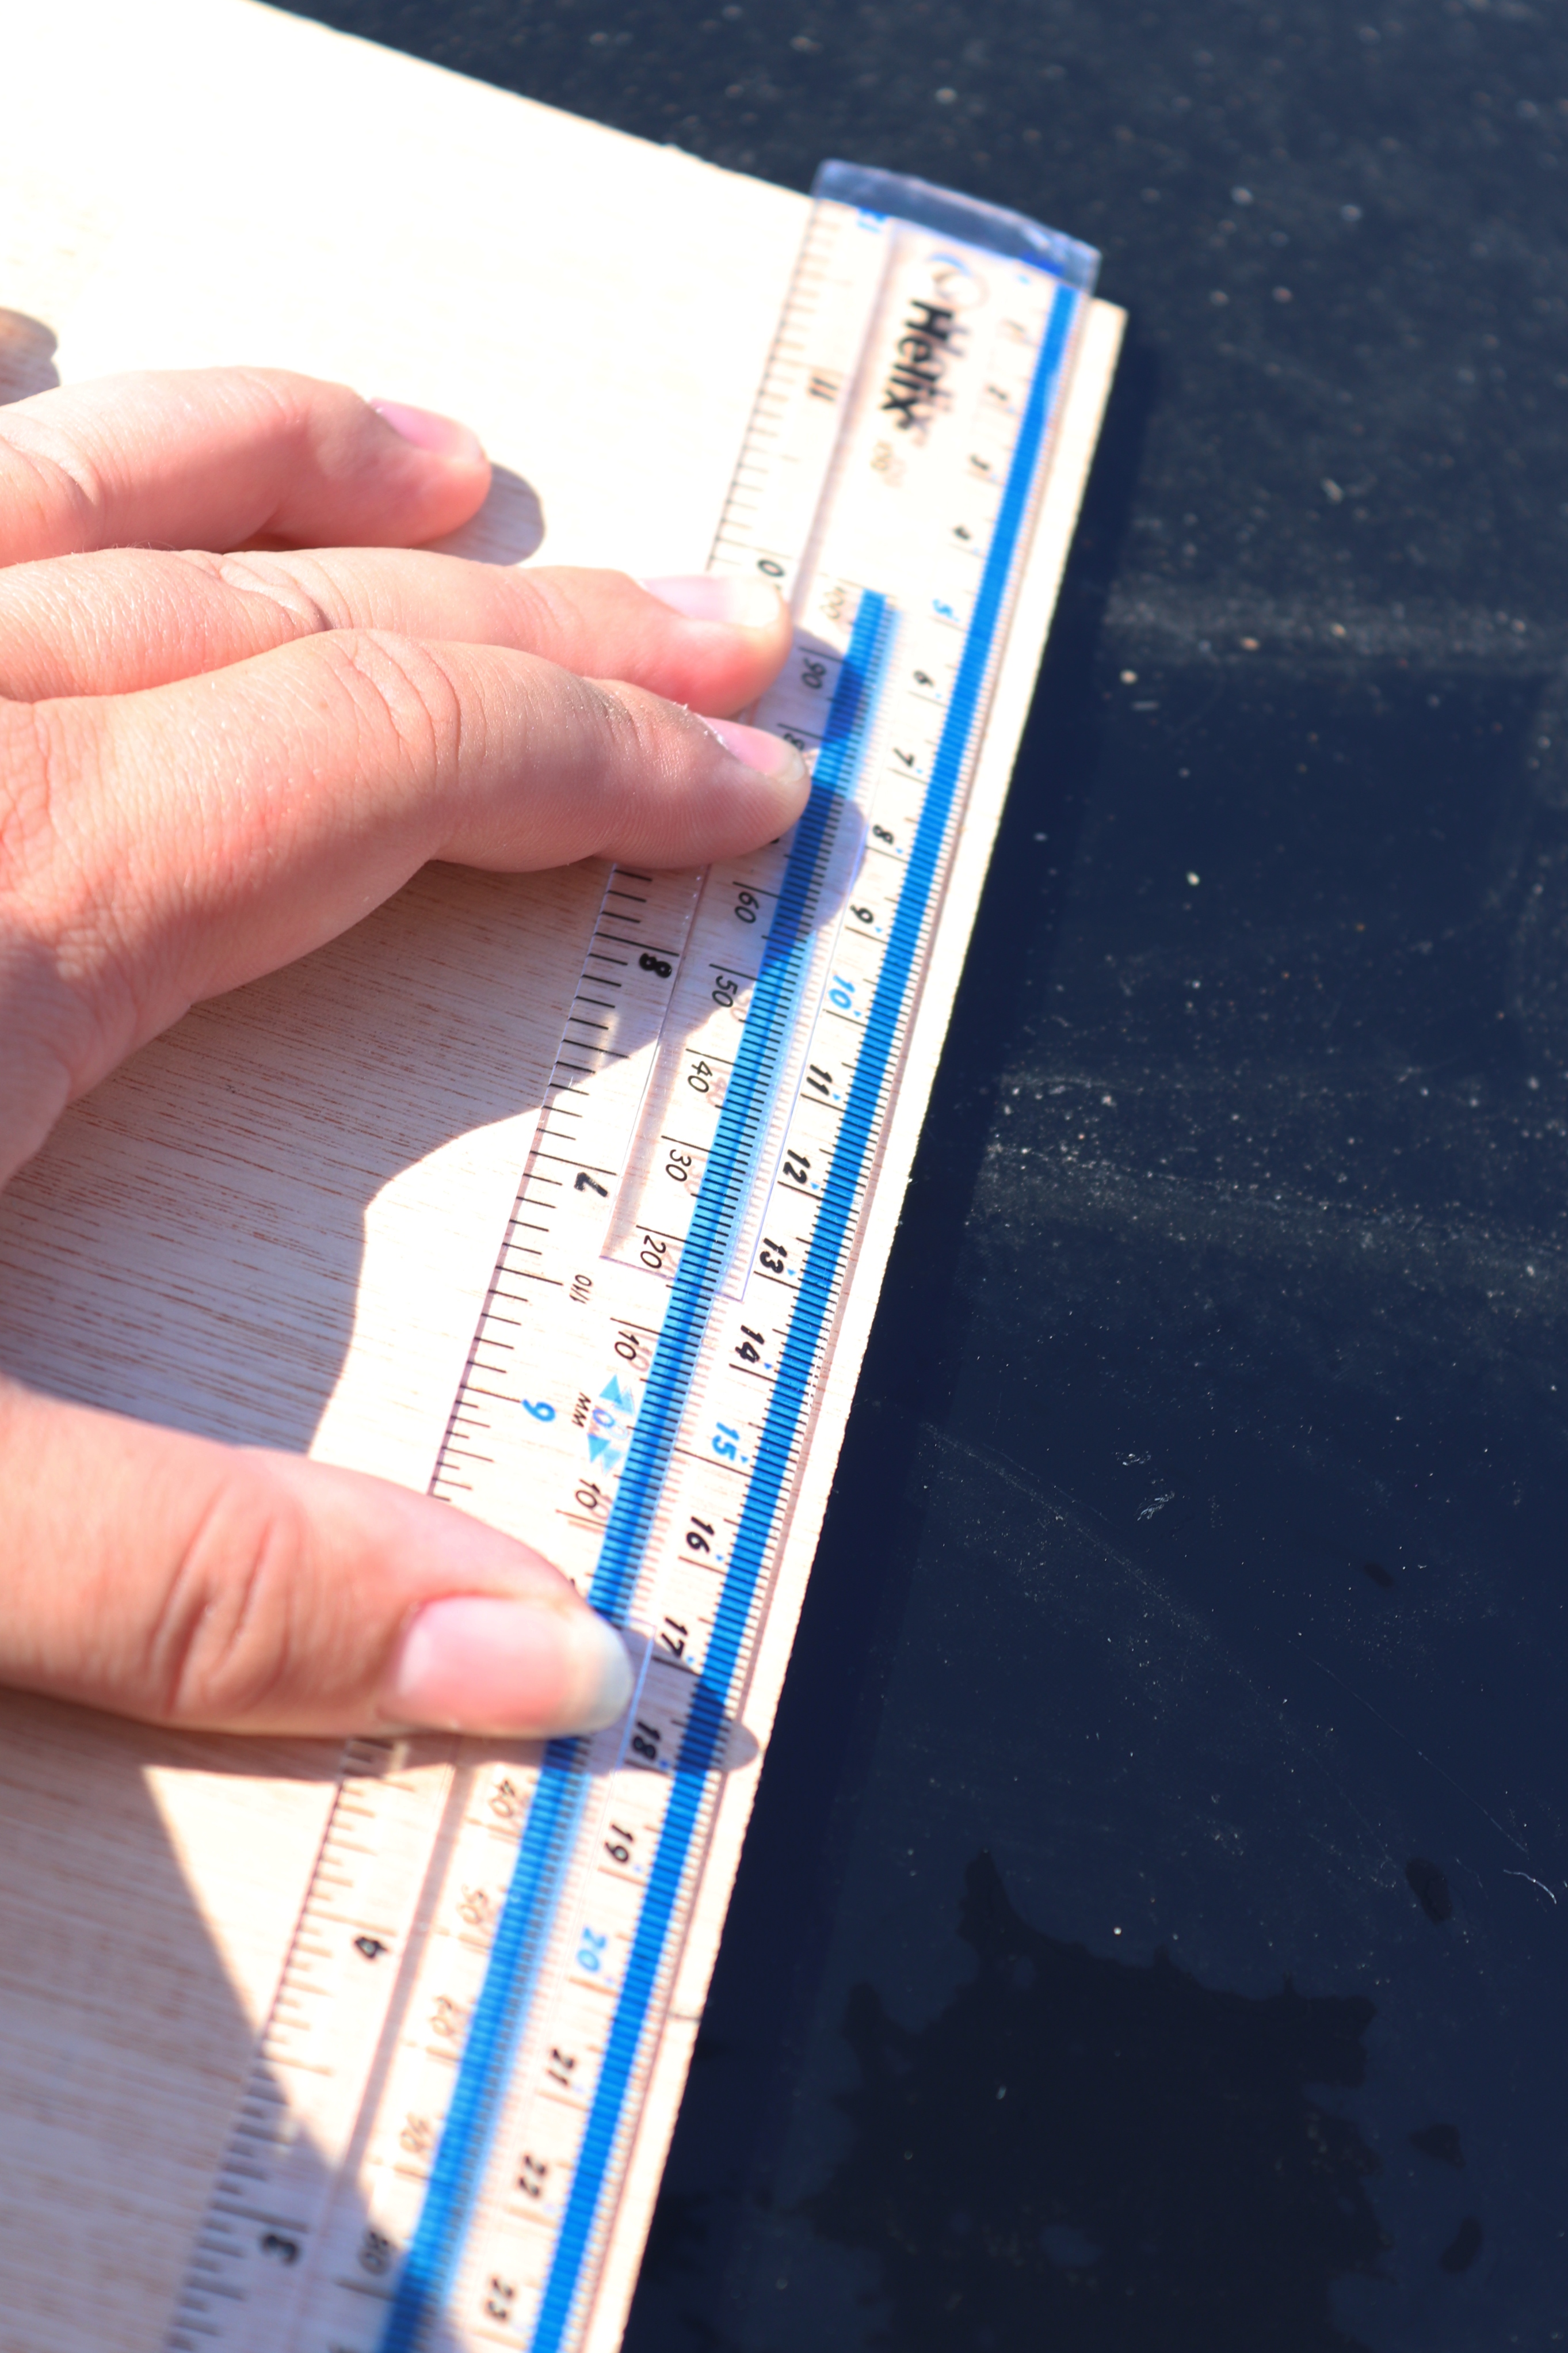
First step is to measure out your shelves, the size you need might vary for your own plates. That’s the beauty of a DIY, you can make it completely custom to what you need. I originally measured it out all wrong! I had cut them out and even started sticking them together before I realised they were too small!! So my advice would be to actually place your plate on the plywood and check your measurements are right and that they will fit on before you start cutting. 😀
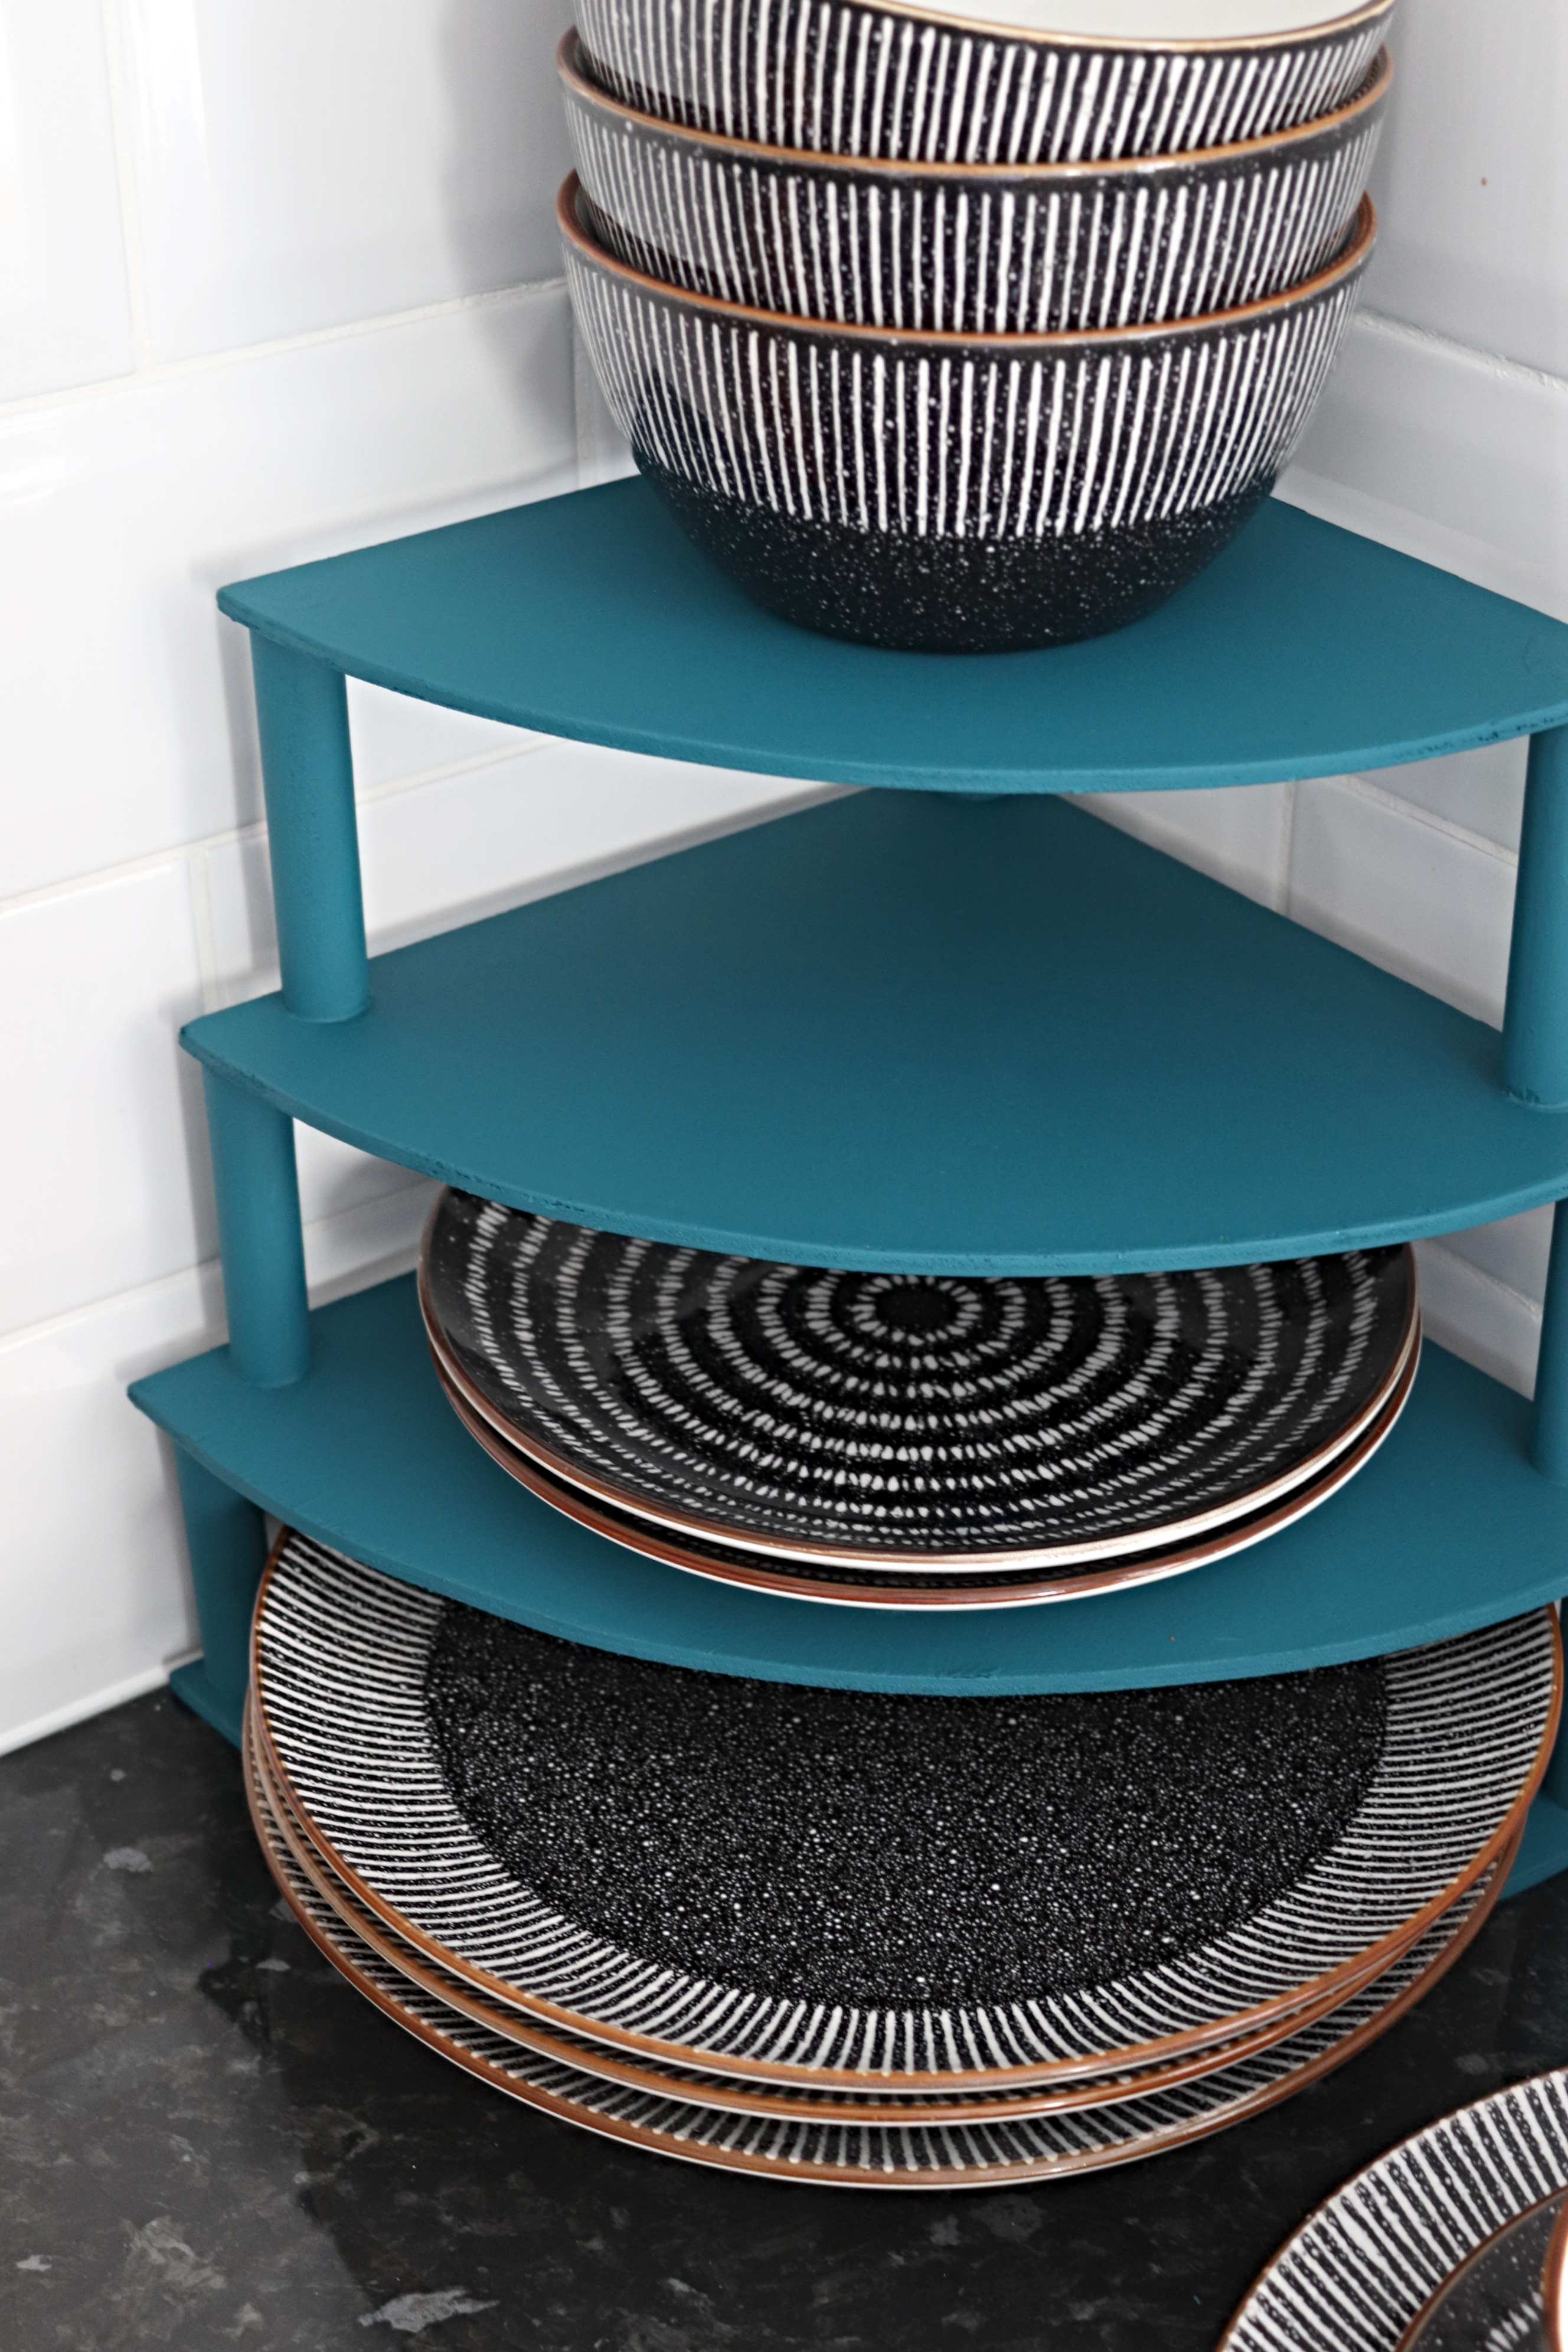
I used the corners of the plywood so there was less cutting and (after my mistake) measured two shelves with 24cm sides, one with 22cm sides and one with 20cm sides.

Tie your length of string to your pencil and use it like a compass. My tips for this are hold the string taut and keep the pencil vertical.
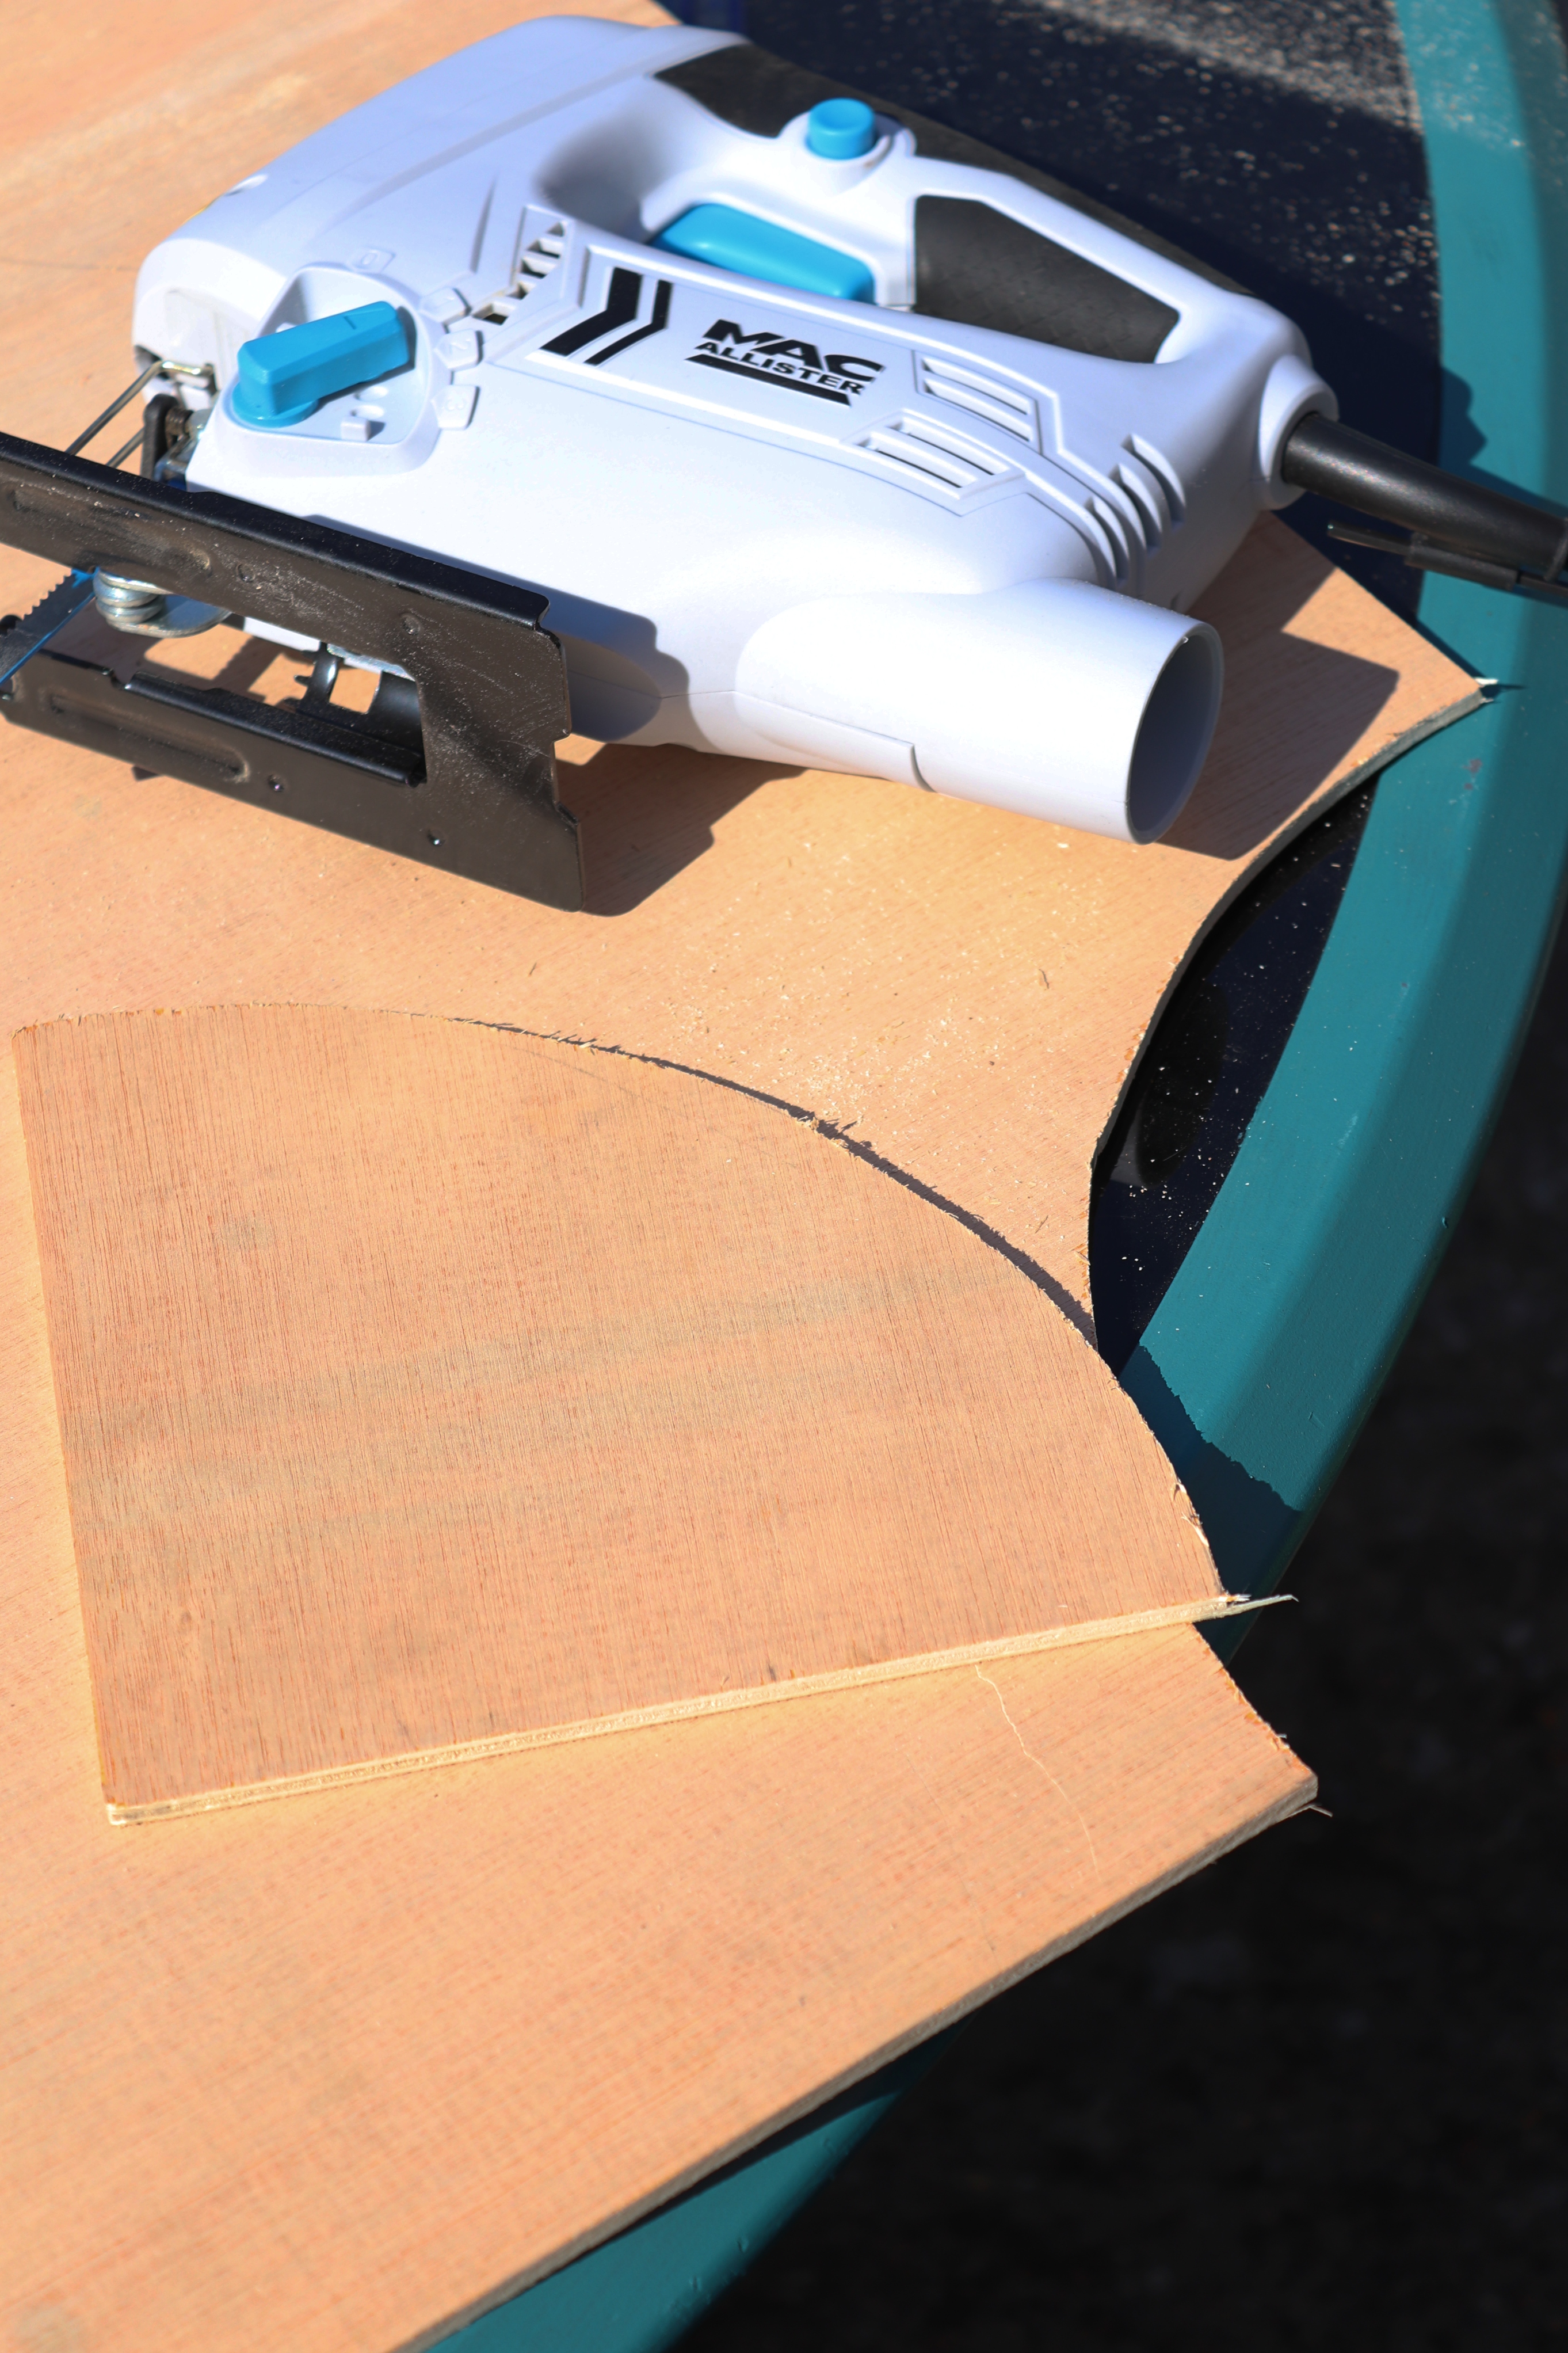
Cut the shelves out using the jigsaw. This is only the second time I’ve ever used one so as much as I would like to tell you that my cuts were perfect, they were not. 😀 But the sander was my friend and smoothed any little bumps out.
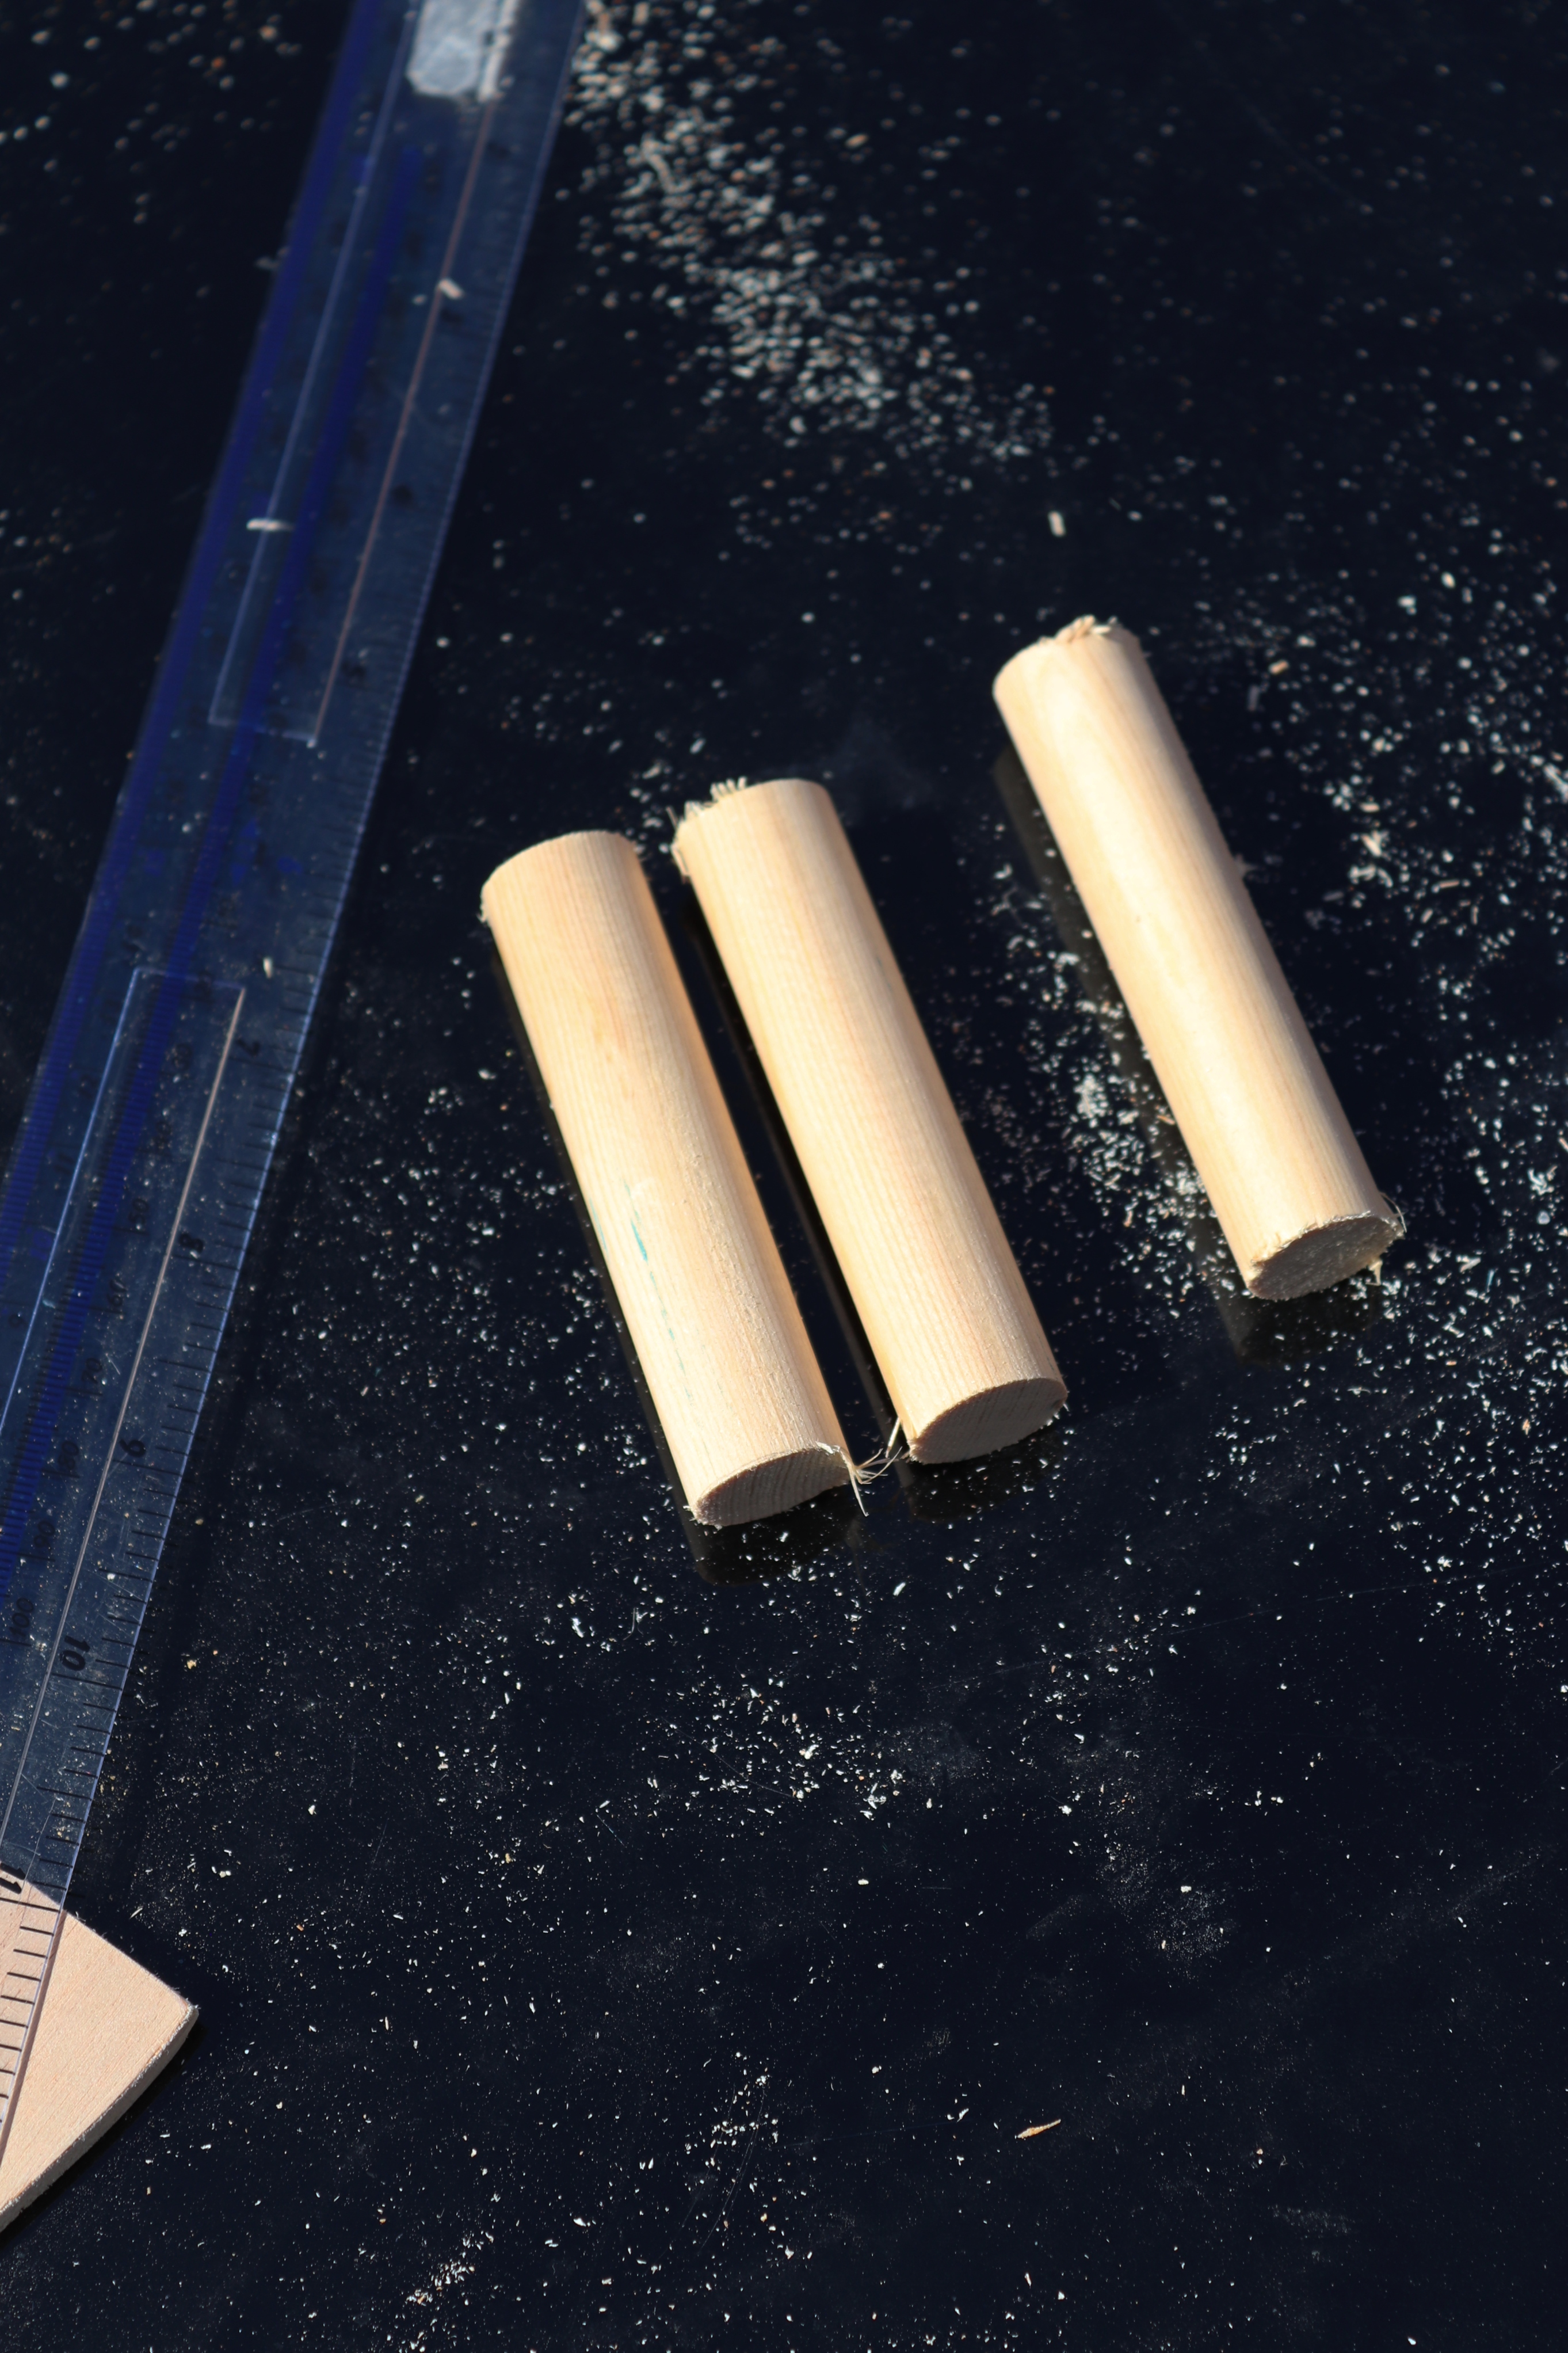
Next up was cutting the dowling, you need three lengths for each layer. I wanted one of my shelves to be a little taller than the others (for my new pasta bowls) so I measured and cut six 8cm lengths and three 9cm lengths. You will need to sand these smooth and level too. Again, my advice would be to measure your stack of plates/bowls and cut your dowling accordingly. I only have 4 of each dish so if you have more you will need your shelves (and therefore your dowling) to be taller.
Here is my stack of cut shelves, the ones I got wrong! So you should have two of the biggest size and then one of the medium and one of the smallest.
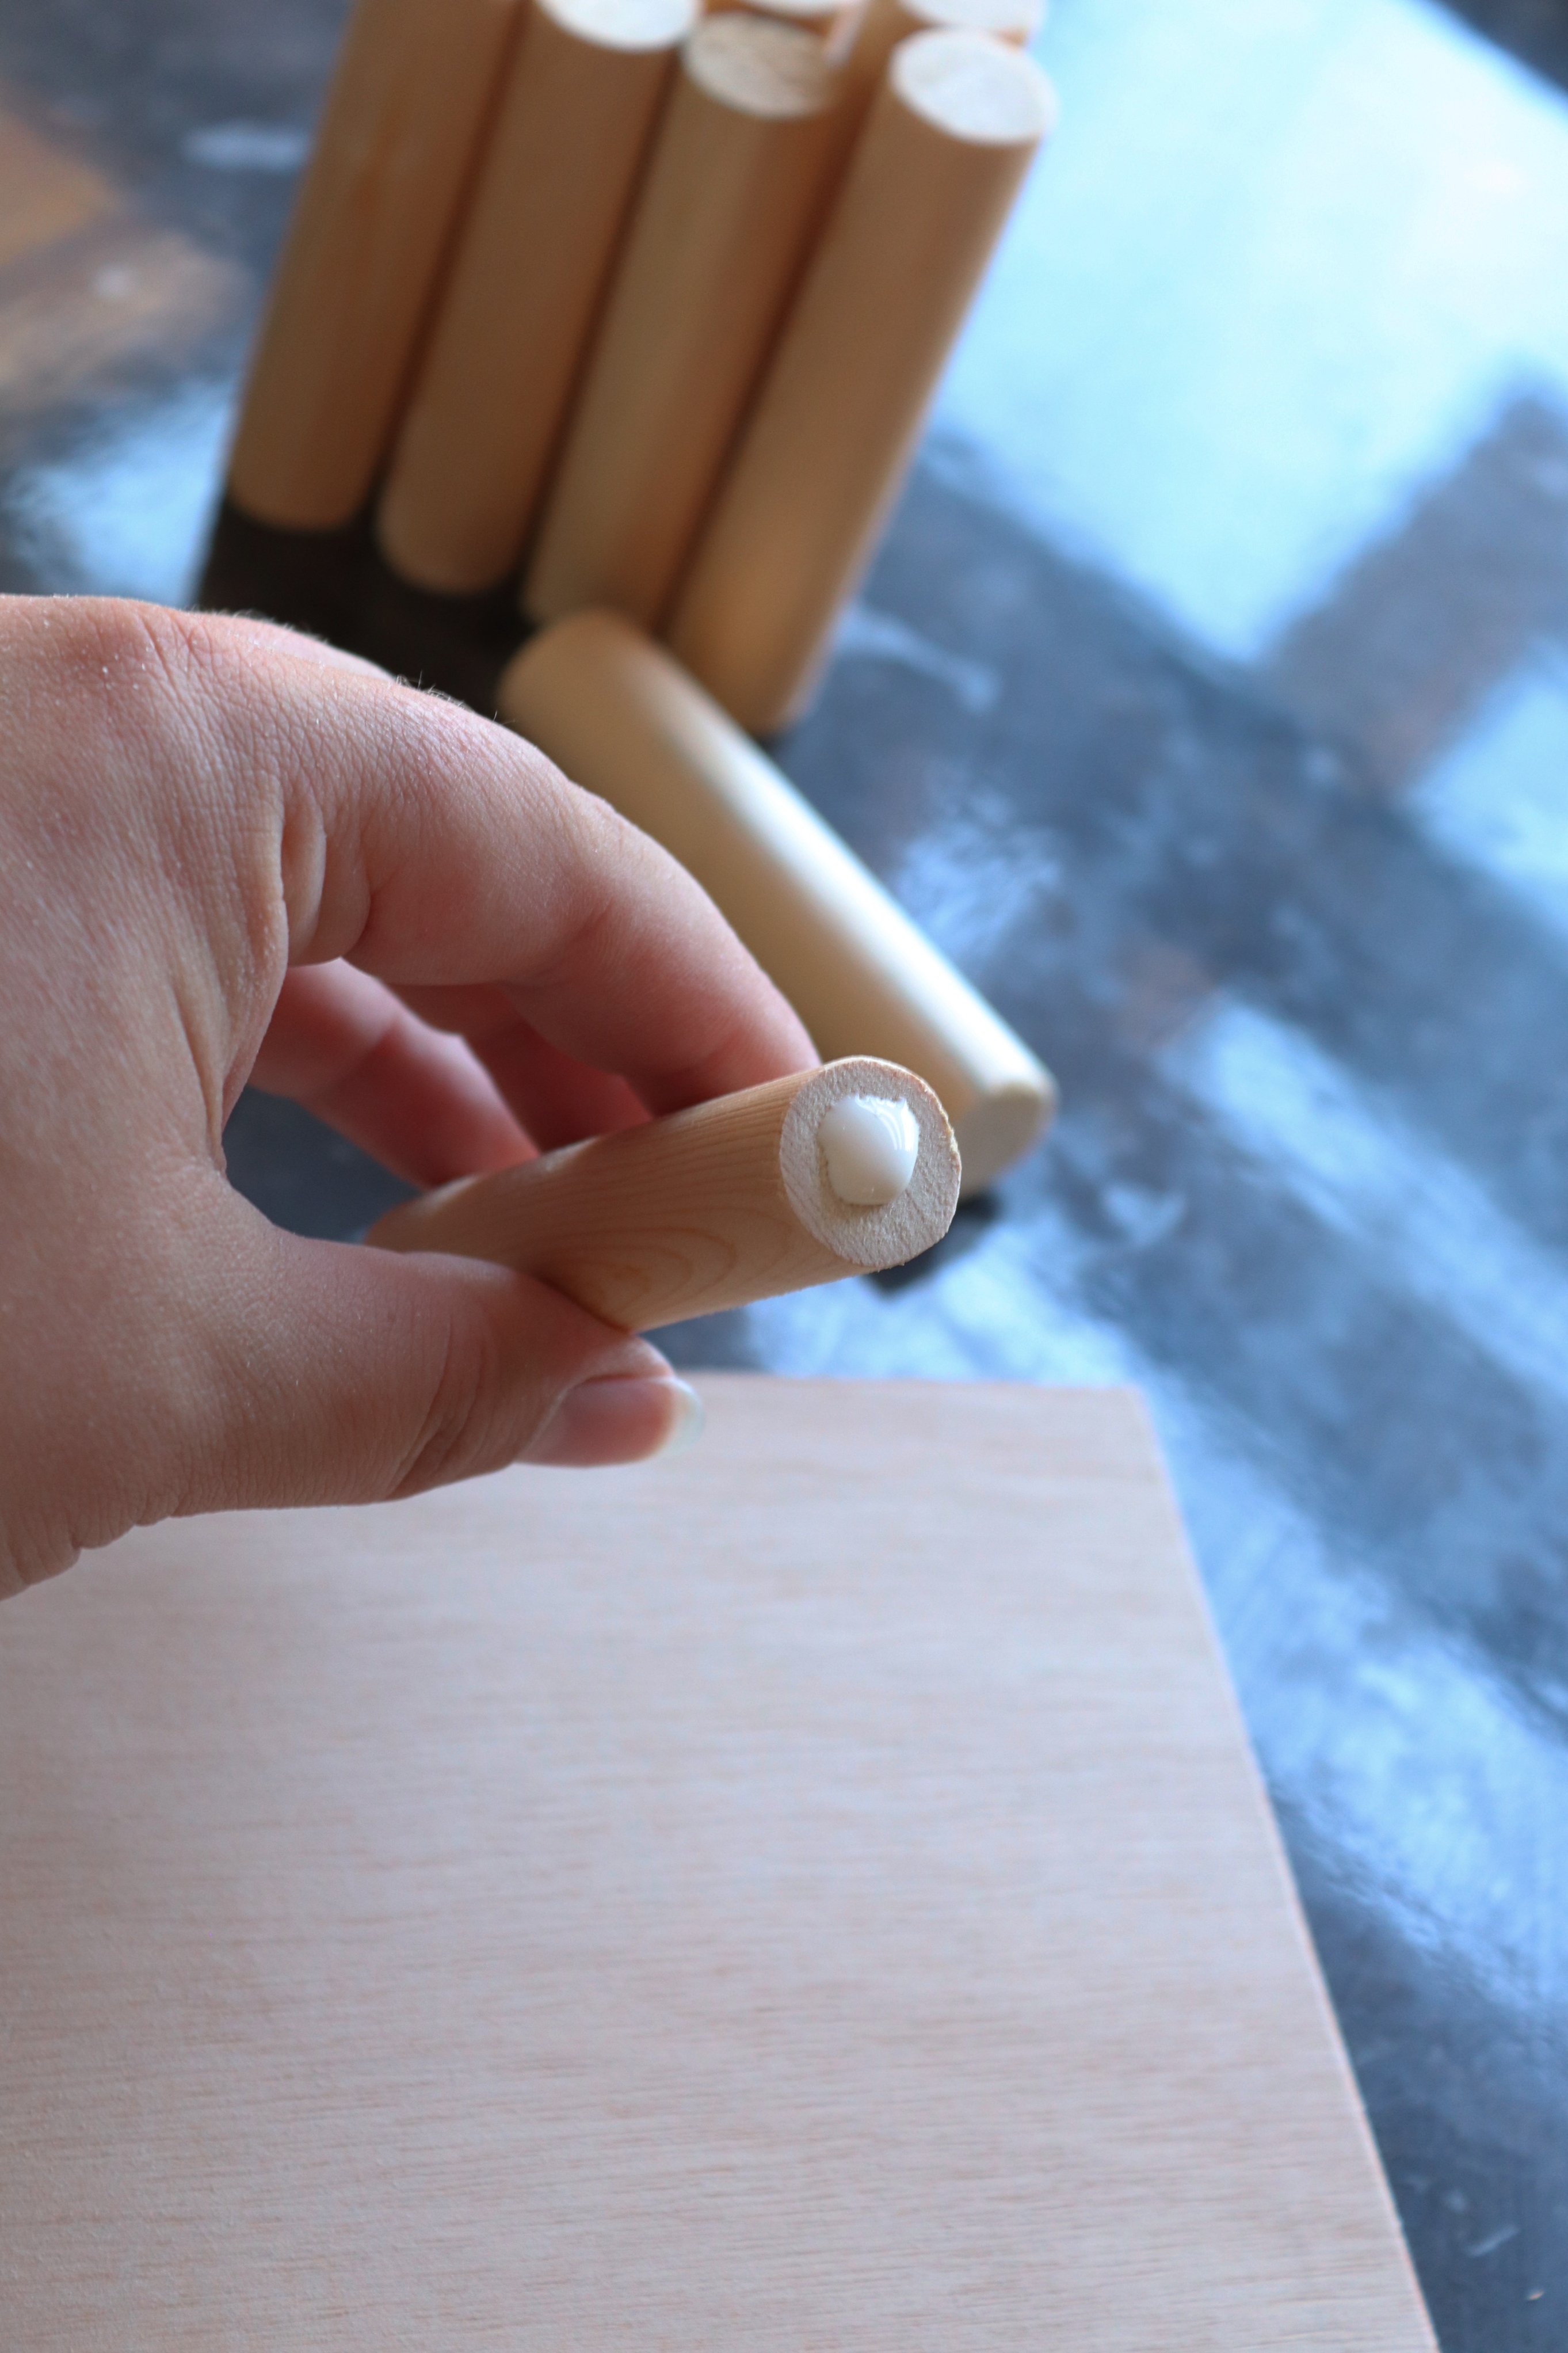
I simply used wood glue to stick it together. Stick a piece of dowling in each corner and then stick on the next shelf.
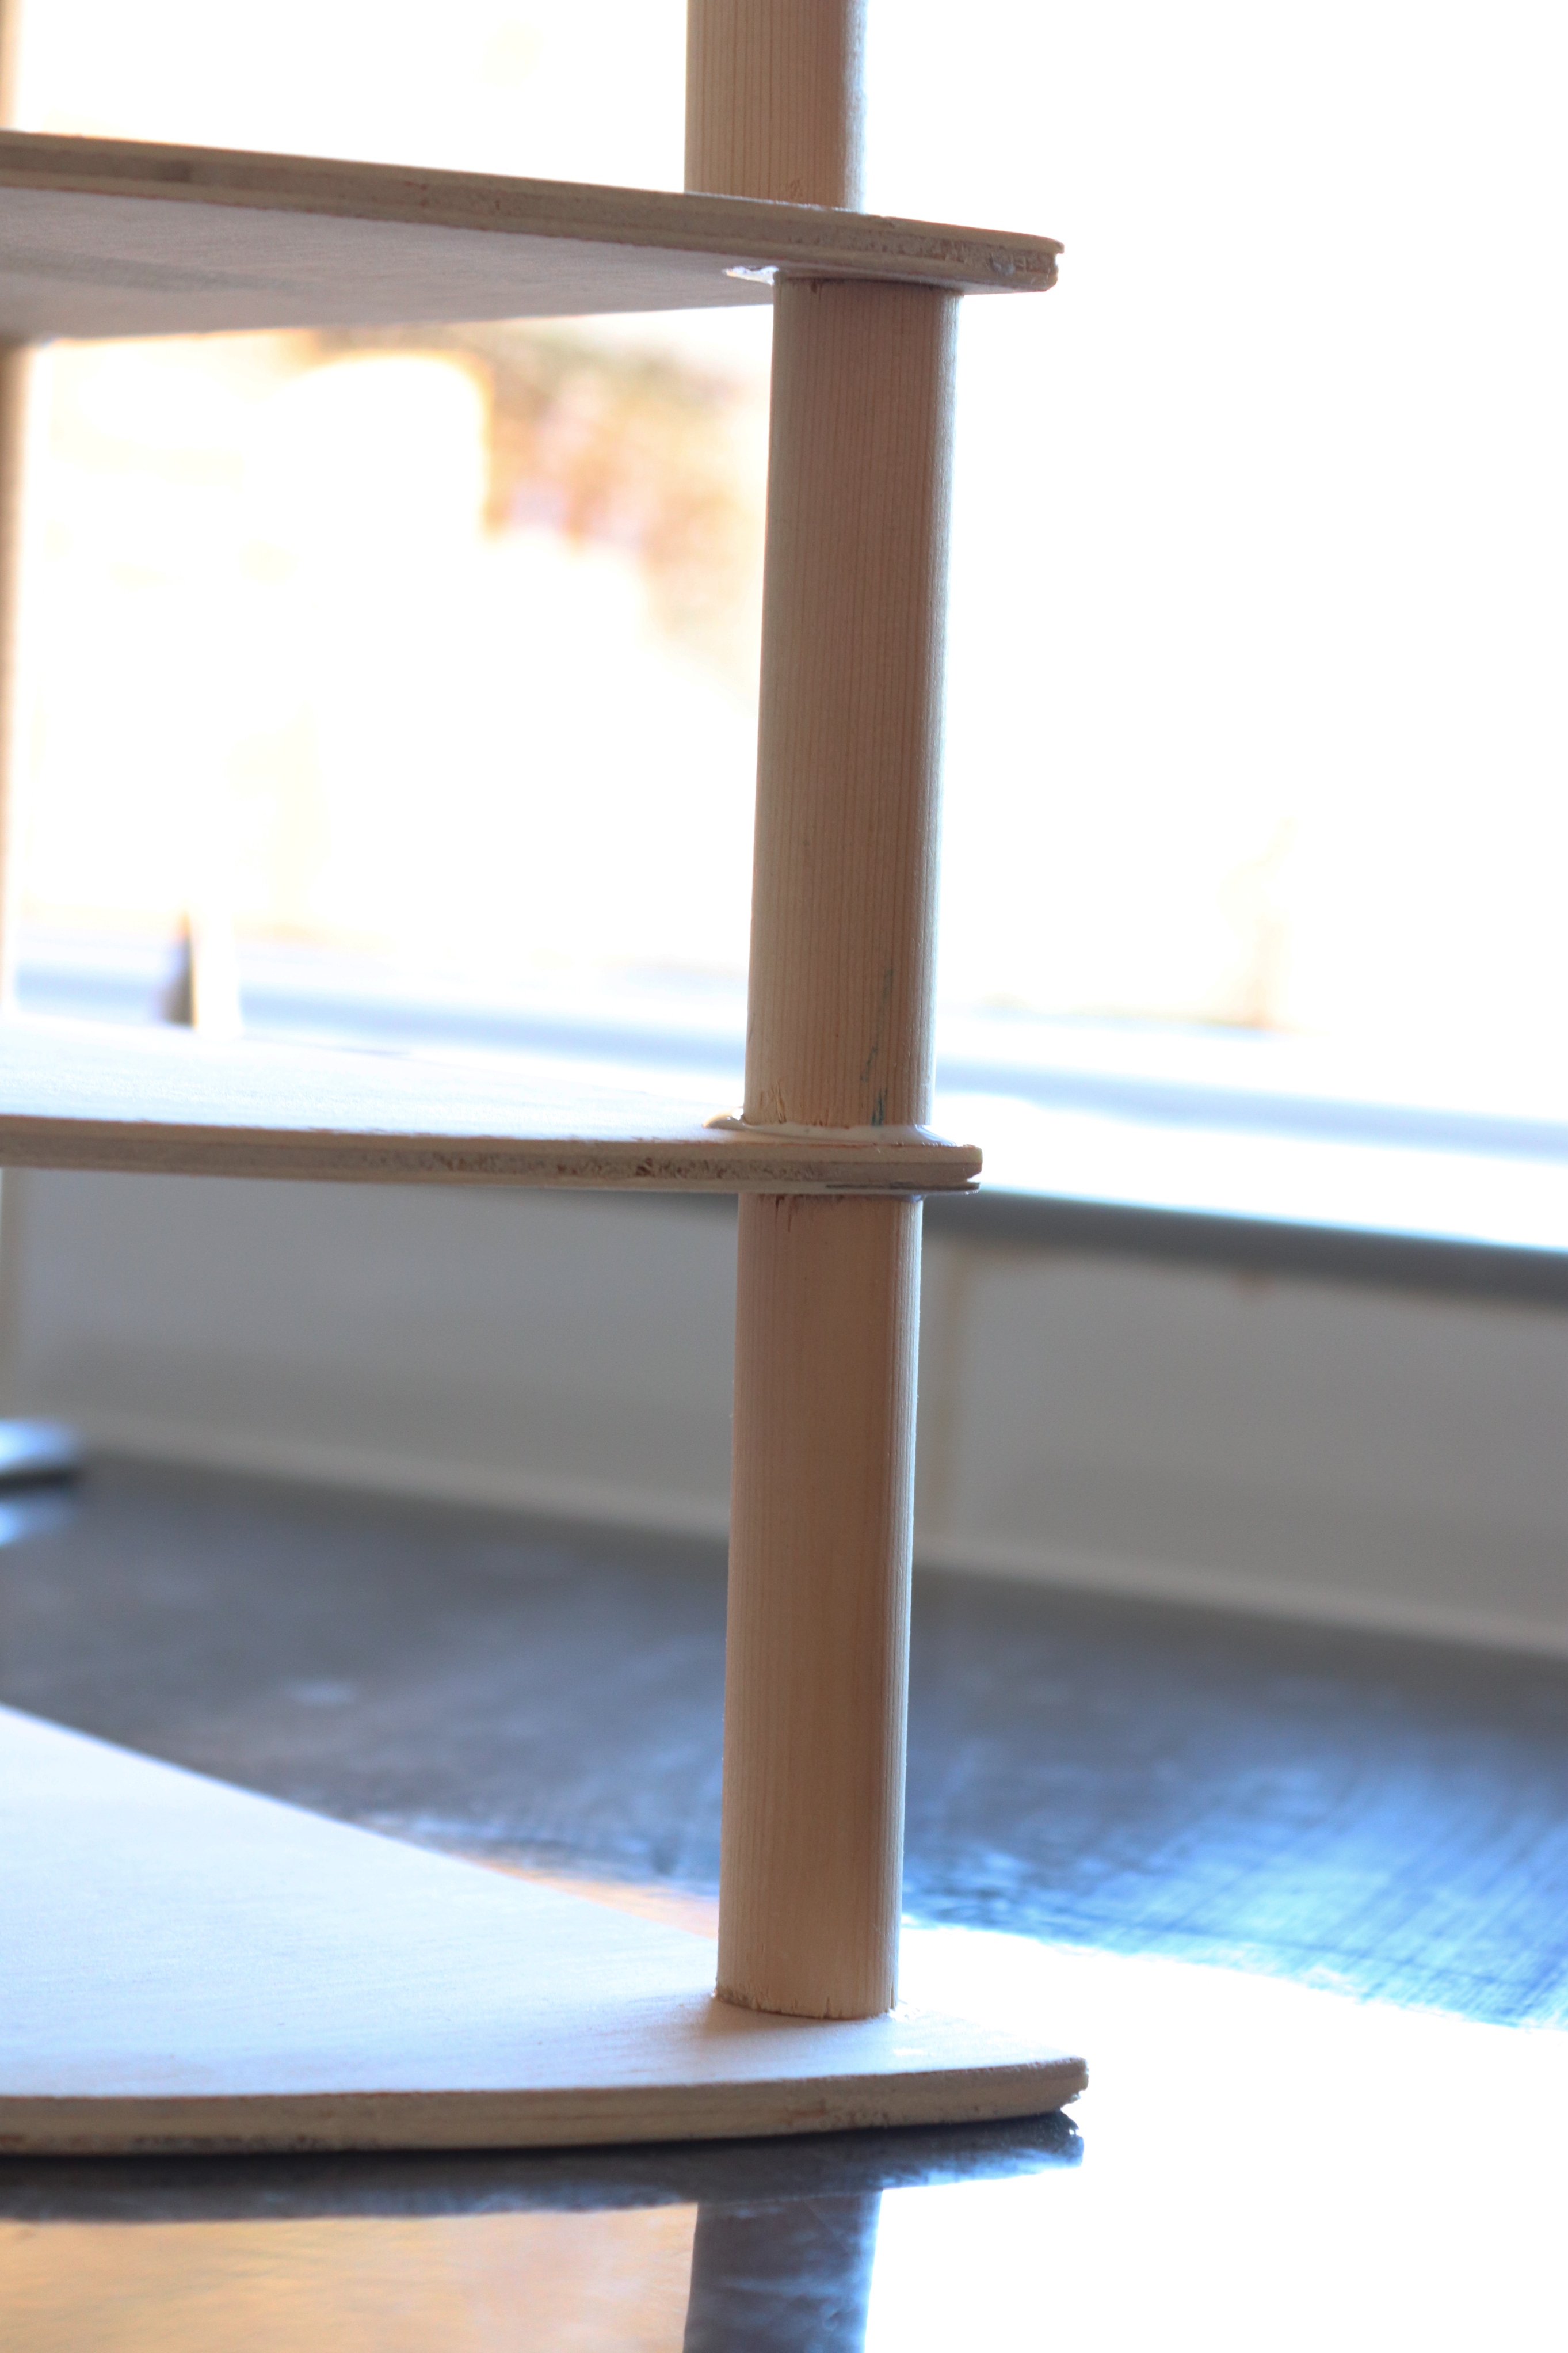
Make sure that the dowling on the first and second rows at the front line up and also the dowling in the back corner.
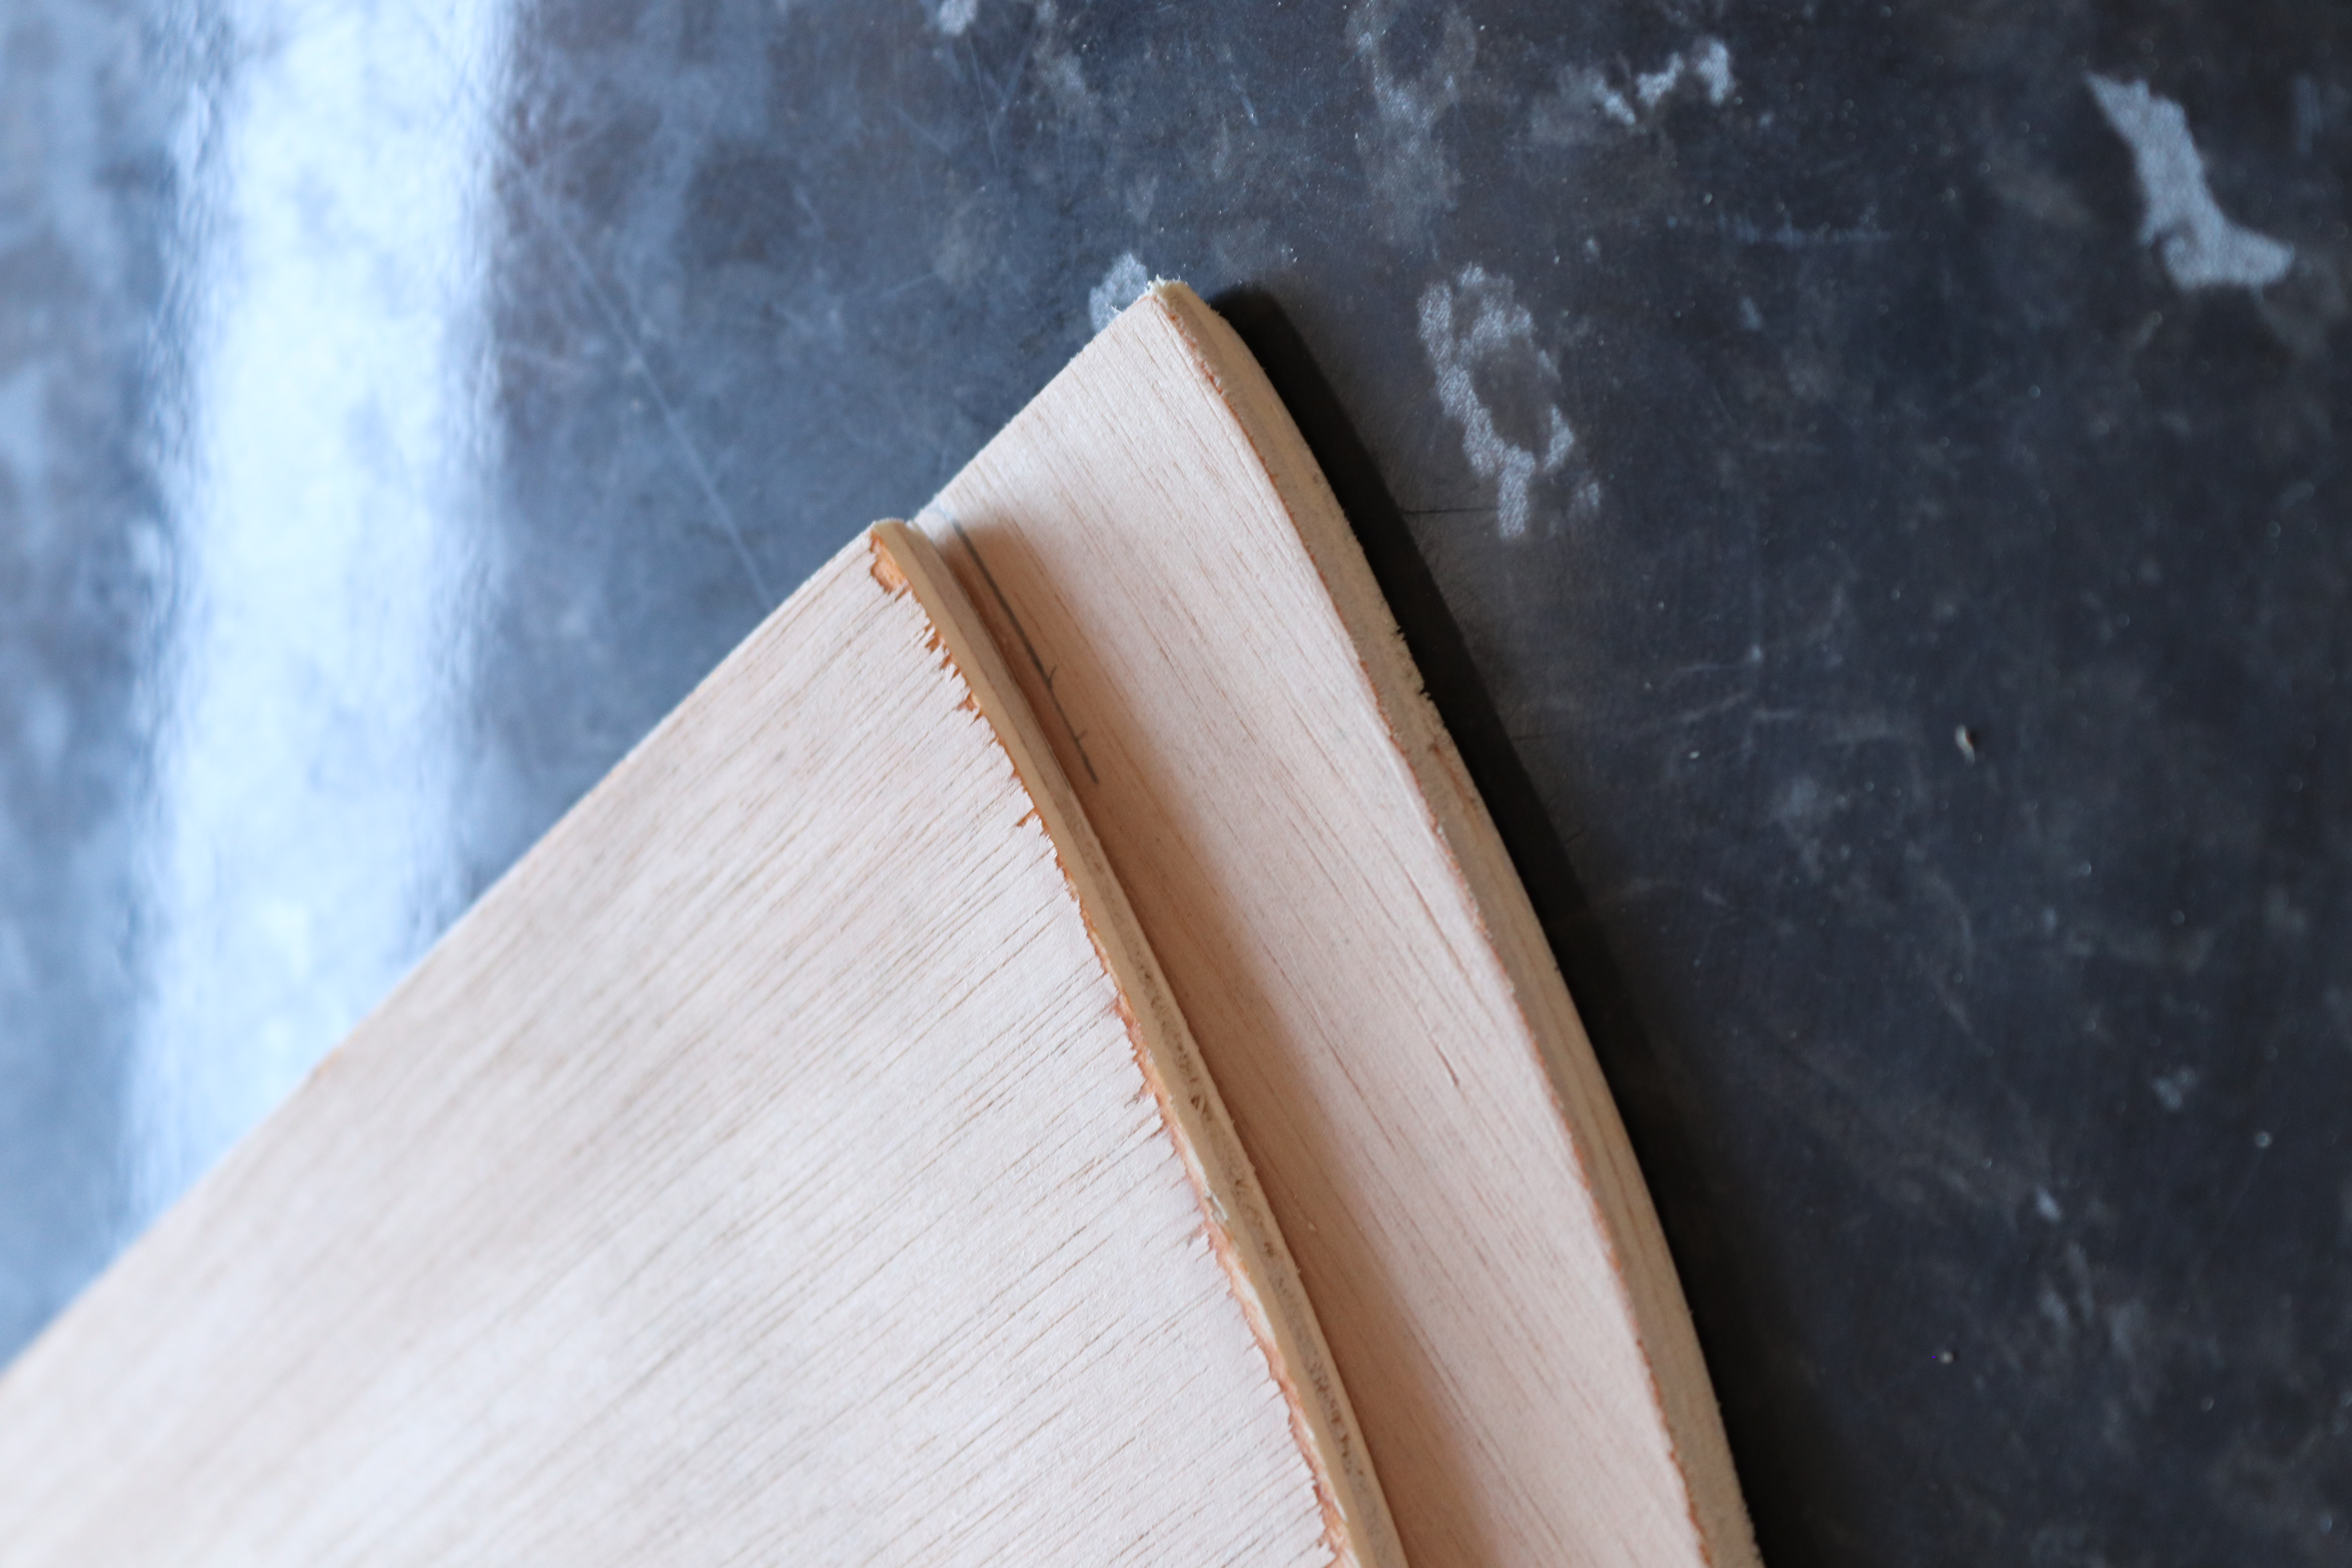

Then for the next row you will need to mark the edge of the smaller shelf like in the image above and instead of sticking the dowling in the outside corners you need to stick them where you have marked.
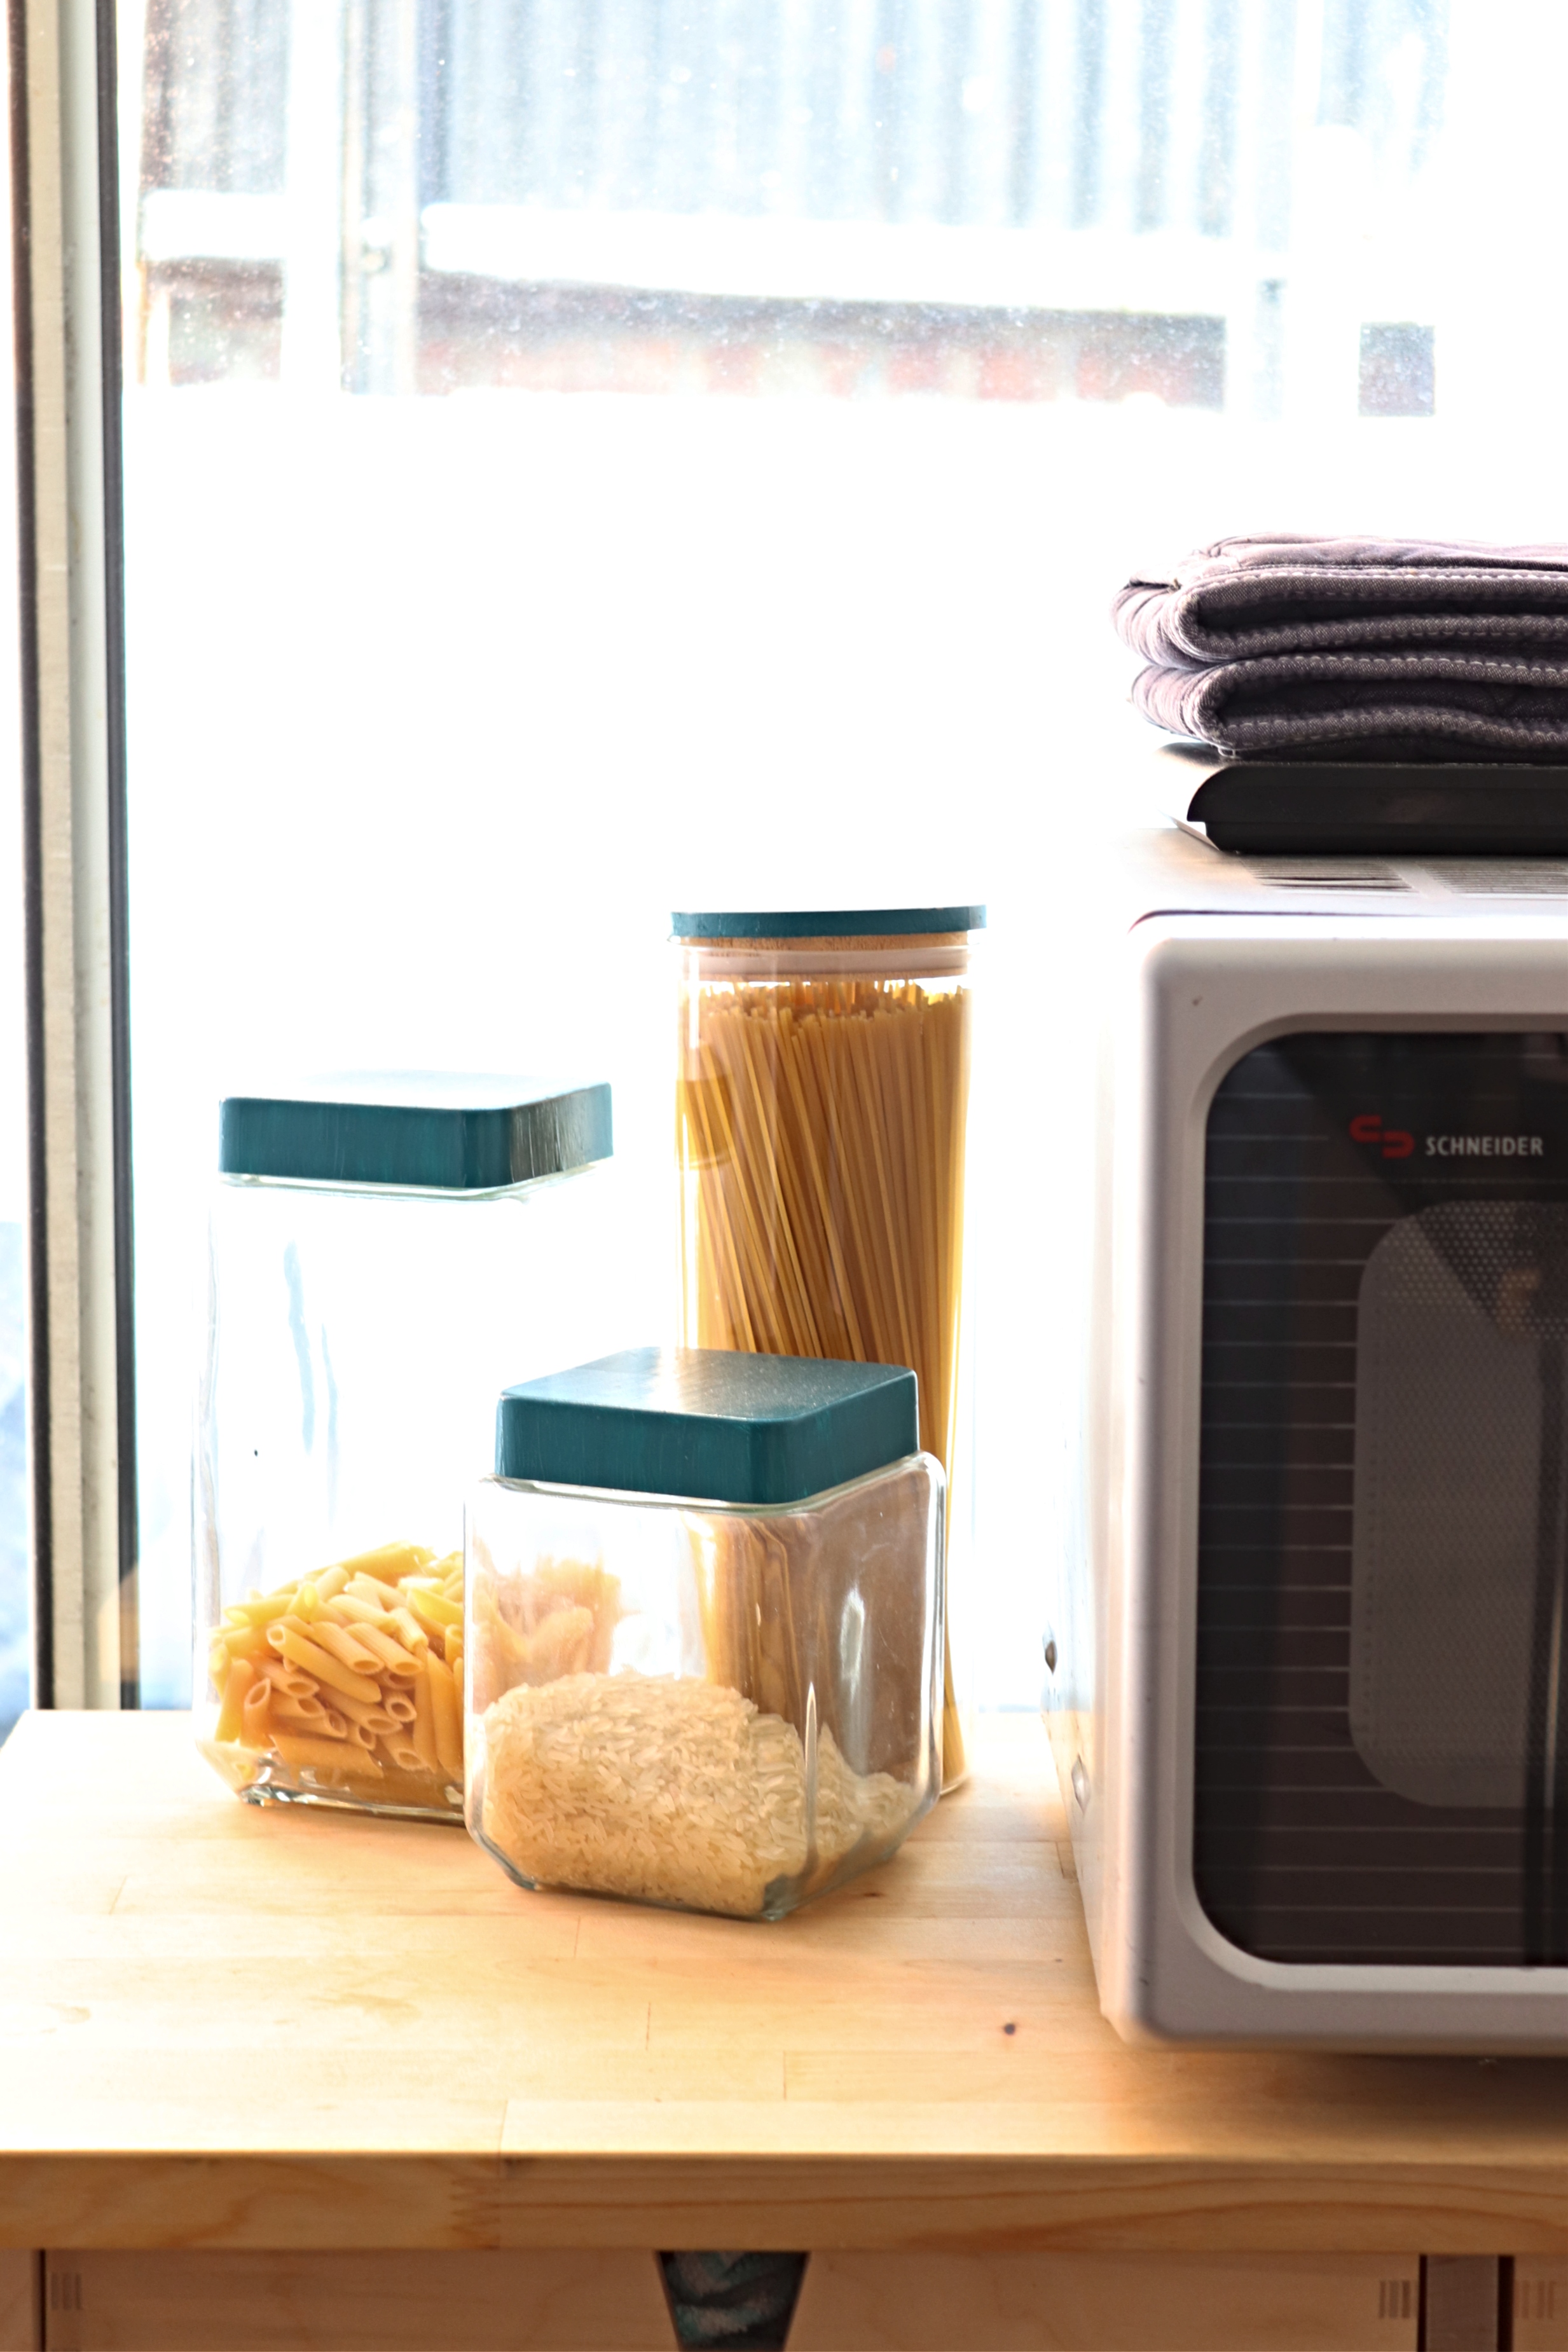
Once your wooden palte rack is glued, leave it to dry. Then you need to choose your paint colour, I just used emulsion and went for teal to match the storage jars that I already painted. Plus I always go for teal, there are no other colours in my world. 😀 The exact colour is jaded teal by Wilko, it’s the colour I used in my living room at Seaways.

It took two coats of paint to cover it. And that’s it, my plate rack finished.
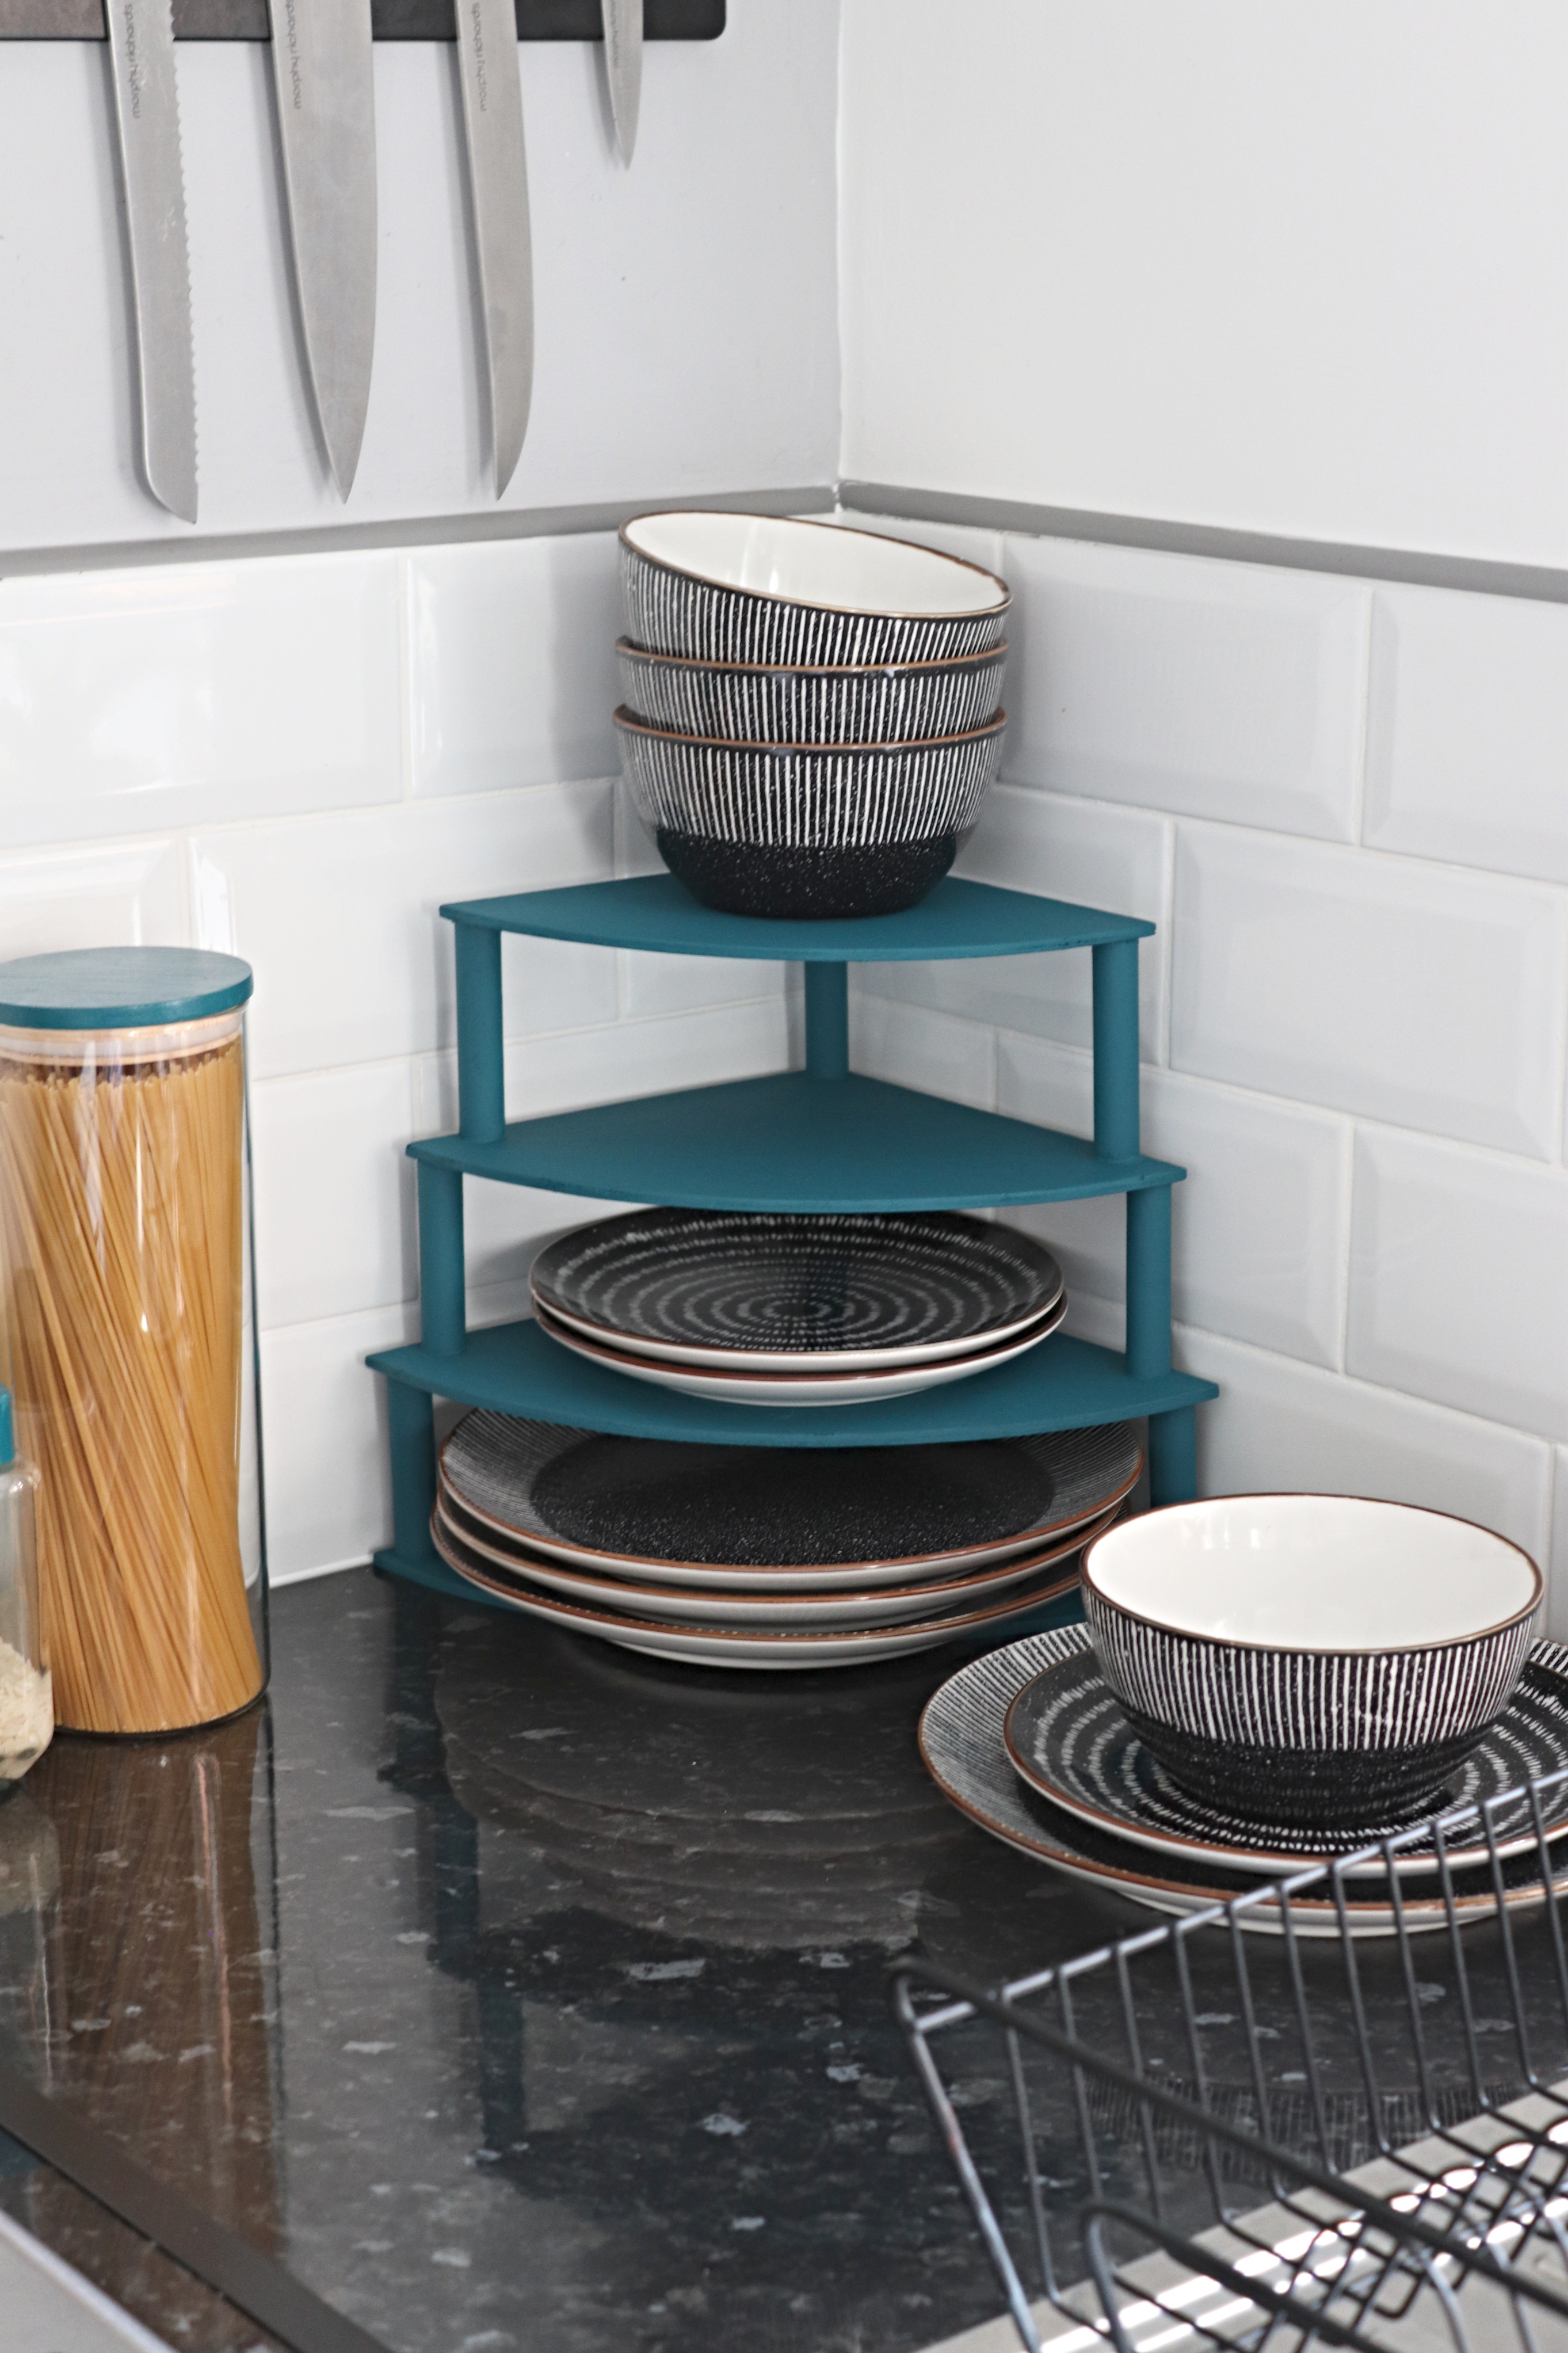
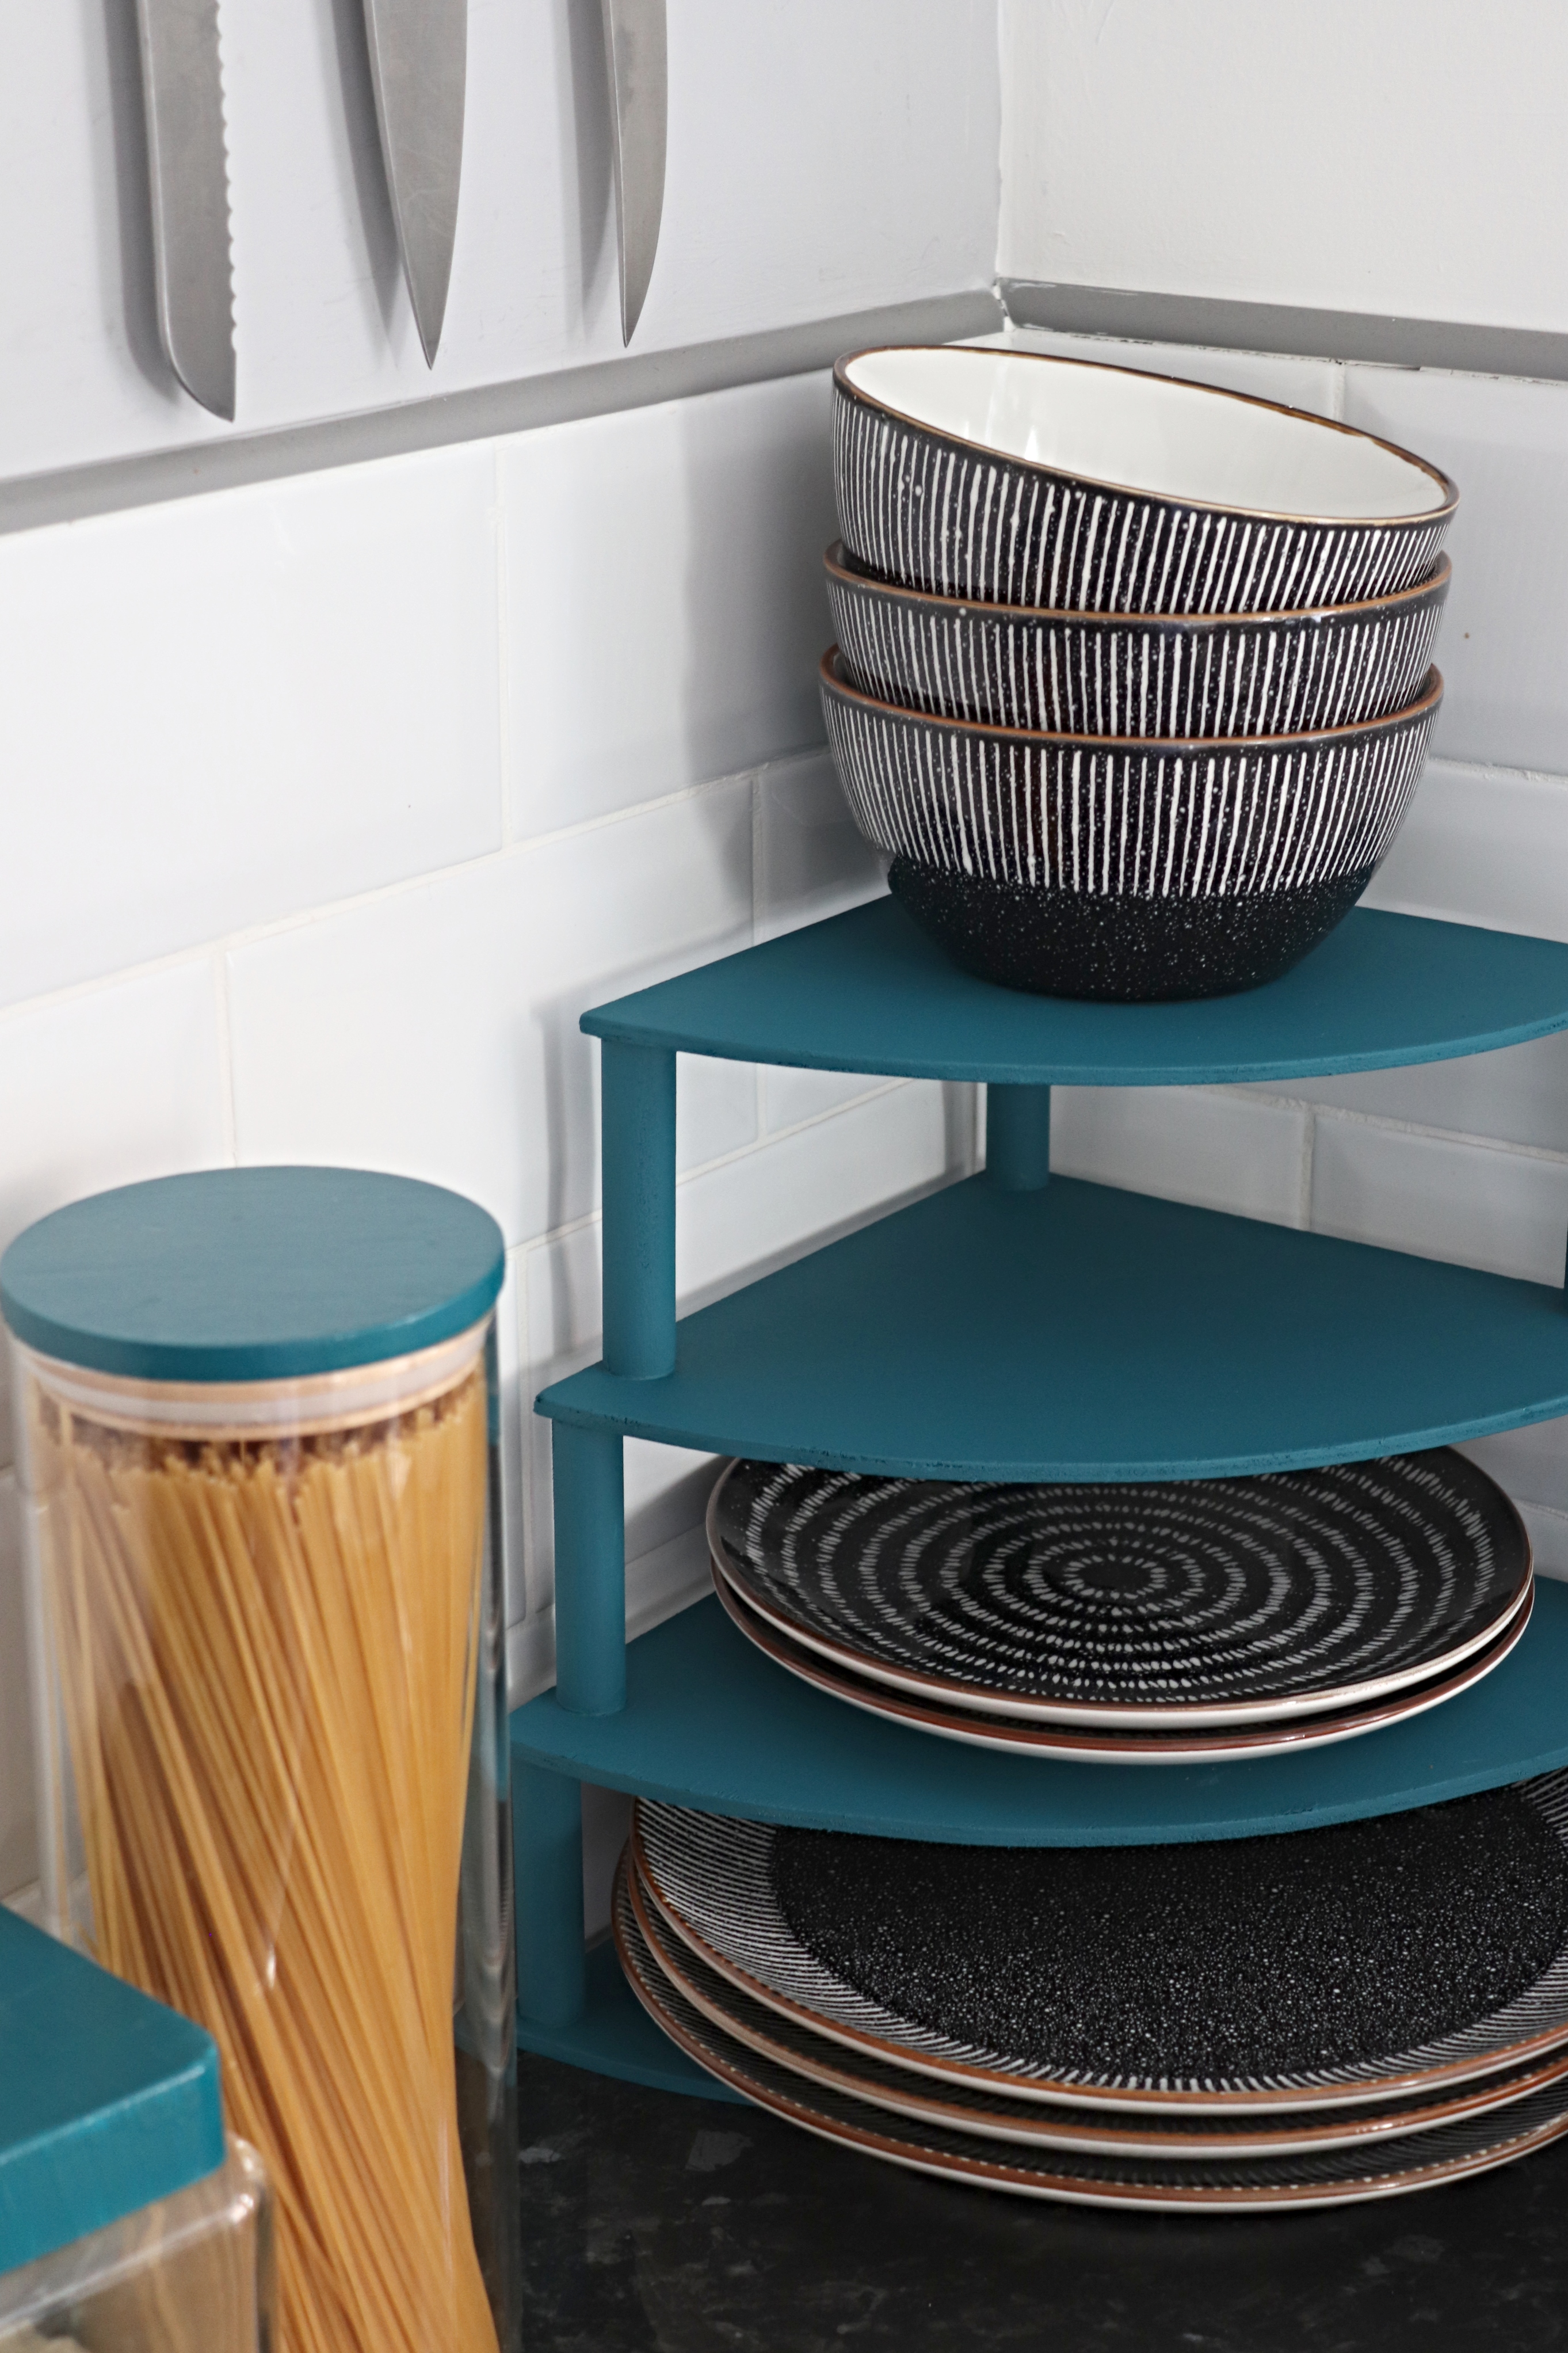
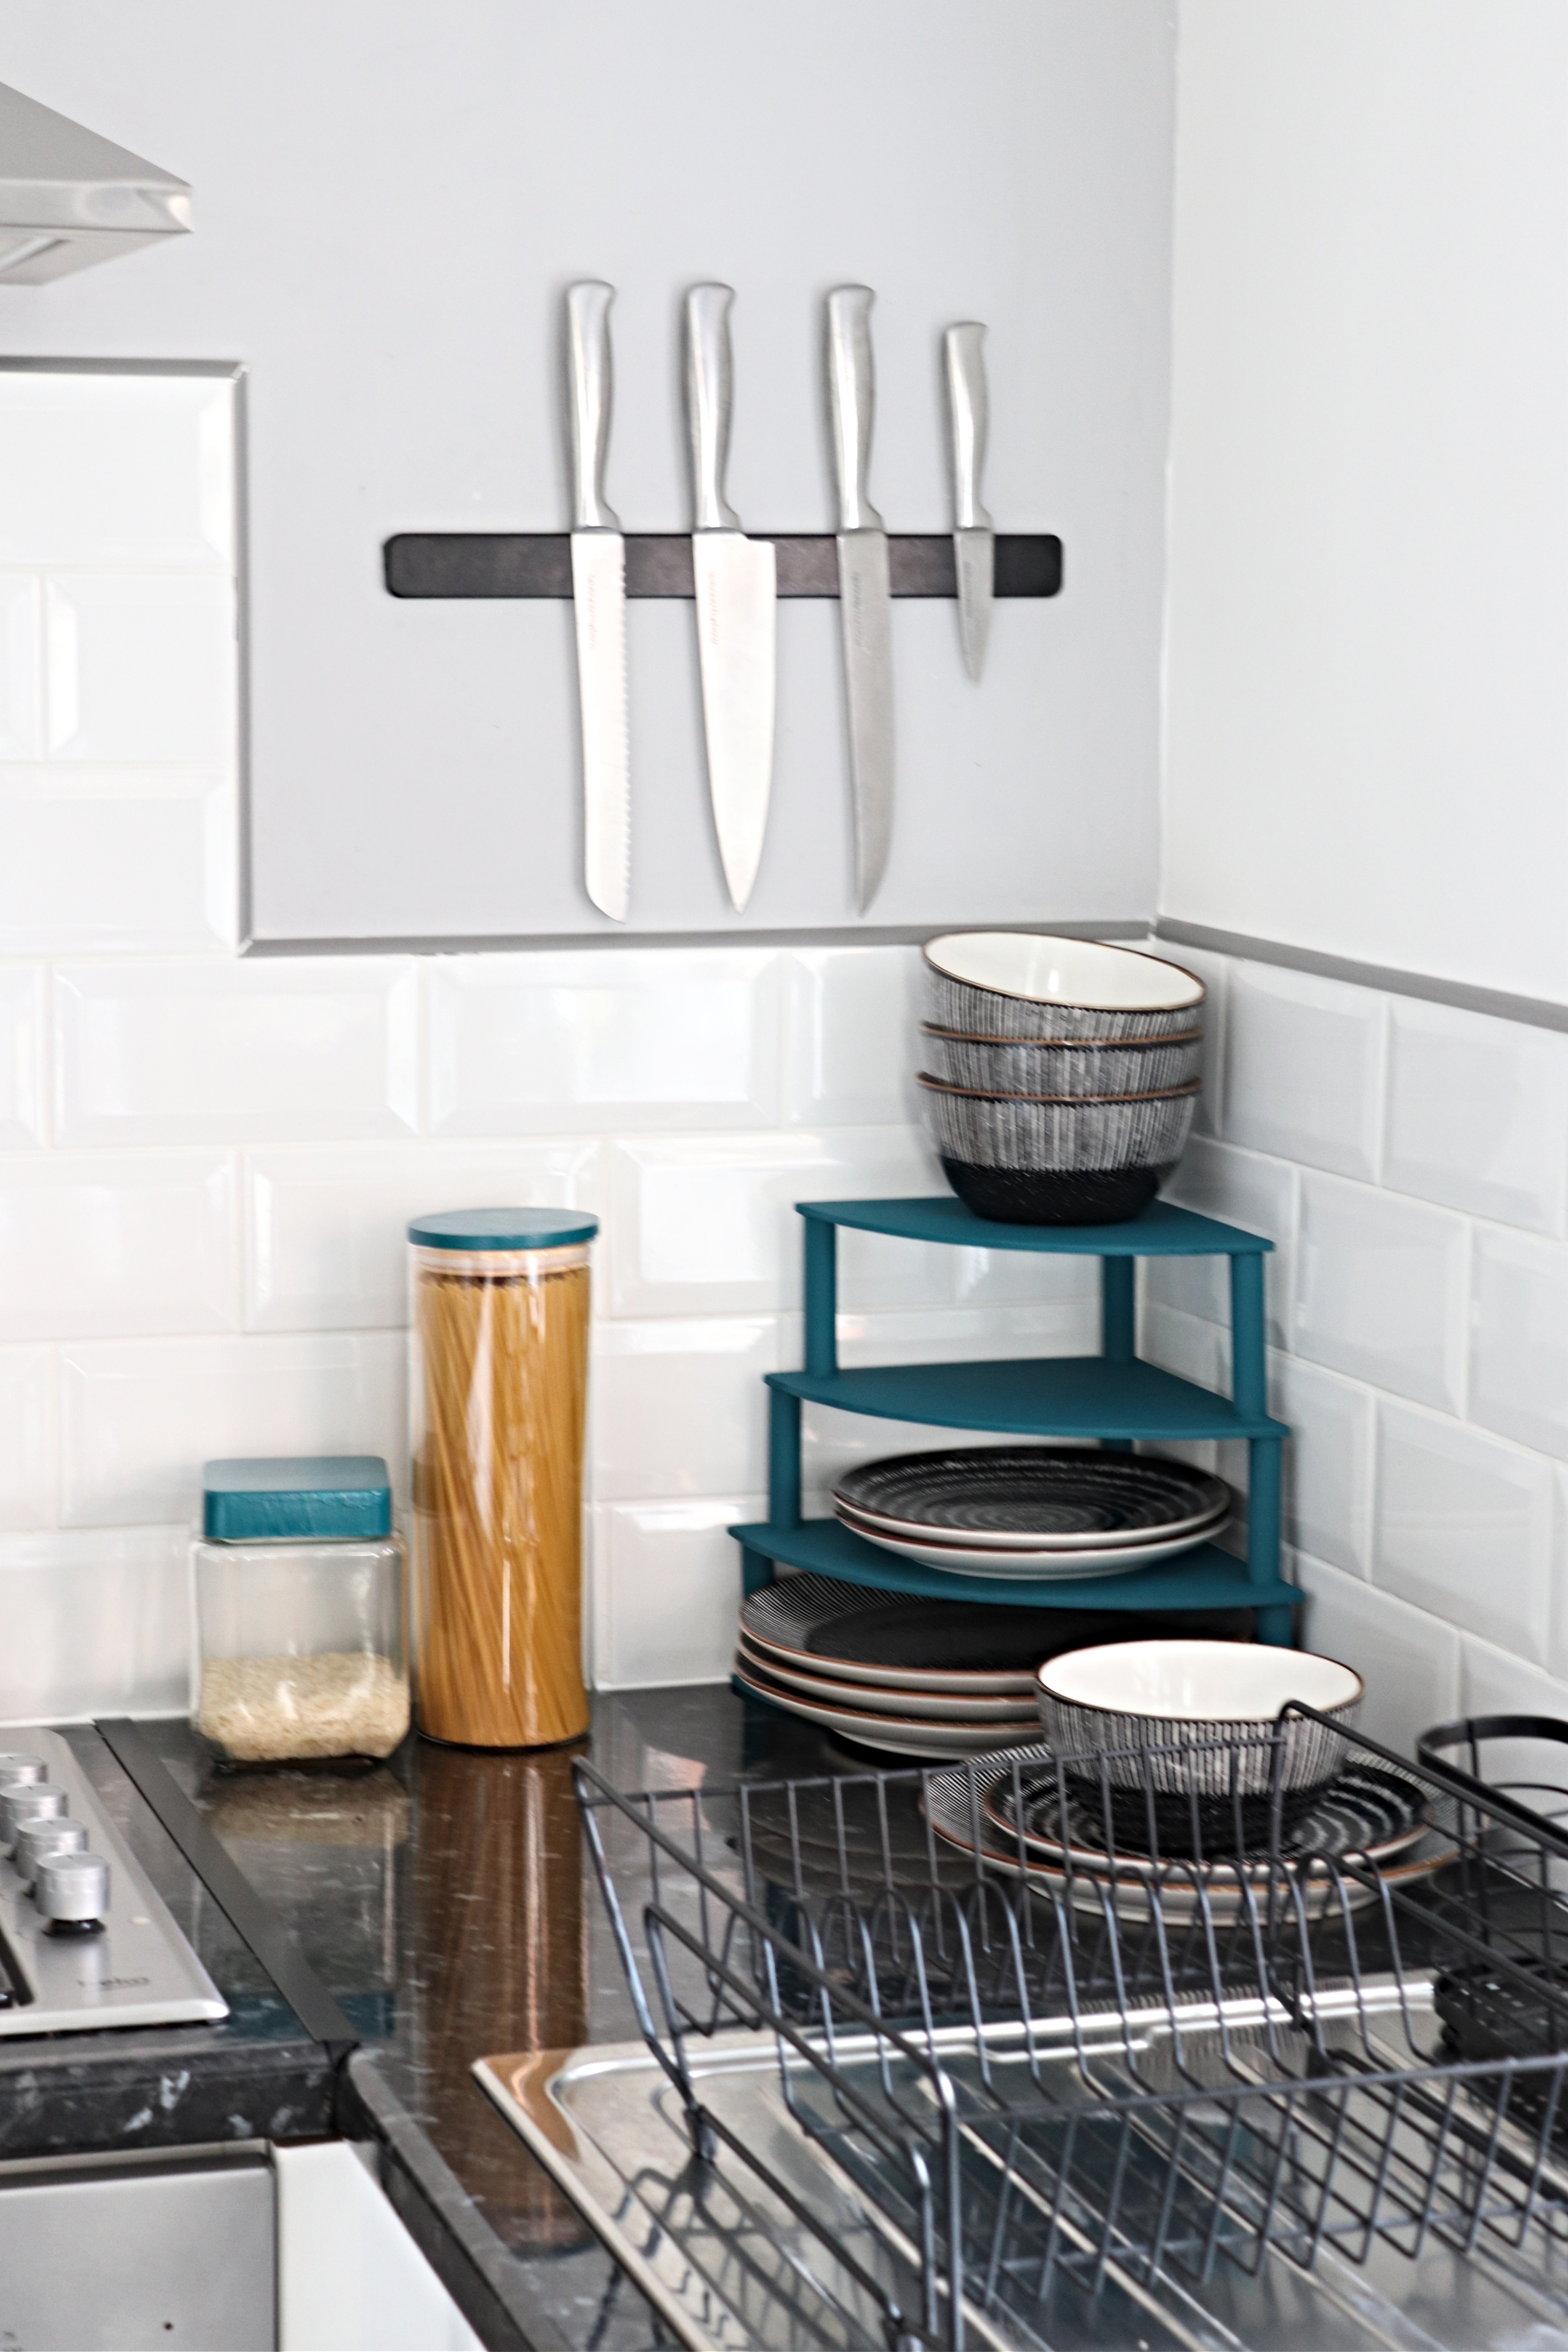
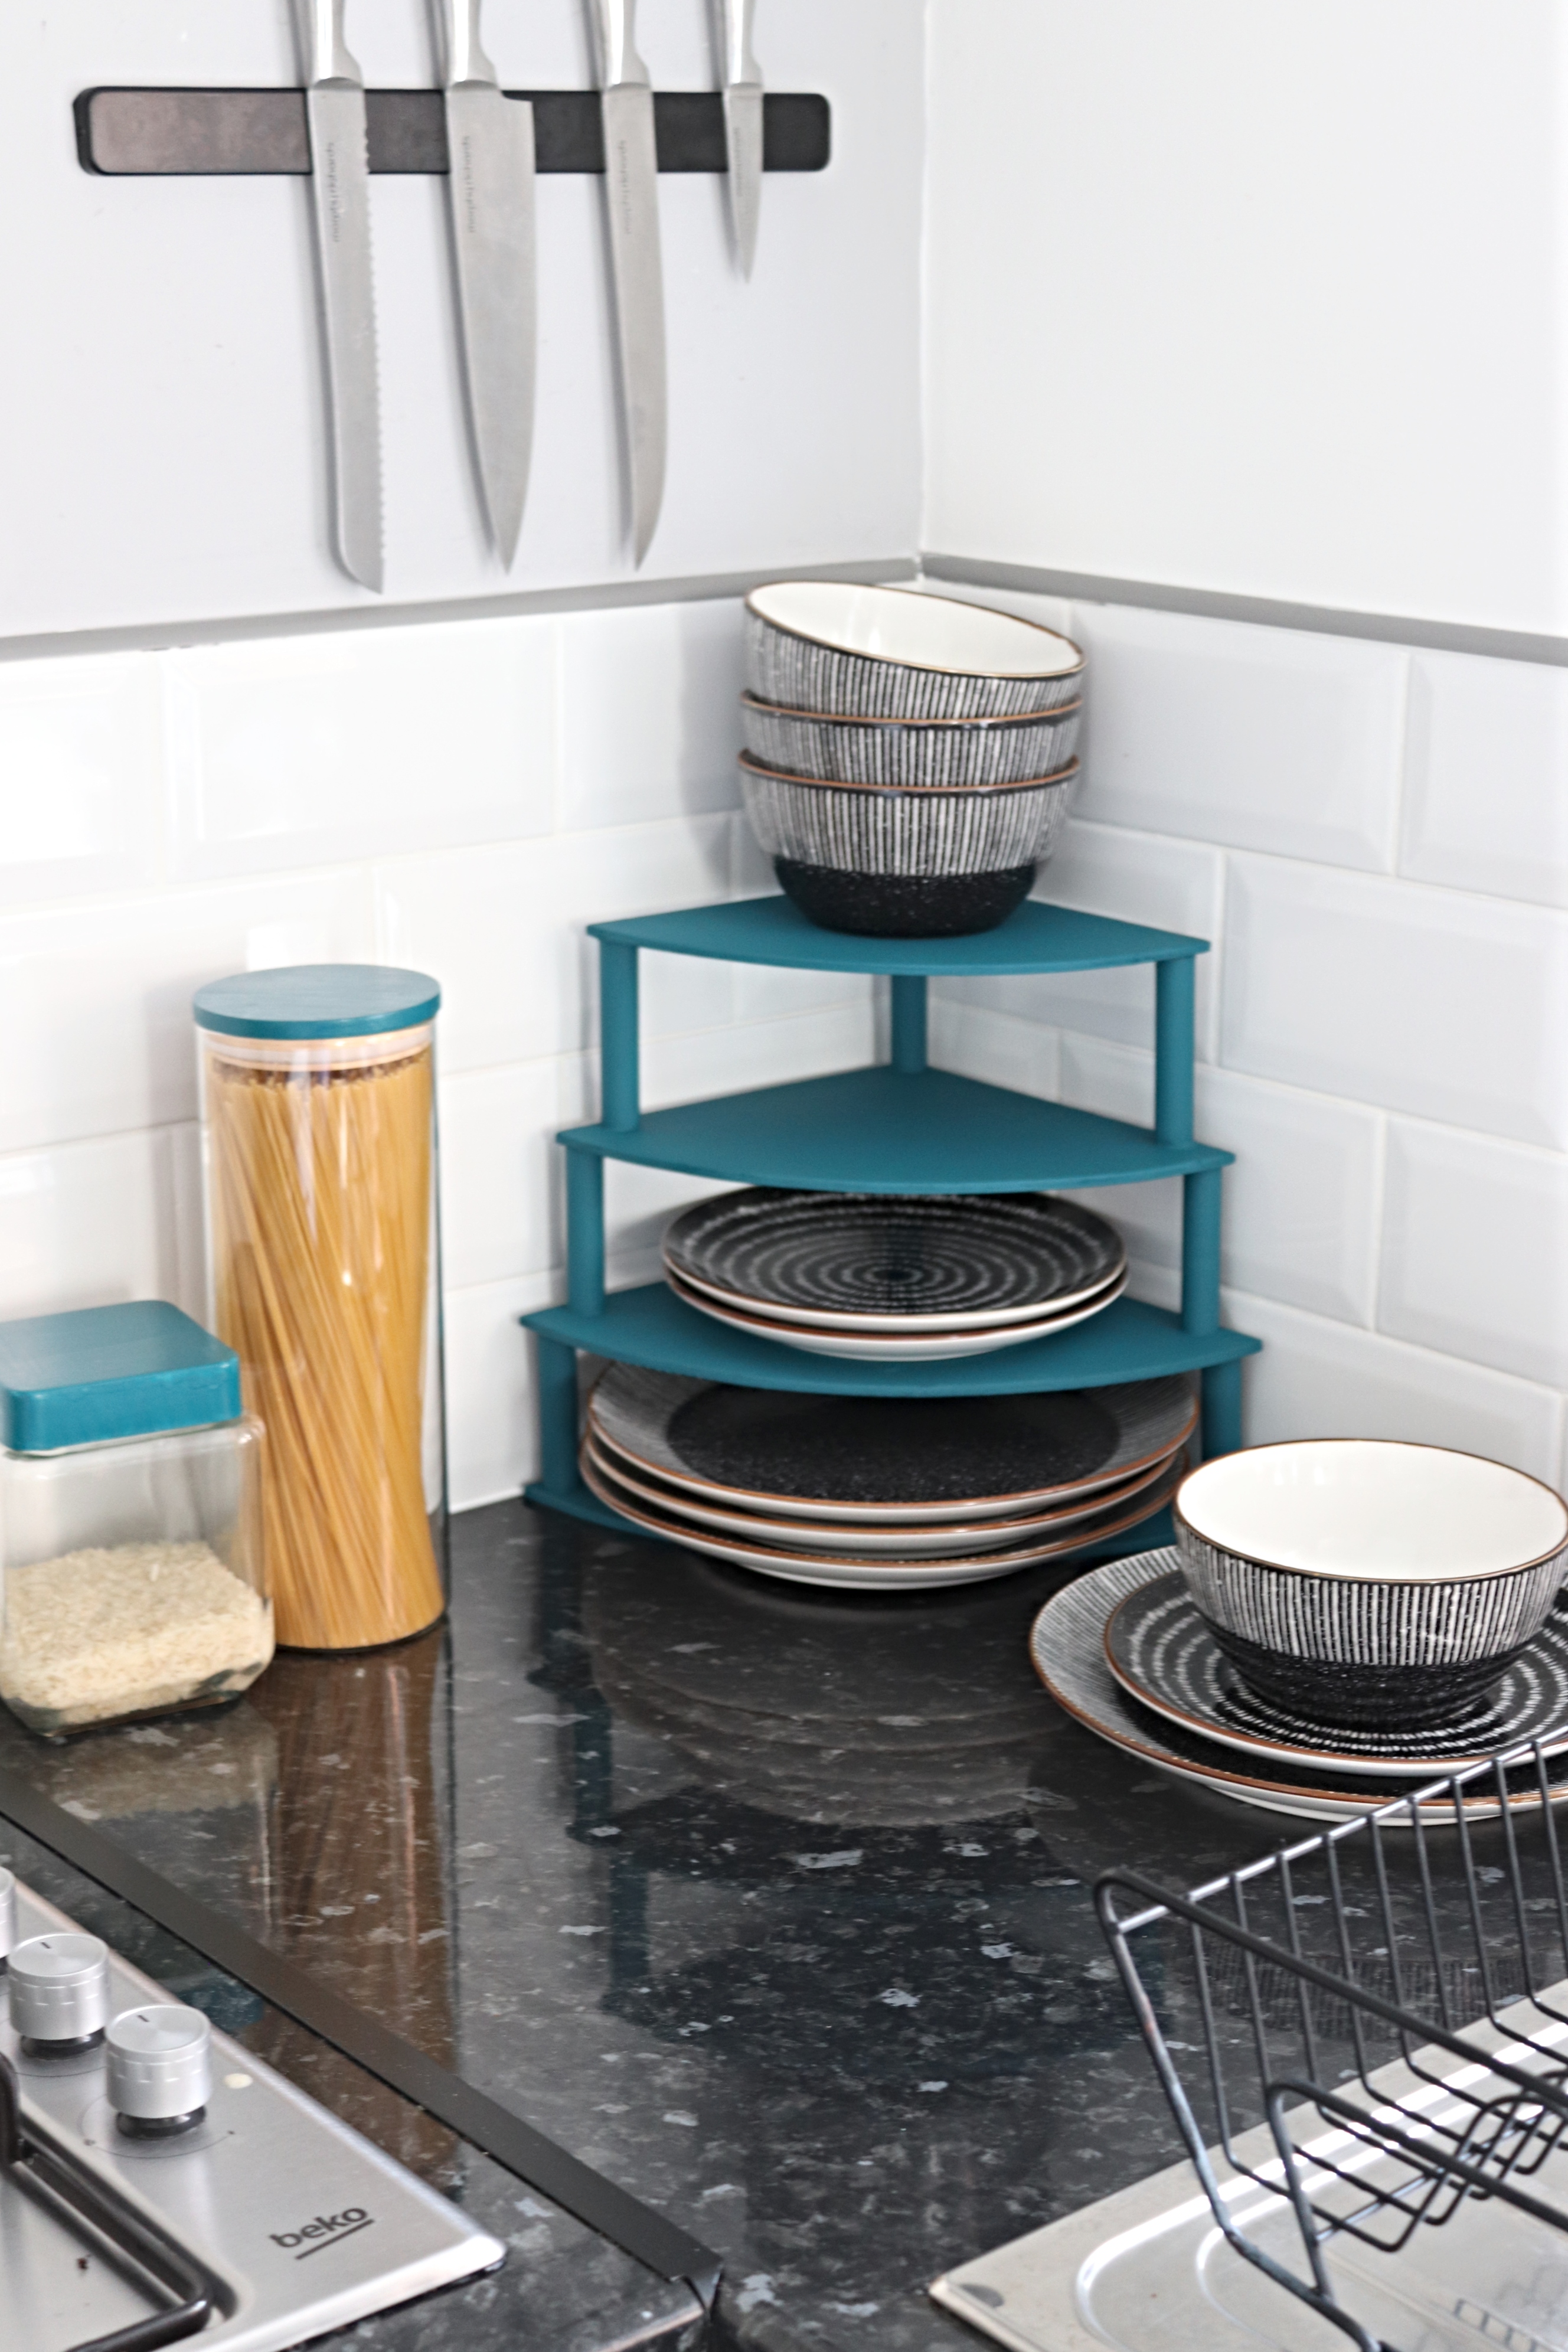
I love, love, love my wooden plate rack DIY. The only problem now is that I really want to paint that grey wall in the Jaded teal too!
Lianne x
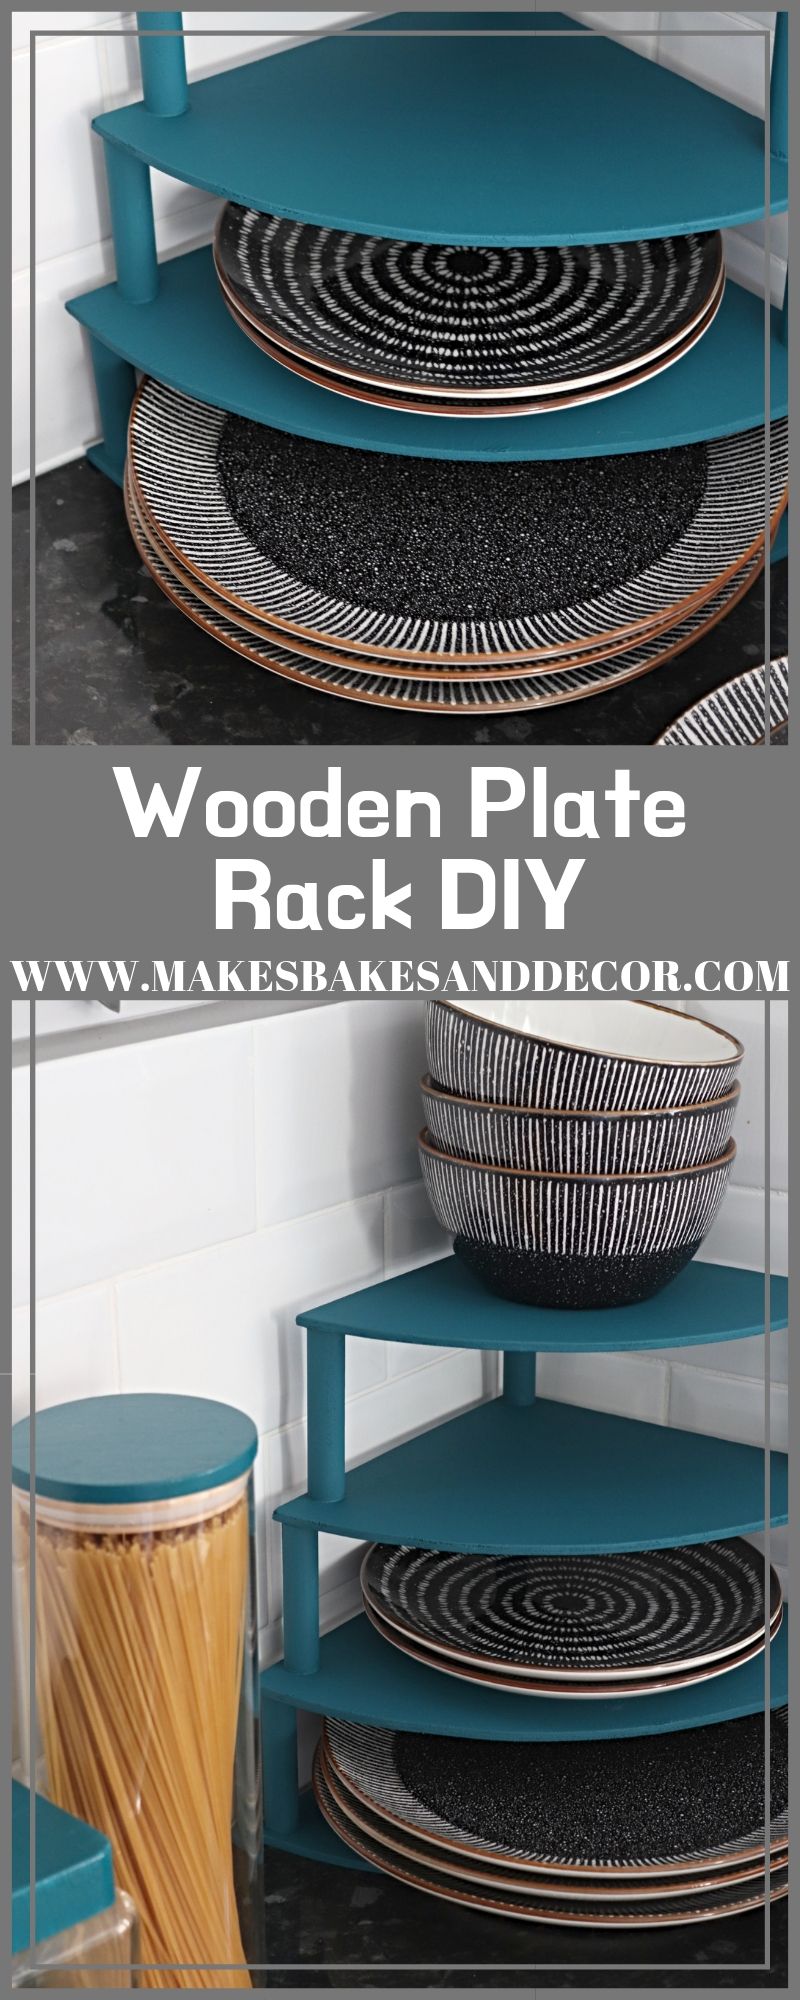
Pin my Wooden Plate Rack DIY to save it for later!

OMG. This is very smart. I have to comment to let you knowhow I like this DIY plate rack.
Author
I’m so happy you like it 🙂